This Pita Bread is made with all-purpose flour, salt, olive oil, active dry yeast, sugar, and warm water.
The first time I made Pita Bread, I had absolutely no chill about it. None. I was supposed to be making a simple side for hummus, maybe a little mezze situation, something relaxed and grown-up. Instead, I ended up crouched in front of the oven door like a sports commentator, whispering, come on, puff… puff… Sound familiar? Because if you’ve ever watched bread do something magical in real time, you already know how weirdly emotional it can make you.
I think what pulled me toward homemade pita bread in the first place was a mix of curiosity and grocery-store overconfidence. I had olives, cucumbers, feta, hummus, and that dangerous little thought of, well now I should probably make the pita too. Which is exactly the kind of thing I say right before turning a very normal meal into a kitchen project. Still, I’m glad I did. Fresh Pita Bread has this softness and warmth that store-bought pita almost never quite captures. Store-bought is fine, sure. Respectable. Dependable. But homemade pita? It feels alive. A little puffier. A little chewier. A little more charming, if bread is allowed to be charming. I think it is.
What I love most about this Pita Bread recipe is that it’s built from such plain ingredients, and yet the result feels like a tiny miracle every time. Flour, yeast, water, olive oil, salt, sugar. That’s not exactly a dramatic list. And still, once the dough rises and those circles hit a blazing hot oven, something really wonderful happens. Some of them puff into perfect pockets. Some puff halfway and still taste amazing. Some come out slightly lopsided and honestly feel more lovable because of it. Ever tried something similar? A recipe that reminds you simple food can still be exciting? That’s exactly what homemade pita bread does for me.
And maybe this is just me, but Pita Bread always feels like one of those recipes that slows me down in a good way. It asks for a little patience, yes, but then it rewards you with warm bread you can tear, dip, stuff, and eat while standing at the counter before dinner has officially started. Which, if we’re being honest, is often the best bite.
Why you’ll Love this Pita Bread?
There are a lot of reasons to love this Pita Bread, but the biggest one is probably that it’s simple without feeling plain. Do you agree? Because some simple recipes are nice in theory and then a little forgettable once you eat them. This is not that. Fresh pita bread is soft, warm, chewy, and so much better than the average packaged version that it almost feels mildly unfair. Not in a mean way. Just in a wow, so this is what it’s supposed to taste like kind of way.
I also really love how versatile homemade Pita Bread is. You can use it for dipping, stuffing, wrapping, tearing, toasting, scooping, or honestly just eating warm with a little olive oil and absolutely no further planning. It works with hummus, grilled meats, salads, breakfast fillings, leftover chicken, random fridge odds and ends, and those “I need lunch but don’t want to think too hard” moods. It’s dependable like that. Very low ego. Very useful.
Another reason this pita bread recipe is such a keeper is that it uses pantry basics. No specialty flours. No mysterious ingredients with names that sound like side quests. Just ordinary things doing a very good job. I always appreciate a bread recipe that doesn’t require me to suddenly become the sort of person who owns six kinds of flour in matching jars.
And honestly, watching Pita Bread puff in the oven is half the fun. I know I keep mentioning it, but it really never gets old. It’s like the bread gives you a tiny performance before dinner. A small oven-based miracle. A very edible magic trick. I’m into it every single time.
Ingredient Notes
One thing I really appreciate about this Pita Bread recipe is how short and practical the ingredient list is. Nothing here is pretending to be more important than it is. Every ingredient has a job, and the whole thing just works.
- All-purpose flour is the backbone of the dough. It gives the pita enough structure to puff and enough softness to stay tender once baked. I like that it keeps the recipe approachable too. No flour drama.
- Salt adds flavor and keeps the bread from tasting bland. I know salt in bread can sound like the least exciting note in the world, but when it’s missing, you absolutely notice. Bread without enough salt has a kind of quiet sadness to it.
- Extra virgin olive oil brings a little richness and softness to the dough. It’s not a huge amount, but it helps give the finished pita a nicer texture and just a little more flavor.
- Active dry yeast is what makes the dough rise and helps create that famous pita pocket. This is the ingredient doing the invisible heavy lifting. Quietly powerful.
- Sugar helps wake up the yeast. It’s not there to make the bread sweet. It’s just giving the yeast a little encouragement, which, frankly, feels relatable.
- Warm water activates the yeast and brings the dough together. The temperature matters here. Warm is good. Too hot and the yeast gives up. Too cold and it just sits there acting mysterious.
That’s part of why homemade Pita Bread feels so satisfying. The ingredient list is short, but it’s smart. No fluff. No filler. Just solid bread-making basics doing exactly what they’re supposed to do.
How to Make Pita Bread?
Making Pita Bread is actually very doable, even if yeast dough has ever made you a little suspicious. The process is straightforward. The main thing is giving the dough enough time and not trying to rush it because you suddenly remembered you’re hungry. Which I have absolutely done.
Step 1: Activate the yeast
In a two-cup measuring cup, combine 1/2 cup warm water, the yeast, and the sugar. Let it sit for about 10 minutes, until it turns foamy.
This is your first little sign that things are working. I always find this oddly comforting. If it foams, the yeast is alive and cooperative. If it doesn’t, it’s better to know now than after you’ve started imagining warm pita with hummus.
Step 2: Make the dough
In the bowl of a stand mixer fitted with the paddle attachment, mix together the flour, salt, and olive oil until combined. Make a well in the center.
Add the yeast mixture and 1 1/4 cups warm water, then switch to the dough hook and knead until the dough is elastic and smooth, about 6 to 8 minutes.
At first, the dough can look a little rough. Maybe slightly awkward. That’s normal. Give it a minute. It usually comes together into something soft and springy, and once it does, I always feel a tiny bit smug. Not too smug. Just enough.
Step 3: Let the dough rise
Transfer the dough to a lightly oiled bowl, cover it, and let it rise until doubled in size, about 1 1/2 hours.
This is the slower part, obviously. Bread dough likes time. It has boundaries. It has standards. You can’t bully it into rising faster just because you opened the hummus already. I’ve tried impatience. The dough was unmoved.
Step 4: Divide the dough
Tear off pieces of dough about the size of a small orange and divide the dough into 12 equal balls. Place them on a rimmed baking sheet.
Cover them with a towel and let them rise for about 30 minutes.
This is one of my favorite points in the recipe because the dough starts looking like actual future Pita Bread instead of one big mysterious lump. It feels like progress. Tangible, round progress.
Step 5: Roll the dough
On a lightly floured surface, roll each dough ball into a circle about 1/4 inch thick.
Cover the dough circles with a towel and let them rise for another 30 minutes.
I know. More waiting. It’s a lot of resting for something you eventually eat in three bites with hummus. But this second rise helps the dough relax and gives you a better chance at that lovely puff in the oven. Annoying, but worth it.
Step 6: Bake the pita
Preheat the oven to 500 degrees F.
Place the dough circles directly on the oven rack and bake for 5 to 7 minutes.
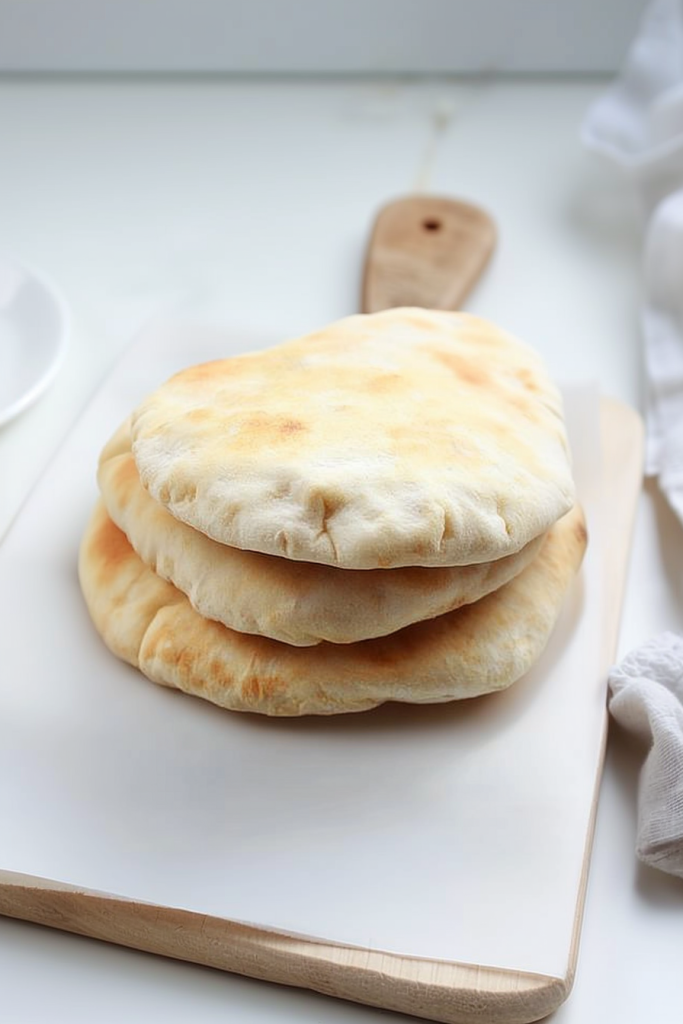
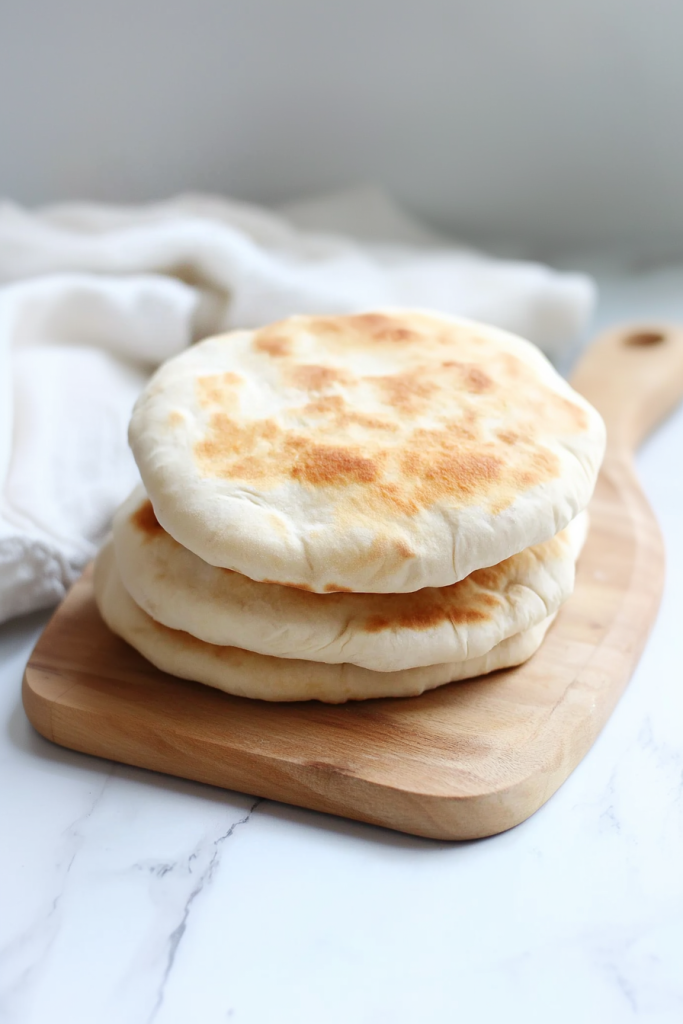
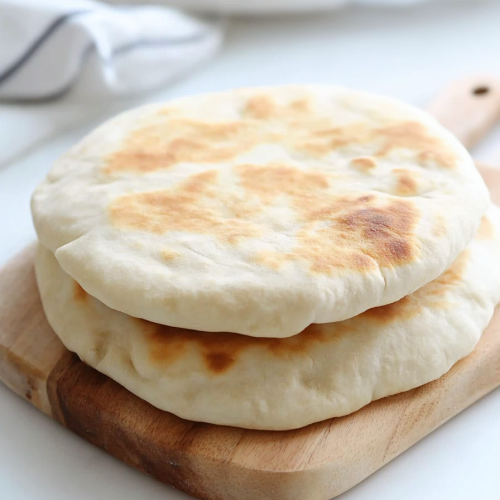
This is the part where things get fun. Some of the pitas puff dramatically. Some puff a little less. Some do a sort of halfway puff and still taste fantastic. I still end up peeking through the oven door every single time like I’m watching a live event. When they’re done, they should be lightly golden and beautifully soft.
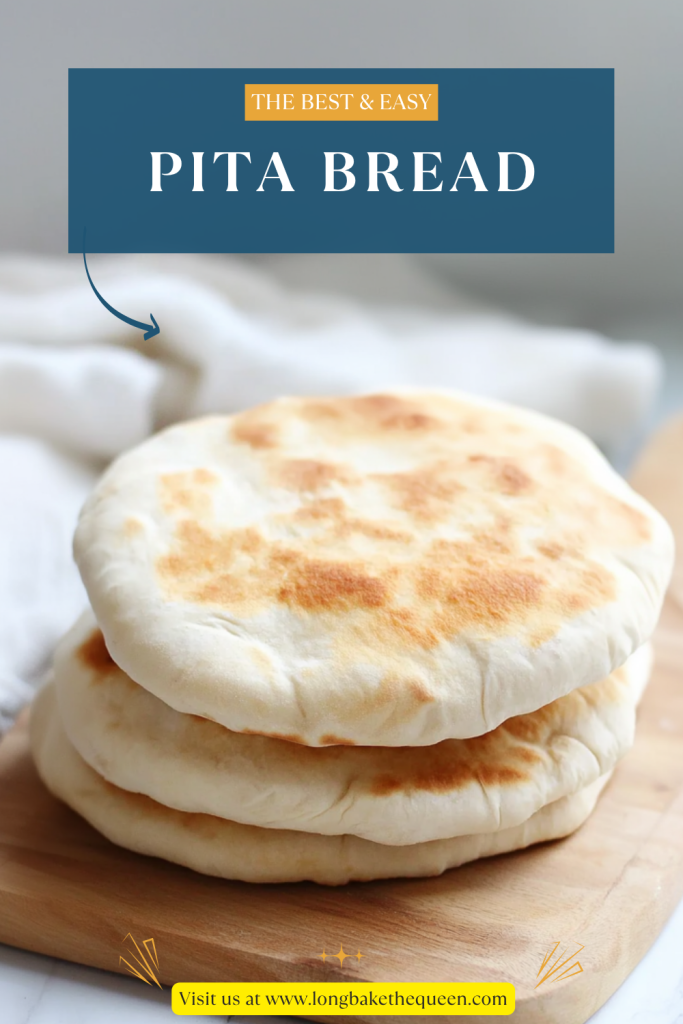
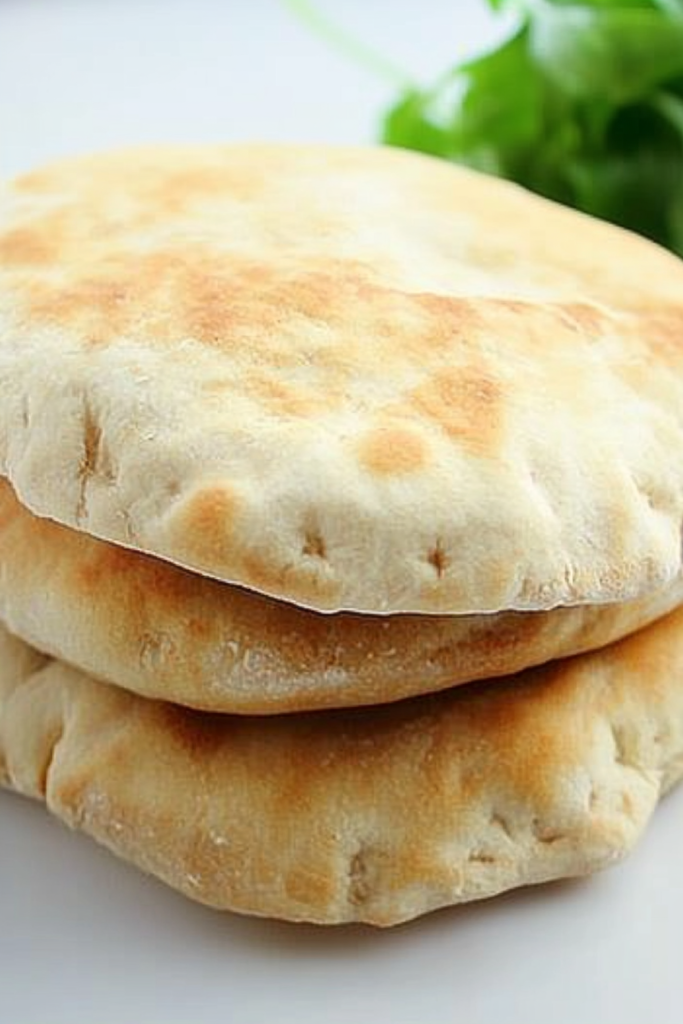
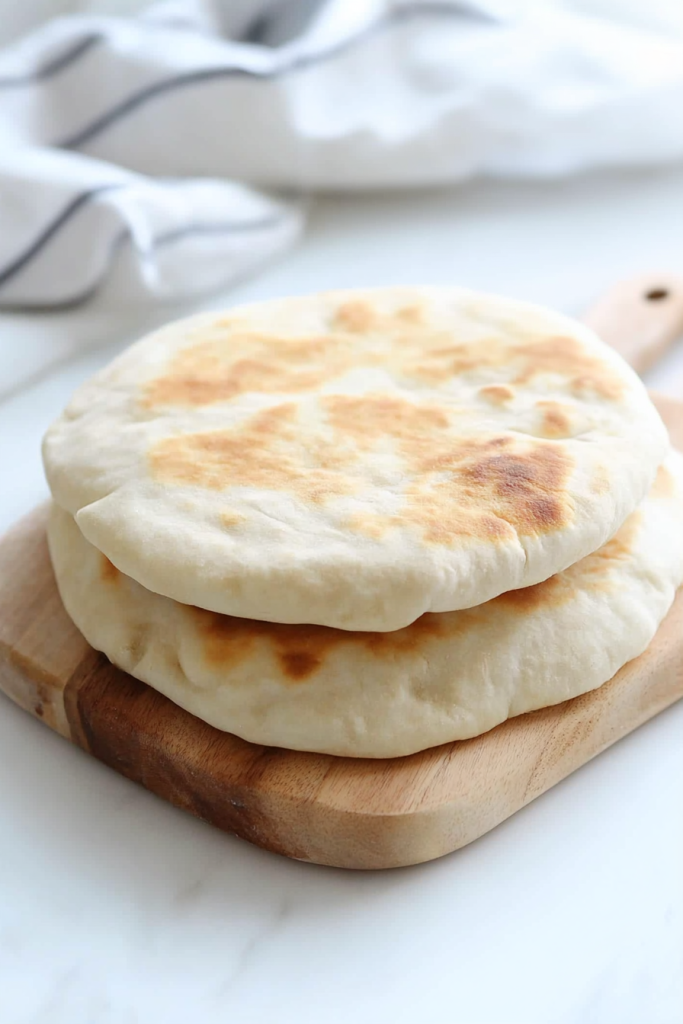
And that’s it. Fresh Pita Bread. Warm, chewy, soft, and genuinely difficult to resist while it’s still warm enough to steam a little when torn open.
Storage Options
This Pita Bread is best the day it’s made. That’s when it’s softest, warmest, and most likely to make you abandon whatever your original meal plan was.
If you have leftovers, let them cool completely and store them in an airtight container or zip-top bag at room temperature for up to 2 days. They’ll still be good, though I think fresh is when pita really shines.
For longer storage, you can freeze homemade Pita Bread very well. Stack the pitas, slip parchment between them if you want, and freeze in a sealed bag for up to 2 months. Reheat them in a skillet, wrapped in foil, or for a few seconds in the microwave to soften them again.
And honestly, leftover pita is never really a burden. It turns into lunch, snack, sandwich base, makeshift flatbread pizza, or “I’m eating this with olive oil and not explaining myself” food. Very adaptable. Very low-maintenance.
Variations & Substitutions
One reason I really like this Pita Bread recipe is that once you get the basic dough down, it’s easy to play around a little.
- Use part whole wheat flour if you want a heartier flavor. I’d still keep some all-purpose flour in the mix so the pita stays soft.
- Add dried herbs or garlic powder if you want a little more flavor built into the dough.
- Brush the finished pita with olive oil if you want extra softness and a little shine.
- Cook the pita in a hot skillet instead of the oven if that works better for your setup. The result is a little different, but still very good.
- Make smaller pitas for lunch plates, mezze spreads, or snack-sized dipping situations.
I think the nicest thing about homemade Pita Bread is that it’s forgiving once you get comfortable with it. It gives you room to make it your own without suddenly becoming complicated and moody.
What to Serve With Pita Bread?
This Pita Bread goes beautifully with hummus, baba ghanoush, tzatziki, falafel, shawarma, gyros, grilled chicken, olives, feta, chopped salads, and basically any mezze-style spread that encourages scooping.
It’s also great for stuffing into pita pockets with lettuce, tomatoes, cucumbers, and whatever savory filling you’ve got going on.
And if you want to keep it simple, warm Pita Bread with olive oil, za’atar, or a thick swipe of hummus is already a very good snack. A dangerous snack, honestly, because one piece turns into two very quickly.
And maybe this is just me, but pita feels happiest when it’s torn apart at the table, dipped into something good, and eaten with very little concern for being neat about it.
FAQ
Why didn’t my Pita Bread puff up?
Usually the oven wasn’t hot enough, the dough circles were too thick, or the dough needed a bit more rest.
Can I make Pita Bread without a stand mixer?
Yes, absolutely. You can mix and knead the dough by hand.
Why does the dough rise twice?
The first rise develops the dough, and the second helps create a lighter texture and better puff when baked.
Can I use whole wheat flour?
Yes, though I’d usually use a mix of whole wheat and all-purpose flour for the softest result.
If you’re looking for a bread recipe that feels simple, comforting, and a little magical the first time you watch it puff, this Pita Bread is such a good one to make. It’s soft, chewy, versatile, and honestly kind of addictive when it’s fresh.
So if you make this Pita Bread, I hope you eat at least one warm and let yourself enjoy that tiny bread-making victory. I’d love to know, would you use yours for dipping, stuffing, or just tearing apart with olive oil and no real plan?
Pita Bread
Ingredients
- 4 c all-purpose flour
- 1/2 tsp salt
- 2 tbsp extra virgin olive oil
- 2 envelopes 1/2 oz total active dry yeast
- 1/2 c warm water
- 2 tsp sugar
- 1 1/4 c warm water about 110°F
Instructions
Activate the yeast.
- In a 2-cup measuring cup, combine 1/2 cup warm water, the active dry yeast, and sugar. Let stand for 10 minutes, or until the mixture becomes foamy.
Prepare the dough.
- In the bowl of a stand mixer fitted with the paddle attachment, combine the flour, salt, and olive oil. Mix until incorporated. Make a well in the center of the mixture.
Add the liquids.
- Pour the yeast mixture and 1 1/4 cups warm water into the well.
Knead the dough.
- Switch to the dough hook attachment and knead the dough until it is smooth and elastic, about 6 to 8 minutes.
First rise.
- Transfer the dough to a lightly oiled bowl. Cover and allow it to rise until doubled in size, about 1 1/2 hours.
Divide the dough.
- Portion the dough into 12 equal pieces, each about the size of a small orange. Roll each portion into a ball and place them on a rimmed baking sheet.
Second rise.
- Cover the dough balls with a towel and allow them to rise for 30 minutes.
Shape the pitas.
- On a lightly floured surface, roll each dough ball into a circle approximately 1/4 inch thick.
Rest again.
- Cover the dough circles with a towel and allow them to rest for 30 minutes.
Preheat the oven.
- Preheat the oven to 500°F.
Bake the pita bread.
- Place the dough circles directly on the oven rack and bake for 5 to 7 minutes, or until puffed and lightly golden.
Notes