Pumpkin puree, all-purpose flour, brown sugar, pumpkin pie spice, cinnamon, butter, egg, heavy cream, vanilla, maple syrup, and powdered sugar.
I have a soft spot for Pumpkin Scones, and honestly, it’s probably because they make an ordinary morning feel like I’ve got my life slightly more together than I do. You know those mornings when the coffee is hot, the kitchen is still a little messy from yesterday, and you just want something warm and cozy that doesn’t come from a drive-thru bag? That’s where these scones come in. They smell like cinnamon, pumpkin spice, maple, and butter all baking together, which is basically fall waving at you from the oven.
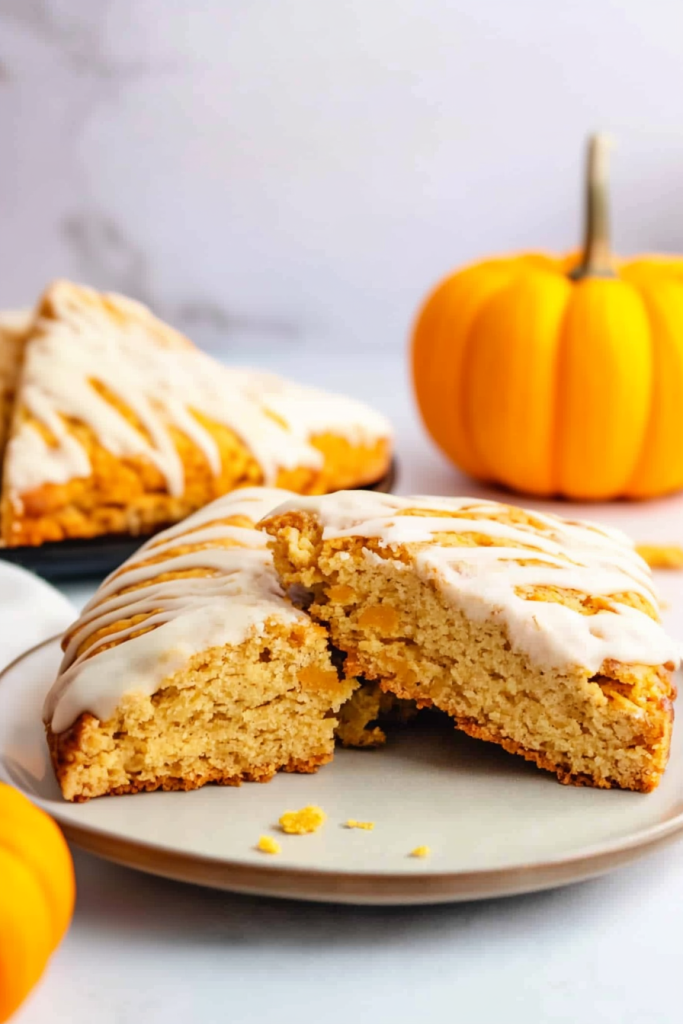
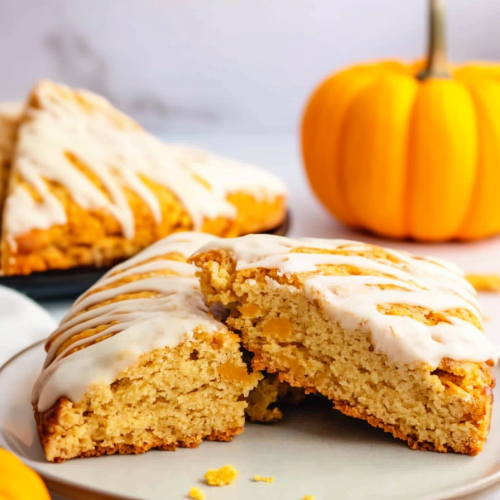
The first time I made these Pumpkin Scones, I was craving one of those bakery-style pumpkin treats but had exactly zero desire to leave the house. No real shoes. No line. No small talk before coffee. I just wanted a tender pumpkin scone with a sweet maple glaze and maybe a quiet corner to eat it in. So I pulled out the pumpkin puree, grated frozen butter into the flour, and hoped the dough wouldn’t punish me for being impatient. It didn’t. The scones baked up golden and soft, and when I poured the warm maple glaze over the tops, I had one of those tiny kitchen moments where you think, oh, okay, I’m definitely making these again. Sound familiar?
Why you’ll Love these Pumpkin Scones?
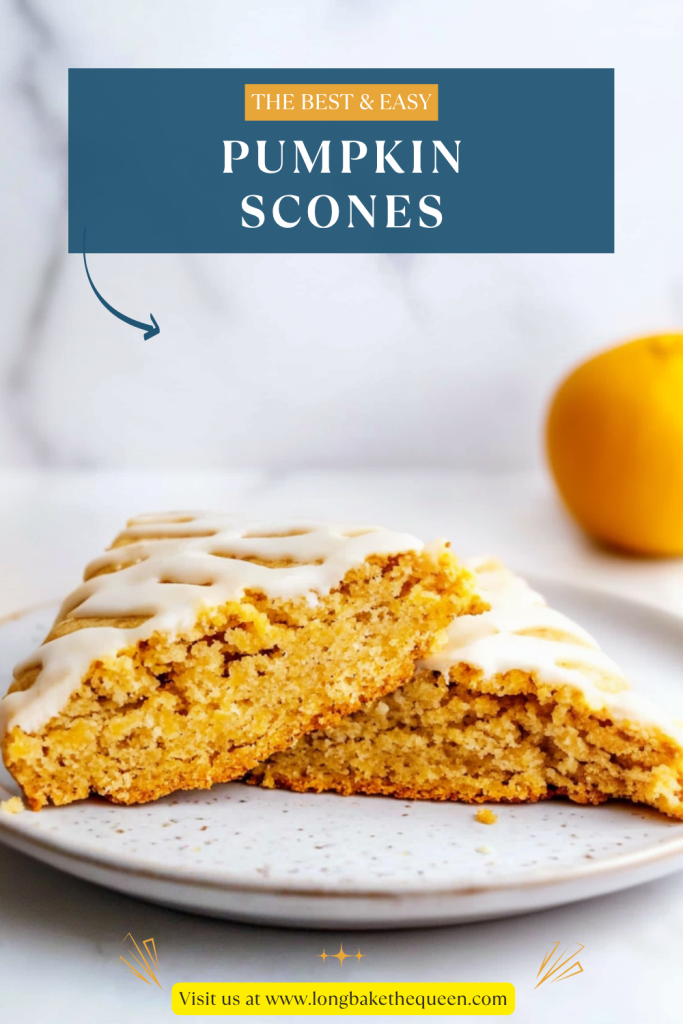
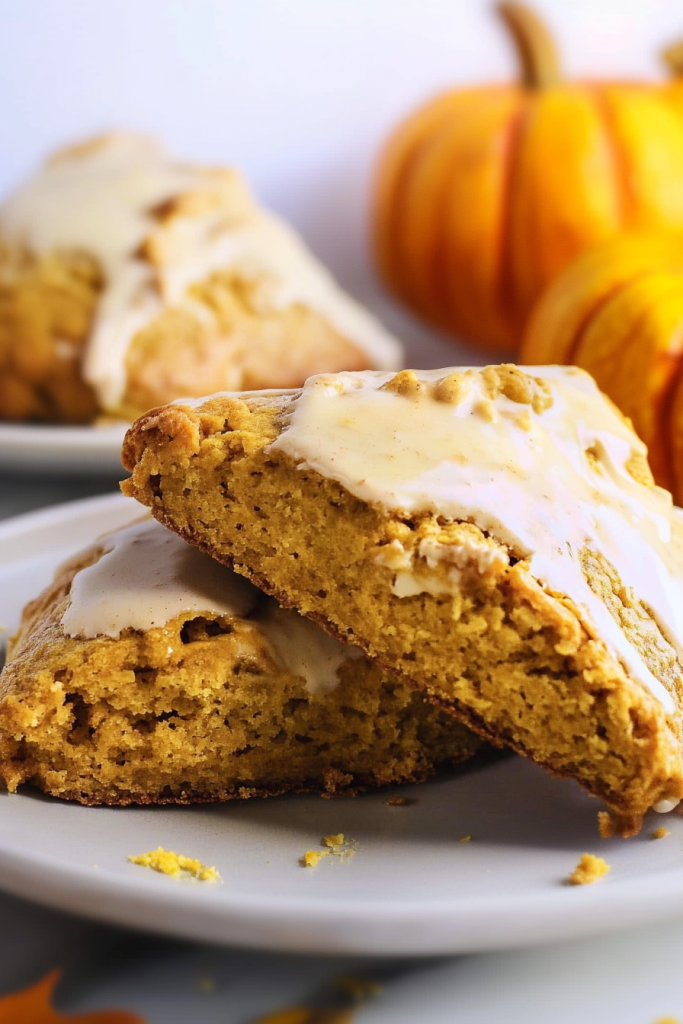
These Pumpkin Scones are cozy, tender, warmly spiced, and finished with a buttery maple glaze that makes them feel like a little bakery treat without leaving home. The pumpkin puree keeps the inside soft, while the frozen grated butter helps create that classic scone texture — tender, slightly crumbly, and golden around the edges. They’re sweet, but not in an overwhelming way. The cinnamon and pumpkin pie spice bring warmth, the brown sugar adds a little depth, and the maple glaze gives them that final “yes, please” moment.
What I really love about this pumpkin scone recipe is that it feels special without being too precious. You don’t need to be a pastry chef. You don’t need a fancy mixer. You just need a bowl, cold butter, pumpkin, cream, and a little patience with the dough. These homemade pumpkin scones are perfect for fall mornings, brunch trays, coffee breaks, holiday breakfasts, or those afternoons when you need something sweet and comforting before dinner. Is that allowed? I think so. Some days just need a scone.
Ingredient Notes
Before you make these Pumpkin Scones, let’s talk ingredients because scones are simple, but they do have opinions. Cold butter matters. Measuring flour carefully matters. And using plain pumpkin puree instead of pumpkin pie filling? Very important. This recipe uses warm spices, brown sugar, heavy cream, and a maple glaze to make soft, flavorful pumpkin spice scones that taste cozy without being dry. Nobody wants a dry scone that crumbles into sadness the second you touch it. We’re aiming for tender, warm, and a little messy from the glaze.
- Pumpkin pie spice: Pumpkin pie spice gives these Pumpkin Scones that classic fall flavor. It usually has cinnamon, ginger, nutmeg, cloves, and sometimes allspice, so it brings a lot of cozy flavor in one spoonful. I like using it here because it gives the scones that bakery-style pumpkin spice taste without making you pull every spice jar out of the cabinet. And if your spice cabinet is anything like mine, that’s a small blessing.
- Cinnamon: Cinnamon adds extra warmth and makes the pumpkin flavor feel deeper. Even though pumpkin pie spice already includes cinnamon, that extra teaspoon helps the flavor stand out. It’s the smell that makes people wander into the kitchen asking, “What are you baking?” which is both sweet and slightly dangerous if you were hoping to keep the batch to yourself.
- Salt: Salt balances the sweetness in the dough and glaze. It may seem tiny, but it helps the butter, pumpkin, maple, and spices taste brighter. Without salt, these pumpkin spice scones can taste a little flat. With it, the flavors feel rounder and more bakery-like. Tiny ingredient, big job.
- All-purpose flour: Flour gives the scones their structure. Sifting it helps keep the dough lighter and removes any little lumps before mixing. Try not to scoop too much flour into the measuring cup, because extra flour can make scones dry. I know flour likes to sneak in there and cause trouble, but we’re watching it.
- Baking powder: Baking powder gives the scones lift. Fresh baking powder matters here because old baking powder can leave you with flat, heavy scones. And after grating frozen butter and making maple glaze, flat scones feel a little rude. Check the date if you’re unsure.
- Light brown sugar: Brown sugar sweetens the scones and adds a soft molasses flavor that pairs beautifully with pumpkin and maple. It also helps keep the crumb a little more tender. White sugar would sweeten them, sure, but brown sugar gives these homemade pumpkin scones that warmer, cozier flavor.
- Frozen unsalted butter: Frozen butter is one of the secrets to tender scones. Grating it into the flour creates tiny cold pieces that melt in the oven and help form a soft, flaky texture. Keep it frozen until you’re ready to use it, and work quickly. Warm butter makes scone dough sad and sticky, and honestly, nobody has time for dough drama before coffee.
- Egg: The egg helps bind the dough and gives the scones structure. It also adds a little richness without making them heavy. Mix it well with the wet ingredients before adding it to the flour mixture so it blends in evenly.
- Heavy cream: Heavy cream makes these Pumpkin Scones rich and tender. Some goes into the dough, and the rest gets brushed over the tops before baking. That little brush of cream helps the scones turn golden and gives coarse sugar something to cling to, if you’re using it. A small step, but such a nice finish.
- Vanilla: Vanilla adds warmth and softens the spice flavor. It doesn’t shout, but it makes everything taste more complete. Vanilla and maple together are especially lovely here, like they were meant to hang out with pumpkin.
- Pumpkin puree: Use plain pumpkin puree, not pumpkin pie filling. Pumpkin puree adds moisture, color, and real pumpkin flavor. Pumpkin pie filling already has sugar and spices mixed in, so it can throw off the balance of the recipe. The puree keeps these Pumpkin Scones soft without making them too sweet.
- Butter for the glaze: Butter gives the maple glaze a richer, smoother flavor. It melts with the maple syrup and makes the glaze taste more like something warm and homemade, not just sugar poured on top. And really, buttery maple glaze is a pretty convincing reason to make scones in the first place.
- Powdered sugar: Powdered sugar thickens the glaze and makes it smooth. If the glaze feels too thin, add a little more powdered sugar. If it’s too thick, add a splash more maple syrup. Glaze is forgiving like that, thank goodness.
- Pure maple syrup: Pure maple syrup gives the glaze that deep, cozy sweetness that goes so well with pumpkin. I’d use pure maple syrup if you can, because it has a richer flavor than pancake syrup. The maple glaze is what gives these maple pumpkin scones that extra special finish.
- Optional pinch of salt: A tiny pinch of salt in the glaze helps balance the sweetness. It’s optional, but I like it. It makes the maple flavor taste deeper and keeps the glaze from feeling too sugary. Just a pinch. Not a whole dramatic moment.
How to Make Pumpkin Scones?
Making Pumpkin Scones is not hard, but the dough likes a gentle hand. You’ll mix the dry ingredients, grate in frozen butter, stir together the pumpkin mixture, shape the dough into a circle, cut it into wedges, bake, and then glaze while the scones are still warm. The biggest tip? Don’t overwork the dough. Scones are like tired people before coffee — handle gently and don’t ask too much of them.
Step 1: Preheat the oven
Preheat your oven to 400°F and place the rack in the middle of the oven. This helps the scones bake evenly. Line your baking pans with parchment paper so the bottoms don’t stick and cleanup stays easy. I love parchment paper because it makes me feel like I planned ahead, even when I absolutely did not.
Step 2: Mix the dry ingredients
In a large bowl, combine the sifted flour, pumpkin pie spice, cinnamon, salt, and baking powder. Whisk everything together until evenly mixed. This helps make sure every scone gets the same warm spice flavor. You don’t want one scone tasting like fall and another tasting like plain flour with hopes and dreams.
Step 3: Grate in the frozen butter
Grate the frozen butter into the flour mixture. Use a pastry cutter to work it in until the mixture looks like pea-sized crumbs. Those little cold butter bits are what help the scones bake up tender and slightly flaky. Try not to use your hands too much, because warm hands can soften the butter quickly. Cold butter is the whole trick here.
Step 4: Mix the pumpkin mixture
In another bowl, combine the egg, 1/3 cup heavy cream, pumpkin puree, vanilla, and brown sugar. Stir until smooth and creamy. The mixture should look thick and pumpkiny, and yes, it will already smell good. That’s your first sign that these Pumpkin Scones are headed in the right direction.
Step 5: Bring the dough together
Drizzle the pumpkin mixture over the flour and butter mixture. Stir gently until the dough starts to come together. It may look a little shaggy, and that’s okay. Actually, that’s good. Scone dough does not need to be perfectly smooth. If you mix too much, the scones can turn tough, and we are not making pumpkin-flavored doorstops.
Step 6: Shape the dough
Lightly flour your hands and shape the dough into a ball. Place it on a floured surface and press it into an 8-inch circle. Try to keep the thickness even so the scones bake at the same pace. If the dough feels sticky, add just a little flour to your hands or the surface. Don’t go wild, though. Too much flour can make these homemade pumpkin scones dry.
Step 7: Cut the scones
Use a sharp knife to cut the circle into 8 pie-shaped wedges. If you want smaller scones, divide the dough into two 5-inch circles and cut those into wedges instead. Place the scones on the parchment-lined baking trays. Brush the tops lightly with the remaining heavy cream, then sprinkle with coarse sugar if you’d like a little crunch. It’s optional, but I’m always happy for a little sparkle.
Step 8: Bake until golden
Bake for 17 to 20 minutes, or until the Pumpkin Scones are lightly golden brown and set around the edges. They should feel firm but not hard. Try not to overbake them, because scones can dry out quickly. Once done, set them aside to cool slightly before glazing. Warm is perfect. Piping hot will make the glaze slide right off like it’s trying to escape.
Step 9: Make the maple glaze
In a small saucepan, add the butter and maple syrup. Stir until the butter melts into the syrup. Remove from the heat and stir in the powdered sugar until a smooth glaze forms. Add a tiny pinch of salt if you want to balance the sweetness. The glaze should be pourable, not watery. If it’s too thick, add a little more maple syrup. If it’s too thin, add more powdered sugar.
Step 10: Glaze and enjoy
Pour the maple glaze over the warm scones and let it settle for a minute. This is the part where the kitchen gets quiet because everyone is suddenly very focused on the tray. The warm pumpkin scone, the buttery maple glaze, the cozy spices — it’s a whole little fall moment. Serve them right away for the best texture and flavor.
Storage Options
These Pumpkin Scones are best fresh, especially while they’re still slightly warm and the maple glaze is soft. If you have leftovers, let them cool completely and store them in an airtight container at room temperature for up to 2 days. Because pumpkin adds moisture, the scones may soften a bit as they sit. They’ll still taste lovely, just less crisp around the edges.
For longer storage, refrigerate the scones for up to 5 days. Let them come to room temperature or warm them slightly before serving. You can also freeze unglazed pumpkin scones for up to 2 months. Wrap them tightly, thaw when needed, warm them gently, and glaze before serving. I prefer freezing them without glaze because maple glaze can get sticky after thawing. Still edible, of course, just a little less pretty.
Variations & Substitutions
These Pumpkin Scones are cozy and classic as written, but there’s plenty of room to play. Pumpkin loves chocolate, nuts, maple, orange, and extra spice. It’s a very friendly ingredient. You can keep the scones simple for breakfast or make them a little more dessert-like if that’s where your mood is headed. No judgment from me. I support dessert-ish breakfast when the weather is chilly.
- Add chocolate chips: Stir mini chocolate chips or regular chocolate chips into the dough before shaping. Chocolate and pumpkin work surprisingly well together, especially with the maple glaze. It makes these pumpkin spice scones feel a little more like dessert, which is never a bad thing.
- Add nuts: Chopped pecans or walnuts add crunch and a toasty flavor. Pecans are especially good with pumpkin and maple. Toast them first if you have time, because toasted nuts taste deeper and richer. If you don’t have time, toss them in anyway. We’re not running a bakery inspection.
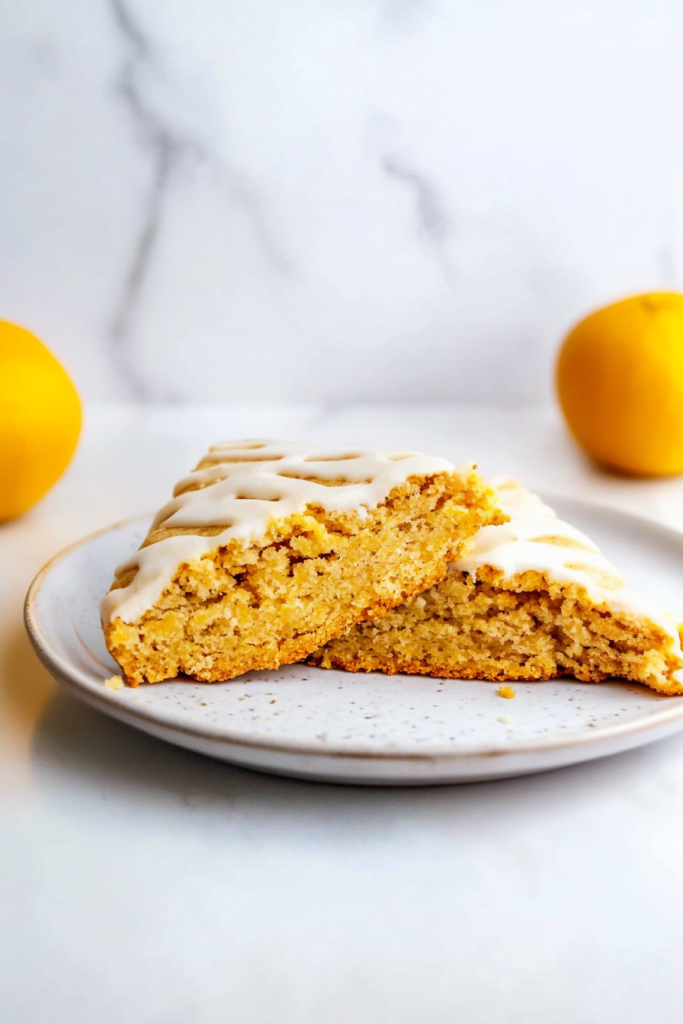
- Use a vanilla glaze: If maple isn’t your thing, make a simple vanilla glaze with powdered sugar, milk or cream, and vanilla. It gives the scones a softer, sweeter finish. The maple glaze feels warmer and more fall-like, but vanilla is still delicious.
- Make mini scones: Divide the dough into two smaller circles and cut each into wedges. Mini Pumpkin Scones are great for brunch trays, holiday mornings, or when you want to pretend eating three tiny scones is different from eating one big one. Scone math is personal.
- Add orange zest: A teaspoon or two of orange zest adds brightness and makes the pumpkin flavor feel lighter. Pumpkin and orange are an underrated pair, in my opinion. The citrus cuts through the spice in a really lovely way.
- Use half-and-half: If you don’t have heavy cream, half-and-half can work. The scones may be a little less rich, but they’ll still be good. Heavy cream gives the best texture, but sometimes we use what’s in the fridge and move on with our lives.
- Add extra spice: Add a pinch of nutmeg, ginger, cloves, or cardamom if you want stronger spice flavor. Go lightly, though. A little extra spice is cozy. Too much and suddenly the scones taste like a scented candle. A cute candle, but still.
What to Serve With Pumpkin Scones?
Pumpkin Scones are wonderful on their own, but they’re even better with something warm to sip or something simple on the side. Since they’re sweet, spiced, and glazed, I like pairing them with coffee, tea, cider, fruit, or a little savory breakfast. They fit beautifully on a fall brunch table, but they’re also perfect for a quiet snack when you need a little comfort. Maybe with a blanket. Maybe while ignoring laundry. Just an idea.
- Coffee: Coffee is my favorite pairing with Pumpkin Scones. The slight bitterness balances the sweet maple glaze and warm spices. A hot cup of coffee and a glazed pumpkin scone feels like a tiny reset button for the day.
- Chai tea: Chai tea works beautifully because the spices echo the cinnamon and pumpkin pie spice. It’s cozy on cozy, which might be a lot, but in a very good way. If you love warm spices, this pairing is perfect.
- Hot apple cider: Apple cider makes these scones feel extra autumnal. The apple flavor pairs well with pumpkin, cinnamon, and maple. It’s the kind of pairing that makes you want to sit near a window and admire leaves, even if the leaves are not cooperating.
- Cream cheese spread: Softened cream cheese or whipped cream cheese is delicious with pumpkin scones. Maple cream cheese would be even better. It adds a creamy tang that balances the sweetness of the glaze.
- Fresh fruit: Apples, pears, grapes, or berries add freshness and color. Fruit makes the plate feel a little lighter, which is nice when the scones are sweet and glazed. Also, fruit beside baked goods makes breakfast feel slightly responsible. We’ll take it.
- Scrambled eggs: If you’re serving these Pumpkin Scones for breakfast or brunch, scrambled eggs add a savory balance. Sweet scones plus soft eggs makes a simple but satisfying meal.
- Yogurt: Greek yogurt with honey, granola, or fruit pairs nicely with these scones. It adds creaminess and makes the whole breakfast feel more complete. Plus, yogurt and a pumpkin scone is basically balance. I’m choosing to believe that.
FAQ
Can I use pumpkin pie filling instead of pumpkin puree?
It’s best to use plain pumpkin puree for Pumpkin Scones. Pumpkin pie filling already has sugar and spices added, which can change the sweetness, flavor, and texture of the dough. Plain pumpkin puree gives you more control and keeps the recipe balanced.
Why does the butter need to be frozen?
Frozen butter helps create tender, flaky scones. When you grate it into the flour, those tiny cold butter pieces melt in the oven and create little pockets in the dough. If the butter is too soft, the scones may spread or become dense. Cold butter is the quiet hero here.
Why are my scones dry?
Dry scones usually happen because of too much flour, overmixing, or overbaking. Measure the flour carefully, stir only until the dough comes together, and bake just until lightly golden. Pumpkin adds moisture, but scone dough still needs a gentle hand.
How do I know when the scones are done?
The scones are done when they’re lightly golden brown, set around the edges, and no longer wet in the center. Bake for 17 to 20 minutes, but start checking near the end because ovens love to have their own personalities.
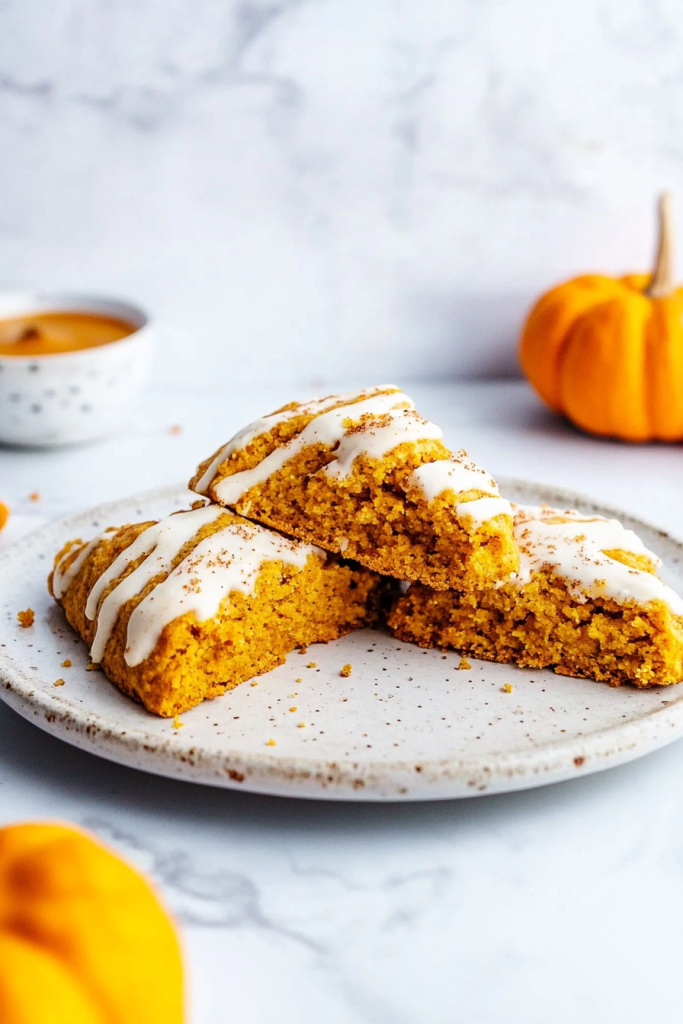
These Pumpkin Scones are tender, warmly spiced, sweet, and finished with a buttery maple glaze that makes them feel like something from a cozy little bakery. They’re made with pumpkin puree, brown sugar, cinnamon, pumpkin pie spice, heavy cream, frozen butter, and vanilla, then baked until golden and glazed while warm. They’re cozy without being complicated, which is exactly my kind of baking.
So grab that pumpkin puree, grate the frozen butter, and make a batch of Pumpkin Scones the next time you want something warm, sweet, and a little special. And when you try them, I’d love to know — are you serving yours with coffee, chai, hot apple cider, or sneaking one straight from the tray while the glaze is still soft?
Pumpkin Scones
Ingredients
For the Pumpkin Scones
- 1 1/2 tsp pumpkin pie spice
- 1 tsp cinnamon
- 1/2 tsp salt
- 2 1/2 c all-purpose flour sifted
- 2 1/2 tsp baking powder
- 1/2 c light brown sugar
- 1/2 c frozen unsalted butter
- 1 large egg
- 1/3 c plus 2 tbsp heavy cream divided
- 1 tsp vanilla extract
- 1/2 c pumpkin puree
- Coarse sugar for sprinkling, optional
For the Maple Glaze
- 2 tbsp butter
- 1 c powdered sugar
- 1/3 to 1/2 c pure maple syrup
- Small pinch of salt optional
Instructions
- Preheat the oven to 400°F.
- Place the oven rack in the center position.
- Line baking sheets with parchment paper and set aside.
- In a large mixing bowl, combine the sifted all-purpose flour, pumpkin pie spice, cinnamon, salt, baking powder, and light brown sugar.
- Whisk until the dry ingredients are evenly combined.
- Grate the frozen unsalted butter directly into the flour mixture.
- Using a pastry cutter, blend the butter into the flour mixture until pea-sized crumbs form.
- In a separate bowl, combine the egg, 1/3 c heavy cream, pumpkin puree, vanilla extract, and brown sugar.
- Whisk until the wet ingredients are smooth and fully incorporated.
- Pour the pumpkin mixture over the flour and butter mixture.
- Stir gently until the dough begins to come together.
- Lightly flour your hands and shape the dough into a ball.
- Transfer the dough to a lightly floured surface.
- Press the dough into an 8-inch round circle.
- Using a sharp knife, cut the circle into 8 wedge-shaped pieces.
- For smaller scones, divide the dough into two 5-inch circles and cut each circle into wedges.
- Arrange the scones on the prepared baking sheets, leaving space between each piece.
- Brush the tops lightly with the remaining 2 tbsp heavy cream.
- Sprinkle with coarse sugar, if desired.
- Bake for 17 to 20 minutes, or until the scones are lightly golden brown and set.
- Remove the scones from the oven and allow them to cool slightly.
- To prepare the glaze, add the butter and maple syrup to a small saucepan.
- Warm over low heat, stirring until the butter is fully melted.
- Remove the saucepan from the heat.
- Whisk in the powdered sugar until a smooth glaze forms.
- Add a small pinch of salt, if desired.
- Pour the maple glaze over the warm scones.
- Allow the glaze to set slightly before serving.
- Serve warm for the best flavor and texture.
Notes