Flour, salt, sugar, baking powder, baking soda, buttermilk, unsalted butter, red currants, and heavy cream.
There’s something about Homemade Buttermilk Scones that makes a kitchen feel softer around the edges. I don’t know if it’s the smell of butter in the oven, the little dusty trail of flour on the counter, or the fact that scones basically invite you to slow down for a minute. But every time I make them, the day feels a bit less rushed. Not perfect, no. Just warmer.
The first time I made a proper batch of buttermilk scones, I was having one of those lazy weekend mornings where leaving the house sounded like a punishment. You know the mood? You want a bakery treat, but you also want to stay in socks and pretend the outside world does not exist. I had buttermilk in the fridge, cold butter waiting patiently, and a small handful of currants tucked in the pantry. So I made scones. And honestly, when they came out golden and warm, I felt a little smug. Not unbearable smug. Just “I made breakfast and it smells amazing” smug.
These Homemade Buttermilk Scones remind me of those cozy tea-table moments where nothing has to match perfectly. Maybe the jam jar is half-empty, the cream is in a little bowl that is technically meant for salsa, and someone is asking if coffee counts instead of tea. It does, by the way. At least in my kitchen. The whole thing still feels special. That’s what I like about scones. They bring a little charm without demanding a full ceremony.
What I love most about this buttermilk scone recipe is that it feels impressive but not fussy. You don’t need yeast. You don’t need a stand mixer. You don’t need to fold dough like you’re training for a pastry championship. You just rub or cut cold butter into flour, add buttermilk, let the shaggy dough rest, fold in currants or raisins, shape it gently, chill it, brush it with cream, and bake. The dough may look a little rough at first. That’s okay. Honestly, scone dough that looks too perfect makes me nervous.
The buttermilk gives these scones a tender crumb and a tiny tang. The butter makes them rich and flaky. The currants add little sweet-tart bursts, though raisins are perfectly fine if that’s what you have. I like currants when I want the scones to feel a bit more tea-room-ish. Raisins feel more old-school and familiar. Both work, and I’m not here to start a dried fruit argument before breakfast.
Serve these flaky scones warm with jam and clotted cream, or butter, honey, lemon curd, or whatever makes you happy. They’re simple, cozy, a little rustic, and exactly the sort of thing that makes you want to stand by the counter and eat “just a corner.” Which becomes half a scone. Which becomes, well… we’ve all been there.

Why you’ll Love these Homemade Buttermilk Scones?
These Homemade Buttermilk Scones are sweet, tender, buttery, and flaky in that lovely homemade way. They’re not too sugary, which I really appreciate, because scones should leave room for jam and cream. They have crisp edges, soft centers, and enough richness from the butter to feel like a treat without turning into dessert-for-breakfast chaos. Though, to be fair, I’m not fully against dessert for breakfast.
One of the best things about this buttermilk scone recipe is that it uses basic ingredients but still feels special. Flour, sugar, salt, baking powder, baking soda, buttermilk, butter, and currants come together in a way that feels almost bakery-level. I say “almost” because bakery scones don’t usually come with the emotional journey of finding flour on your sleeve two hours later. Homemade has its own charm.
The texture is the big selling point for me. Cold butter gets cut into the flour, leaving little pieces throughout the dough. Those pieces melt in the oven and create tender, flaky pockets. The short chill before baking helps the butter stay cold, which gives the scones better lift and shape. It’s a tiny step, and yes, waiting those extra 10 minutes can feel mildly annoying, but it really does help.
These tender homemade scones are also flexible. You can make them with red currants, raisins, dried cranberries, or no fruit at all. You can serve them with classic jam and clotted cream for proper cream tea scones, or you can eat one warm with butter while standing in the kitchen, which is less elegant but very satisfying. Do you agree that some of the best bites happen before food ever reaches the table?
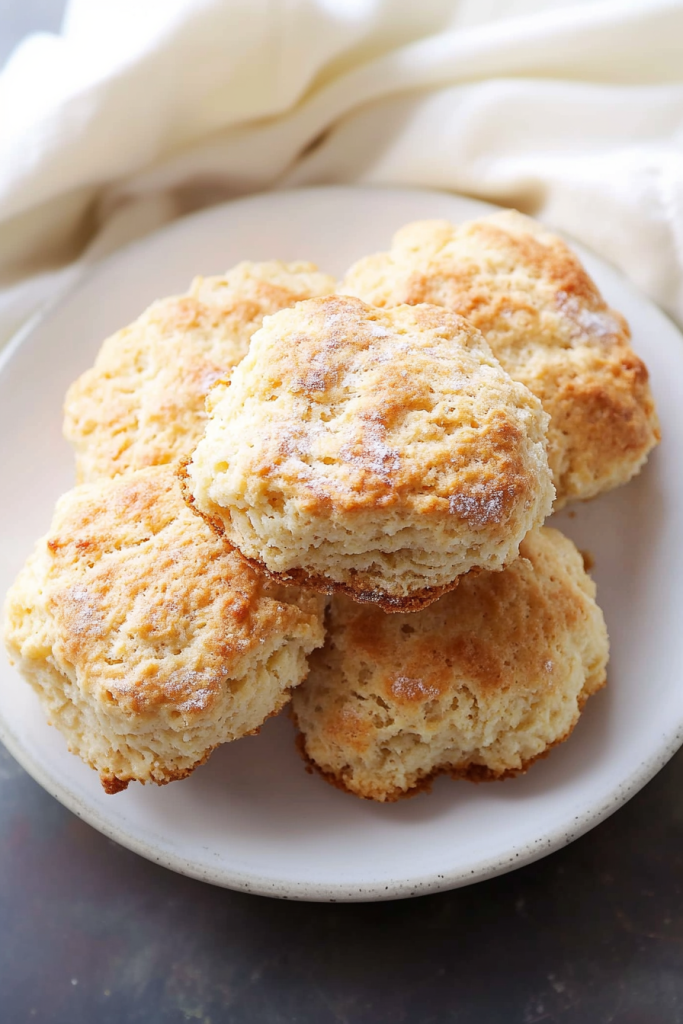
Another reason I love these Homemade Buttermilk Scones is that they make a generous batch. Sixteen scones means you can serve them for brunch, share them with family, or freeze a few for later. There’s something very comforting about knowing a future warm scone is waiting in the freezer. That’s the kind of planning I can get behind.
Ingredient Notes
The ingredients for Homemade Buttermilk Scones are simple, but each one has a purpose. Scones are funny that way. They don’t ask for a lot, but they do ask you to treat the dough gently. Cold butter, fresh leavening, tangy buttermilk, and a light hand are what give you those soft, flaky scones instead of something heavy and dry. No pressure. Just… gentle baking energy.
- Flour: Flour gives these buttermilk scones their structure. All-purpose flour works well here. Try to measure it lightly rather than packing it into the cup, because too much flour can make the dough dry. I’ve made that mistake before, and the scones were still edible, sure, but they had a personality closer to a polite biscuit rock. We want tender, not tough.
- Salt: Salt balances the sweetness and brings out the buttery flavor. It’s a small amount, but it matters. Sweet baked goods without salt can taste a little flat, like something is missing but you can’t quite name it. Salt fixes that quietly in the background.
- Sugar: Sugar adds gentle sweetness and helps the tops brown. These Homemade Buttermilk Scones are sweet, but not overly sweet, which makes them perfect with jam, cream, honey, or lemon curd. If you like a sweeter scone, you can always add a sweet topping later.
- Baking Powder: Baking powder helps the scones rise and become light. Since this recipe doesn’t use yeast, baking powder is doing a lot of the lift work. Make sure it’s fresh. If yours has been in the pantry since a holiday baking phase from long ago, maybe check it first.
- Baking Soda: Baking soda works with the acidity in the buttermilk to help the scones rise and brown. It also helps with tenderness. You only need a small amount, but it gives the dough a helpful little boost.
- Buttermilk: Buttermilk is what makes this buttermilk scone recipe so soft and tender. It adds moisture and a subtle tang that balances the sugar and butter. It also reacts with the baking soda. If you’ve ever wondered why buttermilk shows up in so many tender baked goods, this is why. It’s quietly powerful.
- Unsalted Butter: Cold unsalted butter is key for flaky scones. Cut it into the flour until the mixture has small uneven bits of butter throughout. Don’t blend it until smooth. Those little butter pieces are your friends. They melt during baking and help create that flaky texture. Also, cold butter means better shape and less spreading.
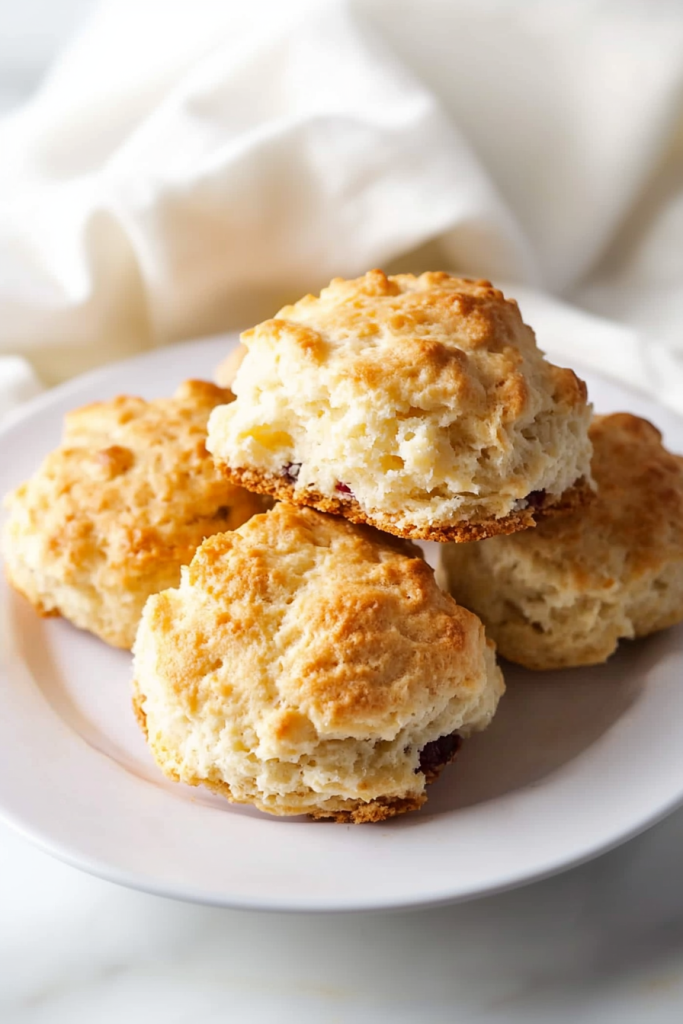
- Red Currants or Raisins: Red currants give the scones little fruity pops that are slightly tart and very nice with jam. Raisins make the scones sweeter and more classic. Use whichever you have. I lean currants when I want them to feel a little more traditional, but raisins are dependable and cozy in their own way.
- Heavy Cream: Heavy cream is brushed over the tops before baking. It helps the scones turn golden and gives them a pretty finish. You only need a teaspoon, so it’s a small touch, but it makes the scones look like they came from a bakery instead of your slightly floury kitchen.
How to Make Homemade Buttermilk Scones?
Making Homemade Buttermilk Scones is mostly about keeping the butter cold and not overworking the dough. The steps are simple: mix the dry ingredients, cut in the butter, add buttermilk, rest the dough, add the fruit, shape, chill, brush with cream, and bake. The dough should look a little shaggy at first. That’s not a problem. That’s actually a good sign. Scones like a relaxed hand, not bread-dough enthusiasm.
Step 1: Preheat the oven
Preheat the oven to 400°F, or 200°C, and line a baking sheet with parchment paper. A hot oven helps the scones rise quickly and bake with golden edges. The parchment keeps them from sticking and makes cleanup easier. And honestly, easy cleanup is part of the joy.
Step 2: Mix the dry ingredients
In a large bowl, whisk together the flour, salt, sugar, baking powder, and baking soda. Whisking spreads the leavening evenly so the scones rise well. It also breaks up little flour lumps. This step is quick, but don’t skip it. Nobody wants one scone getting all the baking powder while the others sit there confused.
Step 3: Cut in the butter
Add the cold unsalted butter to the dry ingredients. Use a pastry cutter, knife, or your fingertips to work the butter into the flour until you see small, uneven pieces throughout. Don’t make the mixture perfectly smooth. Those little butter bits are what help create flaky layers in these Homemade Buttermilk Scones. Imperfect is good here. Convenient, right?
Step 4: Add the buttermilk
Pour in the buttermilk and gently mix until the dough is almost combined. It should look shaggy and a bit rough. Try not to overmix it. If you keep stirring until everything looks perfectly smooth, the scones may turn out tougher. This is one of those times when stopping early feels wrong but is actually right.
Step 5: Let the dough rest
Let the dough rest for 5 to 10 minutes. This gives the flour time to absorb the buttermilk and makes the dough easier to shape. It’s a short pause, but it helps. It also gives you time to clear a spot on the counter, find the flour you just put down somewhere, or sip your coffee. All useful activities.
Step 6: Add the currants or raisins
Add the red currants or raisins and gently mix until they’re evenly distributed. The dough should come together a little more, but don’t knead it heavily. You want the fruit spread through the dough without crushing everything into submission.
Step 7: Divide and shape the dough
Turn the dough out onto a lightly floured surface and divide it in half. Use your hands or palms to gently press each portion together until the dough becomes smoother. Do not knead it like bread. Just press, gather, and coax it into shape. This keeps the tender homemade scones soft instead of dense.
Step 8: Press into rounds
Press each half into a round about ¾ inch thick. Try to keep the thickness fairly even so the wedges bake at the same rate. The edges may look a little rustic, and that is completely fine. Actually, I like them that way. Homemade scones should look like a person made them, not a machine with a ruler.
Step 9: Cut into wedges
Cut each round into 8 equal wedges, giving you 16 scones total. Gently pull the wedges apart and place them on the prepared baking sheet. Give them a little room so the edges can bake properly. If a wedge looks slightly wonky, don’t worry. That one usually tastes best. I don’t know why, it just does.
Step 10: Chill the dough
Chill the shaped scones for 10 to 15 minutes before baking. This helps the butter firm up again, which improves the flaky texture and helps the scones hold their shape. I know, another wait. But it’s short, and it makes the final scones better. Use the time to pre-clean the bowl if you’re feeling responsible. Or don’t.
Step 11: Brush with cream
Brush the tops of the chilled scones lightly with heavy cream. You don’t need much. Just a light coating helps the tops turn golden and gives them a bakery-style finish. It’s a small thing, but it makes the scones look extra inviting.
Step 12: Bake until golden
Bake the scones for 12 to 15 minutes, or until they are golden brown. Keep an eye on them near the end because scones can go from tender to dry if they stay in too long. The tops should look lightly browned, and the edges should be set.
Step 13: Cool and serve
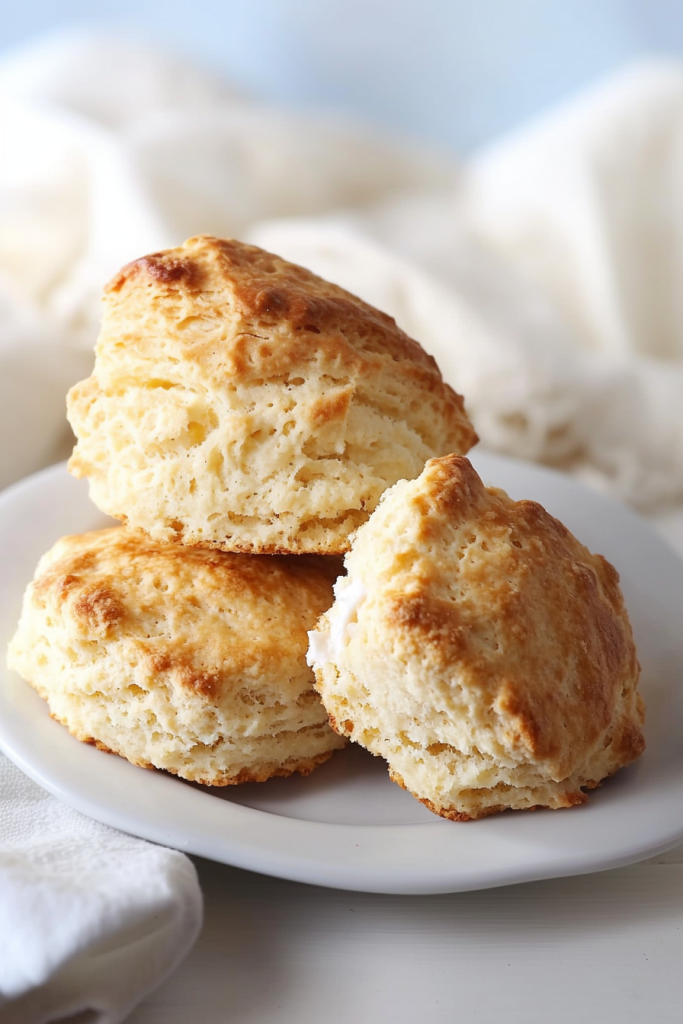
Let the scones cool on the tray for 5 minutes, then move them to a wire rack. Serve warm with jam and clotted cream, or with butter, honey, or lemon curd. These Homemade Buttermilk Scones are best when they’re still a little warm and crumbly in that lovely, buttery way.
Storage Options
These Homemade Buttermilk Scones are best the day they’re baked. That’s just the honest truth. Warm scones with jam and cream are hard to beat. But if you have leftovers, they can still be very good. Let them cool completely, then store them in an airtight container at room temperature for up to 2 days. They may soften a bit as they sit, but a quick warm-up helps bring them back.
To reheat, place a scone in a 300°F oven for about 5 to 8 minutes, or until warmed through. The oven gives the best texture because it gently revives the edges. The microwave works if you’re in a hurry, but it can make the scone softer. I’ve done both. Sometimes patience wins, sometimes hunger wins.
You can also freeze baked buttermilk scones. Let them cool completely, wrap them well, and store them in a freezer-safe bag or container for up to 2 months. Thaw at room temperature, then warm them in the oven before serving. This is lovely for future breakfasts when you want something homemade but do not want to start from scratch.
Another option is freezing the unbaked wedges. Shape the scones, place them on a tray, freeze until firm, then transfer them to a freezer bag. Bake from frozen, adding a few extra minutes to the baking time. This is my favorite little trick because fresh-baked flaky scones on a random morning feel like a luxury you planned. Even if past-you did all the work.
Variations & Substitutions
These Homemade Buttermilk Scones are lovely with red currants or raisins, but you can absolutely change them up. The base dough is simple and friendly, so it works with citrus zest, different dried fruits, a little sugar on top, or no fruit at all. Just don’t add too much wet fruit or liquid. Scone dough is forgiving, but only to a point. After that, it becomes sticky and dramatic.
- Use Raisins Instead of Currants: Raisins are an easy substitute for red currants and give the scones a sweeter, more familiar flavor. Golden raisins are lovely too. They make the scones feel sunny and a little softer in flavor.
- Add Lemon Zest: Lemon zest adds brightness and works beautifully with currants. Add about 1 teaspoon to the dry ingredients for a fresh citrus note. It makes the scones feel a little lighter, especially if you’re serving them with lemon curd.
- Add Orange Zest: Orange zest pairs especially well with raisins. It gives the scones a warm, fragrant flavor that feels right for brunch, holiday mornings, or any day that needs a bit of cheer.
- Use Dried Cranberries: Dried cranberries add tartness and a pretty pop of color. They make these fruit scones feel a little festive without changing the recipe too much. Add orange zest with them if you want a cozy cranberry-orange version.
- Make Them Plain: Leave out the fruit for classic cream tea scones. Plain scones are perfect when you want the jam and clotted cream to be the star. Sometimes simple really is best.
- Add Coarse Sugar: Sprinkle coarse sugar over the cream-brushed tops before baking for a little crunch and sparkle. It’s optional, but it makes the scones look extra pretty. I’m always charmed by a little sparkle on baked goods.
- Use Milk Instead of Heavy Cream for Brushing: If you don’t have heavy cream, brush the tops with milk instead. The browning may be a little lighter, but it still works. No need to abandon the recipe over one teaspoon of cream.
- Make Mini Scones: Shape the dough into smaller rounds and cut smaller wedges for mini scones. They’ll bake faster, so watch them closely. Mini scones are great for tea trays, brunch boards, or for pretending you’re only having a tiny treat. We all know how that goes.
What to Serve With Homemade Buttermilk Scones?
These Homemade Buttermilk Scones are wonderful warm from the oven, especially with something creamy, fruity, or cozy alongside them. They work for breakfast, brunch, afternoon tea, or a quiet snack when you want something comforting. Scones don’t really follow strict meal rules, and I admire that about them.
- Jam: Strawberry, raspberry, blackberry, apricot, or cherry jam all pair beautifully with buttermilk scones. The fruitiness adds sweetness and color, and it settles into the crumb in the best way.
- Clotted Cream: Clotted cream is the classic pairing for cream tea scones. It’s thick, rich, and very luxurious. If you can find it, it makes the whole scone experience feel special. If you can’t, don’t panic. There are other good options.
- Whipped Cream: Lightly whipped cream works nicely if clotted cream is not available. It’s softer and lighter, but still lovely with jam. Not traditional in the strictest sense, maybe, but delicious counts.
- Butter: A little butter on a warm scone is simple and perfect. It melts into the crumb and makes the scone even richer. Sometimes you don’t need anything more.
- Lemon Curd: Lemon curd adds bright, tangy sweetness. It’s especially good with currants or if you added lemon zest to the dough. It gives the scones a fresh, cheerful flavor.
- Honey: Honey adds gentle sweetness and pairs beautifully with the buttery crumb. A drizzle over a warm scone feels simple but kind of wonderful.
- Hot Tea: Tea and scones are classic for a reason. Earl Grey, English breakfast, black tea, or chai all work well with these Homemade Buttermilk Scones. Add a quiet morning or a rainy afternoon and you’re basically set.
- Coffee: Coffee is a great pairing too, especially for breakfast or brunch. The slight bitterness balances the sweet, buttery scones. Tea may be traditional, but coffee people deserve scones too.
- Fresh Fruit: Berries, sliced peaches, oranges, or grapes make the plate feel fresh and pretty. Fruit also makes the whole thing feel a little more balanced, even if there is jam and cream involved. Balance is a flexible concept.
FAQ
Can I use raisins instead of currants?
Yes, raisins work very well. They make the scones sweeter and more classic. Currants are smaller and a little more tart, while raisins are softer and more familiar. Use whichever you like or already have in the pantry.
Why is my scone dough shaggy?
A shaggy dough is normal. Actually, it’s what you want at first. If you mix the dough until it is perfectly smooth too early, you may overwork it and make the scones tough. Letting the dough rest helps it hydrate and come together more easily. Rustic dough often makes better scones. Annoying but true.
Why are my scones dry?
Dry scones can happen if there is too much flour, the dough is overmixed, or the scones are overbaked. Measure the flour gently, mix with a light hand, and bake just until golden. Scones should be tender and slightly crumbly, not dusty. Nobody wants a scone that needs an apology.
How do I know when the scones are done?
The scones are done when the tops are golden brown and the edges are set. They should no longer look doughy in the center. Try not to overbake them, because scones can dry out quickly. Pull them when they look golden and gently firm.
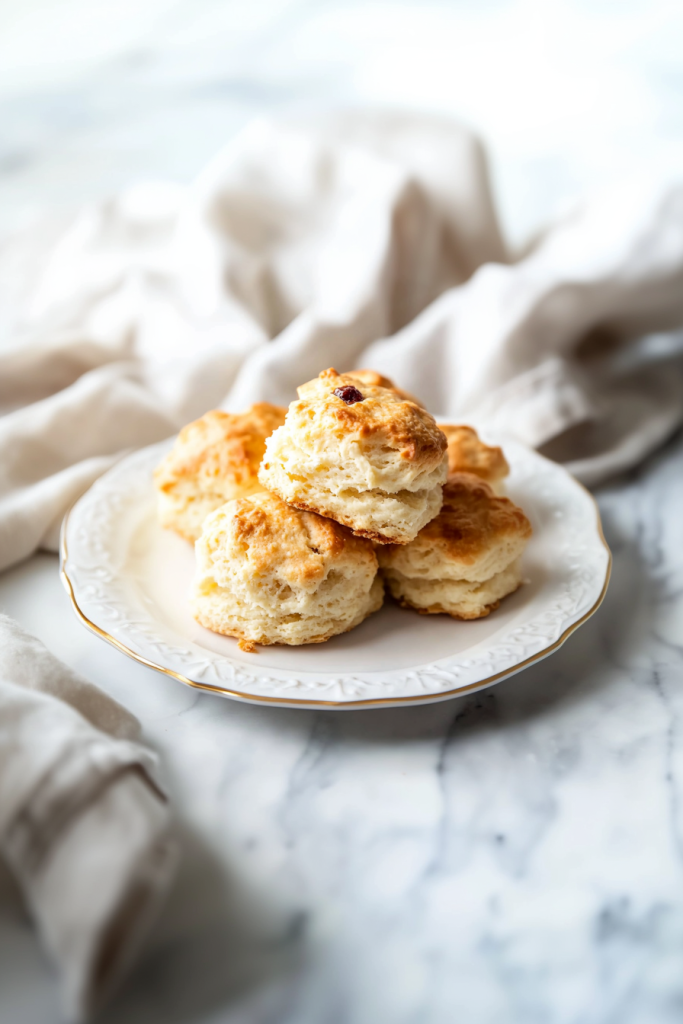
These Homemade Buttermilk Scones are sweet, tender, buttery, and wonderfully flaky. They feel special enough for brunch or afternoon tea, but they’re simple enough for a quiet weekend morning. With cold butter, tangy buttermilk, currants or raisins, and a little cream brushed on top, they bake into golden wedges that are best served warm.
I love this recipe because it gives you that cozy bakery feeling without needing fancy tools or complicated steps. The dough may be shaggy. The wedges may be uneven. You might get flour on the counter, your sleeve, and somehow the floor. That’s all part of it. Homemade scones should feel homemade.
Try these Homemade Buttermilk Scones the next time you want a cozy breakfast, brunch treat, or cream tea-style snack. Serve them warm with jam and cream, and tell me — are you jam-first, cream-first, or simply eating one straight from the tray like I sometimes do?

Homemade Buttermilk Scones
Ingredients
- 3 cups all-purpose flour
- 1 tsp salt
- ⅓ cup sugar
- 2 ½ tsp baking powder
- ½ tsp baking soda
- ¾ cup unsalted butter cold
- 1 cup buttermilk
- ½ cup red currants or raisins
- 1 tsp heavy cream for brushing
Instructions
Preheat the oven.
- Preheat the oven to 400°F, or 200°C. Line a baking sheet with parchment paper.
Combine the dry ingredients.
- In a large mixing bowl, whisk together the flour, salt, sugar, baking powder, and baking soda until evenly combined.
Add the butter.
- Add the cold unsalted butter to the dry ingredients.
Cut in the butter.
- Using a pastry cutter, knife, or fingertips, cut or rub the butter into the flour mixture until small pieces of butter remain throughout the mixture.
Add the buttermilk.
- Pour in the buttermilk and gently mix until the dough is almost combined. The dough should appear shaggy.
Rest the dough.
- Allow the dough to rest for 5 to 10 minutes.
Add the fruit.
- Add the red currants or raisins to the dough. Gently mix until the fruit is evenly distributed and the dough is almost smooth.
Transfer the dough.
- Turn the dough out onto a lightly floured work surface.
Divide the dough.
- Divide the dough into two equal portions.
Shape the dough.
- Using the palms of your hands, gently press each portion of dough until it becomes smoother. Do not knead the dough as you would bread dough.
Flatten the rounds.
- Press each dough portion into a round approximately ¾ inch thick.
Cut into wedges.
- Cut each round into 8 equal wedges, making 16 scones total.
Arrange on the baking sheet.
- Gently separate the wedges and place them on the prepared baking sheet.
Chill the dough.
- Refrigerate the shaped scones for 10 to 15 minutes.
Brush with cream.
- Lightly brush the tops of the chilled scones with heavy cream.
Bake.
- Bake for 12 to 15 minutes, or until the scones are golden brown.
Cool briefly.
- Allow the scones to cool on the baking sheet for 5 minutes.
Transfer and serve.
- Transfer the scones to a wire rack. Serve warm with jam, clotted cream, butter, honey, or lemon curd.
Notes
Confirm that the baking powder, baking soda, currants or raisins, buttermilk, and heavy cream are labeled gluten-free.
Gluten-free scone dough may be slightly more delicate, so handle it gently when shaping and cutting.
Chilling the shaped dough is especially helpful for gluten-free scones because it helps them hold their shape.
Use a clean work surface, utensils, and baking sheet to prevent cross-contamination.