Brown sugar, heavy whipping cream, unsalted butter, vanilla, salt, powdered sugar, and chocolate melts.
I have a real weakness for old-fashioned candy. Not the flashy kind with wild colors and mystery fillings, but the cozy kind you find in a little box, tucked into paper cups, looking like someone’s grandma, aunt, or very patient neighbor made it with love. These Easy Homemade Butterscotch Squares have that same feeling. Creamy brown sugar filling, smooth chocolate coating, and just enough homemade charm to make them feel special without being too fussy.
They remind me of holiday candy trays, See’s Candy boxes, church bake sales, and those family gatherings where everyone says, “I’m only having one,” but somehow keeps walking by the dessert table. Sound familiar? I’m not pointing fingers. I’ve absolutely been that person.
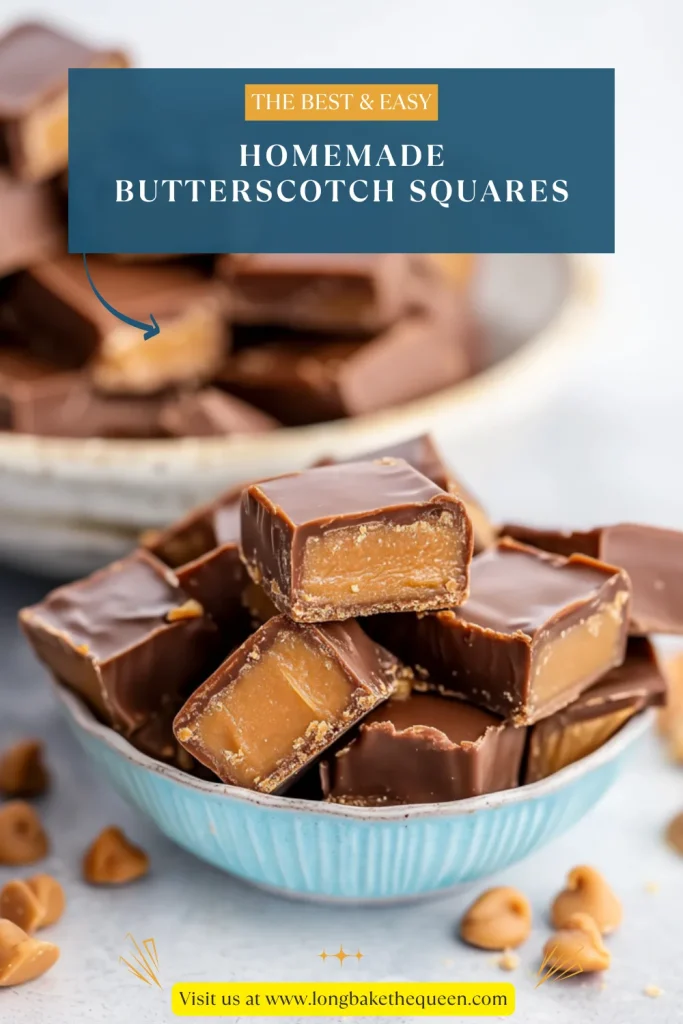
These Easy Homemade Butterscotch Squares are made with packed brown sugar, heavy whipping cream, unsalted butter, vanilla, salt, powdered sugar, and chocolate melts. The filling is soft and creamy, almost like a butterscotch truffle center, then each little square gets dipped in chocolate and chilled until set. It’s rich, sweet, buttery, and honestly a little dangerous if you keep them too close to the coffee pot.
The first time I made Easy Homemade Butterscotch Squares, I was trying to recreate that nostalgic candy-box feeling at home. You know the one. You open a box of chocolates, scan the little paper guide like it’s a treasure map, and immediately look for the pieces with the creamy centers. I always drift toward the butterscotch or caramel-like ones first. Maybe it’s the brown sugar flavor. Maybe it’s the buttery sweetness. Maybe I just have no self-control around chocolate-dipped candy. Honestly, could be all three.
This recipe has that copycat See’s Candy vibe, which makes it feel a little extra special. I won’t pretend it’s exactly like walking into a candy shop with those glass cases and the smell of chocolate in the air, but it gets close enough to make me very happy. And there’s something satisfying about making homemade butterscotch candy in your own kitchen. Even if your counter ends up with chocolate drips, powdered sugar dust, and one “sample” piece missing before the batch is finished.
I used to feel nervous around candy thermometers. They make recipes feel serious, don’t they? Like suddenly you’re not just making dessert, you’re doing kitchen chemistry with consequences. But these Easy Homemade Butterscotch Squares are more approachable than they sound. You cook brown sugar, cream, and butter until the mixture reaches 236°F, then stir in vanilla, salt, and powdered sugar. That’s the big moment. The thermometer is just there to tell you when the filling has cooked enough to set properly.
The waiting part is probably the hardest, at least for me. The butterscotch filling needs time to set at room temperature before you cut it, and then the chocolate needs time to chill. So yes, this is not an instant candy recipe. But it’s also not difficult. It’s more of a “put on some music, make the filling, come back later” kind of recipe. I like that rhythm, especially around the holidays when everything else already feels rushed.
What I love most about these homemade butterscotch squares is how they feel both simple and gift-worthy. They’re small, rich, and pretty enough for candy tins, dessert boards, Christmas trays, or little neighbor gifts. But they’re also perfect for keeping in the fridge for those tiny after-dinner sweet cravings. You know, the ones where you don’t want a whole dessert, just something sweet enough to make the day feel finished.

Why you’ll Love these Easy Homemade Butterscotch Squares?
- They feel like a candy-shop treat made at home. These Easy Homemade Butterscotch Squares have that old-fashioned chocolate-dipped candy flavor that feels nostalgic in the best way. The filling is creamy and buttery with deep brown sugar sweetness, while the chocolate coating gives each piece a smooth truffle-like finish. They look like something you might tuck into a holiday candy box, but you made them yourself. And yes, that does make you feel a little proud, even if three of them turned out slightly lopsided.
- The ingredient list is simple and familiar. You only need brown sugar, heavy whipping cream, butter, vanilla, salt, powdered sugar, and chocolate melts. Nothing too unusual, nothing that requires a specialty store trip, and nothing that makes you stare at the label wondering what it is. The magic comes from cooking those simple ingredients to the right temperature. Brown sugar and butter do a lot of heavy lifting here, and honestly, they rarely let us down.
- They’re perfect for gifting and holiday trays. This recipe makes about 64 small truffles, which is wonderful if you’re making Christmas candy, teacher gifts, neighbor treats, party favors, or dessert boxes. I say “about 64” because the final number depends on how neatly you cut them and how many tiny edge pieces mysteriously disappear during dipping. Those little scraps are cook’s tax. Very official. Probably.
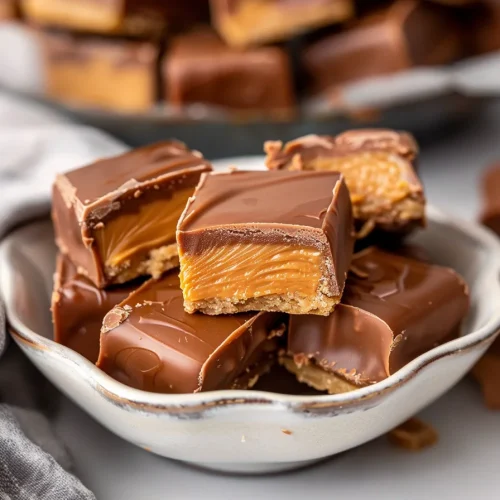
- The texture is soft, creamy, and truffle-like. These butterscotch candy squares are not hard like brittle and not chewy like caramel. The center is creamy, rich, and soft enough to feel like a truffle filling. Once the chocolate sets around it, you get that lovely contrast of smooth chocolate outside and buttery brown sugar filling inside. It’s a small bite, but it feels very satisfying. The kind of candy where one piece is enough, except also maybe not.
- You can make them ahead. Because these Easy Homemade Butterscotch Squares need setting and chilling time, they’re actually great for planning ahead. You can make the filling one day, cut and dip the squares the next, and store them until you’re ready to serve or gift them. I like breaking the recipe up like this because candy-making feels much calmer when you’re not trying to do every single step while dinner is also happening and someone is asking where the tape is for wrapping presents.
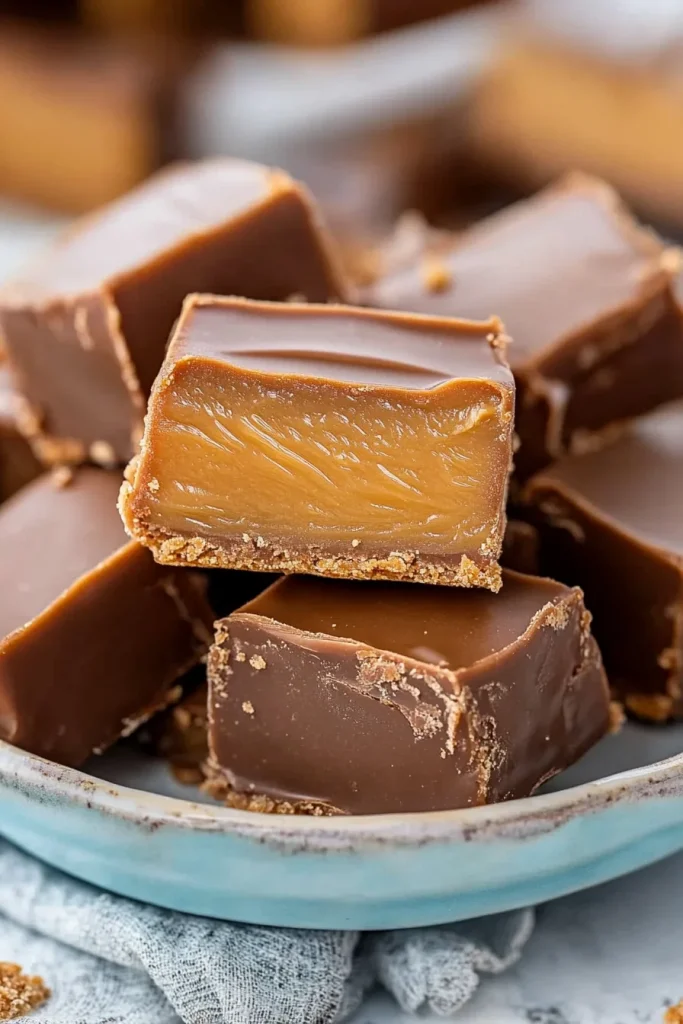
Ingredient Notes
The ingredients in Easy Homemade Butterscotch Squares are basic, but each one matters. Since this is a candy-style recipe, there isn’t much to hide behind. The brown sugar creates the butterscotch flavor, the cream and butter make the filling rich, the powdered sugar helps it firm up, and the chocolate coating turns the whole thing into a candy-shop-style treat. It’s simple, but simple in that cozy, reliable way.
- Packed Brown Sugar: Brown sugar is the main flavor in these Easy Homemade Butterscotch Squares. It gives the filling that deep, warm, caramel-like sweetness that makes butterscotch taste so comforting. Make sure the brown sugar is packed firmly into the measuring cup so the amount is accurate. Light brown sugar gives a softer, more classic flavor, while dark brown sugar adds a deeper molasses note. I usually lean toward light brown sugar, but dark brown sugar has its own cozy little mood.
- Heavy Whipping Cream: Heavy whipping cream helps create the creamy texture of the butterscotch filling. It gives richness and helps the brown sugar cook into a smooth candy base. I wouldn’t swap this with thin milk because candy can be picky, and this is one of those places where the cream really earns its spot. The finished center should feel soft and truffle-like, not grainy or dry.
- Unsalted Butter: Butter adds richness, smoothness, and that classic butterscotch flavor. Unsalted butter is best because the recipe already includes salt, so you can control the balance. When the butter melts with the brown sugar and cream, the mixture smells incredible. Like a bakery candle, but edible and much better. Butter and brown sugar together really know how to make a kitchen feel happy.
- Vanilla: Vanilla adds warmth and rounds out the flavor of the filling. It goes in after the mixture cooks, which helps the flavor stay more noticeable. You don’t need much, but it makes the butterscotch taste more complete. Without vanilla, the filling can still be sweet and buttery, but it feels a little less finished. Like it forgot its earrings before leaving the house.
- Salt: Salt balances the sweetness in these homemade butterscotch candies. Since the filling is rich with brown sugar, cream, and butter, that little bit of salt keeps it from tasting flat or overly sweet. It doesn’t make the candy salty. It just gives the flavor a little backbone. I know salt sounds boring, but in candy, it’s quietly doing important work.
- Powdered Sugar: Powdered sugar helps thicken and stabilize the butterscotch filling. Once it’s whisked in, the mixture becomes smoother and more sliceable, which makes it possible to cut the set filling into neat little squares. Add it carefully and whisk well so you don’t end up with dry pockets. Also, powdered sugar loves to poof into the air if you move too fast. Ask me how my black shirt knows.
- Chocolate Melts: Chocolate melts are used to coat the butterscotch squares. They melt smoothly and set nicely, which makes dipping easier than using regular chocolate chips. You can use milk chocolate, dark chocolate, or semi-sweet chocolate melts depending on what you like. Milk chocolate gives a classic candy-box flavor, while dark chocolate balances the sweetness a bit more. I go back and forth on my favorite, which is very inconvenient but delicious.
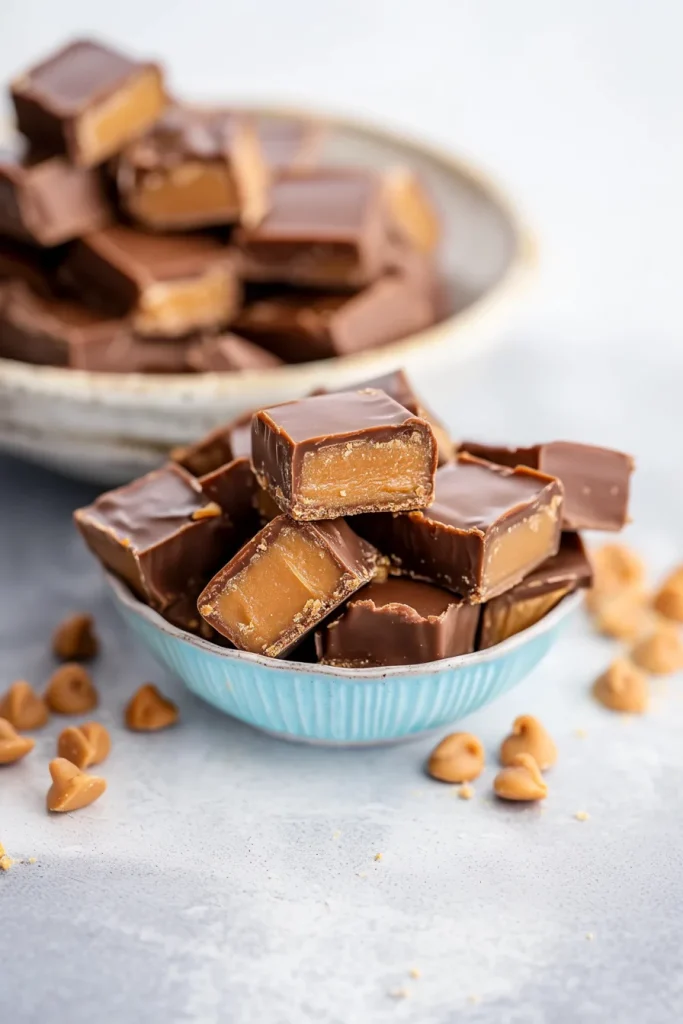
How to Make Easy Homemade Butterscotch Squares?
Making Easy Homemade Butterscotch Squares is mostly about timing and patience. You’ll prepare the pan, cook the brown sugar mixture to 236°F, stir in the flavorings and powdered sugar, let the filling set, cut it into small squares, dip each piece in chocolate, and chill until firm. It sounds like a lot when listed all at once, but each step is manageable. Candy-making just likes to look dramatic.
- Prepare the pan. Line a 9×9-inch pan with foil and spray it with nonstick cooking spray. This makes it easier to lift the set butterscotch slab out of the pan later. Candy can be sticky and stubborn, so don’t skip the foil. It’s one of those little prep steps that feels boring in the moment but saves you from wrestling with a pan later. Nobody wants to lose good candy to a corner.
- Combine the brown sugar, cream, and butter. Place the packed brown sugar, heavy whipping cream, and unsalted butter in a saucepan over medium-high heat. Stir until the butter melts and everything comes together. The mixture will start looking smooth and glossy, and the smell will probably make you feel like you’re already halfway to candy-shop success. It’s brown sugar and butter doing what they do best.
- Bring the mixture to a rolling boil. Keep heating the mixture until it reaches a rolling boil, then reduce the heat to low and place a candy thermometer in the pot. A rolling boil means the bubbles are steady and active across the surface, not just lazily popping around the edges. This is where the recipe starts feeling a little official, but don’t worry. The thermometer is there to help, not intimidate you.
- Cook the filling to 236°F. Simmer the mixture, stirring occasionally, until it reaches 236°F, which usually takes about 7 to 8 minutes. Stay nearby because candy temperature can rise faster than expected. I’ve learned this the slightly panicked way. Once the thermometer hits the right number, turn off the heat. This temperature helps the filling set with that soft, creamy texture instead of staying too loose.
- Stir in vanilla and salt. After removing the pan from the heat, stir in the vanilla and salt. The vanilla adds warmth, while the salt balances the sweetness. It’s a quick step, but it makes the filling taste more rounded. At this point, the butterscotch mixture should smell rich, cozy, and dangerously spoon-worthy. Do not burn your tongue. That is not quality control; that is impatience. I say this with experience.
- Whisk in the powdered sugar. Add the powdered sugar and whisk until the mixture is smooth. It will thicken as you stir, and that’s what you want. The powdered sugar helps create the creamy, truffle-like center in these Easy Homemade Butterscotch Squares. Take your time here so the filling is smooth and evenly mixed. A few extra seconds of whisking can make the texture nicer.
- Pour the filling into the pan. Pour the warm butterscotch mixture into the prepared pan and spread it evenly. Let it set at room temperature for a few hours, or make it the day before and let it sit overnight. This is the part where patience matters. If the filling is too soft, cutting neat squares becomes a sticky little disaster. Tasty, yes. Pretty, not so much.
- Cut the butterscotch into squares. When the filling is firm, lift it from the pan using the foil. Use a large kitchen knife to cut the square into quarters, then cut each quarter into about 16 small squares. You should get around 64 pieces. Don’t worry if every square isn’t perfect. Homemade candy with slightly uneven edges still tastes like homemade candy, which is to say, wonderful.
- Melt the chocolate. Melt the chocolate melts according to the package directions and stir until smooth. Chocolate melts are helpful because they’re made to coat and set easily. If the chocolate feels too thick, follow the package directions for thinning it. Smooth chocolate makes dipping much easier, and when you have 64 little squares waiting, easy matters.
- Dip each square in chocolate. Dip each butterscotch square into the melted chocolate, then tap off the excess. Place each dipped piece on a wax paper-lined cookie sheet. This step is a little messy, and that’s fine. Homemade chocolate dipping has a way of getting on your fingers, the spoon, the counter, and somehow the handle of the refrigerator. It happens.
- Chill until set. Place the dipped Easy Homemade Butterscotch Squares in the refrigerator until the chocolate is firm. Once set, they’re ready to serve, package, or store. The finished candies should have a smooth chocolate coating and a creamy brown sugar butterscotch center. They look pretty in candy cups, but they also look perfectly fine stacked in a container for “private sampling.”
Storage Options
These Easy Homemade Butterscotch Squares store beautifully, which makes them great for holidays, parties, gifting, and make-ahead dessert trays. The biggest thing is keeping them cool enough so the chocolate stays firm. If your kitchen runs warm, use the fridge. If your kitchen is cool, room temperature storage works for shorter periods. Candy is low drama once it’s made, thankfully.
- Room Temperature: Store the butterscotch squares in an airtight container at cool room temperature for up to 1 week. Place wax paper or parchment paper between layers so the chocolate pieces don’t stick together. Keep them away from sunlight, heat, or warm counters because chocolate melts when it feels even mildly inconvenienced. A cool pantry or shaded counter is best.
- Refrigerator: Store Easy Homemade Butterscotch Squares in an airtight container in the refrigerator for up to 2 weeks. Let them sit at room temperature for a few minutes before serving so the butterscotch filling softens slightly. Straight from the fridge, they’re still delicious, but the center is creamier once it relaxes a little. Candy deserves a moment to settle in.
- Freezer: You can freeze these chocolate-dipped butterscotch squares for up to 2 months. Layer them in a freezer-safe container with parchment or wax paper between layers. Thaw them in the refrigerator overnight before serving. The chocolate coating may look slightly different after freezing, but the flavor should still be lovely. Not every piece may look candy-shop perfect, but that’s okay.
- Gift Storage: If you’re giving these as gifts, place each square in a small candy cup or paper liner, then pack them into a tin, box, or holiday container. Keep them cool until gifting. If mailing, choose cooler weather and avoid warm shipping conditions. Chocolate and hot delivery trucks are not exactly a love story. More like a cautionary tale.
- Make-Ahead Tip: The butterscotch filling can be made the day before you plan to dip the candy. Let it set at room temperature, then cut and coat the squares the next day. This makes the recipe feel less rushed and honestly more enjoyable. I like doing it in two stages because dipping candy is more fun when you’re not also watching the clock and trying to clean the kitchen at the same time.
Variations & Substitutions
These Easy Homemade Butterscotch Squares are delicious as written, but they’re also easy to dress up. You can change the chocolate, add sea salt, drizzle the tops, sprinkle on nuts, or play with flavor extracts. Small changes go a long way because the filling is already rich and sweet. Think of the basic recipe as a little black dress, but made of brown sugar and chocolate. Okay, odd image. But you get it.
- Use dark chocolate. Dark chocolate is a great choice if you want to balance the sweetness of the butterscotch filling. The slightly bitter chocolate works beautifully with the brown sugar center and makes the candy taste a little more grown-up. I love this version with coffee. It feels like the kind of treat you’d serve after dinner when everyone says they’re too full but somehow still reaches for one.
- Use milk chocolate. Milk chocolate gives these homemade butterscotch squares a sweeter, creamier, more classic candy-box flavor. If you want that nostalgic See’s Candy-style taste, milk chocolate is probably the way to go. It’s rich and sweet, yes, but that’s kind of the point. Candy is not here to pretend it’s a salad.
- Add flaky sea salt. Sprinkle a tiny pinch of flaky sea salt on top of each dipped square before the chocolate sets. The salt gives the candy a salty-sweet finish and makes the chocolate look a little more polished. Don’t add too much, though. A whisper of salt is lovely. A snowstorm of salt is confusing.
- Drizzle with extra chocolate. Once the coating sets, drizzle the tops with white chocolate, dark chocolate, milk chocolate, or butterscotch candy melts. This makes the squares look gift-worthy and hides any dipping imperfections. A drizzle is basically candy eyeliner. It sharpens everything up, even if the base coat got a little messy.
- Add chopped nuts. Finely chopped pecans, walnuts, or almonds can be sprinkled over the chocolate before it sets. Pecans are especially good because their buttery flavor pairs beautifully with butterscotch. Nuts add crunch and make the candies feel a little more textured. Just chop them small so they don’t overpower the little squares.
- Add a touch of rum extract. For a warmer, deeper flavor, add a tiny amount of rum extract along with the vanilla. Start small because extracts can be strong. This gives the butterscotch filling a slightly more grown-up flavor without changing the texture. I’d use this version for holiday boxes or after-dinner candy trays.
- Try white chocolate coating. White chocolate makes the squares sweeter and gives them a pretty pale finish. It pairs nicely with the brown sugar filling, though it is definitely sweeter than dark or semi-sweet chocolate. A dark chocolate drizzle on top helps balance it and makes the candies look extra pretty. Very holiday tray friendly.
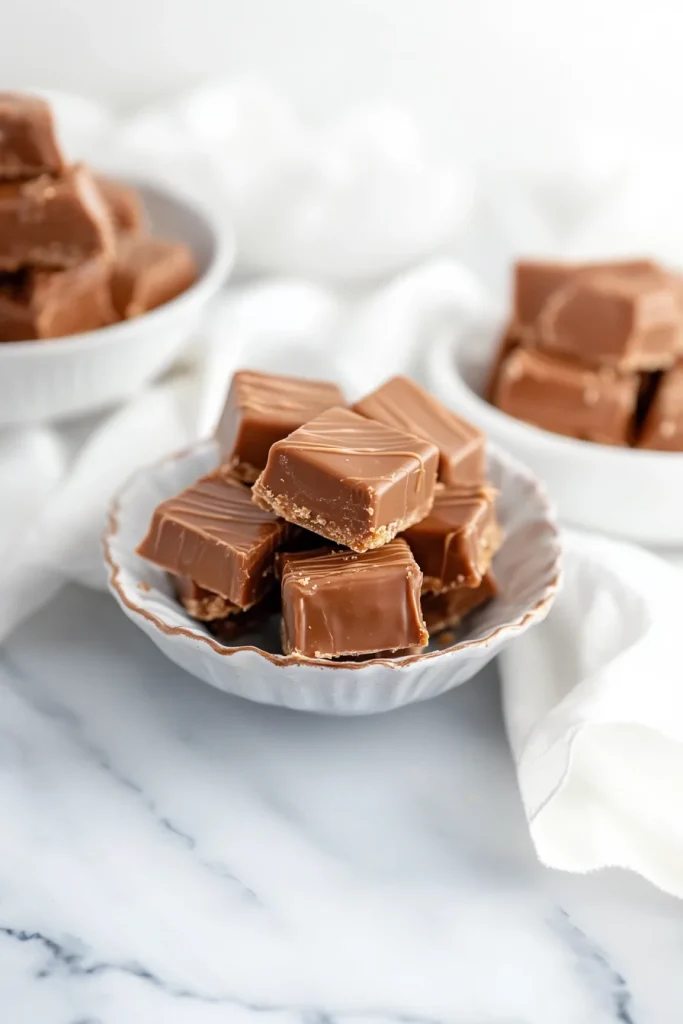
What to Serve With Easy Homemade Butterscotch Squares?
Easy Homemade Butterscotch Squares are rich, sweet, and chocolatey, so they pair nicely with drinks and desserts that balance them. Coffee, tea, milk, fruit, ice cream, and holiday cookie trays are all good choices. Since these candies are small, they’re perfect for dessert boards where people want a little bite of everything. Or where people say they want a little bite and then take four. Happens all the time.
- Coffee: Coffee is one of my favorite things to serve with Easy Homemade Butterscotch Squares. The bitterness of coffee balances the sweet brown sugar filling and chocolate coating. Hot coffee, iced coffee, espresso, cappuccino — they all work. There’s something about a tiny chocolate-dipped candy next to coffee that feels like a café moment, even if you’re standing in your kitchen wearing slippers.
- Hot Tea: Black tea, chai, Earl Grey, or vanilla tea pairs beautifully with these butterscotch truffle squares. Chai is especially lovely because the warm spices go so well with brown sugar and chocolate. Tea makes the whole treat feel a little quieter and cozier, like an afternoon pause. And honestly, we could all use more of those.
- Cold Milk: Cold milk is classic with chocolate candy. It balances the rich butterscotch filling and makes the squares feel a little nostalgic, almost like the kind of treat you’d sneak from a holiday tin as a kid. Adults can absolutely drink milk with candy too. We don’t have to outgrow all the good things.
- Vanilla Ice Cream: Serve one or two Easy Homemade Butterscotch Squares with vanilla ice cream for a simple dessert plate. You can also chop the candies and sprinkle them over the ice cream like homemade candy bits. Add caramel sauce or chocolate drizzle if you want to lean fully into dessert mode. I mean, if you’re already there, why not?
- Fresh Fruit: Strawberries, apple slices, orange wedges, or berries add freshness next to these rich candies. Apples are especially nice because butterscotch and apple have that caramel-apple kind of friendship. The fruit keeps the dessert plate from feeling too heavy, and it also adds color. Candy trays appreciate a little color.
- Holiday Cookie Trays: These homemade butterscotch candies are perfect for holiday cookie trays. Serve them with sugar cookies, shortbread, fudge, peanut butter blossoms, gingerbread, chocolate truffles, or peppermint bark. They add a candy-style option among the cookies, which makes the tray feel more interesting. And people love variety, especially when variety is covered in chocolate.
- Dessert Boards: Add Easy Homemade Butterscotch Squares to a dessert board with pretzels, cookies, nuts, marshmallows, fruit, and extra chocolate pieces. Their small size makes them easy to grab, and the chocolate coating looks pretty beside other treats. A dessert board always feels festive, even if it’s just for movie night. Honestly, maybe especially for movie night.
FAQ
Why is my butterscotch filling too soft?
If the filling is too soft, it may not have reached 236°F, or it may need more time to set. Let it sit at room temperature for several hours before cutting. If it still seems very soft, it was likely undercooked. Candy texture depends a lot on temperature, which is why the thermometer matters.
Why is my butterscotch filling too hard?
If the filling is too hard, the mixture may have cooked past 236°F. A few extra degrees can make candy firmer than intended. Watch the thermometer closely and remove the pan from the heat once it reaches the target temperature. It happens, though. Candy has opinions.
Can I use dark brown sugar?
Yes, dark brown sugar can be used in these Easy Homemade Butterscotch Squares. It gives the filling a deeper, more molasses-like flavor. Light brown sugar gives a softer, more classic butterscotch taste. Both work, so it depends on whether you want a lighter or deeper flavor.
Do Easy Homemade Butterscotch Squares need to be refrigerated?
They can be stored at cool room temperature for a short time, but refrigeration helps keep the chocolate firm and extends freshness. Store them in an airtight container in the refrigerator for up to 2 weeks. Let them sit out briefly before serving so the filling softens slightly.
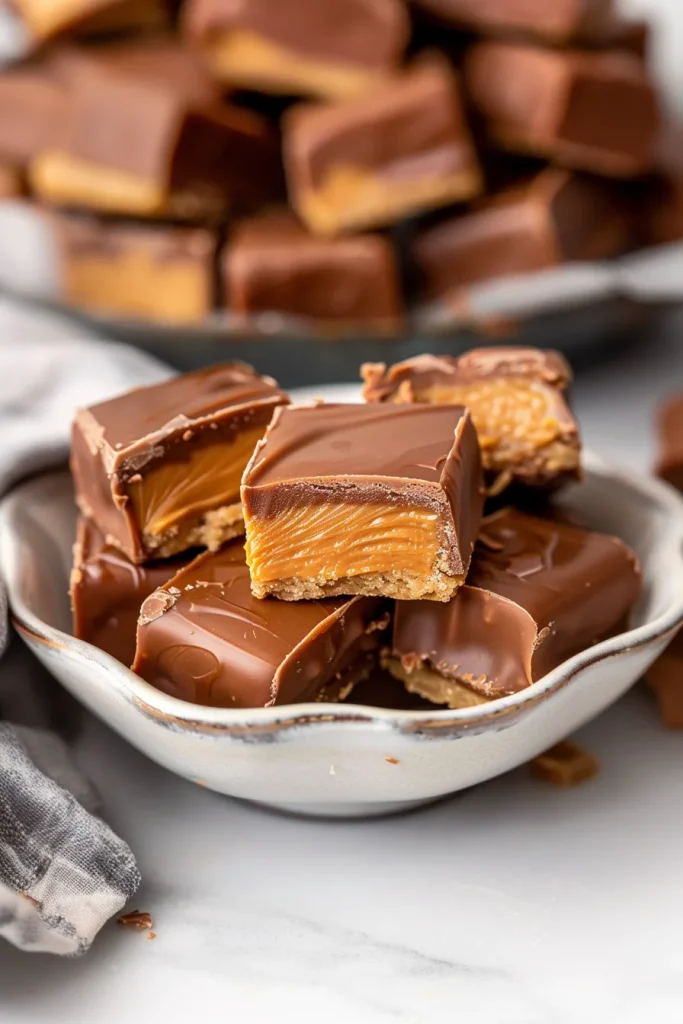
These Easy Homemade Butterscotch Squares are creamy, buttery, chocolate-dipped, and full of nostalgic candy-shop flavor. They take a little patience, yes, but the steps are simple and the reward is a whole batch of sweet little butterscotch truffles that feel perfect for holidays, gifting, dessert trays, or sneaking from the fridge after dinner.
I love that they’re homemade but still feel special enough to box up and share. Would you dip your Easy Homemade Butterscotch Squares in milk chocolate, dark chocolate, or finish them with a tiny sprinkle of flaky sea salt? Can’t wait to hear what you think!
Easy Homemade Butterscotch Squares
Ingredients
- 2 cups packed brown sugar about 400 g
- 3/4 cup heavy whipping cream about 177 ml
- 6 tbsp unsalted butter about 84 g
- 1/2 tsp vanilla extract
- 1/4 tsp salt
- 1 cup powdered sugar about 113 g
- 16 oz chocolate melts
Instructions
- Line a 9 x 9-inch pan with foil.
- Lightly coat the foil-lined pan with nonstick cooking spray.
- Place the packed brown sugar, heavy whipping cream, and unsalted butter in a saucepan.
- Set the saucepan over medium-high heat.
- Stir the mixture until the butter is melted and the ingredients are fully combined.
- Bring the mixture to a rolling boil.
- Once the mixture reaches a rolling boil, reduce the heat to low.
- Place a candy thermometer in the saucepan.
- Simmer the mixture, stirring occasionally, until it reaches 236°F. This should take approximately 7 to 8 minutes.
- Remove the saucepan from the heat.
- Stir in the vanilla extract and salt.
- Add the powdered sugar.
- Whisk until the powdered sugar is fully incorporated and the mixture is smooth.
- Pour the butterscotch mixture into the prepared pan.
- Spread the mixture evenly in the pan.
- Allow the filling to set at room temperature for several hours, or prepare it one day in advance and allow it to set overnight.
- Once the filling is firm, lift it from the pan using the foil.
- Place the set butterscotch square on a cutting board.
- Use a large kitchen knife to cut the square into quarters.
- Cut each quarter into approximately 16 small squares, yielding about 64 pieces total.
- Melt the chocolate melts according to the package directions.
- Stir the melted chocolate until smooth.
- Dip each butterscotch square into the melted chocolate.
- Tap off any excess chocolate.
- Place each dipped square on a wax paper-lined cookie sheet.
- Transfer the dipped candies to the refrigerator.
- Chill until the chocolate coating is fully set.
- Serve once set, or store as directed.
Notes