Chocolate cake mix, whole milk, canola oil, eggs, sweetened condensed milk, caramel topping, whipped topping, Butterfinger candy bars.
I have a soft spot for desserts that feel like they belong at a family party, sitting right beside a bowl of potato salad, a stack of paper plates, and someone’s aunt saying, “You better get a piece before it’s gone.” Butterfinger Cake is exactly that kind of dessert. It’s rich, gooey, cold, creamy, crunchy, and just a little over-the-top in a way that makes people smile before they even take a bite.
The first time I had a cake like this, it was at a casual get-together where everyone brought something. You know those dessert tables where there’s always one dish that quietly steals the show? This was that dish. Someone had made a chocolate poke cake with caramel, whipped topping, and crushed candy bars, and I remember thinking, “Well, that looks dangerous.” And it was. Not in a serious way, of course. More in a “I cut a tiny piece and somehow ended up with another tiny piece ten minutes later” way. Sound familiar?
That’s what I love about Butterfinger Cake. It doesn’t pretend to be delicate. It knows what it is. A soft chocolate cake gets poked full of holes while it’s still warm, then soaked with sweetened condensed milk and caramel sauce. Once it cools, it gets covered with whipped topping and crushed Butterfinger candy bars. It’s like a chocolate cake, a candy bar, and an icebox dessert all decided to show up in the same pan. A little chaotic? Maybe. But the good kind of chaotic.
I also appreciate that this Butterfinger Cake recipe starts with a boxed cake mix. I know some people get very serious about scratch baking, and I get it, I do. But sometimes you need a dessert that works without turning your kitchen into a flour-covered crime scene. Boxed cake mix is dependable, quick, and honestly, once you add the caramel soak, whipped topping, and candy pieces, nobody is standing there asking whether you sifted anything. They’re busy eating cake.
This dessert reminds me of birthdays, game day spreads, summer cookouts, church potlucks, and those family dinners where everyone says they’re “too full” until dessert appears. It’s sweet and indulgent, yes, but it’s also fun. And sometimes that’s exactly what dessert should be. Not serious. Not subtle. Just a cold, creamy, candy-covered Butterfinger poke cake that makes people hover near the fridge.

Why you’ll Love this Butterfinger Cake?
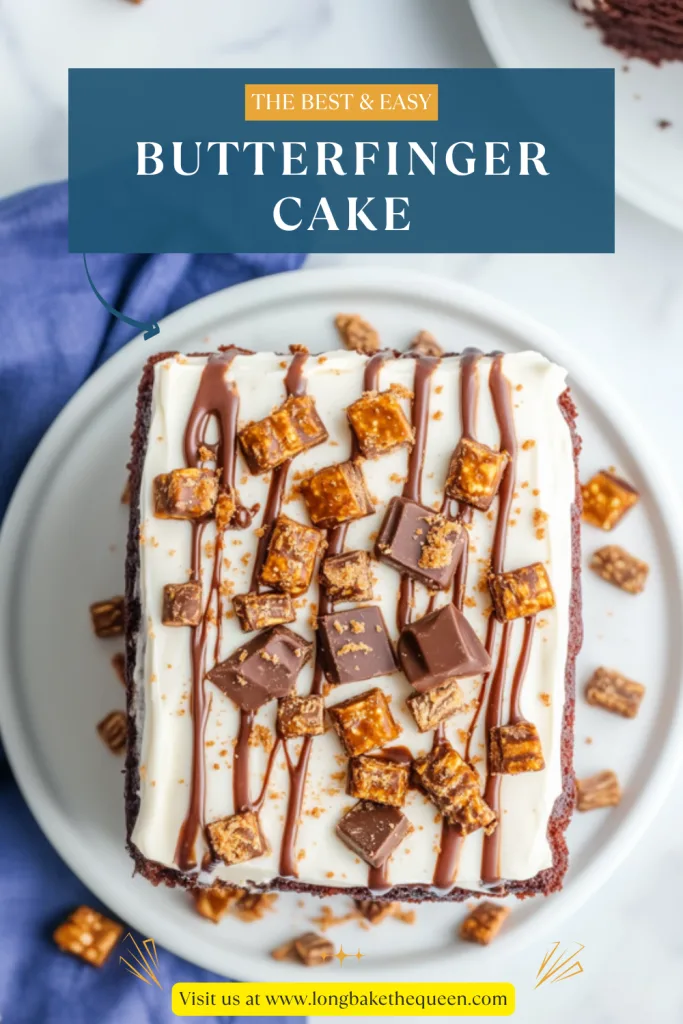
You’ll love Butterfinger Cake because it gives you a big, dramatic dessert with very little stress. The chocolate cake mix keeps the base easy, while the sweetened condensed milk and caramel topping soak into the cake and make it extra moist. Then comes the whipped topping, crushed Butterfinger candy bars, and maybe a little extra caramel drizzle if you’re feeling bold. It’s simple, but it tastes like something you’d be happy to find at the best dessert table.
One of the best things about this easy Butterfinger Cake is that it’s a true crowd-pleaser. It has chocolate, caramel, whipped creaminess, and candy crunch all in one pan. That’s a strong lineup. The cake is soft and rich, the caramel layer is gooey, and the Butterfinger pieces give you that flaky peanut-buttery crunch that makes every bite more interesting. It’s not just a frosted cake; it has layers of texture, even though you don’t have to actually stack any layers. Bless.
This Butterfinger Cake recipe is also great when you need dessert but don’t have hours to spend baking. You only need about 15 minutes of prep time, and the cake bakes according to the box directions, usually around 30 minutes. After that, the hardest part is waiting for it to cool so you can spread on the whipped topping. Waiting is always the rude part of dessert, but here it’s worth it.
Another thing I like is that this cake is better chilled. That means you can make it ahead, tuck it into the fridge, and pull it out when you’re ready to serve. I love a make-ahead dessert because it makes me feel slightly more organized than I actually am. The caramel and condensed milk mixture has time to soak into the chocolate cake, making it soft, sweet, and almost pudding-like in spots. If you’ve never had a poke cake, this is a very good place to start.
And let’s be honest, Butterfinger Cake looks fun. The whipped topping gives it a creamy white layer, the crushed candy bars add golden crunch, and the caramel drizzle makes it look like you tried harder than you did. That’s not a complaint. That’s a kitchen victory.
Ingredient Notes
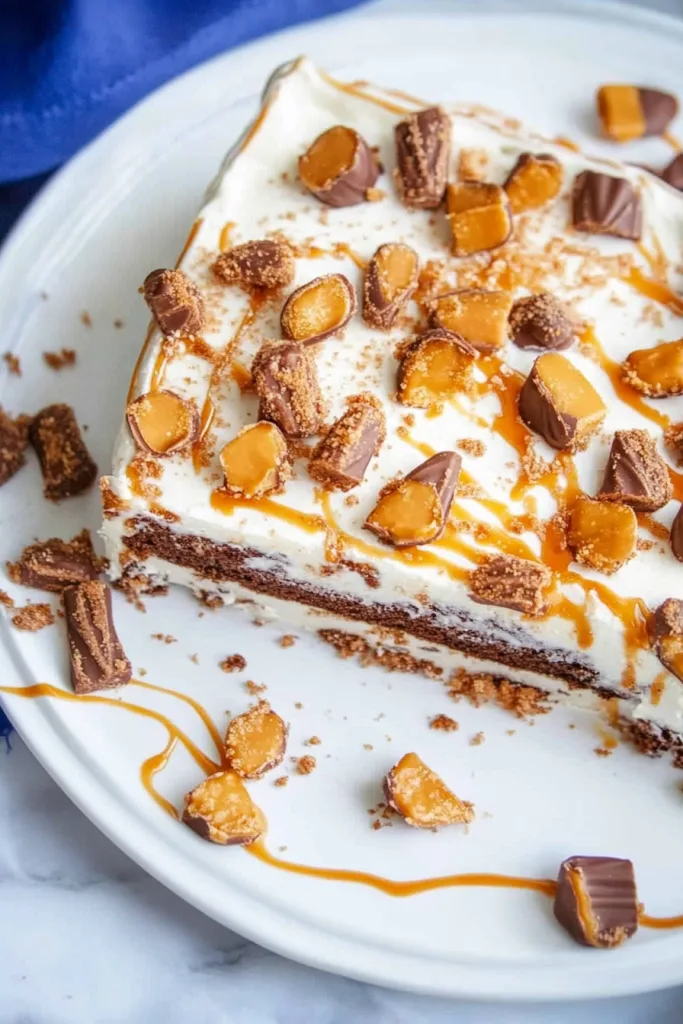
The ingredients for Butterfinger Cake are simple, but they work together in a very specific way. The chocolate cake gives you the soft base, the caramel and sweetened condensed milk soak into all those little holes, the whipped topping adds a cool creamy layer, and the Butterfinger candy bars bring crunch and flavor. It’s a short list, but the final dessert has a lot going on. In a good way.
- Chocolate cake mix: A boxed chocolate cake mix makes this recipe quick and reliable. You can use regular chocolate cake mix, devil’s food cake mix, or a fudge-style cake mix if you want a deeper chocolate flavor. Since this Butterfinger Cake gets topped with caramel and candy, a rich chocolate base works beautifully. I wouldn’t overthink it too much, though. Use the cake mix you like.
- Whole milk: Whole milk gives the boxed cake mix a richer flavor than water. It’s a small swap, but it helps the cake taste a little more homemade. If you only have water, it will still work, but milk gives the cake a softer, fuller texture.
- Canola oil: Canola oil keeps the cake moist and tender. Vegetable oil can also be used if that’s what you have in the pantry. The oil blends easily into the batter and helps the cake stay soft even after chilling.
- Eggs: The eggs help the cake rise and hold together. This recipe uses 3 large eggs, which gives the cake enough structure to handle the caramel and condensed milk soak. You want the cake soft, but not so delicate that it collapses under all that goodness.
- Sweetened condensed milk: Sweetened condensed milk is one of the main reasons this Butterfinger poke cake turns out so rich and gooey. It sinks into the holes and makes the cake extra moist. It’s thick, sweet, and honestly a little magical in desserts like this. Sticky, yes. Worth it, yes.
- Caramel dessert topping: Caramel topping adds buttery sweetness and blends perfectly with the condensed milk. It soaks into the warm cake and gives every bite that gooey caramel flavor. You can also drizzle extra over the top because this dessert has already chosen decadence as its personality.
- Frozen whipped topping: Thawed whipped topping gives the cake its cool, creamy finish. It’s lighter than buttercream, which is nice because the cake itself is already sweet and rich. Make sure the whipped topping is fully thawed before spreading, or it may drag across the cake instead of smoothing nicely.
- Butterfinger candy bars: Crushed Butterfinger candy bars are the star topping. They add crispy, flaky, peanut-buttery crunch and give the cake its signature flavor. I like leaving a mix of crumbs and bigger pieces so every bite feels a little different. Plus, crushing candy bars is weirdly satisfying. Tiny kitchen therapy, almost.
How to Make Butterfinger Cake?
Making Butterfinger Cake is simple, but the timing matters a little. You’ll bake the chocolate cake, poke holes in it while it’s still hot, pour over the caramel and condensed milk mixture, let everything cool completely, then add whipped topping and crushed Butterfingers. It’s easy enough for a busy day, but the result feels like a full-on party dessert.
Step 1: Mix the Cake Batter
Add the chocolate cake mix to a large bowl with the whole milk, canola oil, and eggs. Mix until the batter is smooth and combined. The batter should look thick, glossy, and chocolatey. Try not to overmix it once everything comes together. This part is quick, and that’s one of the reasons this Butterfinger Cake recipe is so handy.
Step 2: Pour the Batter Into the Pan
Pour the batter into a 9×13-inch baking dish. Spread it evenly with a spatula so the cake bakes at the same thickness all the way across. Make sure the batter reaches the corners. It doesn’t need to be perfect, but an even layer helps the cake bake nicely and makes it easier to poke holes later.
Step 3: Bake the Cake
Bake the cake according to the directions on the cake mix box. Most chocolate cakes in a 9×13-inch pan bake in about 30 minutes, but follow the instructions on your box. The cake is done when a toothpick inserted in the center comes out clean or with a few moist crumbs. Don’t overbake it if you can help it, because a soft cake absorbs the caramel mixture beautifully.
Step 4: Mix the Caramel and Condensed Milk
While the cake is baking, combine the sweetened condensed milk and caramel dessert topping in a medium bowl. Stir until smooth. This mixture is what gives Butterfinger Cake that gooey, sweet, almost melt-into-the-cake texture. Set it aside until the cake comes out of the oven.
Step 5: Poke Holes in the Hot Cake
Once the cake is baked, remove it from the oven. While it is still hot, use the handle of a wooden spoon to poke holes all over the cake. Space the holes about 1 inch apart and make them around 1 inch deep. I know, it feels wrong to poke holes in a cake you just successfully baked. But this is the whole point. The holes let the caramel mixture sink down instead of just sitting on top.
Step 6: Pour the Caramel Mixture Over the Cake
Pour the caramel and sweetened condensed milk mixture over the warm cake. Try to fill as many holes as possible, then spread the mixture gently across the top with a spoon or spatula. The cake will start soaking it up as it cools. This is the step that turns a regular chocolate cake into a rich Butterfinger poke cake.
Step 7: Let the Cake Cool Completely
Let the cake cool completely before adding the whipped topping. This is important. If the cake is still warm, the whipped topping can melt and slide around, and suddenly you have a dessert landslide. Still delicious probably, but not ideal. Give the cake time to cool so the topping spreads smoothly.
Step 8: Spread the Whipped Topping
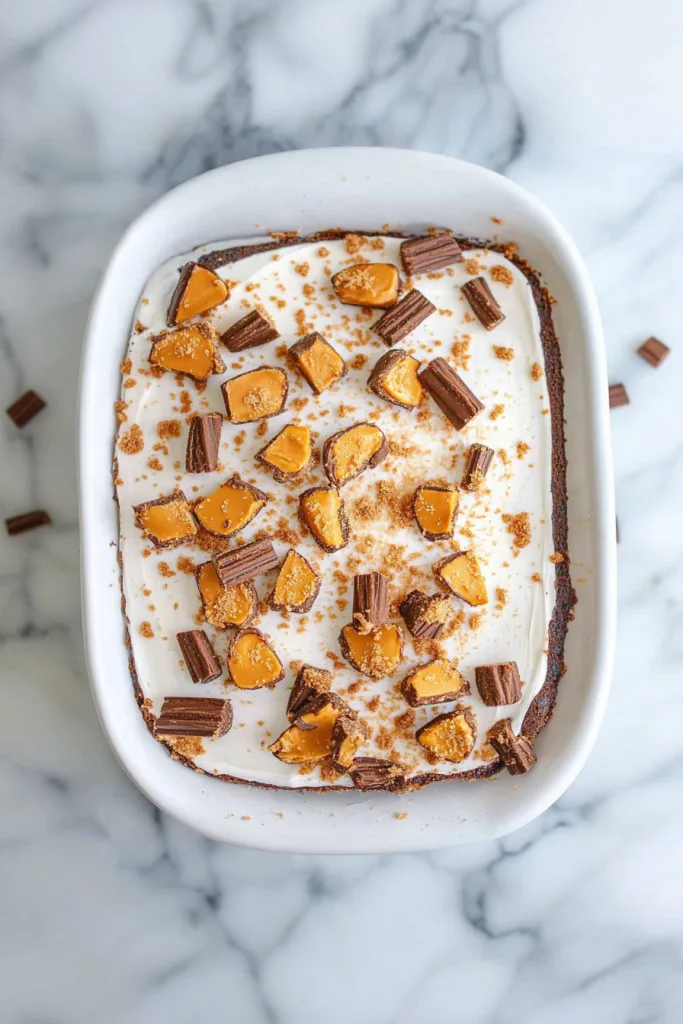
Once the cake is completely cooled, spread the thawed whipped topping evenly over the top. Use a spatula, butter knife, or the back of a spoon. It doesn’t have to look perfect. Soft swoops are charming. Perfectly flat whipped topping is not required for happiness.
Step 9: Add the Crushed Butterfingers
Sprinkle the crushed Butterfinger candy bars over the whipped topping. Spread them evenly so every slice gets that candy crunch. This is where the cake starts looking irresistible. The little golden candy pieces against the creamy topping? Very dessert-table drama.
Step 10: Drizzle With Extra Caramel
Drizzle extra caramel sauce over the top if desired. It’s optional, but let’s be real, it looks pretty and tastes amazing. A little drizzle makes the whole cake feel more finished, like something from a diner dessert case or a birthday party table.
Step 11: Chill and Serve
Chill the cake before serving for the best texture. The cold cake slices more neatly, and the caramel-soaked center has time to settle. Serve it cold or lightly chilled. Every bite should be chocolatey, creamy, gooey, and crunchy. Basically, everything Butterfinger Cake promises to be.
Storage Options
Butterfinger Cake stores well, which makes it perfect for parties, holidays, birthdays, potlucks, and make-ahead desserts. Because it has whipped topping and a milk-based caramel layer, it needs to be refrigerated. The cake actually gets softer and more flavorful as it sits, so leftovers are not exactly a problem. More like a fridge temptation.
- Refrigerator: Store Butterfinger Cake covered in the refrigerator for up to 4 to 5 days. You can keep it in the baking dish and cover it tightly with plastic wrap or foil, or place slices in an airtight container. The cake stays moist, and the whipped topping stays creamy.
- Room temperature: Do not leave the cake at room temperature for more than 2 hours. It can sit out while serving, but leftovers should go back into the refrigerator because of the whipped topping and sweetened condensed milk mixture. Food safety may not be exciting, but neither is questionable dairy.
- Freezer: You can freeze this Butterfinger Cake, though the whipped topping may change texture slightly after thawing. For best results, freeze individual slices in airtight containers for up to 2 months. Thaw overnight in the refrigerator before serving.
- Make-ahead option: This Butterfinger Cake recipe is great for making ahead. You can bake and soak the cake, then refrigerate it until chilled. If you want the Butterfinger candy pieces to stay as crunchy as possible, add them closer to serving.
- Keeping the topping crunchy: Butterfinger pieces can soften after sitting on whipped topping for a while. If you like maximum crunch, sprinkle the crushed candy bars on right before serving. If you don’t mind them softening a little, you can add them when you frost the cake. Both ways are delicious, just a slightly different texture.
- Best serving texture: Serve this cake cold or lightly chilled. The caramel-soaked chocolate cake and whipped topping taste best after they’ve had time to set in the refrigerator. It’s one of those desserts that rewards a little patience, which is annoying but true.
Variations & Substitutions
This Butterfinger Cake is already rich and fun as written, but you can definitely play around with it. The basic poke cake method stays the same: bake, poke, pour, cool, top, and chill. From there, you can change the cake flavor, add extra candy, use homemade whipped cream, or make it more peanut buttery. This cake is flexible, which is nice because sometimes the pantry has its own plans.
- Use devil’s food cake: Devil’s food cake mix gives this Butterfinger Cake a deeper chocolate flavor. It makes the dessert richer and pairs beautifully with caramel and Butterfinger candy. If you love dark, bold chocolate flavor, this is a good swap.
- Try yellow cake mix: Yellow cake mix gives the dessert a more buttery, candy-bar-style flavor. It won’t be as chocolatey, but the caramel and Butterfinger topping still work really well. It tastes a little more nostalgic, almost like a birthday cake met a candy bar.
- Add peanut butter: Warm a few tablespoons of creamy peanut butter and drizzle it over the cake with the caramel mixture. Since Butterfinger candy already has that peanut-buttery flavor, this makes the cake even richer. I’d start with a little, though, because peanut butter likes to take over if invited too loudly.
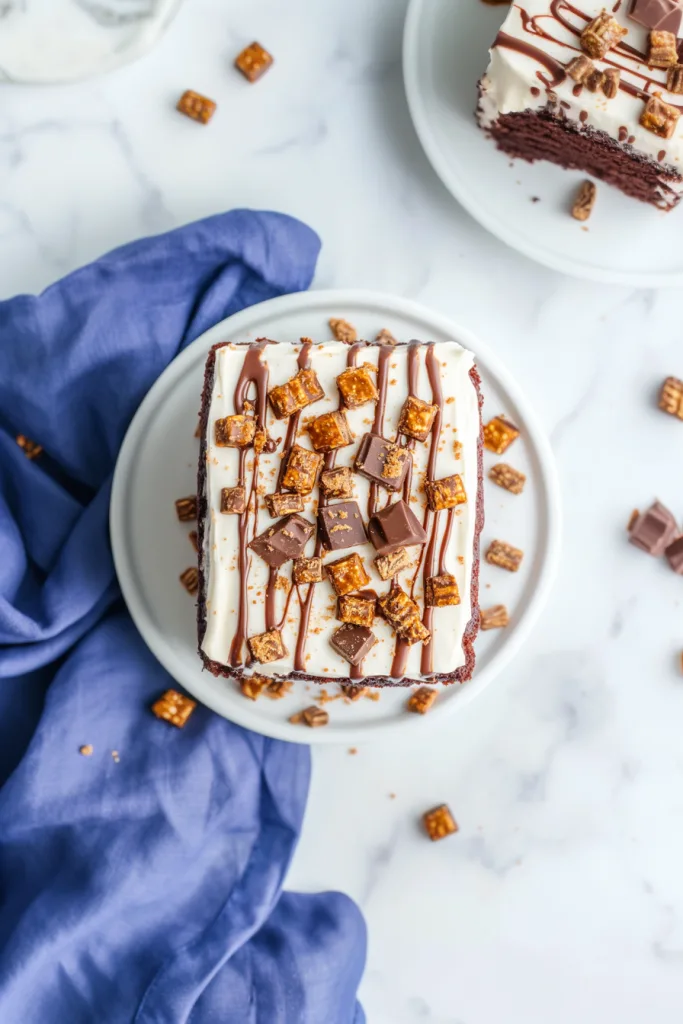
- Use chocolate syrup: Drizzle chocolate syrup over the whipped topping along with the caramel. It gives the cake that ice-cream-sundae look and adds another layer of chocolate flavor. Is it extra? Yes. But this cake is already not trying to be modest.
- Add more candy bars: If you want extra crunch, use more than 2 Butterfinger candy bars. Sprinkle extra on top right before serving or keep some on the side so people can add more. This is especially good if you love a crunchy topping.
- Use homemade whipped cream: Homemade whipped cream can replace frozen whipped topping. Beat heavy cream with confectioners’ sugar and vanilla until soft peaks form, then spread it over the cooled cake. Just keep in mind that homemade whipped cream may not hold as long, especially if you’re making the cake ahead.
- Try different candy bars: Heath bars, Reese’s cups, Snickers, or Twix can all work in place of Butterfinger bars. The flavor will change, of course, but the poke cake method stays the same. It’s a fun way to turn the recipe into a whole candy cake situation.
- Make it extra caramel: Drizzle more caramel over the cake before serving, or add a tiny pinch of sea salt for a salted caramel twist. The salt helps balance the sweetness and makes the caramel flavor pop.
- Add chopped peanuts: Chopped peanuts add crunch and make the peanut-buttery Butterfinger flavor stand out more. They also bring a little salty balance, which this sweet cake honestly appreciates.
- Use chocolate whipped topping: Chocolate whipped topping makes the cake even more chocolatey. It’s rich, dramatic, and definitely for people who believe dessert should not whisper.
What to Serve With Butterfinger Cake?
Butterfinger Cake is rich, sweet, creamy, gooey, and crunchy, so it pairs best with simple drinks and lighter sides. Since the cake already has chocolate, caramel, whipped topping, and candy pieces, you don’t need anything too complicated with it. A fresh or slightly bitter pairing helps balance all that sweetness.
- Coffee: Coffee is one of my favorite pairings with Butterfinger Cake. The slight bitterness balances the caramel and candy sweetness. A cold slice with hot coffee feels like a very good afternoon decision.
- Cold milk: A glass of cold milk is classic with chocolate cake and candy bar desserts. It keeps the richness from feeling too heavy and gives the whole thing a nostalgic, after-school-snack kind of feeling. But, you know, upgraded.
- Vanilla ice cream: If you want to go all in, serve Butterfinger Cake with a scoop of vanilla ice cream. It’s rich, yes, maybe a little outrageous, but the cold ice cream with caramel-soaked cake and crunchy Butterfingers is hard to argue with.
- Fresh strawberries: Strawberries add a bright, fruity contrast to the rich cake. They also make the plate look a little more balanced, which is nice when the dessert itself is basically a candy bar celebration.
- Bananas: Sliced bananas pair nicely with chocolate, caramel, and the peanut-buttery Butterfinger flavor. Add them on the side or serve them with a little drizzle of caramel.
- Hot chocolate: For a cozy dessert moment, serve this cake with hot chocolate. Is that sweet with more sweet? Yes. Is that sometimes exactly what the day calls for? Also yes.
- Tea: Black tea or lightly spiced tea can help balance the richness of this Butterfinger poke cake. It’s a nice choice if you want something less heavy than milk or hot chocolate.
- Party dessert table: Serve Butterfinger Cake with cookies, brownies, fruit, and bars on a dessert table. The crushed candy topping and caramel drizzle make it stand out immediately.
- Extra whipped cream: The cake already has whipped topping, but an extra dollop on each slice makes it feel like a dessert-shop treat. Sometimes more is more. Dessert understands.
- Salted snacks: Pretzels or salted peanuts are great on the side. Sweet and salty is a classic combination, and the salt helps balance the caramel and candy sweetness.
FAQ
Can I make Butterfinger Cake ahead of time?
Yes, Butterfinger Cake is a great make-ahead dessert. It actually tastes better after chilling because the caramel and sweetened condensed milk mixture has time to soak into the chocolate cake. For the crunchiest topping, add the crushed Butterfinger bars shortly before serving.
Can I use homemade chocolate cake instead of cake mix?
Yes, you can use homemade chocolate cake if you prefer. Bake it in a 9×13-inch pan, then follow the same steps for poking the holes, adding the caramel mixture, cooling, topping, and chilling. A cake mix just keeps the recipe faster and easier.
Can I use whipped cream instead of whipped topping?
Yes, homemade whipped cream can be used instead of frozen whipped topping. Just remember that whipped topping is usually sturdier, especially if you’re making the cake ahead or bringing it to a party. Homemade whipped cream may soften faster.
Can I use a different candy bar?
Yes. Heath bars, Snickers, Reese’s, Twix, or other candy bars can be used. The flavor will change, but the same poke cake method works. If you want the classic flavor, though, Butterfinger gives that signature crispy peanut-buttery crunch.
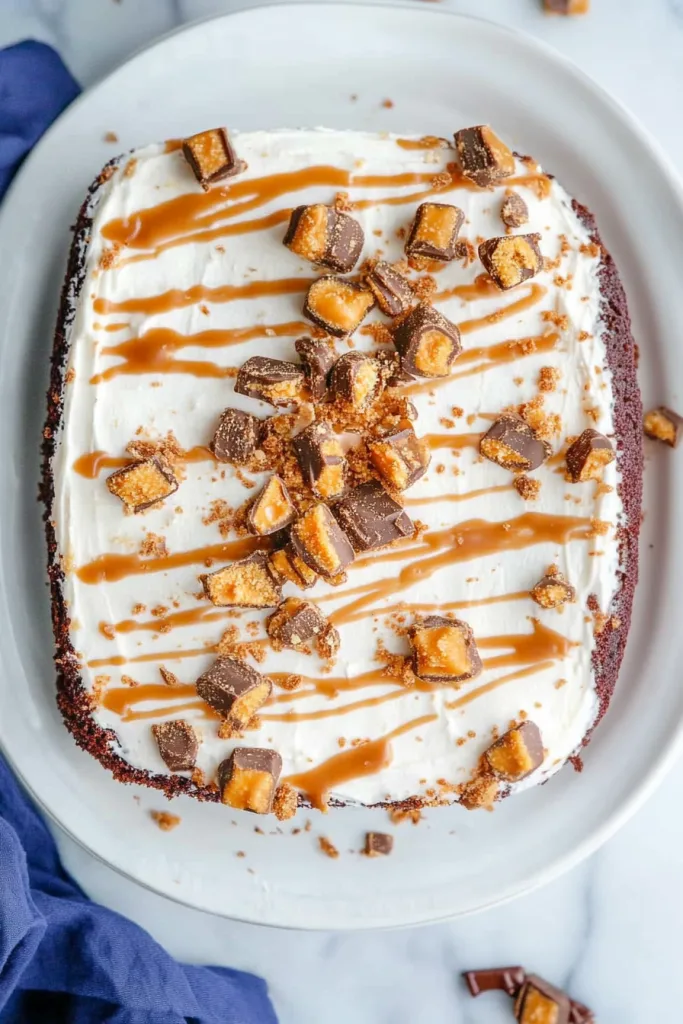
Butterfinger Cake is sweet, gooey, creamy, crunchy, and wildly fun in that old-fashioned poke cake way. It starts with a simple chocolate cake mix, then gets soaked with caramel and sweetened condensed milk, covered with whipped topping, and finished with crushed Butterfinger candy bars. It’s not a quiet dessert. It’s a “people will ask who made this” dessert, and I love that.
So the next time you need something easy for a birthday, potluck, game day, holiday, or just a weekend when candy on cake sounds completely reasonable, try this Butterfinger Cake. Chill it, slice it, drizzle a little extra caramel if you’re in the mood, and maybe save yourself a corner piece before the pan disappears. Can’t wait to hear what you think!
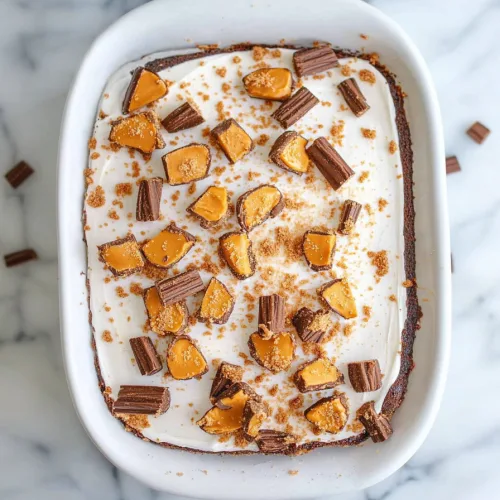
Butterfinger Cake
Ingredients
Cake
- 1 box chocolate cake mix
- 1 cup whole milk
- 1/2 cup canola oil
- 3 large eggs
Toppings
- 1 can sweetened condensed milk
- 1 jar caramel dessert topping
- 1 container frozen whipped topping thawed
- 2 Butterfinger candy bars crushed
- Additional caramel sauce for garnish, optional
Instructions
- Preheat the oven according to the temperature listed on the chocolate cake mix package.
- Lightly grease a 9×13-inch baking dish with nonstick cooking spray.
- Place the chocolate cake mix in a large mixing bowl.
- Add the whole milk, canola oil, and eggs.
- Mix until the batter is smooth and fully combined.
- Pour the batter into the prepared baking dish.
- Spread the batter evenly in the dish.
- Bake according to the instructions on the cake mix package, or until a toothpick inserted into the center comes out clean.
- While the cake is baking, combine the sweetened condensed milk and caramel dessert topping in a medium mixing bowl.
- Stir until the mixture is smooth and evenly combined.
- Remove the baked cake from the oven.
- While the cake is still hot, use the handle of a wooden spoon to poke holes across the surface of the cake, spacing them about 1 inch apart and making them approximately 1 inch deep.
- Pour the sweetened condensed milk and caramel mixture evenly over the hot cake.
- Spread the mixture gently over the surface, allowing it to fill as many holes as possible.
- Allow the cake to cool completely.
- Once the cake has cooled, spread the thawed whipped topping evenly over the entire surface.
- Sprinkle the crushed Butterfinger candy bars evenly over the whipped topping.
- Drizzle with additional caramel sauce, if desired.
- Refrigerate the cake until ready to serve.
- Slice and serve chilled.
Notes