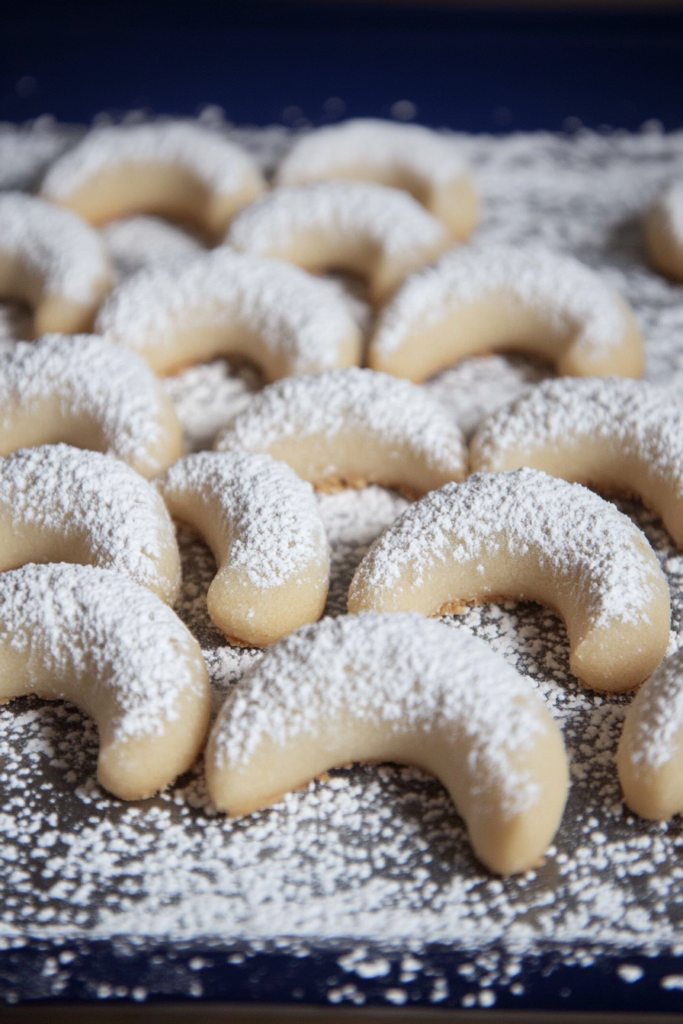
Butter, sugar, almond flour, flour, and vanilla come together in this delicate Vanillekipferl Recipe, classic buttery crescent cookies dusted in vanilla sugar.
Some cookies are loud. Chocolate chunks, caramel drips, sprinkles everywhere. You know the type.
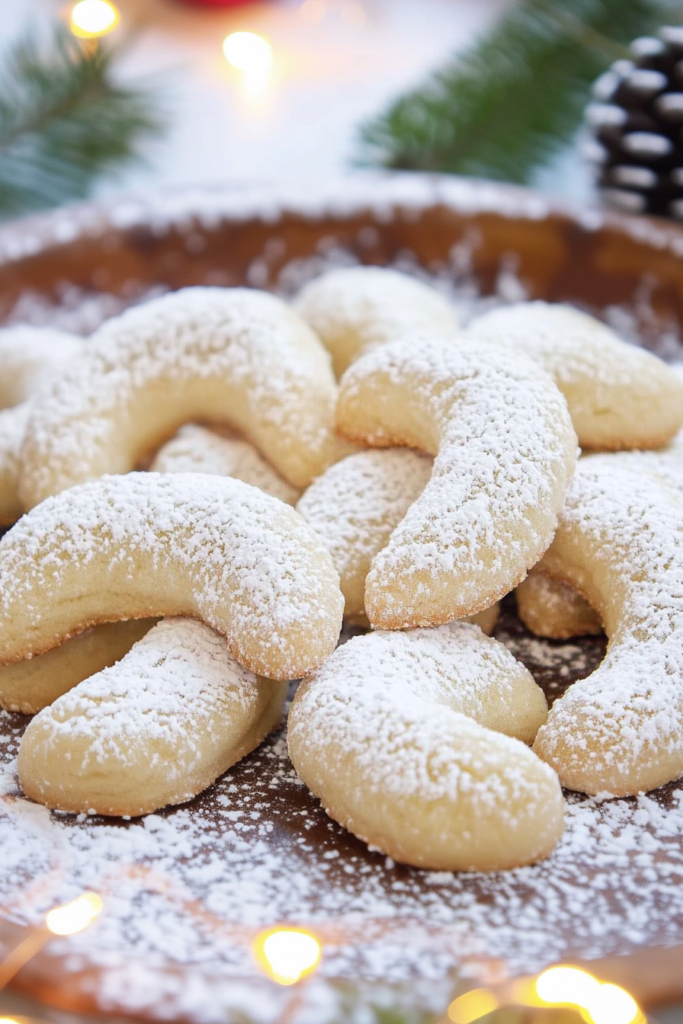
And then there are cookies like Vanillekipferl—quiet little crescents dusted in vanilla sugar that somehow manage to steal the whole show without trying too hard.
If you’ve never tried a Vanillekipferl Recipe before, imagine the softest shortbread cookie you can think of. Now make it slightly nutty from ground almonds, shape it into a crescent moon, and coat it in vanilla sugar that melts the second it touches the cookie.
That’s Vanillekipferl.
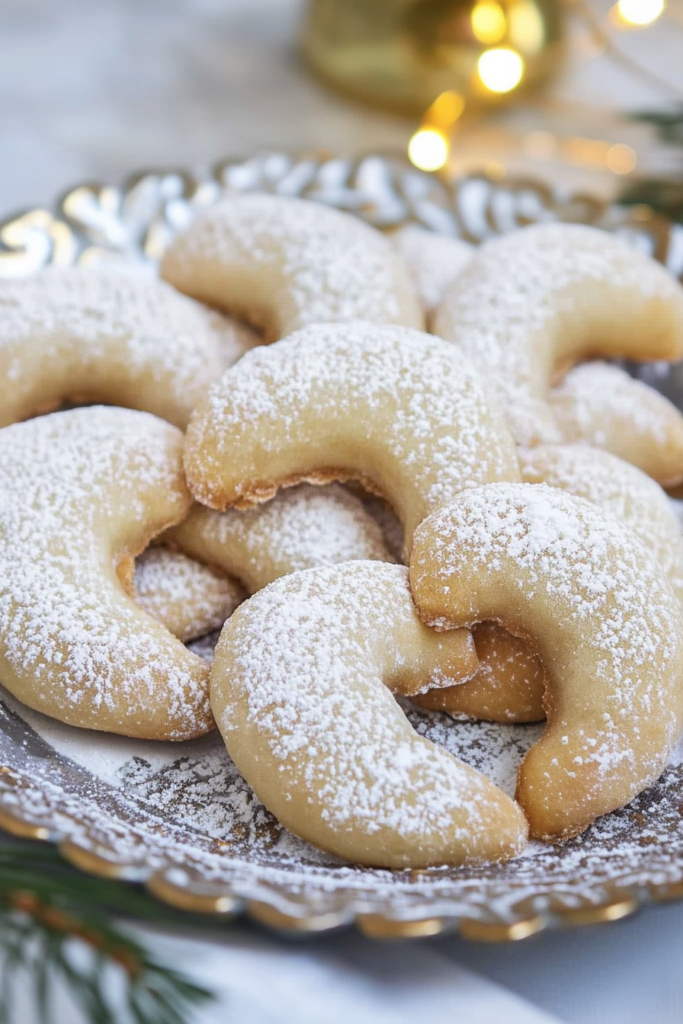
They’re traditional Austrian and Central European Christmas cookies, but honestly? I don’t think they should be limited to December. That feels unfair to the rest of the year.
The funny thing about this Vanillekipferl Recipe is how simple it is. When people see them on a cookie tray they usually assume they’re complicated. But they’re not. Not really.
It’s basically buttery dough… shaped by hand… baked until just barely golden… and then covered in vanilla sugar.
That’s it.
Well, that and a light snowfall of powdered sugar all over your counter.
But hey—that’s part of the experience, right?
The first time I had Vanillekipferl, I was at a holiday gathering where someone had clearly gone all-out with the baking. You know the kind of party—every table somehow has three desserts and nobody remembers who brought what.
There were gingerbread cookies, chocolate crinkles, linzer cookies… and then this small plate of crescent-shaped cookies dusted in powdered sugar.
They looked simple compared to the others. Almost shy.
Naturally, I grabbed one.
The first bite surprised me. It was buttery but delicate, almost crumbly in that perfect shortbread way. Then came the almond flavor, followed by vanilla sugar that melted instantly.
I remember thinking, Wait… why are these so good?
I probably ate three more before asking what they were called.
“Vanillekipferl,” someone said.
Which, to be honest, I immediately forgot how to pronounce.
A few weeks later I tried making my own Vanillekipferl Recipe, and that’s when I discovered two things:
- These cookies are way easier than they look.
- Shaping crescents is strangely relaxing.
It’s almost meditative. Roll the dough. Curve it gently. Place it on the tray. Repeat.
Some crescents look elegant. Others look… well, a little abstract.
But once they’re coated in vanilla sugar? They all look like winter magic.

Why you’ll Love this Vanillekipferl Recipe?
There’s a reason Vanillekipferl show up on so many European holiday cookie trays.
First, the texture is incredible. These cookies are soft, crumbly, and almost melt in your mouth.
Second, the flavor is subtle but addictive. The almond flour adds a gentle nuttiness, while the vanilla sugar creates this delicate sweetness that doesn’t overwhelm.
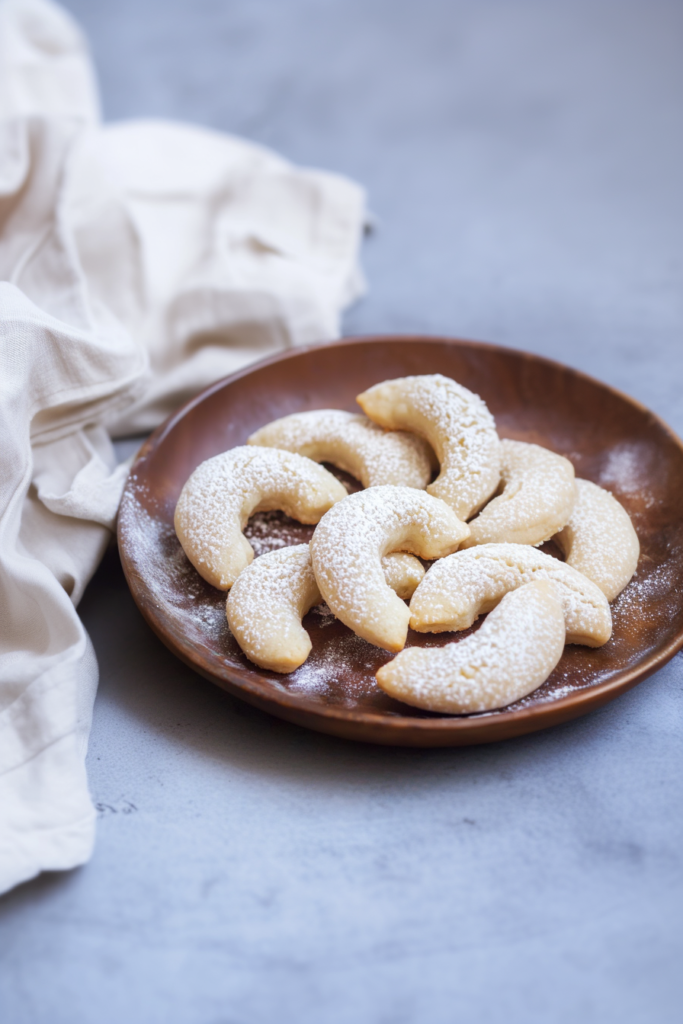
Another thing I really love about this Vanillekipferl Recipe is the simplicity. No frosting. No complicated decorations. Just beautiful little crescent cookies.
And honestly… they look elegant without trying.
They’re the kind of cookies that make people say, “Did you make these?” in that slightly impressed tone.
Which is always a nice moment.
Also—and I’m not sure if this happens to you—but there’s something about powdered sugar cookies that makes people immediately assume they’re homemade.
Even if the shapes are slightly uneven.
Maybe especially if they’re uneven.
Ingredient Notes
One of the best parts of this Vanillekipferl Recipe is how simple the ingredient list is. Just a few pantry staples that somehow transform into something magical.
- Butter – Butter is the heart of these cookies. It gives them their rich flavor and delicate crumb.
- Sugar – Sugar sweetens the dough and helps create the tender texture.
- Almond Flour – Ground almonds add a subtle nuttiness and make the cookies softer than traditional shortbread.
- All-Purpose Flour – Flour provides structure so the cookies hold their crescent shape.
- Vanilla Paste or Vanilla Seeds – Vanilla is the star flavor in this Vanillekipferl Recipe. Using real vanilla paste or seeds makes a noticeable difference.
- Confectioners Sugar – Powdered sugar creates the snowy coating that defines Vanillekipferl.
- Vanilla Sugar – Vanilla sugar adds extra fragrance and sweetness to the coating.
How to Make Vanillekipferl Recipe?
Making Vanillekipferl is actually quite relaxing once you get started. The dough is simple, and the shaping process has a nice rhythm.
Step 1: Cream the Butter and Sugar
Cut the butter into chunks and place it in a mixing bowl with the sugar.
Cream them together until the mixture becomes smooth and slightly glossy.
This step helps create the soft, delicate texture of the cookies.
Step 2: Add the Dry Ingredients
Add the almond flour, all-purpose flour, and vanilla paste.
Mix until a crumbly dough forms. You’ll probably finish bringing the dough together with your hands—that’s completely normal.
Shape the dough into a ball, wrap it, and refrigerate for 1–2 hours.
Step 3: Prepare for Baking
Preheat the oven to 375°F (190°C) and line baking sheets with parchment paper.
Chilled dough is easier to shape and prevents the cookies from spreading too much.
Step 4: Shape the Crescents
Take a portion of dough and roll it into a log about ¾ inch thick.
Cut pieces around 2 inches long, then gently curve each piece into a crescent shape.
Some will look perfect. Others… less so.
That’s okay.
Step 5: Bake the Cookies
Bake for 8–10 minutes until the cookies look dry on top but remain pale.
Vanillekipferl shouldn’t brown much—they’re meant to stay light in color.
Step 6: Coat in Vanilla Sugar
Mix the confectioners sugar and vanilla sugar together.
While the cookies are still warm, sift the sugar mixture over them.
Then sprinkle again after a few minutes.
Because honestly, one layer of vanilla sugar is rarely enough.
Storage Options
One of the things I love about Vanillekipferl is that they actually improve after a day or two.
Stored in an airtight container, these cookies will keep for two to three weeks at room temperature.
Some bakers even swear they taste better after a few days as the vanilla flavor develops.
You can also freeze them for up to three months.
Just give them a fresh dusting of vanilla sugar before serving.
Variations & Substitutions
Once you’ve made the classic Vanillekipferl Recipe, there are a few fun ways to change things up.
- Hazelnut Vanillekipferl – Replace almond flour with ground hazelnuts.
- Chocolate-Dipped Vanillekipferl – Dip the ends of the cookies in melted chocolate.
- Lemon Vanillekipferl – Add lemon zest to the dough for a bright citrus note.
- Walnut Vanillekipferl – Use ground walnuts for a deeper nutty flavor.
Each variation keeps the classic crescent shape but adds a different personality.
What to Serve With Vanillekipferl Recipe?
Because Vanillekipferl are light and buttery, they pair beautifully with warm drinks.
- Coffee – Probably the most classic pairing.
- Espresso – The bitterness balances the sweetness perfectly.
- Tea – Black tea or chai works especially well.
- Hot Chocolate – Especially on cold winter evenings.
FAQ
Why did my Vanillekipferl spread too much?
The dough may not have been chilled long enough.
Can I make Vanillekipferl without almond flour?
Yes. Ground hazelnuts or walnuts work well.
Why are the cookies so delicate?
Vanillekipferl are meant to be tender and crumbly, thanks to the butter and almond flour.
Making this Vanillekipferl Recipe always reminds me that the best cookies aren’t always the flashiest ones.
Sometimes they’re the quiet little crescent cookies sitting on the edge of the tray—dusty with vanilla sugar and waiting patiently to be discovered.
So now I’m curious… have you ever made Vanillekipferl before, or would this be your first batch?

Vanillekipferl Recipe
Ingredients
For the Cookies
- 200 g unsalted butter about 7 oz / 1¾ sticks, softened
- 100 g granulated sugar
- 100 g almond flour ground almonds
- 245 g all-purpose flour
- 1½ teaspoons vanilla paste or seeds from ½ vanilla pod
For Dusting
- 55 g confectioners’ sugar icing sugar
- 8 g vanilla sugar about 1 packet
Instructions
Prepare the Dough
Cream the butter and sugar
- Cut the butter into small pieces and place it in a mixing bowl with the granulated sugar. Using a stand mixer or hand mixer, cream the butter and sugar together until the mixture becomes smooth, pale, and slightly glossy.
Add the dry ingredients
- Add the almond flour, all-purpose flour, and vanilla paste or vanilla seeds to the butter mixture. Mix until the ingredients begin to combine into a soft dough. If necessary, finish incorporating the dough by gently kneading with your hands until a cohesive dough forms.
Chill the dough
- Shape the dough into a ball, wrap it tightly in plastic wrap, and refrigerate for 1 to 2 hours. Chilling the dough helps firm the butter and makes the dough easier to shape.
Shape the Cookies
Prepare the oven and baking sheets
- Preheat the oven to 375°F (190°C). Line one or two baking sheets with parchment paper or silicone baking mats.
Form the crescents
- Remove a portion of dough (approximately one-eighth of the dough at a time) from the refrigerator. Roll or press the dough into a log about ¾ inch (2 cm) thick. Cut pieces approximately 2 inches (5 cm) in length.
- Gently shape each piece into a crescent by curving the ends inward. Place the shaped cookies on the prepared baking sheets. Smooth any cracks gently with your fingers or the back of a knife.
- Repeat with the remaining dough.
Bake the Cookies
Bake the Vanillekipferl
- Bake the cookies for 8–10 minutes, or until they appear dry on the surface but remain pale. The cookies should not brown significantly and will remain slightly soft immediately after baking.
Dust the Cookies
Prepare the sugar coating
- While the cookies are baking, combine the confectioners’ sugar and vanilla sugar in a small bowl.
Coat the cookies
- Remove the cookies from the oven and allow them to cool for approximately 1 minute. Using a fine sieve or small strainer, lightly dust the cookies with the vanilla sugar mixture.
- After a few minutes, dust them again to ensure a generous coating. If desired, carefully dip the bottoms of the cookies into the excess sugar mixture on the baking sheet.
- Allow the cookies to cool for 8–10 minutes, then transfer them to a wire rack to cool completely.
Notes