Sugar, salt, cream of tartar, egg whites, water, and vanilla extract.
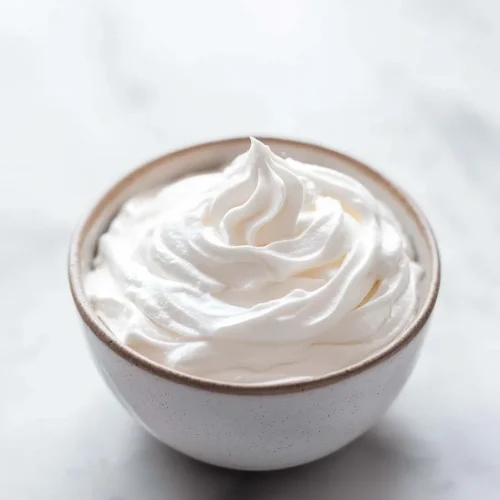
There’s something about Seven-Minute Frosting that feels a little magical, isn’t there? One minute you’re staring at sugar, egg whites, water, and cream of tartar in a saucepan, and a few minutes later you’ve got this glossy white cloud of frosting that looks like it belongs on an old-fashioned birthday cake under a glass dome. It’s light, fluffy, sweet, smooth, and just a tiny bit dramatic in the best possible way.
I think that’s why I’ve always had a soft spot for this Seven-Minute Frosting. It’s not heavy like buttercream, and it’s not rich like cream cheese frosting. It’s more airy and marshmallow-like, almost like a cross between meringue and marshmallow cream. It melts in your mouth, but it still holds those pretty little peaks and swirls on top of a cake. Honestly, it feels like the frosting version of a soft white Sunday dress—old-school, sweet, and maybe a little fussy, but worth it.
This 7-minute frosting recipe is made with just a few basic ingredients: sugar, salt, cream of tartar, egg whites, water, and vanilla extract. No butter. No powdered sugar. No shortening. You beat everything except the vanilla over gentle heat for about 5 to 7 minutes, and the mixture slowly turns from thin and foamy into thick, shiny frosting. The first time you see it happen, it really does feel like a kitchen trick someone’s grandmother knew all along.
What I love most is that this homemade Seven-Minute Frosting makes a simple cake look special without requiring perfect decorating skills. You don’t need a piping bag or steady hands or one of those rotating cake stands that always make me feel slightly more professional than I am. You just spread it over a cooled cake and make swoops with a spoon or spatula. If the swirls are uneven? Good. That’s personality. Homemade cake should not look like it’s afraid to be touched.
This frosting is especially lovely on chocolate cake, coconut cake, vanilla cake, lemon cake, angel food cake, spice cake, cupcakes, and sheet cakes. It gives cakes that fluffy, snowy topping without weighing them down. Sometimes buttercream is exactly right, I’ll admit that. But sometimes you want something lighter, something that feels soft and nostalgic and not quite so rich after a big meal. Sound familiar?
The one little thing to know is that Seven-Minute Frosting is happiest when it’s fresh. It’s not really the type of frosting you make days ahead and tuck away like buttercream. It can get sticky or lose a little volume if it sits too long. So, yes, it asks for timing. A little attention. Maybe even a little patience. But when you spread it over a cake while it’s still glossy and cloud-like? Oh, it’s worth it.
I first learned to appreciate Seven-Minute Frosting because it reminded me of the cakes I saw at family gatherings when I was younger. Not the perfect bakery-style cakes with sharp edges and fancy borders. I mean the homemade ones. The ones sitting on a plate or tucked inside one of those plastic cake carriers, covered in fluffy white frosting with little peaks going every direction. Some peaks tall, some leaning, some clearly made by someone who got distracted halfway through. And somehow, those cakes always looked more inviting.
The first time I made this Seven-Minute Frosting recipe, I was honestly nervous. It looked too simple on paper, which sometimes makes me suspicious. Sugar, egg whites, water, cream of tartar, salt, heat, mixer. That’s it? I stood at the stove with the hand mixer buzzing away, feeling like I was doing something slightly old-fashioned and slightly risky. You know when a recipe makes you think, “Well, this is either going to be beautiful or a complete mess”? That was me.
At first, the mixture looked thin and foamy, and I had that tiny panic moment where I wondered if I’d ruined it already. Then it started changing. Slowly. The bubbles got smaller, the color turned bright white, and the whole thing thickened into this glossy, marshmallow-like frosting. I lifted the beaters, saw stiff peaks, and actually said, “Oh my gosh, it worked,” to my empty kitchen. Very glamorous. Very normal.
There’s something emotional about recipes like this, maybe because they feel connected to older ways of baking. Seven-Minute Frosting reminds me of coconut cakes at Easter, chocolate cakes at birthdays, and church potluck tables where someone always brought a cake that disappeared before the casseroles were even cold. It has that slightly retro feeling, like a handwritten recipe card with one corner bent and a little vanilla stain near the instructions.
And I’ll be honest, this frosting has a little moodiness to it. Not in a bad way. Just in a “please pay attention to me” way. You need clean beaters. You need no egg yolk in the whites. You need to beat it constantly. It’s not hard, but it does want your focus. I kind of respect that. Some recipes are dump-and-go; this one wants a seven-minute relationship.
What I love, though, is how forgiving it looks once it’s on the cake. The frosting doesn’t need perfect piping. It looks best when it has soft swoops, tall peaks, and maybe one side with a little extra frosting because you got carried away. That’s part of the charm. This marshmallow-like frosting feels homemade in the warmest possible way.

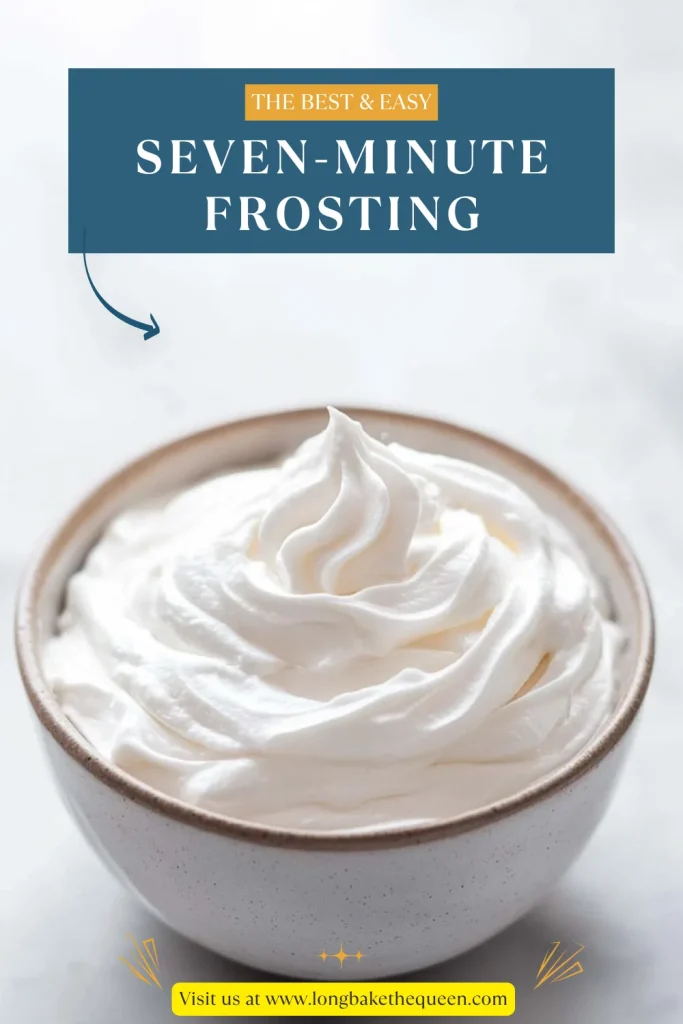
Why you’ll Love this Seven-Minute Frosting?
You’ll love this Seven-Minute Frosting because it’s light, fluffy, glossy, and totally different from heavier frostings. It has a soft texture that feels almost like marshmallow cream, but a little lighter and more delicate. It melts in your mouth and makes cakes feel special without burying them under a thick layer of butter and powdered sugar. Not that buttercream doesn’t have its place—it does—but this frosting brings a different kind of charm.
One of the biggest reasons this failproof 7-minute frosting recipe is worth keeping around is that it uses simple ingredients. Sugar, salt, cream of tartar, egg whites, water, and vanilla. That’s all. There’s no butter to soften, no powdered sugar cloud exploding across the counter, and no cream cheese waiting to become lumpy at the worst possible moment. It feels simple, but also a little impressive. The best kind of kitchen magic.
The texture is really the star. As you beat the mixture over medium-low heat, it transforms into a shiny white frosting that holds stiff peaks. That means you can make pretty swirls and swoops without needing professional decorating skills. I actually think Seven-Minute Frosting looks better when it’s a bit rustic. A perfectly smooth finish is nice, sure, but those soft peaks? That’s where the charm lives.
This homemade Seven-Minute Frosting is also lovely because it doesn’t overpower the cake. It pairs beautifully with chocolate, coconut, vanilla, lemon, spice, and angel food cakes. It gives you sweetness and height without the heaviness of some frostings. If you’ve ever taken a bite of cake and felt like the frosting was doing too much, this one might feel like a relief.
It’s quick, too, at least in the way old-fashioned recipes define quick. You’ll spend about 5 to 7 minutes beating it over heat, and you do need to stay with it the whole time. No checking your phone, no wandering off to switch laundry, no “I’ll just rinse this bowl real quick.” This frosting needs you. But only for seven minutes, which feels fair enough.
And then there’s the nostalgia. This classic Seven-Minute Frosting has a cozy, vintage feel that makes even a simple cake look like it came from a family celebration. It reminds me of birthdays, holidays, Sunday dinners, and those cakes everyone cuts into before anyone remembers to take a picture. Do you agree that some recipes feel like memories before you even make them? This one does for me.
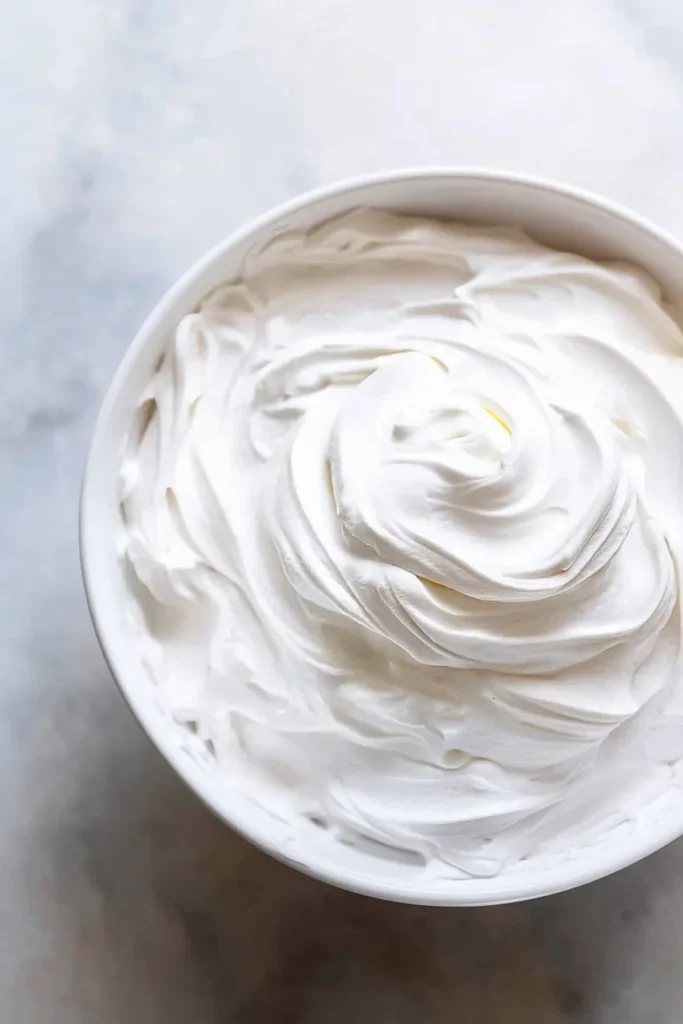
Ingredient Notes
The ingredients in Seven-Minute Frosting are simple, but they each matter more than you might think. Since there are so few of them, every ingredient has a job. The sugar gives sweetness and structure, the egg whites create the airy volume, the cream of tartar helps stabilize the frosting, the water helps everything dissolve and cook smoothly, the salt balances the sweetness, and the vanilla adds that classic homemade flavor. It’s a short list, yes, but not one I’d mess with too casually.
- Sugar: Granulated sugar is the base of this Seven-Minute Frosting. It sweetens the frosting and helps create that glossy, stable texture as it heats and whips with the egg whites. Use regular granulated sugar, not powdered sugar. I know substitutions can be tempting when you’re already halfway into a recipe and realize you’re low on something, but this is one of those times where the original ingredient really matters.
- Salt: Salt may seem tiny here, but it helps keep the frosting from tasting flat. Since this marshmallow frosting is naturally sweet, the salt gives it a little balance. You only need 1/4 tsp, but it makes the sweetness feel cleaner and less one-note. Small ingredient, big attitude.
- Cream of tartar: Cream of tartar is important in this 7-minute frosting recipe, and I really would not substitute it. It helps stabilize the egg whites so they whip up fluffy and hold their shape. It’s one of those little pantry jars that sits around quietly until suddenly it becomes the hero. Here, it earns its space.
- Egg whites: Egg whites are what give Seven-Minute Frosting its fluffy, cloud-like texture. As they heat and whip, they become glossy and full of volume. Make sure no egg yolk gets into the whites because even a tiny bit of fat can affect the way they whip. Also, clean beaters and a clean saucepan matter. I know that sounds fussy, but egg whites are picky little things.
- Water: Water helps dissolve the sugar and creates the right consistency as the frosting cooks. You only need 3 tbsp, so measure it carefully. Too much liquid can make it harder for the frosting to become thick and stable. It’s a small amount, but it’s doing important behind-the-scenes work.
- Vanilla extract: Vanilla extract is added after the frosting comes off the heat. It gives the frosting that warm, familiar flavor that makes it taste homemade instead of just sweet. Pure vanilla is lovely if you have it, but regular vanilla extract works too. No need to be dramatic about it.
- Stainless steel heavy-bottomed saucepan: This isn’t technically an ingredient, but it matters enough to mention. A stainless steel heavy-bottomed saucepan heats the mixture more evenly and gives you a sturdy place to beat the frosting. Since you’re using a hand mixer directly in the pan, avoid nonstick if the beaters might scratch it. Learned that lesson once. Not cute.
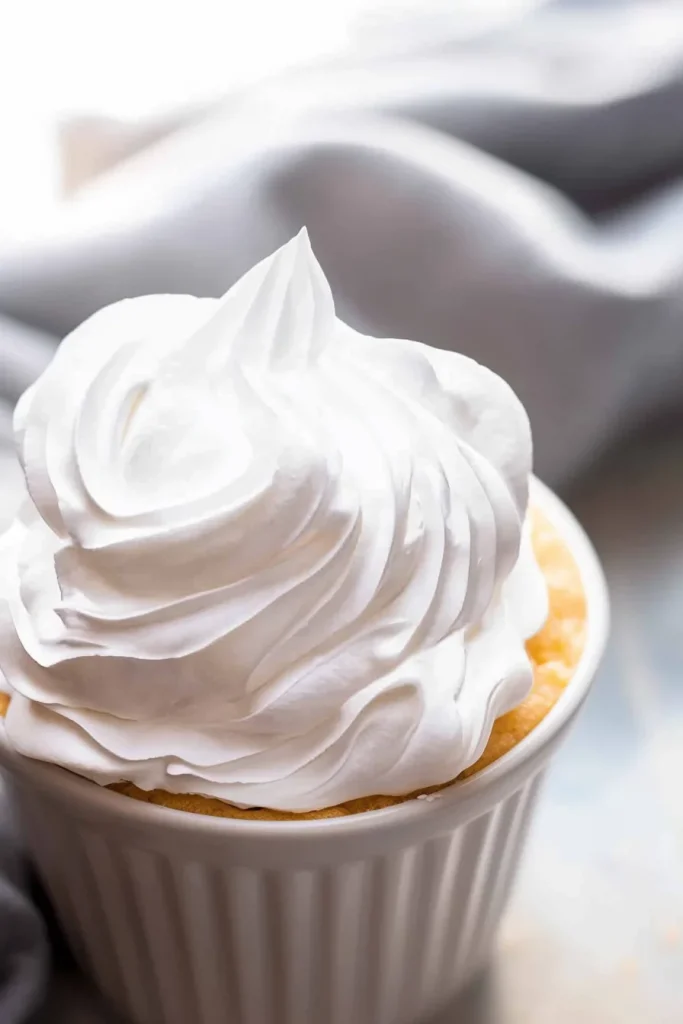
How to Make Seven-Minute Frosting?
Making Seven-Minute Frosting is simple, but it does ask you to stay present. This is not a “walk away and hope for the best” recipe. You combine the ingredients, beat them constantly over gentle heat, watch the mixture turn fluffy and glossy, then stir in vanilla and frost your cooled cake right away. It feels a little old-school, and honestly, that’s part of why I like it.
Step 1: Combine the Ingredients
Add the sugar, salt, cream of tartar, egg whites, and water to a stainless steel heavy-bottomed saucepan. Do not add the vanilla yet. That comes after the frosting is removed from the heat. Make sure your saucepan and mixer beaters are clean and free from grease because egg whites need a clean setup to whip properly. A tiny bit of grease can cause trouble, which feels unfair but true.
Step 2: Place the Pan Over Gentle Heat
Place the saucepan over medium-low heat. You want gentle heat here, not a roaring burner. The goal is to warm the mixture while beating it so the sugar dissolves and the egg whites whip into a stable frosting. If the heat is too high, the mixture can cook unevenly or turn grainy. Nobody wants grainy frosting after standing there with a hand mixer for seven minutes. That would be rude.
Step 3: Beat Constantly
Use an electric hand mixer to beat the mixture constantly while it sits over the heat. Continue beating for 5 to 7 minutes. At first, the mixture will look loose and foamy, and you might wonder if anything is happening. It is. Keep going. Slowly, it will become thicker, whiter, glossier, and much fluffier. This is the part where the recipe starts to feel a little magical.
Step 4: Check for Stiff Peaks
Keep beating until the frosting forms stiff peaks when you lift the beaters. Stiff peaks mean the frosting stands up and holds its shape instead of drooping back into the pan. The finished Seven-Minute Frosting should look smooth, shiny, fluffy, and almost marshmallow-like. If the peaks are still soft and slouchy, give it another minute and check again.
Step 5: Remove from the Heat
Once the frosting holds stiff peaks, remove the saucepan from the heat. Turn off the mixer before lifting it completely out of the frosting unless you enjoy cleaning little white frosting dots off your stove. I wish I did not know this from experience, but here we are.
Step 6: Add the Vanilla
Stir in the vanilla extract after the frosting is off the heat. Mix until it is evenly combined. The vanilla gives this homemade Seven-Minute Frosting that classic sweet flavor and softens the overall taste. It’s a small final step, but it makes the frosting feel complete.
Step 7: Frost the Cake Right Away
Spread the frosting over a completely cooled cake right away. Seven-Minute Frosting is easiest to use while it is fresh, warm, glossy, and fluffy. Use a spoon or spatula to create swirls, peaks, and swoops. Don’t worry about making it perfect. In my opinion, this frosting looks best when it has a little movement and personality.
Step 8: Serve and Enjoy
Serve the frosted cake soon after icing for the best texture. The frosting will be soft, fluffy, and melt-in-your-mouth fresh. It’s one of those toppings that makes a cake feel special immediately, even if the cake underneath came from a boxed mix. No shame. Cake is cake.
Storage Options
Seven-Minute Frosting is best used as soon as it is made. It’s not like buttercream, which can sit around patiently in the fridge or freezer and wait for its moment. This frosting is lighter, airier, and more delicate, so it can become sticky, lose volume, or change texture over time. It’s not difficult, exactly. It just has a short window where it’s at its best. A little diva behavior, but charming.
- Use immediately: For the best results, spread Seven-Minute Frosting onto a cooled cake as soon as it is ready. This is when it is fluffiest, smoothest, and easiest to shape into swirls. If it sits too long before spreading, it can become harder to work with and may not look as soft and glossy.
- Room temperature: A cake frosted with Seven-Minute Frosting can usually sit at room temperature for several hours if you are serving it the same day. Cover it loosely with a cake dome or large container. Avoid pressing plastic wrap directly onto the frosting because it will stick, and then you’ll lose those pretty swoops. Tragic? Maybe not. Annoying? Absolutely.
- Refrigerator: Refrigeration can make this frosting sticky or slightly weepy. If you need to refrigerate a frosted cake, cover it loosely and serve it as soon as possible. Let it sit briefly at room temperature before serving so the texture softens a bit. It may not look quite as fresh as it did at first, but it should still taste sweet and fluffy enough.
- Freezer: Freezing is not recommended for Seven-Minute Frosting. The whipped egg-white texture does not thaw well, and the frosting can become watery or grainy. If you want to freeze a cake, freeze it unfrosted and make a fresh batch of 7-minute frosting when you are ready to serve.
- Leftover frosting: Leftover frosting can be stored briefly in an airtight container, but it will not stay as fluffy as it is when fresh. If you have extra, spoon it onto cupcakes, cookies, graham crackers, or even between vanilla wafers. It tastes a bit like a marshmallow sandwich, which is not a bad little kitchen bonus.
- Best texture tip: Make this Seven-Minute Frosting recipe the same day you plan to serve the cake. It looks best fresh, spreads best fresh, and tastes best fresh. Some recipes are built for make-ahead schedules. This one is built for a little spotlight moment.
Variations & Substitutions
This Seven-Minute Frosting is classic as written, but you can add small flavor twists once the frosting is whipped. I wouldn’t change the core ingredients too much because the structure depends on the sugar, egg whites, water, and cream of tartar. But extracts, zest, toppings, and color? Those are fair game. Think small changes, not a full recipe rebellion.
- Coconut Seven-Minute Frosting: Replace the vanilla with coconut extract, or use half vanilla and half coconut extract. This version is especially good on coconut cake, chocolate cake, white cake, or pineapple cake. Add shredded coconut on top, and suddenly it looks like a snowy bakery cake from an old holiday magazine.
- Lemon frosting: Add a little lemon zest after the frosting is whipped. This gives the frosting a fresh citrus flavor without adding too much liquid. It’s lovely on lemon cake, vanilla cake, angel food cake, or berry-filled desserts. Just don’t add too much juice, because extra liquid can mess with the texture.
- Almond frosting: Swap part of the vanilla for almond extract. Use a light hand because almond extract is strong and not shy at all. A little gives the frosting a sweet bakery-style flavor. Too much and suddenly the frosting is running the whole show.
- Peppermint frosting: Add a tiny amount of peppermint extract for a holiday-style marshmallow frosting. This is great on chocolate cake or cupcakes. Start with less than you think you need because peppermint can go from festive to toothpaste very quickly. Ask any holiday cookie that went too far.
- Toasted coconut topping: Keep the frosting plain and sprinkle toasted coconut over the top after frosting the cake. It adds texture and flavor without changing the frosting itself. This works especially well with the light, fluffy texture of Seven-Minute Frosting.
- Chocolate drizzle: Drizzle cooled melted chocolate over the finished frosting for a pretty contrast. Make sure the chocolate is not hot, or it may melt the frosting. This is a fun option for cupcakes, sheet cakes, or chocolate layer cakes when you want a little extra flair.
- Food coloring: Add a small amount of gel food coloring after the frosting is whipped if you want a tinted frosting. Gel coloring is better than liquid because it adds less moisture. Start with a tiny amount and mix gently. A little color goes a long way in white frosting.
- Do not substitute cream of tartar: Cream of tartar stabilizes the egg whites, so I would not replace it in this recipe. I know recipe notes that say “do not substitute” can sound bossy, but this time it’s there for a reason. The frosting needs it to hold its shape.
- Do not casually replace egg whites: Egg whites are essential for the fluffy structure of Seven-Minute Frosting. Fresh egg whites usually whip more reliably than carton egg whites, though some carton brands may work if labeled suitable for whipping. If you’re making this for a special cake, I’d use fresh eggs to be safe.
- Avoid reducing the sugar too much: Sugar does more than sweeten this frosting. It helps create structure and stability. If you reduce it too much, the frosting may not whip properly or hold stiff peaks. If you want a frosting that is barely sweet, this may not be the easiest recipe to adjust.
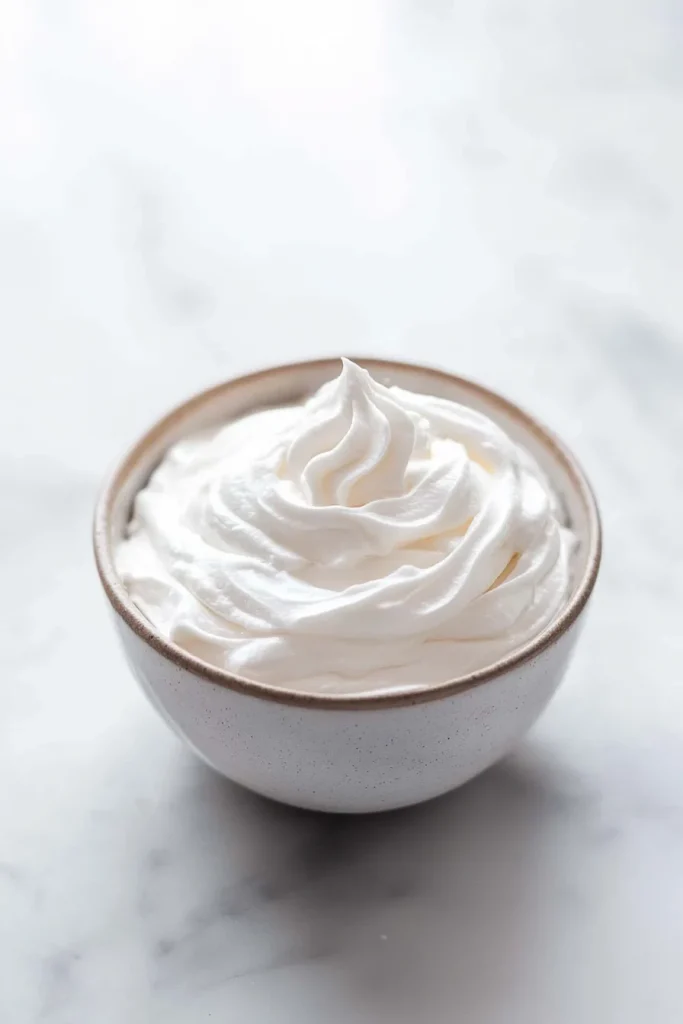
What to Serve With Seven-Minute Frosting?
Seven-Minute Frosting is light, glossy, fluffy, and sweet, so it pairs beautifully with cakes that need a soft cloud-like topping. It has that vintage, marshmallow-like flavor that works especially well with simple cakes and nostalgic desserts. It’s the kind of frosting that makes a cake feel ready for birthdays, holidays, Sunday dinners, or a family table where someone is already asking when dessert will be served.
- Chocolate cake: Chocolate cake with Seven-Minute Frosting is a classic pairing for a reason. The deep cocoa flavor balances the sweet, airy frosting beautifully. Plus, the contrast of dark cake and bright white frosting looks dramatic with almost no effort. Very low work, very high reward.
- Coconut cake: Coconut cake might be the most iconic partner for Seven-Minute Frosting. The fluffy texture and shredded coconut create that snowy, old-fashioned look that feels perfect for Easter, birthdays, holidays, or spring gatherings. It’s soft, sweet, and very nostalgic.
- Vanilla cake: Vanilla cake lets this homemade Seven-Minute Frosting shine. The flavor is simple and classic, and the frosting adds height and sweetness without making the cake too heavy. Add sprinkles if it’s for a birthday, or toasted coconut if you want a more vintage finish.
- Angel food cake: Angel food cake is already light and airy, so this frosting matches it beautifully. It gives the cake sweetness and softness without weighing it down. Cloud on cloud, basically. A little dramatic, but accurate.
- Lemon cake: Lemon cake works beautifully with Seven-Minute Frosting because the citrus cuts through the sweetness. You can even add lemon zest to the frosting for a brighter flavor. This pairing feels especially nice for spring and summer.
- Spice cake: Spice cake with 7-minute frosting feels cozy and old-fashioned. The warm spices contrast nicely with the fluffy white topping. It’s especially good for fall baking, holiday dinners, or any time you want a cake that feels like it belongs beside a cup of coffee.
- Cupcakes: This frosting can be spread or softly swirled onto cupcakes while fresh. It’s not as sturdy as buttercream for detailed piping, but it makes beautiful soft peaks. Chocolate, vanilla, coconut, lemon, and spice cupcakes all work well.
- Layer cakes: Seven-Minute Frosting looks lovely on layer cakes, especially if you like tall swoops and fluffy peaks. It is usually best as an outside frosting rather than a thick filling because it is light and airy. Use it right after making so it spreads easily.
- Sheet cakes: Sheet cakes are one of the easiest ways to use this frosting. Spread it over a cooled cake, make simple swirls with a spatula, and call it done. No fancy decorating required. Honestly, sheet cakes understand busy people.
- Graham crackers or cookies: If you have extra frosting, spoon it onto graham crackers, vanilla wafers, or cookies. It tastes like a little marshmallow cream sandwich, and I fully support that as a cook’s treat.
FAQ
Why did my Seven-Minute Frosting not form stiff peaks?
Your frosting may not form stiff peaks if it was not beaten long enough, if the heat was too high or too low, if there was grease on the pan or beaters, or if a little egg yolk got into the whites. Cream of tartar also helps stabilize the egg whites, so don’t skip it. Annoying? A little. Important? Yes.
Can I use carton egg whites?
Fresh egg whites usually whip more reliably for Seven-Minute Frosting. Some carton egg whites are pasteurized in a way that makes them harder to whip. If you use carton egg whites, check the label to make sure they are suitable for whipping.
Can I use this frosting for piping?
You can use Seven-Minute Frosting for soft swirls, peaks, and simple decorating, but it is not as firm as buttercream. It works best for rustic swoops, fluffy cake tops, and classic homemade finishes rather than detailed flowers or sharp borders.
Can I toast Seven-Minute Frosting?
Yes, you can lightly toast Seven-Minute Frosting with a kitchen torch, similar to meringue. Be gentle and avoid overheating it. Toasting gives the frosting a toasted marshmallow flavor and pretty golden edges, which is especially lovely on chocolate or coconut cake.
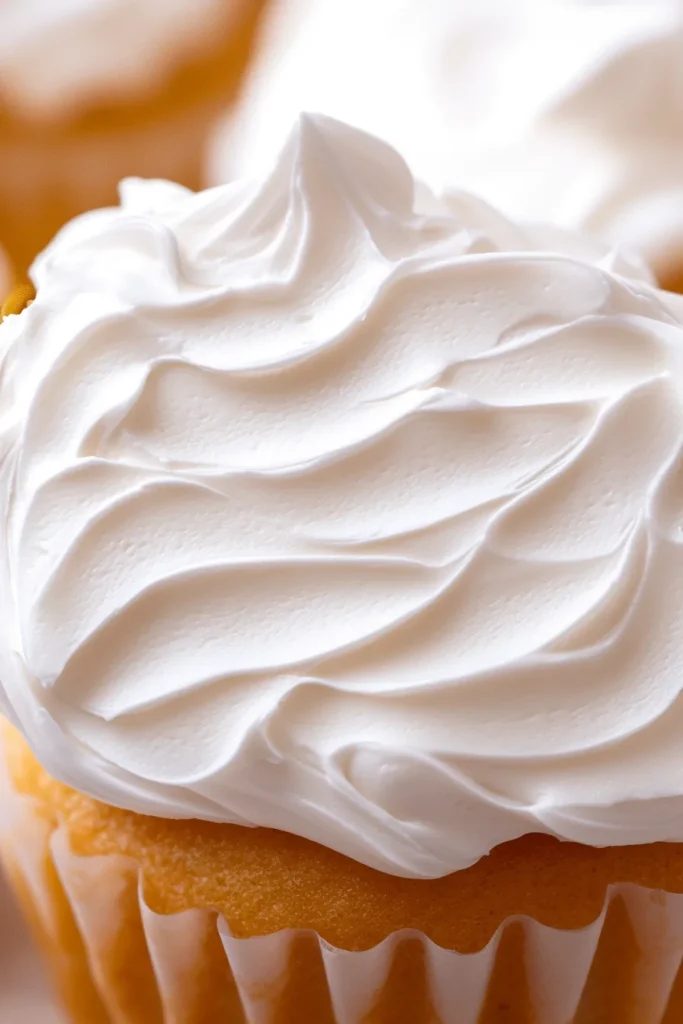
This Seven-Minute Frosting is light, fluffy, glossy, sweet, and beautifully old-fashioned. With sugar, salt, cream of tartar, egg whites, water, and vanilla extract, it turns into a smooth marshmallow-like frosting that makes cakes feel special without butter, powdered sugar, or complicated decorating.
Make this failproof 7-minute frosting recipe when you want a cloud-like topping for chocolate cake, coconut cake, vanilla cake, lemon cake, angel food cake, cupcakes, or sheet cakes. And tell me—would you swirl it high, toast the edges, or sneak a spoonful straight from the pan? Can’t wait to hear what you think!
Seven-Minute Frosting
Ingredients
- 1 cup granulated sugar
- 1/4 tsp salt
- 1/2 tsp cream of tartar do not substitute
- 2 large egg whites
- 3 tbsp water
- 1 tsp vanilla extract
Instructions
- Add the granulated sugar, salt, cream of tartar, egg whites, and water to a stainless steel heavy-bottomed saucepan.
- Do not add the vanilla extract at this stage.
- Place the saucepan over medium-low heat.
- Using an electric hand mixer, beat the mixture constantly while it heats.
- Continue beating for 5 to 7 minutes, or until the frosting becomes thick, glossy, and fluffy.
- Check the consistency by lifting the beaters from the frosting.
- The frosting is ready when stiff peaks form and hold their shape.
- Remove the saucepan from the heat.
- Add the vanilla extract.
- Stir until the vanilla is fully incorporated.
- Use the frosting immediately on a completely cooled cake.
- Spread the frosting evenly with a spatula or spoon, creating peaks or swirls as desired.
- Serve the frosted cake the same day for the best texture.
Notes