All-purpose flour, cocoa powder, butter, brown sugar, egg, vanilla, buttermilk, red food coloring, cream cheese, and powdered sugar.
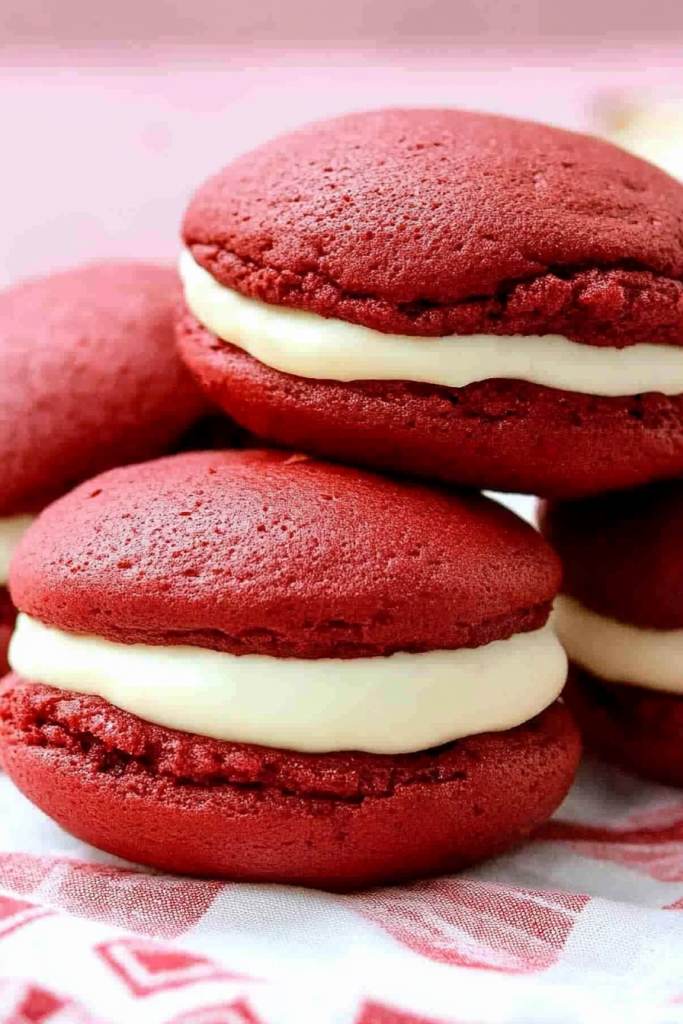
I have a soft spot for desserts that feel a little playful, and Red Velvet Whoopie Pies are exactly that. They’re not quite cookies. Not quite cake. Not exactly cupcakes either. They live in that sweet little middle space where everything is soft, handheld, and filled with cream cheese goodness. Honestly, that’s a pretty wonderful place for dessert to be.
The first time I made Red Velvet Whoopie Pies, I remember thinking they looked way more impressive than the effort I put in. That deep red color, the soft cake-like rounds, the creamy filling tucked in between — they looked like something from a bakery case, but the process was actually friendly. No tall cake layers sliding around. No piping perfect cupcake swirls. No dramatic frosting crisis. Just mix, scoop, bake, fill, and sandwich.
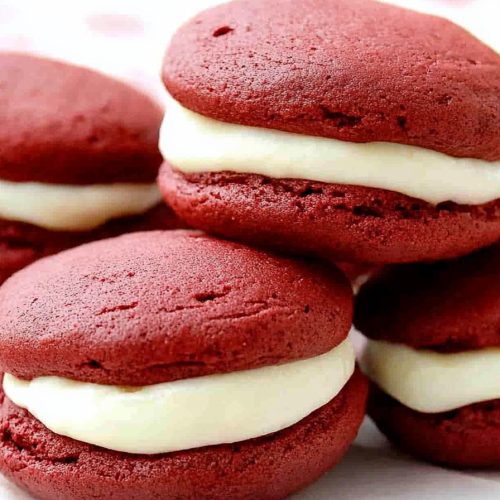
And I’ll admit it, I love a dessert that feels a little nostalgic. These red velvet sandwich cookies remind me of bake sales, Valentine’s Day treats, holiday dessert trays, and those small-town bakery counters where everything looks slightly homemade in the best way. A little uneven? Maybe. One whoopie pie bigger than the next? Probably. But that’s part of the charm. Perfectly identical desserts are pretty, sure, but the homemade ones have personality.
The best part is the filling. That sweet cream cheese filling gives these Red Velvet Whoopie Pies the classic red velvet flavor we all expect. Because red velvet without cream cheese? I don’t know. It feels like a song missing the chorus. The cookie rounds are soft and lightly cocoa-flavored, and the filling adds that tangy sweetness that makes each bite feel complete. Sound familiar? It’s the kind of dessert where you say you’re only having one… and then suddenly you’re wrapping one up “for later.”

Why you’ll Love these Red Velvet Whoopie Pies?
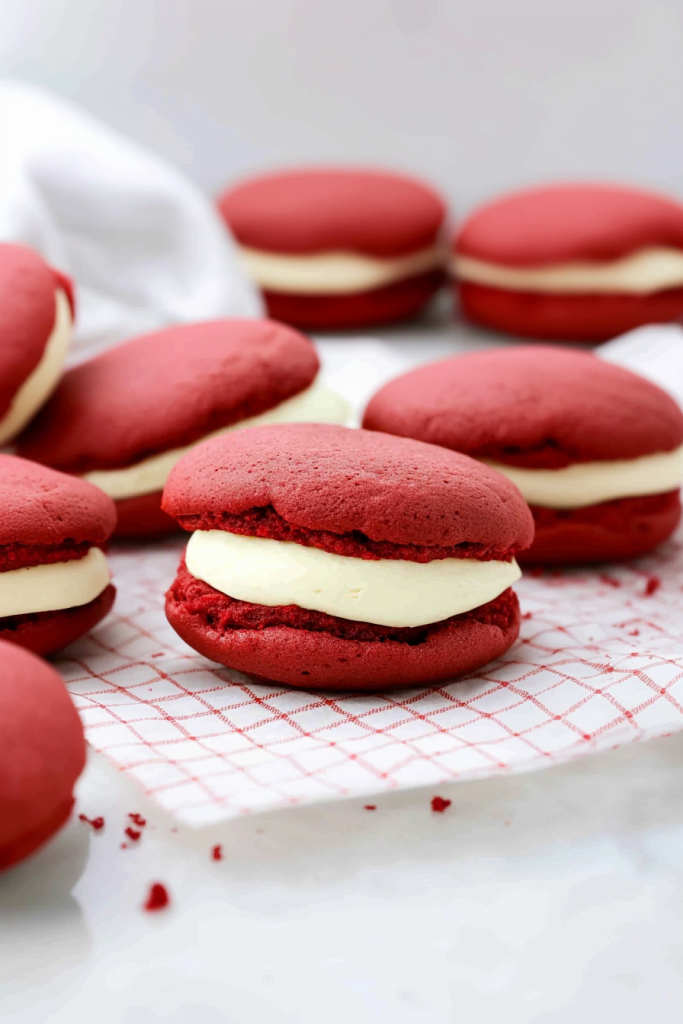
These Red Velvet Whoopie Pies are soft, pretty, and just a little dramatic in the most charming way. They give you the cozy flavor of red velvet cake, but in a fun handheld dessert. The cookie rounds are tender and cake-like, with a mild cocoa flavor and that bold red color. Then the cream cheese filling brings the sweet, tangy middle that makes the whole thing feel special.
I also love that this Red Velvet Whoopie Pies recipe doesn’t require anything too complicated. You’re using simple baking staples: flour, cocoa powder, baking soda, salt, butter, brown sugar, egg, vanilla, buttermilk, and red food coloring. Then the filling is made with cream cheese, powdered sugar, and vanilla. That’s it. Nothing too wild, nothing that sends you hunting through five grocery aisles. Just good ingredients doing what they’re supposed to do.
The texture is what makes these red velvet whoopie pie cookies really shine. Brown sugar helps keep the cookie rounds soft and moist, while buttermilk gives them that subtle tang red velvet is known for. They’re not crunchy cookies, and they’re not dense cake. They’re soft, fluffy, and just sturdy enough to hold the filling without falling apart in your hands. Which, honestly, is important. A dessert that collapses mid-bite can ruin a whole mood.
And let’s talk about how easy they are to serve. No slicing. No forks. No plates required if you’re keeping things casual. These Red Velvet Whoopie Pies are perfect for parties, bake sales, Valentine’s Day, Christmas, birthdays, showers, or anytime you want a dessert that looks cute without making you work too hard. Do you agree that handheld desserts always disappear faster? I swear people grab them like they don’t count.
Ingredient Notes
Before you make Red Velvet Whoopie Pies, let’s chat about the ingredients. This recipe is simple, but each ingredient plays a role in that soft, cake-like texture and classic red velvet flavor. The cocoa gives a gentle chocolate note, the buttermilk adds tenderness, the brown sugar keeps things moist, and the cream cheese filling brings that familiar sweet-tangy finish. Nothing too fussy, but the little details matter.
- All-purpose flour: All-purpose flour gives these Red Velvet Whoopie Pies enough structure to hold their shape. Since the rounds are soft and cake-like, you want them sturdy enough to sandwich together but still tender when you bite in. Once the flour mixture goes into the batter, try not to overmix. Overmixing can make the whoopie pies tougher, and we want soft little cake clouds, not stubborn red biscuits.
- Unsweetened cocoa powder: Cocoa powder gives the whoopie pies that classic red velvet flavor. It’s not meant to taste like a deep chocolate brownie or a rich chocolate cookie. It’s lighter than that. Just enough cocoa to give warmth and depth behind the red color. That’s what makes red velvet feel different from plain vanilla or chocolate. It’s kind of its own little mystery.
- Baking soda: Baking soda helps the whoopie pie rounds puff up and bake into soft, tender cookies. It also works with the buttermilk to give the batter lift. Make sure your baking soda is fresh because old baking soda can leave you with flat whoopie pies. They’ll still taste good, probably, but they won’t have that cute pillowy look.
- Salt: Salt balances the sweetness and helps the cocoa, vanilla, and brown sugar stand out. It’s a small amount, but don’t skip it. Without salt, sweet desserts can taste a little dull, like they’re missing their sparkle.
- Butter: Softened butter adds richness and flavor to the cookie rounds. You’ll beat it first so it gets smooth before adding the brown sugar. Make sure the butter is softened, not melted. Melted butter can make the batter spread too much, and then the whoopie pies might turn flatter than you want. Soft butter is the sweet spot here.
- Brown sugar: Brown sugar gives these red velvet sandwich cookies moisture and a deeper sweetness than regular white sugar. It keeps the rounds soft and adds a cozy, almost caramel-like note in the background. Make sure you pack it into the measuring cup so you get the right amount. Sticky? Yes. Worth it? Absolutely.
- Egg: The egg helps bind the batter and gives structure to the whoopie pies. It also adds a little richness. One egg is enough to hold everything together without making the cookies heavy.
- Vanilla extract: Vanilla shows up in both the cookie rounds and the filling, and it makes the whole dessert taste warmer and more rounded. It softens the cocoa flavor and gives that sweet bakery-style background we all love.
- Buttermilk: Buttermilk is one of the ingredients that makes these Red Velvet Whoopie Pies taste like red velvet instead of just red cookies. It adds moisture, tenderness, and a slight tang. If you don’t have buttermilk, you can make a quick substitute with milk and a little vinegar or lemon juice, but real buttermilk gives the nicest flavor and texture.
- Red food coloring: Red food coloring gives these whoopie pies their signature look. The flavor doesn’t really change, but the color is part of the experience. Red velvet should feel a little bold, right? You can use liquid food coloring as written, or gel food coloring if you want a deeper color with less liquid.
- Cream cheese: Cream cheese is the heart of the filling. It gives that tangy flavor that pairs so perfectly with red velvet. Make sure it’s softened before mixing, or the filling can turn lumpy. And while lumps aren’t the end of the world, smooth filling definitely feels nicer.
- Powdered sugar: Powdered sugar sweetens and thickens the cream cheese filling. It blends smoothly and helps create that pipeable texture. Add it slowly if you want to avoid a sugar cloud. I’ve made the sugar cloud mistake before, and let me tell you, it makes the counter look like a tiny winter storm happened.
- Vanilla extract for the filling: Vanilla makes the cream cheese filling taste sweet, warm, and smooth. This recipe uses a generous amount, which gives the filling that lovely vanilla-forward flavor. It works beautifully with the cocoa and buttermilk in the red velvet rounds.

How to Make Red Velvet Whoopie Pies?
Making Red Velvet Whoopie Pies is easier than they look. You mix the dry ingredients, beat the butter and brown sugar, add the egg and vanilla, alternate the dry mixture with buttermilk, stir in the red food coloring, scoop the batter, bake the rounds, cool them, and fill them. It sounds like a lot, but once you start, it moves along pretty nicely. And the end result? So worth it.
Step 1: Prepare the oven and baking sheets
Preheat your oven to 375°F. Line your baking sheets with parchment paper and set them aside. Parchment helps the whoopie pie rounds release easily and makes cleanup much nicer. Since these are soft cookies, you don’t want them sticking to the pan and breaking apart. That would be a sad little moment.
Step 2: Mix the dry ingredients
In a medium bowl, combine the all-purpose flour, cocoa powder, baking soda, and salt. Stir or whisk everything together until evenly mixed. This helps the cocoa and baking soda spread through the flour so each whoopie pie bakes evenly. No hidden cocoa pockets. No random salty bite. Just smooth, even batter.
Step 3: Beat the butter
In a large mixing bowl, beat the softened butter on medium to high speed for about 30 seconds. This helps loosen it up and makes it easier to blend with the brown sugar. You want it creamy, not cold and chunky. Butter can be stubborn if it’s too firm, and honestly, we have enough problems.
Step 4: Add the brown sugar
Beat in the packed brown sugar until the mixture becomes light and fluffy. This step helps create that soft texture in the finished Red Velvet Whoopie Pies. Brown sugar adds moisture, so giving it time to blend well with the butter is important.
Step 5: Add the egg and vanilla
Beat in the egg and vanilla extract until everything is fully combined. Scrape down the sides of the bowl if needed. I know scraping the bowl can feel like an annoying little pause, but it helps make sure all the butter and sugar get mixed in evenly. No one wants a streaky batter situation.
Step 6: Add the dry mixture and buttermilk
Alternate adding the flour mixture and buttermilk to the butter mixture. Beat after each addition just until combined. Don’t overmix here. Once the flour disappears, stop. The batter should look soft and thick, not beaten into submission. Whoopie pies like a gentle touch, apparently. Very delicate little things.
Step 7: Stir in the red food coloring
Add the red food coloring and stir until the batter is evenly colored. Make sure to scrape the bottom of the bowl too, because plain batter loves to hide down there like it has secrets. You want that red velvet color all the way through.
Step 8: Scoop the batter
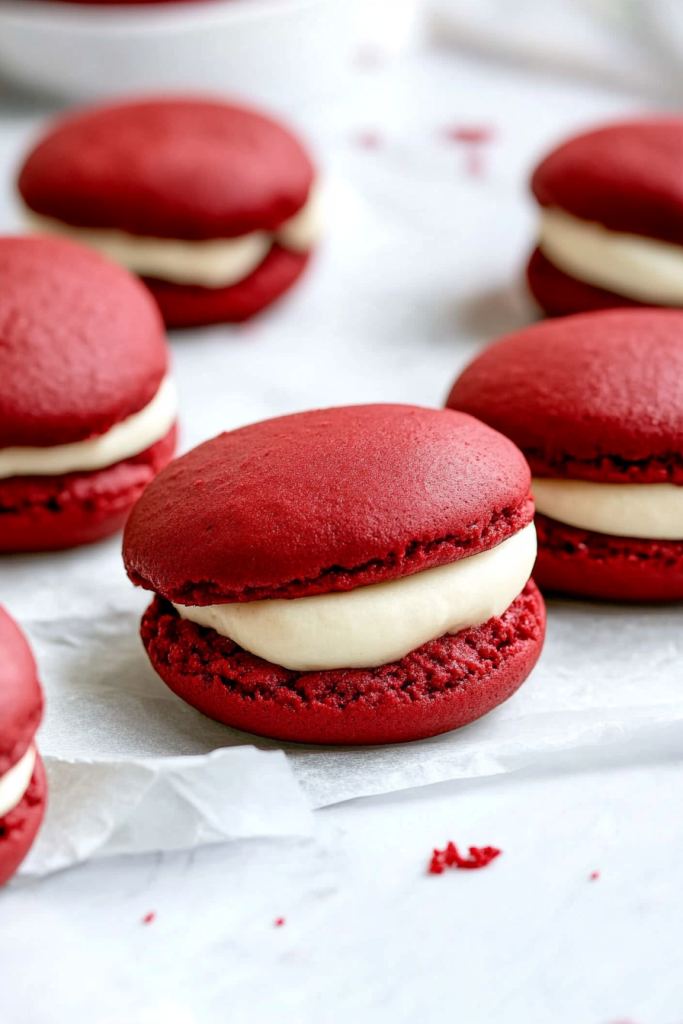
Drop heaping tablespoons of dough onto the prepared baking sheets, spacing them about 1 inch apart. Try to keep them close in size so the top and bottom pieces match when you sandwich them. They don’t have to be identical. Honestly, homemade desserts rarely are. Close enough is good enough here.
Step 9: Bake the whoopie pie rounds
Bake for 9 to 11 minutes, or until the tops are set. The rounds should look puffed and soft, not wet in the center. Try not to overbake them because Red Velvet Whoopie Pies should stay tender and cake-like. If they bake too long, they can get dry, and nobody wants that.
Step 10: Cool completely
Let the baked rounds cool completely on the baking sheets set over a rack. Once they’re cool, remove them from the baking sheets. Don’t rush this part. If you add the cream cheese filling while they’re warm, it can soften and slide right out. Tasty? Sure. Cute? Not so much.
Step 11: Make the cream cheese filling
In the bowl of a stand mixer fitted with the paddle attachment, combine the softened cream cheese and powdered sugar until smooth. Add the vanilla extract and beat until fully combined. The filling should be creamy, thick, and smooth enough to pipe or spread. If it looks too soft, chill it for a little while before filling the cookies.
Step 12: Fill and sandwich
Transfer the filling to a piping bag. Pipe the cream cheese filling onto the flat side of half the cooled cookies. Top with the remaining cookies, flat side down, and gently press to make sandwiches. Don’t press too hard, or the filling will squeeze out like it’s making a run for it. Gentle pressure is enough.
Storage Options
Because these Red Velvet Whoopie Pies are filled with cream cheese, they should be stored in the refrigerator. Place them in an airtight container in a single layer if possible. If you need to stack them, place parchment paper between the layers so they don’t stick together or smear too much. They will keep well for up to 3 days.
Before serving, let the whoopie pies sit at room temperature for about 15 to 20 minutes. This softens the filling slightly and makes the cookie rounds taste more tender. Cold whoopie pies are still good, but slightly softened whoopie pies feel more bakery-style. I don’t know why, but it makes a difference.
You can also freeze the unfilled cookie rounds for up to 2 months. Let them cool completely, then place them in a freezer-safe container with parchment between layers. Thaw them at room temperature, then add the cream cheese filling before serving. I’d freeze them unfilled for the best texture because cream cheese filling can get a little different after freezing. Still edible, just not quite as dreamy.
Variations & Substitutions
These Red Velvet Whoopie Pies are lovely as written, but you can definitely have a little fun with them. Make them mini, add sprinkles, dust them with powdered sugar, or adjust the filling. Whoopie pies are already playful, so a few extra touches fit right in.
- Make mini whoopie pies: Use smaller spoonfuls of batter and reduce the baking time slightly. Mini Red Velvet Whoopie Pies are perfect for parties, dessert trays, or bite-sized treats. Be warned, though, mini desserts have a way of disappearing very fast. People say, “They’re small!” and suddenly six are gone.
- Add sprinkles: After filling the whoopie pies, roll the edges in sprinkles. Red, white, pink, gold, or holiday sprinkles work beautifully. This is especially cute for Valentine’s Day, Christmas, birthdays, or baby showers. Sprinkles are basically edible confetti, and I’m not against that.
- Use cream cheese buttercream: If you want a richer, fluffier filling, add softened butter to the cream cheese mixture. This creates a more stable cream cheese buttercream-style filling, which is helpful if you want a thicker layer or a neater pipe.
- Add a hint of almond: Add a tiny splash of almond extract to the filling for a bakery-style twist. Go easy, though. Almond extract is strong and loves attention. A little is lovely. Too much tastes like the whole bottle got involved.
- Make them extra chocolatey: Add a small handful of mini chocolate chips to the batter for a little extra chocolate flavor. Keep it light so the rounds stay soft and don’t become too heavy.
- Dust with powdered sugar: A light dusting of powdered sugar before serving makes the red velvet sandwich cookies look sweet and pretty. It’s easy, quick, and gives them that soft bakery finish.
- Use gel food coloring: Gel food coloring gives a deeper red color without adding as much liquid to the batter. If you want a bolder red velvet look, gel is a great option.
What to Serve With Red Velvet Whoopie Pies?
Red Velvet Whoopie Pies are sweet, soft, and filled with tangy cream cheese, so they pair well with simple drinks and dessert spreads. Since they’re handheld, they’re especially great for parties, holidays, and casual gatherings. No forks, no slicing, fewer dishes. Honestly, that alone makes them a winner.
- Coffee: Coffee balances the sweetness and pairs beautifully with the mild cocoa flavor. A warm cup of coffee with a red velvet whoopie pie makes a very good afternoon treat. Maybe even a “hide in the kitchen for five quiet minutes” treat.
- Cold milk: Cold milk is classic with soft cookies and creamy filling. It works perfectly with the cocoa and cream cheese flavors. Simple, nostalgic, and always welcome.
- Hot chocolate: If you want a cozy dessert moment, serve these with hot chocolate. Is it sweet with sweet? Yes. Is that always a problem? Absolutely not. Some days call for it.
- Fresh berries: Strawberries, raspberries, or blueberries add freshness and color. They look beautiful next to Red Velvet Whoopie Pies and help balance the richness of the cream cheese filling.
- Vanilla ice cream: Serve a whoopie pie with a scoop of vanilla ice cream for a full dessert plate. It’s creamy, sweet, and perfect when you want the dessert to feel a little more special.
- Dessert boards: Add these whoopie pies to a dessert board with cookies, brownies, fruit, chocolate-covered strawberries, and candies. Their red color makes the whole board look festive without much effort.
- Sparkling drinks: Lemonade, sparkling water, fruit punch, or a bubbly mocktail pairs nicely with these for birthdays, showers, Valentine’s Day, or holiday parties. The bubbles keep things light and fun.
FAQ
Can I make Red Velvet Whoopie Pies ahead of time?
Yes. You can bake the cookie rounds ahead and fill them before serving. You can also assemble them and refrigerate for up to 3 days.
Can I freeze Red Velvet Whoopie Pies?
For best results, freeze the unfilled cookie rounds. Place parchment between layers, freeze, then thaw and fill before serving.
Why are my whoopie pies flat?
They may be flat if the baking soda is old, the butter was too soft or melted, or the batter was overmixed. If the batter feels too loose, chill it briefly before scooping.
Can I spread the filling instead of piping it?
Yes. If you don’t have a piping bag, spread the filling on the flat side of half the cookies with a spoon or small spatula, then sandwich them together.
These Red Velvet Whoopie Pies are soft, pretty, lightly chocolatey, and filled with sweet cream cheese filling. They have all the charm of red velvet cake, but in a fun handheld dessert that works for holidays, parties, bake sales, Valentine’s Day, birthdays, or just a cozy weekend baking mood.
So grab your mixing bowl, line the baking sheets, and make these Red Velvet Whoopie Pies when you want something sweet, red, soft, and a little playful. And when you try them, I’d love to know — are you making them for a holiday tray, a birthday, Valentine’s Day, or just because red velvet sounded too good to resist?
Red Velvet Whoopie Pies
Ingredients
For the Whoopie Pies
- 2 c all-purpose flour
- 2 tbsp unsweetened cocoa powder
- 1/2 tsp baking soda
- 1/4 tsp salt
- 1/2 c butter softened
- 1 c packed brown sugar
- 1 egg
- 1 tsp vanilla extract
- 1/2 c buttermilk
- 2 tbsp red food coloring
For the Cream Cheese Filling
- 8 oz cream cheese softened
- 3 c powdered sugar
- 4 tsp vanilla extract
Instructions
- Preheat the oven to 375°F.
- Line baking sheets with parchment paper and set aside.
- In a medium mixing bowl, combine the all-purpose flour, cocoa powder, baking soda, and salt.
- Whisk until evenly combined, then set aside.
- In a large mixing bowl, beat the softened butter on medium to high speed for approximately 30 seconds, or until smooth.
- Add the packed brown sugar.
- Beat until the mixture is light and fluffy.
- Add the egg and vanilla extract.
- Mix until fully incorporated.
- Gradually add the flour mixture and buttermilk to the butter mixture, alternating between the two.
- Beat after each addition only until combined.
- Add the red food coloring.
- Mix until the batter is evenly colored.
- Drop heaping tablespoons of batter onto the prepared baking sheets, spacing each portion approximately 1 inch apart.
- Bake for 9 to 11 minutes, or until the tops are set.
- Remove the baking sheets from the oven.
- Allow the whoopie pie rounds to cool completely on the baking sheets placed over wire racks.
- Once cooled, remove the rounds from the baking sheets.
- To prepare the cream cheese filling, place the softened cream cheese and powdered sugar in the bowl of a stand mixer fitted with the paddle attachment.
- Beat until smooth and creamy.
- Add the vanilla extract.
- Beat until fully combined.
- Transfer the filling to a piping bag.
- Pipe the cream cheese filling onto the flat side of half of the cooled whoopie pie rounds.
- Top with the remaining rounds, flat side down, to form sandwich cookies.
- Press gently to secure the filling without squeezing it out.
- Serve immediately or refrigerate until ready to serve.
Notes