Cake flour, cocoa powder, sugar, vegetable oil, eggs, red food color, vanilla, buttermilk, cream cheese, and powdered sugar.
I don’t know what it is about Red Velvet Cupcakes with Cream Cheese Frosting, but they always feel like the cupcake version of showing up in a red dress. A little bold. A little fancy. Maybe slightly dramatic, but in a good way. You set them on a dessert table, and suddenly everyone notices. And honestly? They deserve the attention.
The first time I made Red Velvet Cupcakes with Cream Cheese Frosting, I was half excited and half convinced I was going to mess them up. Red velvet has that reputation, doesn’t it? It looks bakery-pretty, the color has to be just right, and then there’s that tiny science experiment with baking soda and vinegar bubbling in a bowl. I remember standing there thinking, Okay, please don’t betray me now, cupcake batter.
But then the cupcakes baked up soft, deep red, and lightly cocoa-scented, and I kind of got why people are so loyal to red velvet. They’re not just chocolate cupcakes with red food coloring. Nope. They have that tender crumb, that little tang from buttermilk, and just enough cocoa to make you wonder where vanilla ends and chocolate begins. It’s a bit of a mystery cupcake, and maybe that’s the charm.
And the frosting? Oh, the frosting matters. Red Velvet Cupcakes with Cream Cheese Frosting without cream cheese frosting feels like a movie without the ending. Technically, you can still watch it, but why would you? That tangy, creamy frosting brings the whole thing together. It balances the sweetness, softens the cocoa, and makes each bite feel like a proper little celebration.
These cupcakes remind me of birthdays, Valentine’s Day, church bake sales, holiday trays, and those random afternoons when you need something pretty on the counter because the day has been… a lot. Sound familiar?
Why you’ll Love these Red Velvet Cupcakes with Cream Cheese Frosting?
These Red Velvet Cupcakes with Cream Cheese Frosting are soft, moist, lightly chocolatey, and topped with that classic tangy frosting red velvet is famous for. The cake flour gives them a tender crumb, the vegetable oil keeps them soft, and the buttermilk adds that gentle tang that makes red velvet taste different from a regular chocolate cupcake. It’s subtle, but it matters.
I also love that this red velvet cupcake recipe feels special without being impossible. There are a few steps, yes, but none of them are scary once you slow down and take them one at a time. You mix the dry ingredients, blend the sugar and oil, add eggs, color, vanilla, buttermilk, and then finish with that fizzy baking soda and vinegar mixture. It sounds a little fussy on paper, but in real life? It’s very doable.
The cream cheese frosting is simple too. Just softened cream cheese, powdered sugar, and vanilla extract. No complicated buttercream. No candy thermometer. No “why is my frosting splitting?” panic spiral. It’s smooth, sweet, tangy, and easy to pipe or spread. If you want the bakery-style swirl, use a 1M tip. If not, grab a spoon and make soft little swoops. Homemade cupcakes don’t need to look like they passed an inspection.
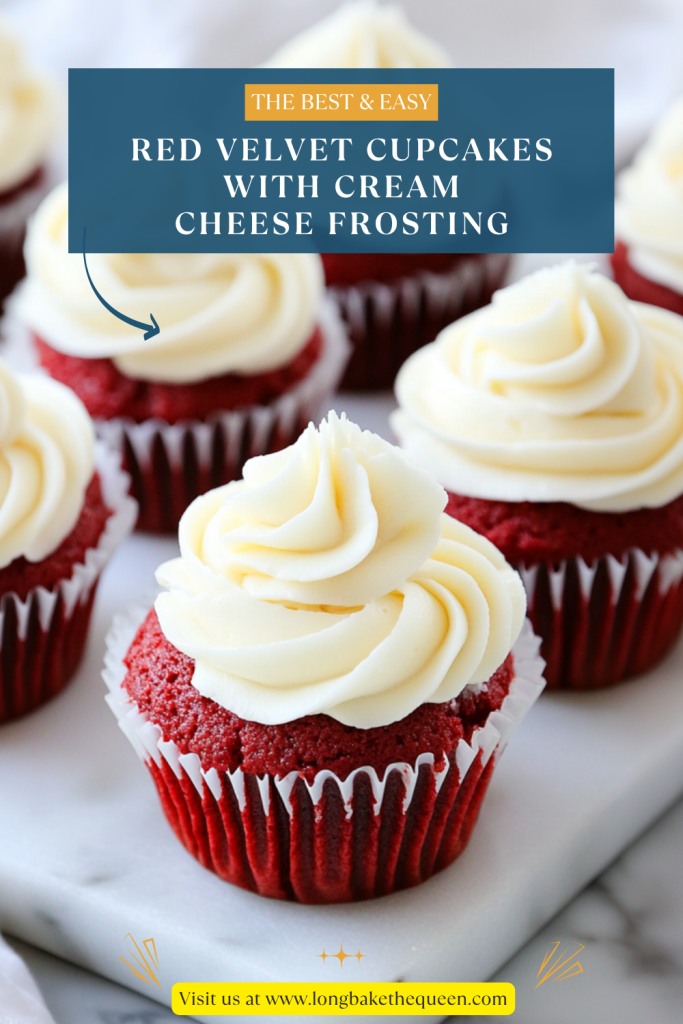
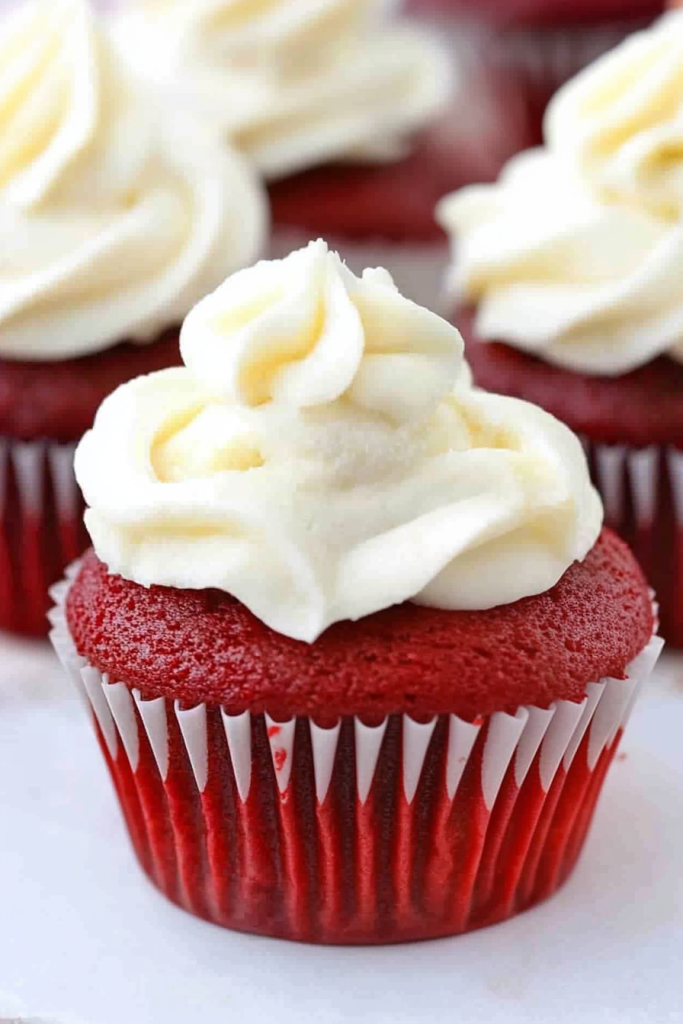
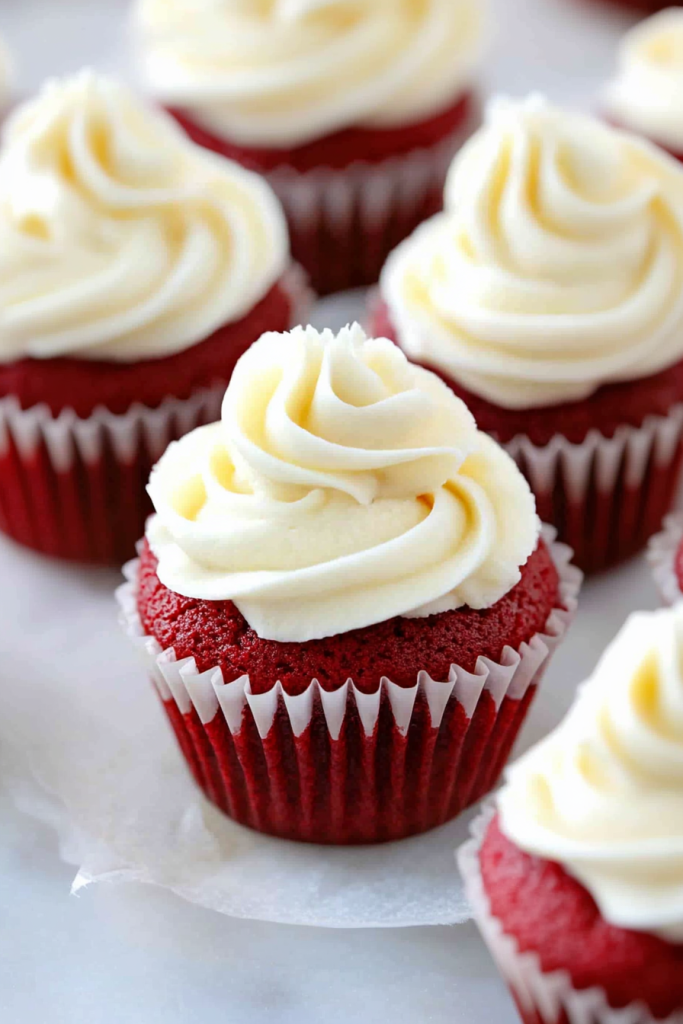
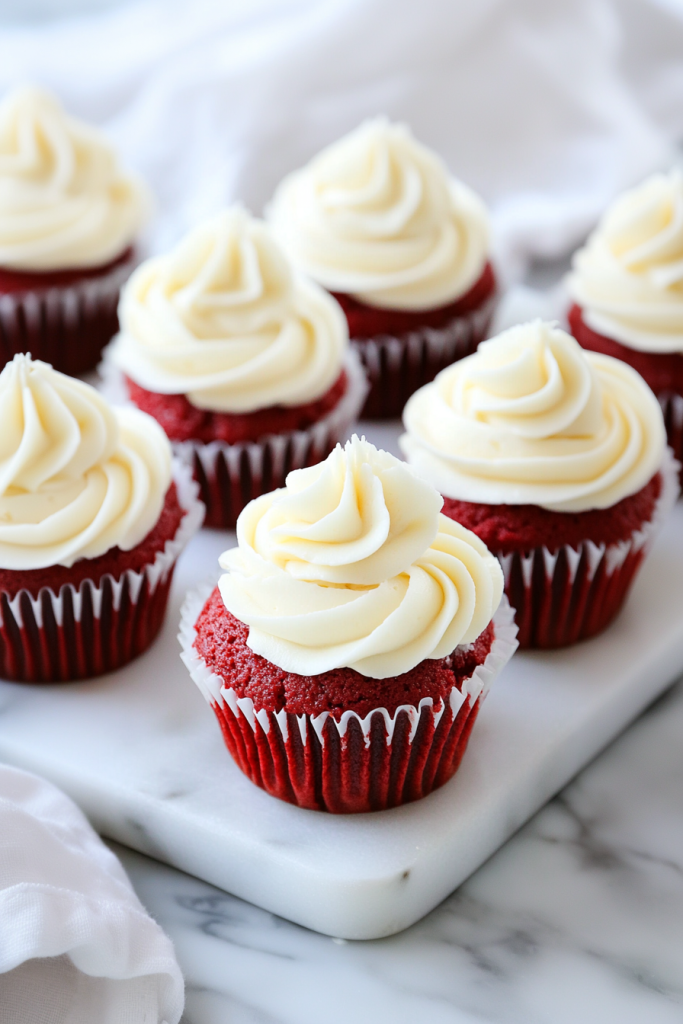
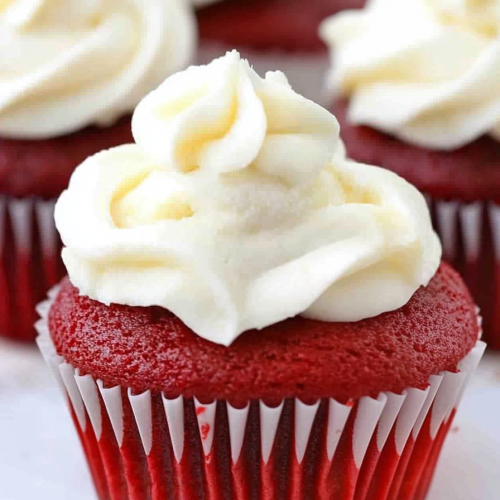
And let’s be honest, Red Velvet Cupcakes with Cream Cheese Frosting are just beautiful. That red cupcake with a creamy white frosting swirl? Classic. They’re perfect for Valentine’s Day, Christmas, birthdays, bridal showers, baby showers, or anytime you want dessert to feel a little extra without going full wedding cake mode.

Ingredient Notes
Before you make Red Velvet Cupcakes with Cream Cheese Frosting, let’s talk about what each ingredient does. Red velvet is all about balance. It needs a little cocoa, a little tang, a soft crumb, and a frosting that doesn’t overpower the cupcake. Every ingredient has a job here, even the tiny splash of vinegar that looks suspicious for about ten seconds.
- Cake flour: Cake flour is what helps these Red Velvet Cupcakes with Cream Cheese Frosting bake up soft and delicate. It has a lighter texture than all-purpose flour, which gives the cupcakes that tender crumb we want. Make sure you use cake flour that is not self-rising, because this recipe already has its own leavening. Sifting it helps too, even if sifting sometimes feels like one extra thing you don’t want to do.
- Unsweetened Dutch-process cocoa powder: Cocoa powder gives the cupcakes their soft chocolate flavor. Red velvet isn’t supposed to taste like a full chocolate cupcake, so don’t expect that deep brownie-like flavor. It’s more subtle. More gentle. Dutch-process cocoa has a smoother taste and a deeper color, which works beautifully with the red food coloring.
- Salt: Salt balances all the sweetness and helps the cocoa and vanilla stand out. It won’t make the cupcakes salty. It just keeps them from tasting flat. Tiny ingredient, big job. Kind of like the quiet person in the room who somehow keeps everything under control.
- Sugar: Sugar sweetens the cupcakes and helps create that soft texture. It mixes with the oil to form the base of the batter. Since red velvet has cocoa and buttermilk, the sugar helps bring everything into cupcake territory without making the flavor too heavy.
- Vegetable oil: Vegetable oil keeps these red velvet cupcakes moist and soft. This is especially helpful because cupcakes with cream cheese frosting need to be refrigerated, and oil helps them stay tender even after chilling. Butter is lovely, but oil is doing the practical work here.
- Eggs: Eggs help hold the batter together and give the cupcakes structure. Room temperature eggs mix in more smoothly, so use them if you can. Add them one at a time so the batter stays even. It’s one of those little steps that feels minor, but it helps.
- Red food color: Red food color gives these cupcakes their classic look. Gel-paste color is more concentrated, so you only need a little. Regular liquid food color works too, but you’ll need more. The color doesn’t really change the flavor, but come on — red velvet needs that red velvet moment.
- Vanilla extract: Vanilla rounds out the flavor and softens the cocoa. It adds that warm bakery smell that makes the kitchen feel instantly happier. Use pure vanilla extract if you can, but honestly, use what you have.
- Buttermilk: Buttermilk is one of the big reasons Red Velvet Cupcakes with Cream Cheese Frosting taste like red velvet. It adds moisture, tenderness, and a slight tang. It also works with the baking soda and vinegar to help the cupcakes rise. Very useful stuff.
- Baking soda: Baking soda gives the cupcakes lift. It reacts with the vinegar and buttermilk, which helps create that soft, tender texture. Make sure it’s fresh. Old baking soda can make cupcakes fall flat, and nobody wants sad little red cupcake disks.
- Distilled white vinegar: Vinegar reacts with the baking soda and helps the batter rise. Don’t worry, your cupcakes won’t taste like vinegar. It disappears into the batter and just does its job quietly. Honestly, very polite.
- Cream cheese: Cream cheese is the star of the frosting. It gives that tangy flavor that red velvet absolutely needs. Make sure it’s softened before mixing, or you may end up with lumps. Still edible, sure, but not the smooth frosting dream we’re after.
- Powdered sugar: Powdered sugar sweetens and thickens the frosting. It blends into the cream cheese and gives the frosting that pipeable texture. If it’s clumpy, sift it first. If you skip that and get a few tiny lumps, well… it happens. We move on.
- Vanilla extract for frosting: Vanilla softens the tang of the cream cheese and makes the frosting taste rounded and sweet. It’s simple, but it makes the frosting feel finished.
How to Make Red Velvet Cupcakes with Cream Cheese Frosting?
Making Red Velvet Cupcakes with Cream Cheese Frosting is easier when you don’t rush it. The steps are simple, but red velvet likes a little attention. Mix gently, don’t overbeat once the flour goes in, and let the cupcakes cool completely before frosting. Warm cupcakes plus cream cheese frosting equals a slippery little mess. Ask me how I know.
Step 1: Prepare the oven and pan
Preheat your oven to 350°F. Line a muffin pan with paper liners. This makes the cupcakes easier to remove and keeps cleanup simple. Plus, liners make the cupcakes look neat even if the kitchen currently looks like cocoa powder had a tiny explosion.
Step 2: Mix the dry ingredients
In a large bowl, whisk together the sifted cake flour, Dutch-process cocoa powder, and salt. Set it aside. This helps the cocoa and salt spread evenly through the flour, so every cupcake has the same flavor and texture. Nobody wants one cupcake that got all the cocoa while another tastes like plain cake.
Step 3: Beat the sugar and oil
In the bowl of a stand mixer fitted with the paddle attachment, beat the sugar and vegetable oil on medium-high speed until combined. It won’t get fluffy like butter and sugar, so don’t panic. It should look smooth and blended. This is the base that keeps the cupcakes moist.
Step 4: Add the eggs
Add the eggs one at a time, beating after each addition. Scrape down the sides of the bowl when needed. I know scraping the bowl is annoying, but it helps the batter mix evenly. Tiny step. Big difference.
Step 5: Add the color and vanilla
Mix in the red food color and vanilla extract. This is where the batter starts looking like proper red velvet, and honestly, it’s always a little satisfying. If you’re using gel color, a little goes a long way. If you’re using regular liquid food color, use the larger amount listed.
Step 6: Add the flour mixture and buttermilk
Reduce the mixer speed to low. Add the flour mixture in three batches, alternating with two additions of buttermilk. Start and end with the flour mixture. Mix just until combined after each addition. This is not the time to overmix. Once flour joins the party, too much mixing can make cupcakes tough, and tough cupcakes are just rude.
Step 7: Add the baking soda and vinegar
In a small bowl, stir together the baking soda and distilled white vinegar. It will foam quickly, like a tiny volcano. Add the mixture to the batter and mix on medium speed for about 10 seconds, just until combined. This helps give the cupcakes their light, classic red velvet texture.
Step 8: Fill the cupcake liners
Fill each cupcake liner about three-quarters full. Try to divide the batter evenly so the cupcakes bake at the same pace. Don’t fill them all the way to the top unless you’re hoping for cupcake volcanoes. Cute idea, not cute cleanup.
Step 9: Bake the cupcakes
Bake for about 20 minutes, rotating the pan halfway through. The cupcakes are done when a toothpick inserted into the center comes out clean. The tops should spring back lightly when touched.
Step 10: Cool completely
Transfer the muffin pan to wire racks and let the cupcakes cool completely before removing and frosting. I know it’s hard to wait, especially when they smell amazing, but cream cheese frosting needs a cool cupcake. Otherwise, it melts and slides around like it has somewhere else to be.
Step 11: Make the cream cheese frosting
In the bowl of a stand mixer fitted with the paddle attachment, beat the softened cream cheese and powdered sugar until smooth. Add the vanilla extract and beat until combined. The frosting should be creamy, smooth, and thick enough to pipe or spread.
Step 12: Frost the cupcakes
Place the frosting in a large decorating bag fitted with a 1M decorating tip. Hold the tip about 1/4 inch above the cupcake at a 90-degree angle, then pipe a spiral starting at the outside edge and working inward. If you don’t have a piping bag, don’t stress. Spread the frosting with a spoon or knife and make little swoops. A homemade swoop has charm, and I will defend that opinion.
Storage Options
Because these Red Velvet Cupcakes with Cream Cheese Frosting have cream cheese frosting, they need to be stored in the refrigerator. Place them in an airtight container and refrigerate for up to 3 days.
Before serving, let the cupcakes sit at room temperature for about 15 to 30 minutes. This helps the frosting soften and brings back the best cupcake texture. Cold cupcakes are fine, but slightly softened cupcakes taste so much better. I don’t make the rules. Okay, maybe I do a little.
You can also freeze the cupcakes unfrosted for up to 2 months. Wrap them tightly and place them in a freezer-safe container. Thaw at room temperature, then frost before serving. I prefer freezing them without frosting because cream cheese frosting can change texture after freezing. Still tasty, but not always as pretty.
Variations & Substitutions
These Red Velvet Cupcakes with Cream Cheese Frosting are classic, but there’s room to play a little. You can make mini cupcakes, add sprinkles, use cupcake crumbs for decoration, or keep the frosting simple and rustic. Red velvet already has personality, so a few extras only make it more fun.
- Make mini cupcakes: Use a mini muffin pan and start checking them around 10 to 12 minutes. Mini red velvet cupcakes are perfect for parties, dessert trays, or those moments when people say, “I’ll just have one small one,” and then come back for three more. It’s fine. We’ve all seen it happen.
- Add more cocoa: If you want a slightly deeper cocoa flavor, add a little extra cocoa powder. Don’t go too far, though, or you’ll end up moving away from classic red velvet and closer to chocolate cupcakes. Not a bad thing, just a different thing.
- Use liquid food color: If you don’t have gel food color, regular red food coloring works. Use 2 tablespoons regular food color instead of 1/2 teaspoon gel-paste food color. The color may be a little less intense, but still pretty.
- Make a softer frosting: If you want frosting that spreads more easily instead of holding a tall swirl, you can beat it a little less or add a tiny splash of milk. Go slowly because cream cheese frosting can loosen quickly. One splash too many and suddenly it’s frosting soup.
- Add cupcake crumbs on top: For a bakery-style look, crumble one unfrosted cupcake and sprinkle the crumbs over the frosting. It looks beautiful and adds that classic red velvet finish. A little extra? Yes. Worth it? Also yes.
- Add sprinkles: Red, white, pink, gold, or holiday sprinkles make these Red Velvet Cupcakes with Cream Cheese Frosting perfect for birthdays, Christmas, Valentine’s Day, or showers. Sprinkles are basically edible confetti, and I’m not here to argue with joy.
- Use simple swoops instead of piping: If piping feels like too much, spread the frosting with a spatula or spoon. Soft swoops look homemade and inviting. Not everything needs to look like it came from a bakery window. Sometimes cozy is better.
What to Serve With Red Velvet Cupcakes with Cream Cheese Frosting?
Red Velvet Cupcakes with Cream Cheese Frosting are sweet, tangy, and lightly chocolatey, so they pair nicely with simple drinks and fresh sides. They already bring plenty of personality, so you don’t need to overthink what goes with them.
- Coffee: Coffee balances the sweetness of the cupcakes and frosting. A warm cup of coffee with a red velvet cupcake feels like a cozy little dessert break, especially after dinner.
- Cold milk: Cold milk is a classic cupcake pairing. It works especially well with the mild cocoa flavor and creamy frosting. Simple, nostalgic, and always good.
- Hot chocolate: Hot chocolate with red velvet cupcakes is definitely sweet-on-sweet, but sometimes that’s exactly the mood. This is especially fun for winter parties or holiday dessert tables.
- Fresh berries: Strawberries, raspberries, or blueberries look beautiful next to Red Velvet Cupcakes with Cream Cheese Frosting. They add freshness and help balance the richness of the frosting.
- Vanilla ice cream: A small scoop of vanilla ice cream turns these cupcakes into a full dessert plate. It’s creamy, easy, and crowd-friendly.
- Party dessert trays: Add these cupcakes to a tray with cookies, brownies, fruit, and mini desserts. Their red color makes them stand out right away, which is helpful when the dessert table gets crowded.
- Sparkling drinks: Sparkling water, lemonade, fruit punch, or a bubbly mocktail pairs well with these cupcakes for birthdays, showers, and celebrations. The bubbles make everything feel a little more festive.
FAQ
Do red velvet cupcakes need to be refrigerated?
Yes. Once they are topped with cream cheese frosting, they should be refrigerated. Let them sit at room temperature before serving so they taste soft and fresh.
Can I use all-purpose flour instead of cake flour?
Cake flour gives the softest texture, but all-purpose flour can work if needed. The cupcakes may be slightly less tender, but they’ll still taste good.
Why do you add vinegar and baking soda?
The vinegar reacts with the baking soda and helps the cupcakes rise. It also helps create the classic red velvet texture. Don’t worry, the cupcakes will not taste like vinegar.
Can I use regular food coloring instead of gel?
Yes. Use 2 tablespoons regular red food coloring instead of 1/2 teaspoon gel-paste food color.
These Red Velvet Cupcakes with Cream Cheese Frosting are soft, tender, lightly chocolatey, and topped with the creamy tangy frosting that makes red velvet feel complete. They’re pretty enough for holidays and celebrations, but still simple enough for weekend baking when you just want something sweet and a little special.
So grab the cupcake liners, mix up that red batter, and pipe — or swoop — on the cream cheese frosting. And when you make these Red Velvet Cupcakes with Cream Cheese Frosting, I’d love to know: are they for Valentine’s Day, a birthday, a holiday table, or just because you needed a cupcake with a little drama?
Red Velvet Cupcakes with Cream Cheese Frosting
Ingredients
For the Cupcakes
- 2 1/2 c cake flour not self-rising, sifted
- 2 tbsp unsweetened Dutch-process cocoa powder
- 1 tsp salt
- 1 1/2 c sugar
- 1 1/2 c vegetable oil
- 2 large eggs room temperature
- 1/2 tsp red gel-paste food color or 2 tbsp regular red food color
- 1 tsp pure vanilla extract
- 1 c buttermilk
- 1 1/2 tsp baking soda
- 2 tsp distilled white vinegar
For the Cream Cheese Frosting
- 8 oz cream cheese softened
- 3 c powdered sugar
- 2 tsp vanilla extract
Instructions
- Preheat the oven to 350°F.
- Line a muffin pan with paper cupcake liners.
- In a large mixing bowl, whisk together the sifted cake flour, Dutch-process cocoa powder, and salt.
- Set the dry mixture aside.
- In the bowl of a stand mixer fitted with the paddle attachment, combine the sugar and vegetable oil.
- Beat on medium-high speed until fully combined.
- Add the eggs one at a time, mixing well after each addition.
- Scrape down the sides of the bowl as needed.
- Add the red food color and vanilla extract.
- Mix until evenly incorporated.
- Reduce the mixer speed to low.
- Add the flour mixture in three additions, alternating with two additions of buttermilk.
- Mix after each addition until just combined.
- In a small bowl, stir together the baking soda and distilled white vinegar.
- Allow the mixture to foam.
- Add the baking soda and vinegar mixture to the cupcake batter.
- Mix on medium speed for approximately 10 seconds, or until incorporated.
- Fill each cupcake liner about three-quarters full with batter.
- Bake for approximately 20 minutes, rotating the pan halfway through the baking time.
- The cupcakes are done when a toothpick inserted into the center comes out clean.
- Transfer the muffin pan to a wire rack.
- Allow the cupcakes to cool completely before removing them from the pan and frosting.
- To prepare the cream cheese frosting, place the softened cream cheese and powdered sugar in the bowl of a stand mixer fitted with the paddle attachment.
- Beat until smooth and creamy.
- Add the vanilla extract.
- Beat until fully combined.
- Transfer the frosting to a large decorating bag fitted with a 1M decorating tip.
- Hold the piping tip approximately 1/4 inch above the cupcake at a 90-degree angle.
- Pipe a spiral of frosting, beginning at the outer edge and working inward.
- Store the frosted cupcakes in airtight containers in the refrigerator for up to 3 days.
- Bring the cupcakes to room temperature before serving.
Notes