Butter, dark chocolate, sugar, eggs, vanilla extract, red food coloring, all-purpose flour, salt, and cream cheese.
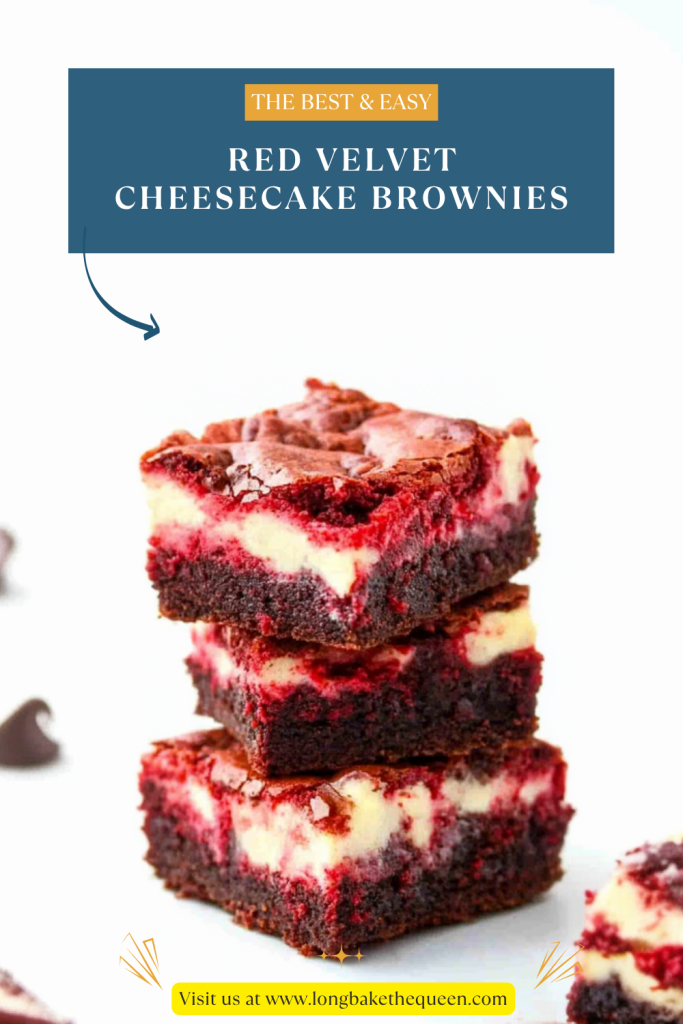
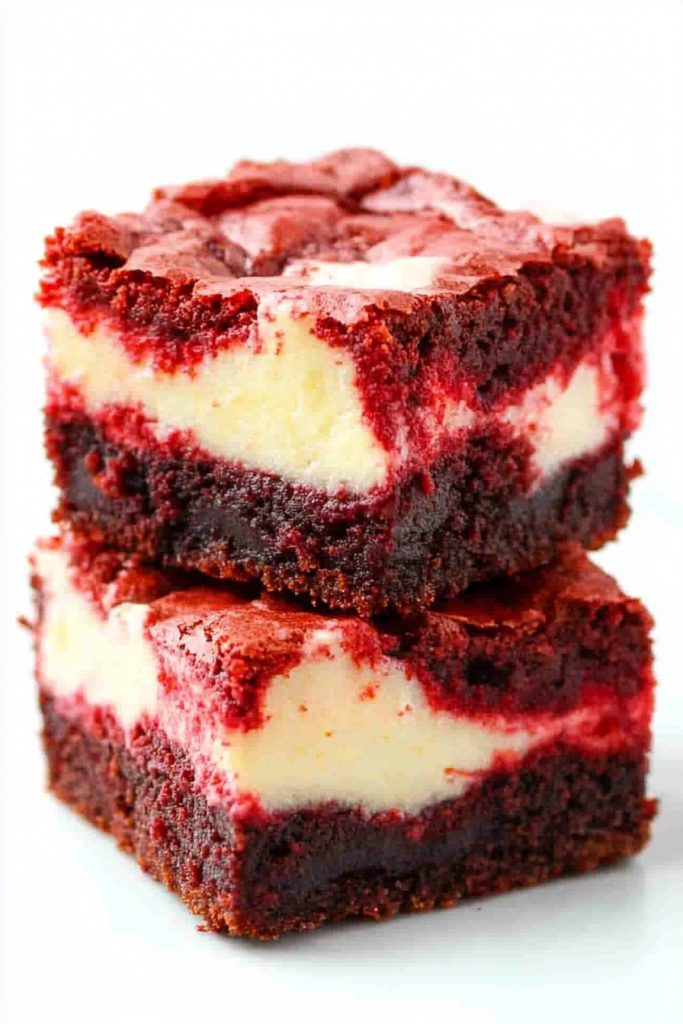
I have a soft spot for desserts that look a little dramatic without making me work too hard, and Red Velvet Cheesecake Brownies are exactly that kind of treat. They have that bold red velvet color, a soft chocolatey brownie base, and creamy cheesecake swirls that make the whole pan look like something you’d bring out for a birthday, Valentine’s Day, Christmas, or honestly just a random Tuesday when dessert needs to be more exciting than usual. Some days call for a plain brownie. Other days? You need the red one with cheesecake ribbons. You know?
The first time I made these Red Velvet Cheesecake Brownies, I remember swirling the cream cheese mixture into the batter and thinking, “Please look pretty, please look pretty.” Because swirls are funny like that. You can guide them, but you can’t fully control them. One pan looks elegant, another looks a little wild, and both still taste amazing. That’s kind of what I love about this recipe. It gives you that beautiful marbled look, but it doesn’t demand perfection. A slightly messy swirl still feels homemade and charming, maybe even more charming.
Red velvet has always felt a little nostalgic to me. It reminds me of bakery cases, church potlucks, holiday dessert tables, and those big family gatherings where someone always brings “their famous” dessert and everyone acts casual while secretly watching which platter empties first. These red velvet brownies have that same special-occasion feeling, but they’re easier than a whole cake. No layers. No frosting bag. No crumb coat situation. Just brownie batter, cheesecake dollops, a quick swirl, and into the oven.
What I really love about Red Velvet Cheesecake Brownies is the balance. The brownie layer is sweet and softly chocolatey, not too heavy, while the cheesecake swirl brings that tangy cream cheese flavor red velvet desserts pretty much beg for. It’s rich, but not overwhelming. Pretty, but still simple. And when you cut into those squares after they’ve cooled? Oh, that red-and-cream swirl moment gets me every time. Sound familiar? Sometimes dessert just needs to make a little entrance.
Why you’ll Love these Red Velvet Cheesecake Brownies?
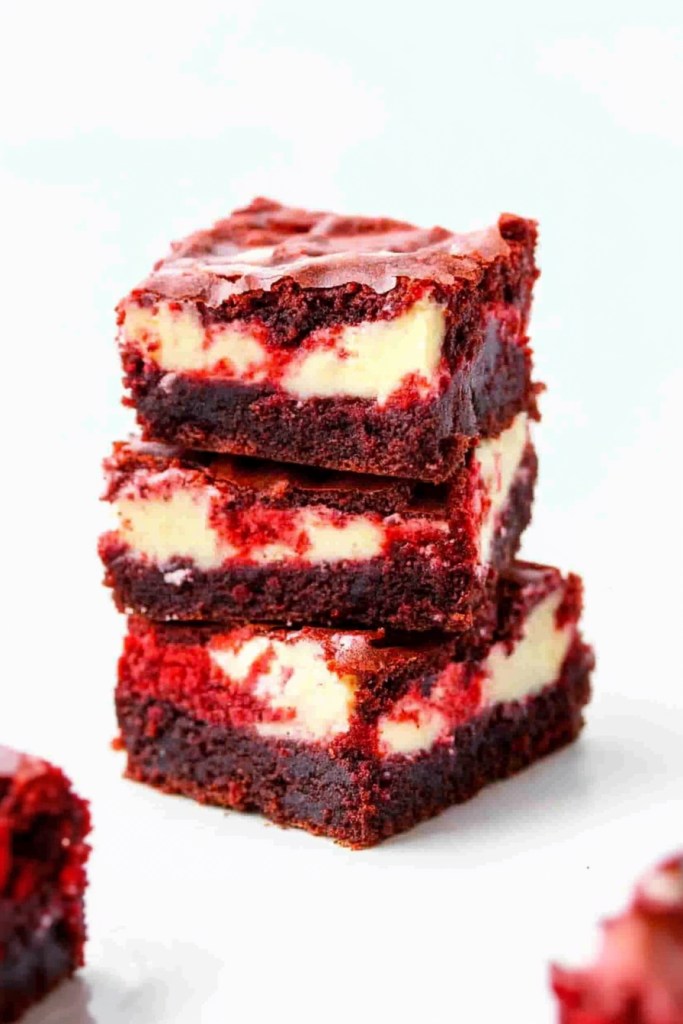
The biggest reason these Red Velvet Cheesecake Brownies stand out is that they give you two desserts in one bite. You get the soft, chocolate-kissed red velvet brownie layer and the creamy cheesecake swirl baked right on top. It’s not quite a classic brownie, not quite cheesecake, and not quite red velvet cake either. It lands somewhere deliciously in the middle, which is usually where the best desserts like to hang out.
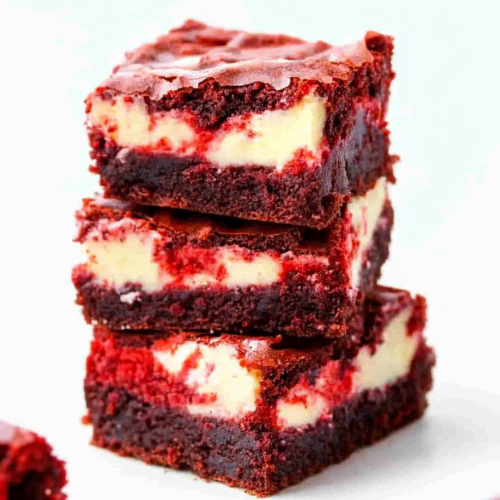
Another thing I love is how beautiful these red velvet cheesecake bars look without needing any extra decorating. The red food coloring gives the brownie layer that classic red velvet color, and the cheesecake mixture creates a pretty marbled top. You don’t need sprinkles, frosting, piping bags, or edible glitter — though I’m not judging if you love edible glitter. The swirl does the heavy lifting here. And if yours looks a little uneven? Good. That means it looks like a real person made it, not a machine.
These Red Velvet Cheesecake Brownies are also wonderfully easy to serve. Once they cool completely, the parchment paper helps you lift the whole batch out of the pan so you can slice them neatly. I always appreciate that little parchment sling because trying to dig brownies out of a pan is not my idea of a peaceful baking moment. It’s more like dessert excavation, and nobody asked for that.
The flavor is another reason this recipe works so well. The dark chocolate gives the brownie layer a little depth, the vanilla keeps everything warm and soft, and the cream cheese swirl adds tangy sweetness. It tastes like red velvet and cheesecake decided to stop competing and become one dessert. Honestly, good for them.
And maybe my favorite part? These brownies feel special, but they’re not fussy. You don’t need a water bath like a full cheesecake. You don’t need to make a tall red velvet cake. You don’t even need to frost anything. The recipe is simple enough for casual baking but pretty enough for holidays, potlucks, bake sales, or gifting. That’s the kind of dessert I like to keep close.
Ingredient Notes
Before making these Red Velvet Cheesecake Brownies, let’s talk through the ingredients. This recipe has two simple parts: the red velvet brownie batter and the cheesecake swirl. The brownie layer gets its richness from butter, dark chocolate, sugar, eggs, vanilla, flour, and red food coloring, while the cheesecake layer brings in cream cheese, sugar, egg, and vanilla for that smooth, creamy finish.
- Butter: Butter gives the brownies richness and helps create that soft, fudgy texture. It melts with the dark chocolate to form the base of the brownie batter. I like using unsalted butter when I can, because it lets me control the salt better. Not a huge thing, but it does help.
- Dark chocolate: Dark chocolate adds real chocolate flavor to the red velvet brownie layer. Red velvet usually has a gentler chocolate taste than a regular brownie, so the dark chocolate gives depth without making the whole dessert too intense. It’s chocolate, but still red velvet. There’s a difference.
- Sugar: Sugar sweetens both the brownie batter and the cheesecake swirl. In the brownie layer, it helps create that tender bite. In the cheesecake mixture, it balances the tanginess of the cream cheese. Very basic ingredient, very important job.
- Eggs: Eggs help both layers set properly. The brownie batter uses eggs for structure and richness, while the cheesecake layer uses an egg so it bakes into a smooth, creamy swirl instead of staying too loose.
- Vanilla extract: Vanilla goes into both the brownie batter and the cheesecake mixture. It rounds out the chocolate, softens the cream cheese flavor, and makes the whole dessert taste a little warmer and more complete.
- Red food coloring: Red food coloring gives these brownies their classic red velvet look. It doesn’t really add flavor, but it brings the visual drama. And let’s be honest, red velvet without the red feels like it forgot to get dressed.
- All-purpose flour: Flour gives the brownie layer structure. Stir it in just until the dry streaks disappear. Overmixing can make brownies tough, and nobody wants a brownie that makes you work for it.
- Salt: Salt balances the sweetness and helps the chocolate and vanilla flavors stand out. It’s a small amount, but it keeps the brownies from tasting flat.
- Cream cheese: Cream cheese is the heart of the cheesecake swirl. Make sure it’s at room temperature before mixing so it blends smoothly with the sugar, egg, and vanilla. Cold cream cheese can leave little lumps, and surprise cheesecake pebbles are not the goal.
How to Make Red Velvet Cheesecake Brownies?
Making Red Velvet Cheesecake Brownies is much easier than they look. You’ll prepare the pan, make the red velvet brownie batter, mix the cheesecake layer, dollop and swirl everything together, then bake until set. The hardest part is waiting for them to cool completely before slicing. I know. Rude. But warm cheesecake brownies can be messy little troublemakers, so the cooling time really matters.
Step 1: Prepare the Oven and Pan
Preheat your oven to 350°F.
Butter the bottom and sides of an 8-inch metal baking pan. Place a long piece of parchment paper into the bottom of the pan, letting it extend up two sides and hang slightly over the edges. Butter the parchment too. This gives you an easy way to lift the brownies out later, and trust me, it makes life much easier.
Step 2: Melt the Butter and Chocolate
In a small heatproof bowl, melt the butter and coarsely chopped dark chocolate together.
Stir until the mixture is smooth and glossy. Set it aside for a few minutes so it can cool slightly. You want it warm and pourable, but not so hot that it cooks the eggs when you add it to the batter. Chocolate scrambled eggs? No thank you.
Step 3: Mix the Sugar, Eggs, Vanilla, and Red Food Coloring
In a large bowl, whisk together the sugar, eggs, vanilla extract, and red food coloring.
Whisk until the mixture looks smooth and evenly colored. This is where the batter starts looking like red velvet instead of just regular brownie batter with ambitions.
Step 4: Add the Chocolate Mixture
Pour the slightly cooled chocolate mixture into the sugar and egg mixture.
Stir until everything is smooth and combined. The batter should look glossy, red, and softly chocolatey. This is also where you may start feeling very confident about dessert. Enjoy that.
Step 5: Add the Flour and Salt
Add the all-purpose flour and salt to the bowl.
Stir just until combined and no dry streaks remain. Once the flour disappears, stop mixing. Brownies like a gentle hand. If you overmix, they can turn tougher instead of soft and fudgy.
Step 6: Spread the Brownie Batter
Pour the red velvet brownie batter into the prepared pan.
Spread it into an even layer with a spatula, making sure the batter reaches the corners. This helps the brownies bake evenly and gives the cheesecake swirl a nice base to sit on.
Step 7: Make the Cheesecake Mixture
In a medium bowl, beat the room-temperature cream cheese, sugar, egg, and vanilla extract until smooth.
The mixture should be creamy and lump-free. If it looks a little chunky, your cream cheese may have been too cold. Keep beating a bit, but don’t panic. Dessert is forgiving most of the time.
Step 8: Add the Cheesecake Dollops
Spoon the cheesecake mixture over the brownie batter in 8 dollops.
Try to space the dollops across the pan so the swirl spreads evenly. It doesn’t have to look perfect. You’re just setting yourself up for that pretty marbled top.
Step 9: Swirl the Layers
Use a knife or spatula to gently swirl the cheesecake mixture into the red velvet brownie batter.
A few gentle passes are enough. Don’t overdo it, or the colors will blend too much and you’ll lose that pretty red-and-cream contrast. Think ribbons, not full mixing. Soft little swoops. That’s the mood.
Step 10: Bake the Brownies
Bake for 35 to 40 minutes, or until the brownies and cheesecake layer are set.
A knife inserted into the cheesecake mixture should come out clean, and the edges should be lightly browned. The center should not look wet or jiggly. If it still looks too loose, give it a few more minutes.
Step 11: Cool Completely
Let the brownies cool completely in the pan on a cooling rack.
This step matters more than we want it to. The cheesecake layer needs time to set, and the brownies will slice cleaner once they’re fully cooled. If you cut them too soon, they’ll still taste good, but they may look a little chaotic. Been there.
Step 12: Lift and Slice
Use the parchment paper overhang to lift the cooled brownies out of the pan.
Transfer them to a cutting board and slice into squares. For cleaner cuts, wipe the knife between slices. It’s a tiny extra step, but it makes the brownies look much neater.
Storage Options
Because these Red Velvet Cheesecake Brownies have a cheesecake layer, they should be stored in the refrigerator. Once they are completely cooled, place them in an airtight container and refrigerate for up to 4 days. If you need to stack them, place parchment paper between layers so the cheesecake tops stay pretty and don’t stick together.
For the best texture, let the brownies sit at room temperature for about 10 to 15 minutes before serving. This gives the brownie layer time to soften slightly and makes the cheesecake swirl taste creamier. Straight-from-the-fridge brownies are fine, but a short rest makes them better.
You can also freeze these red velvet cheesecake bars for longer storage. Wrap individual squares tightly in plastic wrap, then place them in a freezer-safe container or bag. Freeze for up to 2 months. Thaw them overnight in the refrigerator before serving. The cheesecake layer may be a little softer after thawing, but the flavor will still be rich, sweet, and lovely.
Variations & Substitutions
One thing I love about Red Velvet Cheesecake Brownies is how easy they are to dress up. They’re already pretty with the red velvet base and cheesecake swirl, but a few small extras can make them feel even more festive, more chocolatey, or more playful. Same brownie, different mood.
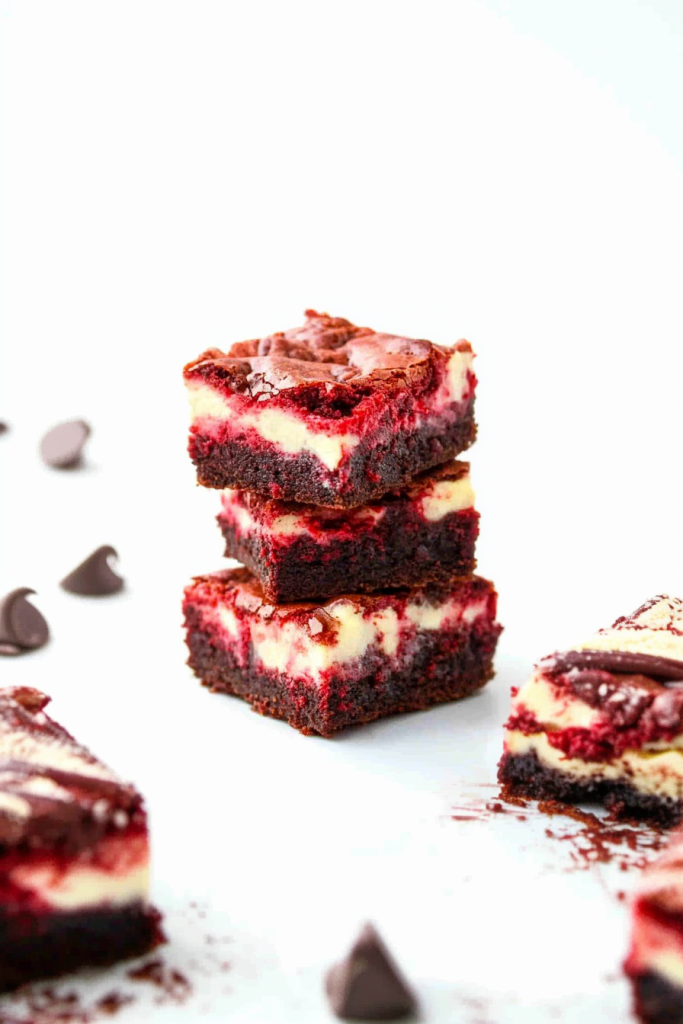
- Add white chocolate chips: Stir a handful of white chocolate chips into the brownie batter for extra sweetness and a pretty color contrast. White chocolate and red velvet are a natural match, in my opinion.
- Add mini chocolate chips: Mini chocolate chips can make the brownie layer more chocolate-forward. They melt into little pockets and add extra richness without changing the recipe too much.
- Use gel food coloring: Gel food coloring can give a stronger red color without adding much extra liquid. Start with a small amount and adjust as needed. Red velvet can be a little dramatic, but let’s keep control of the drama.
- Add a little cocoa powder: If you want the brownies slightly more chocolatey, add a small spoonful of cocoa powder with the flour. Don’t add too much, though, or it may affect the texture.
- Make them festive: Add red, white, or pink sprinkles on top before baking for Valentine’s Day, Christmas, birthdays, or bake sales. It’s simple, but cute.
- Add peppermint: A tiny drop of peppermint extract in the cheesecake layer gives these brownies a holiday twist. Use a very light hand because peppermint has no volume control.
- Use a larger pan: If you prefer thinner brownies, use a slightly larger pan and reduce the baking time. Keep an eye on them so they don’t dry out.
What to Serve With Red Velvet Cheesecake Brownies?
Red Velvet Cheesecake Brownies are rich, creamy, and sweet, so they pair best with simple drinks and fresh sides. They already bring plenty of flavor, color, and creaminess, so you don’t need much to make them feel like a complete dessert.
- Coffee: Coffee balances the sweetness and pairs beautifully with the chocolate and cream cheese flavors. It’s especially nice with a chilled brownie that has rested for a few minutes.
- Cold milk: Milk is classic with brownies, and it works especially well with the rich cheesecake swirl and soft red velvet base. Simple, but perfect.
- Hot chocolate: Hot chocolate makes these brownies feel extra indulgent. This is a cozy pairing for winter dessert trays, holiday movie nights, or any time you want full chocolate comfort.
- Fresh strawberries: Strawberries add freshness and look beautiful beside the red velvet color. They make the dessert plate feel a little fancy without much effort.
- Raspberries: Raspberries bring a tart contrast that balances the sweet, creamy brownies. They’re especially nice if you want something bright on the side.
- Vanilla ice cream: A small scoop of vanilla ice cream turns one brownie square into a full dessert plate. The cold creaminess with the brownie and cheesecake swirl is so good.
- Whipped cream: A light dollop of whipped cream adds softness without making the dessert feel too heavy. It’s simple and pretty.
FAQ
Can I make Red Velvet Cheesecake Brownies ahead of time?
Yes, these brownies are great for making ahead. Bake and chill them, then slice before serving.
Can I freeze Red Velvet Cheesecake Brownies?
Yes, you can freeze them for up to 2 months. Wrap individual squares tightly and thaw them in the refrigerator before serving.
Why did my cheesecake swirl sink?
The cheesecake mixture may have been too thin, or it may have been swirled too deeply into the batter. Dollop it on top and swirl gently for the prettiest marbled look.
Can I skip the red food coloring?
Yes, you can skip it, but the brownies will not have the classic red velvet look. The flavor will still be delicious.
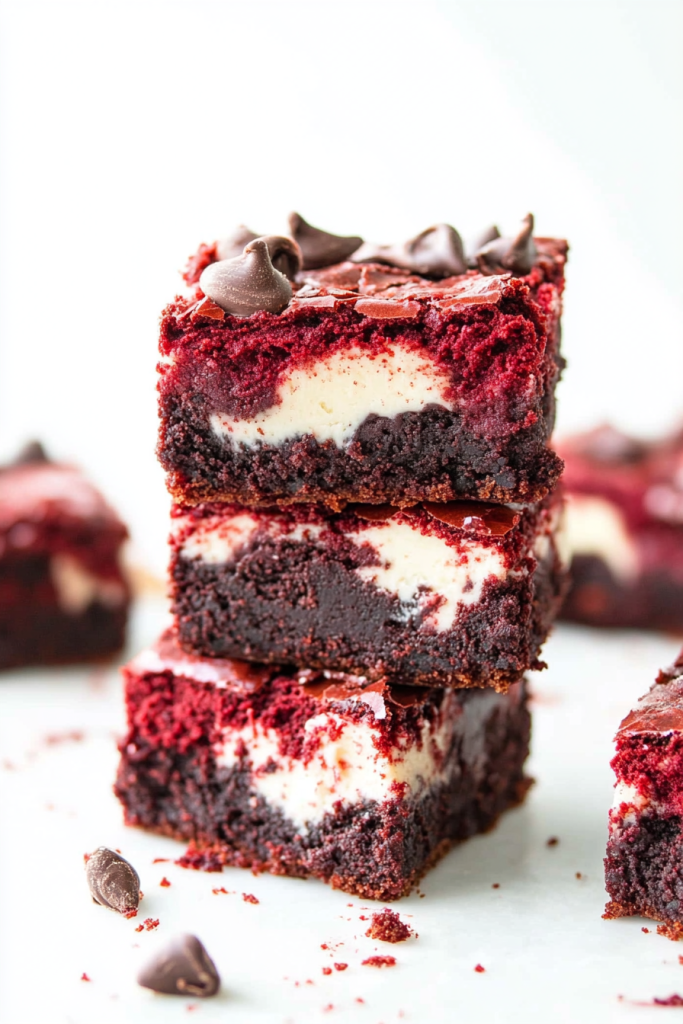
These Red Velvet Cheesecake Brownies are rich, creamy, colorful, and just dramatic enough to make dessert feel special. The red velvet brownie layer is soft and chocolatey, while the cheesecake swirl adds that sweet, tangy creaminess that makes every bite feel a little more exciting.
I love that they look impressive but don’t ask too much from you. One pan, one swirl, one gorgeous dessert. That’s the kind of baking win I’ll happily take.
So tell me — would you keep these Red Velvet Cheesecake Brownies classic, or would you add white chocolate chips, peppermint, sprinkles, or fresh berries on the side? I’d love to know how you’d make them your own.
Red Velvet Cheesecake Brownies
Ingredients
For the Red Velvet Brownie Layer
- ½ c butter
- 2 oz dark chocolate coarsely chopped
- 1 c granulated sugar
- 2 large eggs
- 1 tsp vanilla extract
- 1 ½ tsp red food coloring
- ⅔ c all-purpose flour
- ¼ tsp salt
For the Cheesecake Swirl
- 8 oz cream cheese room temperature
- ⅓ c granulated sugar
- 1 large egg
- ½ tsp vanilla extract
Instructions
Step 1: Prepare the Oven and Pan
- Preheat the oven to 350°F.
- Butter the bottom and sides of an 8-inch metal baking pan.
- Place a long piece of parchment paper in the bottom of the pan, allowing it to extend up two sides and overhang slightly on both ends.
- Butter the parchment paper.
Step 2: Melt the Butter and Chocolate
- In a small heatproof bowl, combine the butter and chopped dark chocolate.
- Melt together until smooth, stirring as needed.
- Set aside to cool for a few minutes.
Step 3: Prepare the Brownie Batter
- In a large mixing bowl, whisk together the granulated sugar, eggs, vanilla extract, and red food coloring.
- Add the cooled chocolate mixture.
- Stir until smooth and fully combined.
Step 4: Add the Dry Ingredients
- Add the all-purpose flour and salt to the batter.
- Stir until just combined and no dry streaks remain.
- Do not overmix.
Step 5: Spread the Batter
- Pour the red velvet brownie batter into the prepared pan.
- Spread it into an even layer.
Step 6: Prepare the Cheesecake Mixture
- In a medium mixing bowl, beat the room-temperature cream cheese, granulated sugar, egg, and vanilla extract until smooth.
Step 7: Add the Cheesecake Swirl
- Distribute the cheesecake mixture in 8 dollops over the brownie batter.
- Use a knife or spatula to gently swirl the cheesecake mixture into the brownie batter.
- Do not over-swirl.
Step 8: Bake
- Bake for 35 to 40 minutes, or until the brownies and cheesecake layer are set.
- A knife inserted into the cheesecake mixture should come out clean, and the edges should be lightly browned.
Step 9: Cool
- Place the pan on a cooling rack.
- Allow the brownies to cool completely in the pan.
Step 10: Remove and Slice
- Use the parchment paper overhang to lift the cooled brownies from the pan.
- Transfer to a cutting board.
- Slice into squares and serve.
Notes