All-purpose flour, yeast, soy milk, sesame oil, cabbage, vermicelli noodles, carrots, scallions, soy sauce, and sesame seeds.
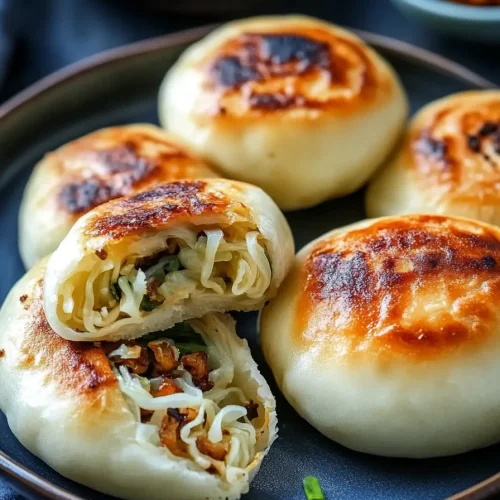
I have a soft spot for food that feels like it came from a busy street stall, especially the kind you eat while it’s still too hot because waiting feels impossible. These Pan-Fried Cabbage and Noodle Buns give me exactly that feeling. They’re golden and crisp on the outside, chewy and tender inside, and filled with a savory cabbage and vermicelli noodle mixture that tastes cozy, simple, and honestly a little addictive.
These Pan-Fried Cabbage and Noodle Buns are inspired by those night market-style buns from Taipei—the kind you buy hot from a stall, hold carefully in a paper bag, and somehow still burn your fingers on because excitement wins over common sense. The filling is made with shredded cabbage, vermicelli noodles, carrots, scallions or chives, soy sauce, sesame oil, roasted sesame seeds, and salt. It’s humble stuff, but together? So good. The cabbage softens, the noodles turn chewy, the carrots add sweetness, and the sesame oil makes the whole kitchen smell like something wonderful is about to happen.
The dough is homemade, which might sound like a big project at first, but don’t panic. It’s made with all-purpose flour, instant yeast, sugar, salt, sesame seeds, warm soy milk, and oil. After resting, it becomes soft and stretchy enough to roll into wrappers. Then each wrapper gets filled, pleated, sealed, pan-fried until golden, and steamed with a splash of water so the inside cooks through. That fry-then-steam method is the magic here. You get the crisp bottom and the chewy bun texture. Best of both worlds, right?
I won’t pretend these cabbage and noodle buns are a five-minute snack. They take time. You’re making dough, cooking filling, rolling wrappers, folding buns, and cooking them in batches. But to me, this is the good kind of kitchen time. The kind where you put on music, flour gets on your shirt somehow, and by the end you feel like you actually made something with your hands. It’s not perfect, but it’s satisfying.
And the freezer situation? This is where these buns become dangerously useful. Once cooked, you can freeze them and reheat them later without thawing. That means future-you can pull out a few Pan-Fried Cabbage and Noodle Buns, crisp them back up, and have something warm and homemade without starting from scratch. I love that. A freezer bag full of buns feels like a tiny insurance policy against boring meals.
These buns are also plant-based if you use soy milk or another non-dairy milk, which makes them great for vegan meals, snack plates, lunchboxes, appetizers, or cozy dinners. Serve them hot with a dipping sauce made from soy sauce, a little sugar, chili sauce, and sesame seeds. Or eat one plain straight from the pan after waiting exactly not long enough. We’ve all been there.
So if you’re craving crispy-bottomed buns with a soft wrapper and savory vegetable noodle filling, these Pan-Fried Cabbage and Noodle Buns are such a fun recipe to try. They’re a little rustic, a little nostalgic, and very much worth the effort.
These Pan-Fried Cabbage and Noodle Buns remind me of wandering through night markets, where every few steps there’s another smell trying to convince you that yes, you absolutely need one more snack. There’s sizzling dough, steam rising from carts, people lining up with bags in hand, and that very specific joy of eating something hot while standing on the side of a busy street. It’s chaotic, but in the best way.
The inspiration for these buns comes from favorite food stall and night market buns in Taipei. The kind you remember long after the trip is over. I love that detail of packing a dozen in a suitcase, bringing them home, freezing them, and reheating them later when the craving hits. That feels so real to me, because food memories don’t always stay where they started. Sometimes they follow you home. Sometimes they end up in your freezer next to frozen peas and last week’s good intentions.
The first time I made Pan-Fried Cabbage and Noodle Buns at home, I was mostly nervous about the folding. I can make dough, I can cook filling, but pleating buns? That’s where my confidence gets a little wobbly. The first few looked… let’s say “handmade with enthusiasm.” One had a lopsided top. One was clearly overfilled. Another looked like it had given up halfway through. But once they hit the pan and started browning, I stopped worrying so much.
That’s the thing with homemade cabbage noodle buns: they don’t need to look like they came from a professional stall to taste amazing. The dough puffs and crisps, the filling gets warm and savory, and suddenly the imperfect folds don’t matter. Actually, I kind of like them. They make the buns feel personal, like each one had its own tiny adventure before dinner.
The filling is the part that really makes me happy. Cabbage, vermicelli noodles, carrots, scallions, soy sauce, sesame seeds, and toasted sesame oil don’t sound flashy, but together they’re deeply comforting. The noodles make the filling chewy and satisfying, the cabbage gives it softness, the carrot adds sweetness, and the sesame oil brings that nutty smell that makes everyone wander into the kitchen asking, “What are you making?”
For me, Pan-Fried Cabbage and Noodle Buns feel like travel, memory, and comfort food all wrapped into one. They’re not fancy. They’re not fast. But they’re cozy, freezer-friendly, and so rewarding. Ever tried making a street food favorite at home and felt weirdly proud afterward? That’s exactly the feeling here.

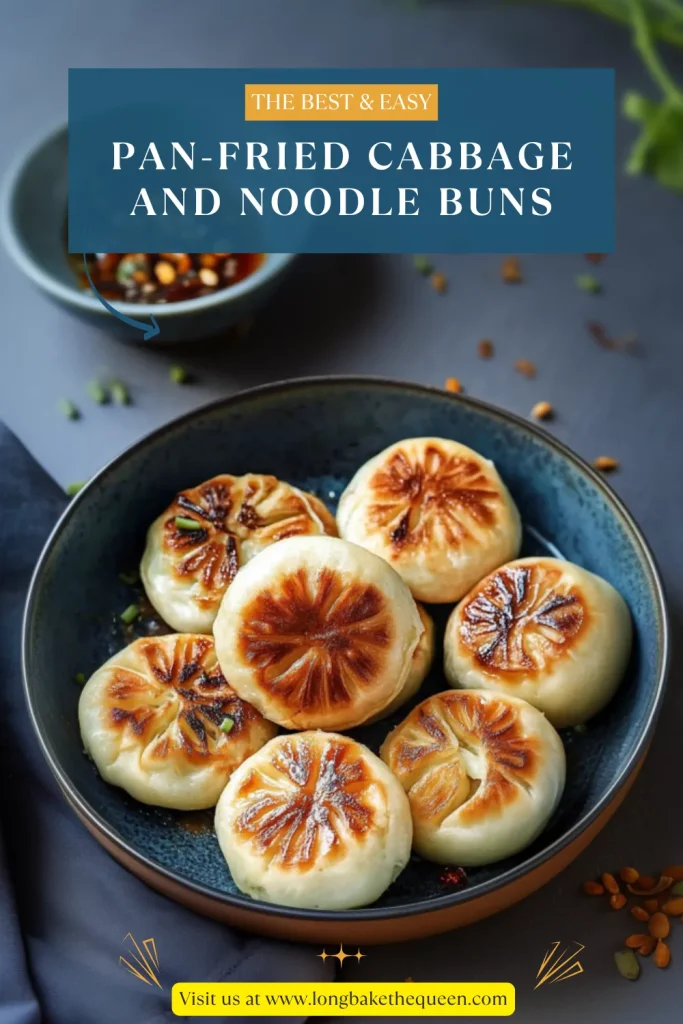
Why you’ll Love these Pan-Fried Cabbage and Noodle Buns?
You’ll love these Pan-Fried Cabbage and Noodle Buns because they have that perfect texture contrast: crisp on the bottom, chewy in the wrapper, and soft and savory inside. The buns are pan-fried first to create a golden crust, then steamed with a little water so the dough cooks through and stays tender. It’s such a simple technique, but it makes the buns taste like something you’d happily wait in line for.
The filling is hearty without being heavy. You get shredded cabbage, vermicelli noodles, carrots, scallions or chives, soy sauce, roasted sesame seeds, salt, and toasted sesame oil. The cabbage cooks down into something tender and slightly sweet, the noodles make every bite more satisfying, and the sesame oil ties it all together with that deep, nutty flavor. These vegetable noodle buns feel cozy enough for dinner but snackable enough that you may keep grabbing “just one more.”
The homemade dough also gives these buns their charm. It’s soft, flexible, and lightly flavored with roasted sesame seeds. I like that little sesame detail because it makes the wrapper taste more interesting without overpowering the filling. The dough does need resting time, but that’s mostly hands-off. You’re not working the whole time. You’re just letting the yeast do its little invisible job.
These pan-fried vegetable buns are also wonderfully freezer-friendly. That might be my favorite practical part. After cooking, you can freeze them on a tray until firm, then store them in a bag and reheat them straight from frozen. No thawing. No big plan. Just hot buns when you want them. That feels like a small gift from past-you to future-you, and I fully support that kind of meal prep.
You can also decide whether you want larger or smaller buns. Divide the dough into 12 pieces for bigger, meal-sized buns, or 16 pieces for smaller snack-style buns. I usually like the smaller ones because they’re easier to freeze and reheat, but the bigger ones are great when you want something more filling. There’s no wrong answer, really. Just different bun moods.
Most of all, these Pan-Fried Cabbage and Noodle Buns are fun. They’re hands-on, a little messy, and very rewarding. They make the kitchen smell amazing, they crisp up beautifully, and they give you leftovers you’ll actually look forward to. Do you agree that the best comfort foods are the ones that take a little time but give back way more?
Ingredient Notes
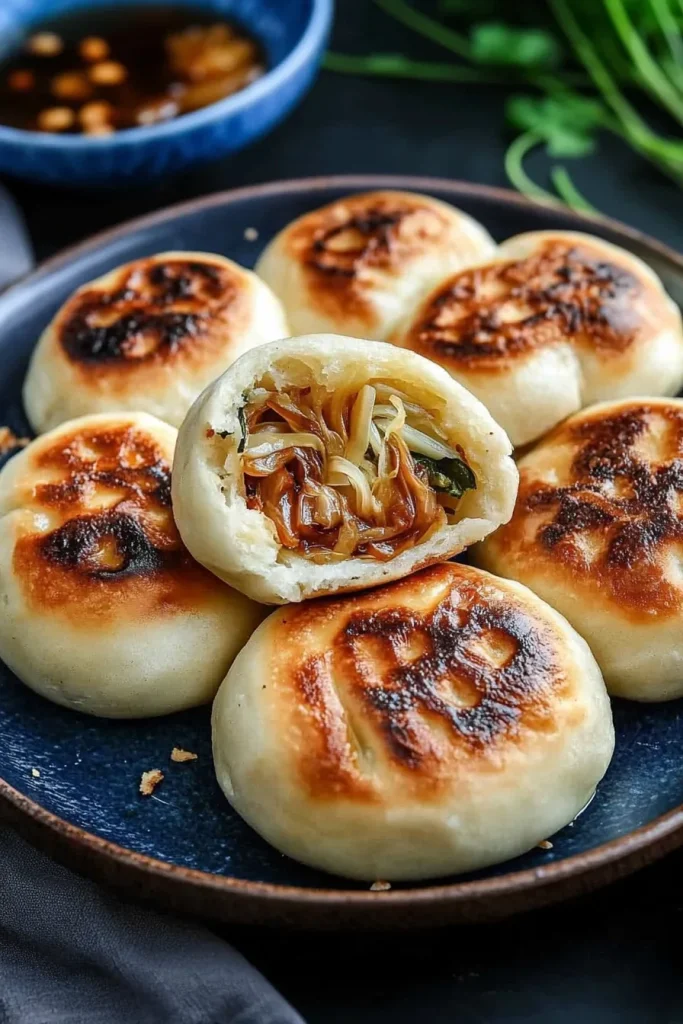
The ingredients for Pan-Fried Cabbage and Noodle Buns are simple, but they all do something important. The dough needs flour, yeast, sugar, salt, sesame seeds, warm soy milk, and oil to become soft and chewy. The filling uses cabbage, vermicelli noodles, carrots, scallions or chives, soy sauce, sesame seeds, salt, and sesame oil for that savory, cozy center. Nothing here is too fancy, but together they make a bun that tastes like it came from a very good snack stall.
- All-purpose flour: All-purpose flour gives the dough structure. It creates a wrapper that is soft enough to fold but strong enough to hold the cabbage noodle filling. When rolling the wrappers, use a little flour to prevent sticking, but don’t go overboard. Too much flour can make the dough dry, and dry dough is not exactly cooperative.
- Instant dry yeast: Instant dry yeast helps the dough rise and gives the buns that soft, chewy bite. It mixes right into the dry ingredients, which keeps things easy. If you open a pack and don’t use all of it, storing the extra yeast in the freezer helps keep it fresh. I always love a tiny practical tip that saves future baking drama.
- Sugar: Sugar helps feed the yeast and gives the dough a little balance. The buns won’t taste sweet, so don’t worry. It just helps the dough rise nicely and brown better during pan-frying. Small ingredient, useful job.
- Salt: Salt adds flavor to both the dough and filling. Without it, the buns can taste a bit flat because cabbage and noodles are mild on their own. Taste the filling before wrapping and adjust if needed. Once it’s sealed inside the dough, it’s harder to fix.
- Roasted sesame seeds: Roasted sesame seeds go into both the dough and filling. They add a nutty flavor and a little texture. They’re not loud, but they make the buns taste more complete. Sesame seeds are like tiny flavor confetti, but more useful.
- Warm soy milk or other non-dairy milk: Warm soy milk helps hydrate the dough and supports the yeast. It should be warm, not hot. If it’s too hot, it can hurt the yeast; if it’s too cold, the dough may rise slowly. Other non-dairy milks can work too, but soy milk gives the dough a nice softness.
- Toasted sesame oil or neutral oil: Oil keeps the dough soft and easier to work with. Toasted sesame oil adds a stronger nutty flavor, while neutral oil keeps the dough more mild. Use toasted sesame oil if you love that deeper sesame flavor. Use neutral oil if you want the filling to carry most of the flavor.
- Neutral oil for cooking: Neutral oil is used to cook the filling and pan-fry the buns. Canola oil, vegetable oil, avocado oil, or another mild oil all work. You want the oil to help brown the buns without distracting from the sesame, cabbage, and soy sauce flavors.
- Shredded cabbage: Cabbage is the heart of the filling. It starts as a big pile, but it cooks down a lot, so don’t be alarmed if the pan looks very full at first. The cabbage becomes tender, slightly sweet, and savory once mixed with the noodles and seasonings. Humble? Yes. Boring? Not here.
- Vermicelli noodles: Vermicelli noodles add chewiness and make the filling more satisfying. After soaking, chop them into small 1/2-inch pieces so they’re easier to mix and wrap. Long noodles inside a bun can turn folding into a tiny wrestling match, and nobody needs that.
- Carrot: Finely shredded or grated carrot adds color, sweetness, and texture. It brightens the filling and balances the cabbage and soy sauce. Plus, that little pop of orange inside the bun is just nice.
- Scallions or chives: Scallions or chives add fresh onion flavor. Chives are a little stronger and more aromatic, while scallions are milder and easy to find. Either works beautifully in these cabbage and noodle buns, so use what you have.
- Soy sauce: Soy sauce adds savory depth to the filling. It pairs well with the noodles, cabbage, sesame oil, and scallions. You can use regular soy sauce or low-sodium soy sauce if you want more control over the salt.
- Toasted sesame oil for filling: Toasted sesame oil gives the filling that warm, nutty aroma that makes these buns smell so good. A little goes a long way, but it really helps the filling taste rich and rounded.
How to Make Pan-Fried Cabbage and Noodle Buns?
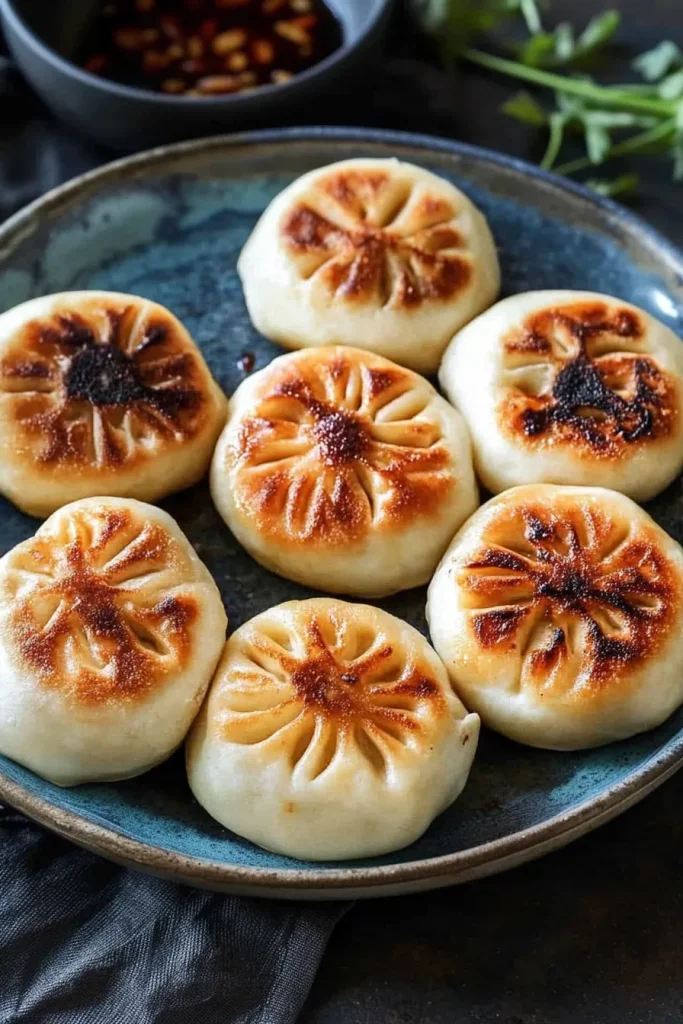
Making Pan-Fried Cabbage and Noodle Buns is easiest when you break it into parts. Make the dough. Let it rise. Cook and cool the filling. Roll the wrappers. Fill and seal the buns. Pan-fry, then steam. See? Not scary. Just a few steps lined up like a little kitchen parade. It takes time, yes, but it’s not complicated if you move one step at a time.
Step 1: Make the Dough
In a large bowl, mix the all-purpose flour, instant dry yeast, sugar, salt, and roasted sesame seeds. Make a well in the center, then pour in the warm soy milk and oil while mixing. Keep mixing until a dough forms. At first it may look rough and shaggy, but don’t worry. Dough often starts out looking like it has no plan, then suddenly pulls itself together.
Step 2: Let the Dough Rise
Shape the dough into a ball and place it in a bowl. Cover the bowl with a damp towel and let the dough rest for at least 2 hours, or until it rises. This resting time gives the yeast a chance to work and makes the dough softer and easier to roll. If your kitchen is cool, the dough may take a little longer. Dough can be dramatic, but we accept it.
Step 3: Soak the Vermicelli Noodles
Soak the dry vermicelli noodles in boiling hot water for 7 to 8 minutes, or until softened and cooked. Drain them well, then roughly chop them into small 1/2-inch pieces. This makes the filling easier to mix and much easier to wrap. Long noodles are great in soup, but inside buns they tend to act like escape artists.
Step 4: Cook the Vegetables
Heat a pan and add 1 tablespoon neutral oil. Once the oil is hot, add the scallions or chives, shredded carrots, and shredded cabbage. Cook over medium-high heat for 4 to 5 minutes, stirring often, until the carrots are tender and the cabbage has softened. The cabbage will shrink down, so if it looks like too much at first, just give it time.
Step 5: Add Noodles and Seasoning
Add the chopped vermicelli noodles to the cooked vegetables. Pour in the soy sauce, salt, roasted sesame seeds, and toasted sesame oil. Mix everything well with a wooden spoon or spatula and cook for another 2 to 3 minutes over medium heat. Taste and adjust the seasoning if needed. This is the moment to make sure the filling tastes good before it gets wrapped up and hidden away.
Step 6: Drain and Cool the Filling
Transfer the filling to a strainer and let any excess liquid drain away. This matters more than it sounds. Wet filling can make the wrappers soggy and harder to seal. Let the filling cool while you roll the dough. Warm filling plus soft dough can get sticky fast, and sticky dough has a talent for testing patience.
Step 7: Divide the Dough
Take the risen dough out of the bowl. Gently stretch it into a large ring by making a hole in the center of the dough ball and widening it. Slice the dough into 12 or 16 pieces. For 12 larger buns, each piece will be around 50 g. For 16 smaller buns, each piece will be around 38 g. Roll each piece into a ball.
Step 8: Roll the Wrappers
Press one dough ball down on your work surface and lightly flatten it. Sprinkle a little flour on top and lightly flour your rolling pin. Roll forward and backward, rotate the dough 90 degrees, and repeat until you have a wrapper. For smaller 38 g wrappers, aim for about 3 to 4 inches wide. For larger 50 g wrappers, aim for about 4 to 5 inches wide. If they aren’t perfectly round, please don’t stress. Homemade buns do not need perfect geometry.
Step 9: Keep the Wrappers Covered
Place the rolled wrappers on a tray. Space them apart if possible. If you stack them, dust each layer with flour and keep the stacks to about 4 to 5 wrappers so they don’t stick together. Cover with a dry towel to keep them from drying out. If they’ll sit for more than 30 minutes, it’s better to spread them out instead of stacking them.
Step 10: Fill the Buns
Place one wrapper in your hand or on the counter and add 2 to 3 tablespoons of filling to the center. Try not to overfill, even though it’s tempting. Too much filling makes sealing harder, and the bun may open during cooking. A generous but reasonable scoop is the goal. Very adult of us, I know.
Step 11: Seal the Buns
Pleat the edges of the wrapper with one hand while pinching the folds together with the other. Work around the bun until the filling is enclosed, then pinch and twist the top to seal it. This step takes practice. The first few might look rustic, and that’s completely fine. Rustic still tastes good. Sometimes rustic tastes better because you’re less stressed.
Step 12: Flatten and Cover
Place the sealed bun on a flat surface and gently press down on the top to flatten it slightly. Transfer it back to the tray and cover it with a towel so it doesn’t dry out while you finish the rest. Repeat with the remaining wrappers and filling. After a few buns, you’ll probably find your rhythm.
Step 13: Pan-Fry the Buns
Heat a pan with a lid and add 1 tablespoon oil for every 4 buns. When the oil is hot, place the buns in the pan crease-side down first and lightly press them down. Cook over medium heat for 4 to 5 minutes, or until the bottoms are golden brown and crisp. Flip and cook the other side until golden. Don’t crowd the pan too much, because the buns need space to brown.
Step 14: Steam the Buns
Have the lid ready before adding water. Using the lid as protection, carefully pour 4 tablespoons of water into the pan for every 4 buns, then cover immediately. The water may splatter, so be careful. Let the buns steam for about 5 to 6 minutes, or until the water evaporates. This finishes cooking the dough and gives the wrapper that chewy inside.
Step 15: Serve Hot
Remove the buns from the pan and repeat with the remaining batches. Serve these Pan-Fried Cabbage and Noodle Buns while they’re hot and crisp. They’re delicious on their own, but I love them with a quick dipping sauce made from soy sauce, sugar, chili sauce, and sesame seeds. That salty-sweet-spicy dip really brings everything together.
Storage Options
Pan-Fried Cabbage and Noodle Buns are excellent for storing, which is one of the reasons I love them so much. This recipe makes a generous batch, and while you could eat them all fresh, it’s also very satisfying to freeze some for later. A homemade bun waiting in the freezer feels like a tiny rescue plan for busy days, lazy lunches, or late-night cravings. Not dramatic. Just true.
- Refrigerator: Store cooked Pan-Fried Cabbage and Noodle Buns in an airtight container in the refrigerator for up to 5 days. Let them cool before storing so trapped steam doesn’t make them soggy. To reheat, pan-fry them again with a small splash of water, warm them in an oven toaster on low heat, or microwave them in a bowl with a splash of water. Pan-frying gives the best crisp texture, but the microwave is fine when life is moving fast.
- Freezer: Cooked buns freeze beautifully. Place them on a tray in a single layer, making sure they don’t touch. Freeze for 5 to 6 hours, or until firm. Once frozen solid, transfer them to a plastic or silicone freezer bag. This keeps them from sticking together, so you can reheat one bun or a few at a time. Very convenient. Almost too convenient.
- Reheating from frozen: You do not need to thaw frozen cabbage noodle buns before reheating. Reheat them straight from frozen in a pan, toaster oven, or steamer. For the best texture, pan-fry them with a little oil to crisp the bottom, then add a splash of water and cover so the inside heats through.
- Pan reheating: To reheat in a pan, add a small amount of oil and place the buns over medium heat. Let the bottoms crisp, then add a splash of water and cover until warmed through. This method brings back the crispy-chewy texture closest to freshly cooked buns, which is ideal if you have a few extra minutes.
- Microwave reheating: For the fastest option, place a bun in a microwave-safe bowl with a small splash of water and cover loosely. Microwave until warmed through. The bun will be softer and won’t have the same crisp bottom, but it still works. Sometimes lunch is not about perfection. Sometimes it’s about getting food into your face before the next thing happens.
- Make-ahead tip: You can prepare the filling a day ahead and refrigerate it until ready to assemble. Just make sure it is well drained and fully cooled before wrapping. You can also cook the full batch and freeze the buns, which is my favorite option because it turns future cravings into almost no work.
Variations & Substitutions
These Pan-Fried Cabbage and Noodle Buns are wonderful as written, but they’re also flexible. Once you understand the dough, filling, and cooking method, you can adjust the ingredients based on what you have or what you’re craving. Add mushrooms, switch the cabbage, make them spicy, use glass noodles, add tofu, or make larger buns. The recipe gives you a foundation, not a strict rulebook.
- Use napa cabbage: Napa cabbage works well instead of regular green cabbage. It has a softer texture and a slightly sweeter flavor. Since napa cabbage releases more water, cook it well and drain the filling thoroughly before wrapping the buns.
- Add mushrooms: Finely chopped shiitake, cremini, or oyster mushrooms add a deeper savory flavor to the filling. Cook them with the cabbage and carrots so they release moisture before wrapping. Mushrooms make these vegetable noodle buns taste even heartier and more satisfying.
- Make them spicy: Add chili oil, chili crisp, white pepper, or extra chili sauce to the filling or dipping sauce. A little heat works beautifully with cabbage, noodles, and sesame oil. Just start small. Chili crisp can be sneaky. One spoonful feels cute, two spoonfuls might start a whole situation.
- Use glass noodles: If you don’t have vermicelli noodles, glass noodles or mung bean noodles can work well. Soak, drain, and chop them the same way so they mix evenly into the filling. That chewy texture is perfect inside pan-fried buns.
- Add tofu: Crumbled firm tofu can be added to the filling for extra protein. Press the tofu first to remove moisture, then cook it with the vegetables. This keeps the buns plant-based while making them a little more filling.
- Use dairy milk if preferred: The recipe uses warm soy milk or another non-dairy milk, but dairy milk can work if you are not keeping the buns vegan. The dough should still turn out soft and easy to shape.
- Swap scallions for chives: Scallions and chives both work well. Chives have a stronger aroma and a more classic savory bun flavor, while scallions are mild and easier to find. Use whichever one feels right, or whichever one is already in your fridge looking useful.
- Add ginger or garlic: Fresh minced ginger or garlic can add more flavor to the filling. Cook them briefly in oil before adding the vegetables so their flavor opens up. Just don’t burn the garlic. Burnt garlic has a very loud personality, and not in a charming way.
- Make larger buns: Divide the dough into 12 pieces instead of 16 if you want larger buns. These feel more like a meal and work well when you want something filling. Roll the wrappers to about 4 to 5 inches wide and use slightly more filling.
- Make smaller snack buns: Divide the dough into 16 pieces for smaller buns. These are great for appetizers, lunchboxes, snack platters, and freezing in smaller portions. They’re also easy to eat one after another, which is both the problem and the joy.
What to Serve With Pan-Fried Cabbage and Noodle Buns?
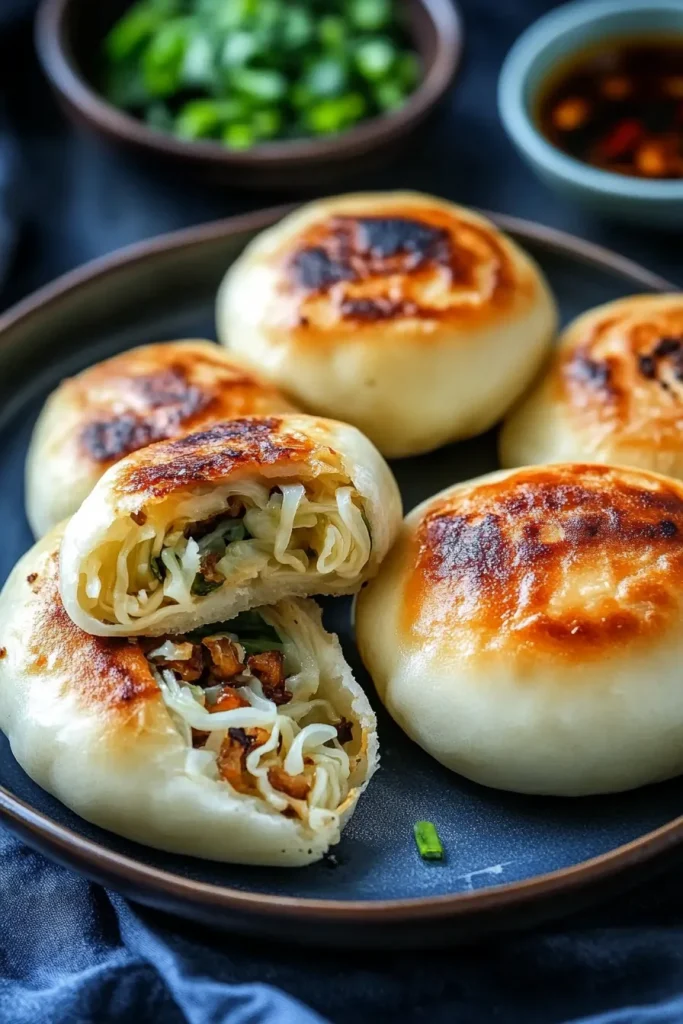
Pan-Fried Cabbage and Noodle Buns can be served as a snack, appetizer, side dish, or light meal. Since they’re savory, crispy, and filled with vegetables and noodles, they pair beautifully with dipping sauces, soups, fresh salads, pickles, greens, and tea. I like serving them hot with something bright or tangy on the side because it balances the crispy pan-fried dough and makes the whole plate feel complete.
- Soy chili dipping sauce: A simple sauce made with soy sauce, a little sugar, chili sauce, and sesame seeds is perfect for these buns. It adds salty, sweet, spicy, and nutty flavors in one small bowl. You can also add rice vinegar or sesame oil if you want a little more depth.
- Chili oil or chili crisp: If you like heat, serve these Pan-Fried Cabbage and Noodle Buns with chili oil or chili crisp. The spicy oil pairs beautifully with the chewy dough and savory cabbage filling. Just a little spoonful can wake up the whole bite.
- Hot and sour soup: Hot and sour soup makes a cozy pairing. The tangy broth balances the richness of the pan-fried exterior and turns the buns into a more complete meal. It feels especially nice on a cool evening or a rainy day.
- Simple cucumber salad: Cucumber salad with rice vinegar, sesame oil, salt, and a little sugar adds cool crunch beside the hot buns. It’s fresh, quick, and especially good if you’re serving the buns as a main dish.
- Pickled vegetables: Pickled carrots, daikon, cucumbers, or cabbage add brightness and acidity. They cut through the richness of the pan-fried dough and make the meal feel lighter. Also, pickles just make plates more fun. I stand by this.
- Steamed greens: Serve the buns with steamed bok choy, Chinese broccoli, spinach, or napa cabbage. A little garlic, soy sauce, or sesame oil gives the greens enough flavor without competing with the buns.
- Rice porridge or congee: Congee is soft, warm, and comforting, which makes it a lovely contrast to crispy buns. This pairing feels especially cozy for a slow breakfast, lunch, or rainy evening meal.
- Fried rice: If you want a more filling meal, serve the buns with vegetable fried rice. Yes, it’s carb-on-carb, but sometimes that’s exactly the mood. Add plenty of vegetables if you want to pretend balance was the plan all along.
- Tea: Hot tea pairs beautifully with cabbage and noodle buns. Jasmine tea, oolong tea, green tea, or black tea all work well. The tea helps balance the savory richness and makes the meal feel calm and cozy.
- Fresh fruit: Fresh fruit like oranges, pineapple, grapes, or sliced melon makes a refreshing side. The juicy sweetness balances the savory buns and keeps the meal from feeling too heavy.
FAQ
Why is my filling too wet?
The filling may be too wet if the cabbage released a lot of moisture or if the noodles were not drained well. After cooking the filling, transfer it to a strainer and let the excess liquid drain before wrapping. This helps prevent soggy wrappers and makes the buns easier to seal.
Why are my buns opening while cooking?
Buns may open if they are overfilled, if the edges were not sealed tightly, or if the filling was too wet. Use about 2 to 3 tablespoons of filling, pinch and twist the top firmly, and make sure the filling is cool and well drained before wrapping.
Can I bake these instead of pan-frying?
You can bake them, but the texture will be different. Pan-frying gives the buns their signature golden crisp bottom, while steaming keeps the inside chewy. Baking may make them drier and less crisp unless they are brushed with oil.
How do I know when the buns are fully cooked?
The buns are done when both sides are golden and the dough has cooked through after steaming. The steaming step usually takes 5 to 6 minutes, or until the water evaporates. The outside should have crisp golden spots, and the wrapper should feel tender and chewy.
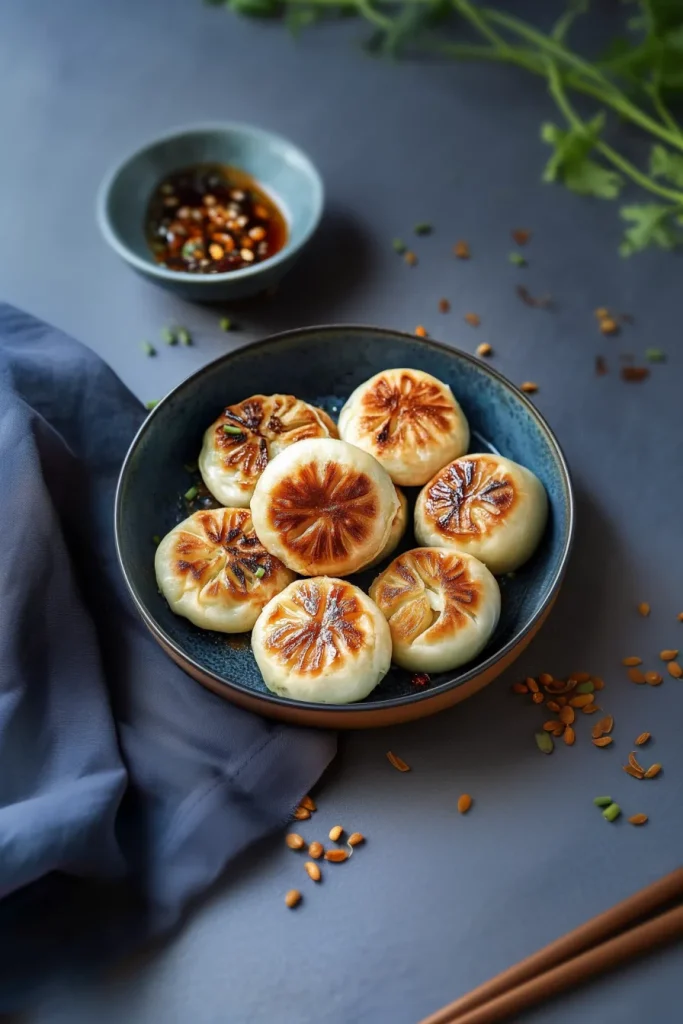
These Pan-Fried Cabbage and Noodle Buns are crispy, chewy, savory, and full of cozy night market-style flavor. The homemade dough wraps around cabbage, vermicelli noodles, carrots, scallions, soy sauce, sesame oil, and sesame seeds, then cooks until golden outside and tender inside. They take time, yes, but the reward is a batch of hot buns you can enjoy now and freeze for later.
Serve them with soy chili dipping sauce, enjoy them as a snack or meal, and tuck a few into the freezer for future cravings. So tell me—are you making these Pan-Fried Cabbage and Noodle Buns for dinner, meal prep, or your own cozy homemade night market moment? Can’t wait to hear what you think!
Pan-Fried Cabbage and Noodle Buns
Ingredients
For the Dough
Dry Ingredients
- 3 cups all-purpose flour 375 g
- 2 tsp instant dry yeast
- 2 tbsp sugar
- 1/2 tsp salt
- 1 tbsp roasted sesame seeds
Wet Ingredients
- 1 cup warm soy milk or other non-dairy milk
- 1 tbsp toasted sesame oil or neutral oil
For the Filling
- 1 tbsp neutral oil for cooking
- 6 cups raw shredded cabbage from approximately 1/2 large head of cabbage
- 3.5 oz uncooked vermicelli noodles 100 g total
- 1 cup finely shredded or grated carrot 150 g
- 1/2 cup chopped scallions or chives 25 g
- 1 tbsp soy sauce
- 2 tsp salt or to taste
- 1 tbsp roasted sesame seeds
- 2 tbsp toasted sesame oil
For Cooking the Buns
- Neutral oil as needed, approximately 1 tbsp for every 4 buns
- Water as needed, approximately 1 tbsp for each bun
Instructions
Prepare the Dough
- In a large mixing bowl, combine the all-purpose flour, instant dry yeast, sugar, salt, and roasted sesame seeds.
- Create a well in the center of the dry ingredients.
- Pour the warm soy milk and toasted sesame oil into the well while mixing.
- Continue mixing until a dough forms.
- Shape the dough into a ball.
- Place the dough in a bowl and cover it with a damp towel.
- Allow the dough to rest and rise for at least 1 to 2 hours, or until it has increased in size and become soft and elastic.
Prepare the Filling
- Place the dry vermicelli noodles in a bowl and cover them with boiling hot water.
- Allow the noodles to soak for 7 to 8 minutes, or until softened and cooked.
- Drain the noodles thoroughly.
- Roughly chop the noodles into small pieces, approximately 1/2 inch long.
- Heat a pan over medium-high heat.
- Add 1 tbsp neutral oil to the pan.
- Once the oil is hot, add the chopped scallions or chives, shredded carrots, and shredded cabbage.
- Cook for 4 to 5 minutes, stirring frequently, until the carrots are tender and the cabbage has softened.
- Add the chopped vermicelli noodles to the pan.
- Add the soy sauce, salt, roasted sesame seeds, and toasted sesame oil.
- Stir well with a wooden spoon or spatula until the filling is evenly combined.
- Continue cooking for 2 to 3 minutes over medium heat.
- Taste the filling and adjust the seasoning if necessary.
- Transfer the filling to a strainer to drain any excess liquid.
- Set the filling aside to cool completely before assembling the buns.
Prepare the Wrappers
- Remove the rested dough from the bowl.
- Form the dough into a large ring by making a hole in the center of the dough ball and gently stretching it.
- Slice the dough into 12 or 16 equal pieces. For 12 buns, each piece should be approximately 50 g. For 16 buns, each piece should be approximately 38 g.
- Shape each dough portion into a ball.
- Lightly flour the work surface and rolling pin.
- Flatten one dough ball with the palm of your hand.
- Roll the dough forward and backward with the rolling pin.
- Rotate the dough 90 degrees and continue rolling until a wrapper forms.
- For smaller wrappers, roll each piece to approximately 3 to 4 inches in diameter. For larger wrappers, roll each piece to approximately 4 to 5 inches in diameter.
- Place the prepared wrappers on a tray.
- If stacking wrappers, lightly dust each layer with flour and limit each stack to 4 to 5 wrappers.
- Cover the wrappers with a dry towel to prevent them from drying out.
Assemble the Buns
- Place one wrapper on a clean work surface or in the palm of your hand.
- Add 2 to 3 tbsp of cooled filling to the center of the wrapper.
- Pleat the edges of the wrapper while pinching the folds together.
- Continue pleating around the wrapper until the filling is enclosed.
- Pinch and twist the top firmly to seal the bun.
- Place the sealed bun on a flat surface and gently press down to flatten it slightly.
- Transfer the bun to a tray and cover it with a towel.
- Repeat the process with the remaining wrappers and filling.
Cook the Buns
- Heat a pan with a lid over medium heat.
- Add approximately 1 tbsp neutral oil for every 4 buns.
- Once the oil is hot, place the buns in the pan with the creased side facing down.
- Lightly press each bun down.
- Cook for 4 to 5 minutes, or until the bottom develops a golden brown crust.
- Flip the buns and cook the opposite side until golden brown.
- Carefully pour approximately 1 tbsp water per bun into the pan. For 4 buns, use 4 tbsp water.
- Immediately cover the pan with the lid to contain the steam and prevent splashing.
- Steam the buns for 5 to 6 minutes, or until the water has evaporated and the dough is fully cooked.
- Remove the buns from the pan.
- Repeat the cooking process with the remaining buns, adding oil and water as needed for each batch.
- Serve the buns hot with a dipping sauce, if desired.
Notes