Double-Stuffed Oreo cookies, butter, chocolate pudding mix, cold milk, Cool Whip, cream cheese, and powdered sugar.
Some desserts just have that everyone is going to ask for the recipe feeling, and this Heavenly Oreo Dessert is absolutely one of them. It’s creamy, chocolatey, fluffy, and full of that cookies-and-cream flavor that somehow makes adults act like kids again. I mean, put Oreos, pudding, cream cheese, and Cool Whip in one pan and what do we expect? People are going to hover.
This Heavenly Oreo Dessert has all the layers I love in a no-bake treat. There’s a chunky Oreo crust made with Double-Stuffed Oreos and melted butter, then a sweet cream cheese filling, a smooth chocolate pudding layer, a fluffy Cool Whip topping, and extra Oreo crumbs sprinkled over the top. It’s not complicated. It’s not trying to be a delicate French pastry. It’s just cold, creamy, chocolatey comfort in a 9×13 pan, and honestly, I respect that.
I’ve made a few versions of this kind of no-bake Oreo dessert over the years, usually for the kind of gatherings where someone says, “Don’t make too much,” and then somehow the dessert table looks like a small wedding buffet. Sound familiar? This is the kind of recipe that fits right in at potlucks, birthdays, summer cookouts, family dinners, church suppers, or holiday tables when the oven is already busy doing seventeen other things.
What I like most is that this dessert feels nostalgic without being boring. Oreos and pudding remind me of childhood treats, but the cream cheese layer gives it a slightly richer, almost cheesecake-like taste. Not fancy exactly, but a little more grown-up. Like the dessert version of wearing nice earrings with your comfy clothes. Still relaxed, but with effort.
And because this Oreo pudding dessert needs to chill for at least 2 hours, it’s a great make-ahead option. You can put it together earlier, tuck it into the fridge, and let it firm up while you move on with your life. Or while you clean the kitchen. Or while you pretend not to keep opening the fridge to “check if it’s set.” I’ve done that. More than once.
This Heavenly Oreo Dessert serves 12, but I’ll be honest, serving sizes get a little blurry when Oreos are involved. Someone always wants “just a sliver,” and then another sliver, and then suddenly the pan looks suspiciously empty. No judgment. That’s usually how you know a dessert worked.
This Heavenly Oreo Dessert reminds me of those big family-style desserts that show up in a covered pan and instantly make everyone curious. Not the tiny, polished desserts that look too pretty to touch. I’m talking about the creamy, layered desserts that get served with a big spoon, passed around after dinner, and somehow taste even better when eaten from a paper plate at a backyard party.
The first time I made an Oreo layered dessert like this, I remember thinking it felt almost too easy. Crush cookies. Mix butter. Whisk pudding. Beat cream cheese. Layer it all together. Chill. That’s it? No oven timer? No cake sinking in the middle? No dramatic moment where I wonder if I forgot the baking powder? It felt suspiciously simple.
But then I sliced into it after it chilled, and there it was: the dark Oreo crust, the creamy white filling, the chocolate pudding, the fluffy topping, and those cookie crumbs on top. It looked like I had done much more work than I actually had. And I love recipes like that. They give you the joy of serving something pretty without making you earn a culinary degree first.
This Heavenly Oreo Dessert also reminds me of summer gatherings when nobody wants to turn on the oven because the kitchen already feels like it’s auditioning to be a sauna. A cold, no-bake dessert feels like a relief. You pull it from the fridge, slice it into squares, and everyone suddenly finds room for dessert. Even the person who said, “I’m full, just a small piece.” Sure. We all know how that story ends.
There’s something comforting about the combination of Oreos and chocolate pudding. It’s familiar. It’s sweet. It doesn’t ask you to analyze it. But then the cream cheese filling adds a little tang, which keeps the dessert from tasting like pure sugar. I wouldn’t say it’s balanced in a health-food way—let’s not get carried away—but flavor-wise, yes, it works really well.
And can we talk about crushing Oreos in a zip-top bag? It’s oddly satisfying. You seal the bag, grab a rolling pin, and just go for it. Not too fine, though. You want chunks and crumbs, not Oreo dust. I kind of like that the crust doesn’t have to be perfect. It makes the dessert feel homemade, in the best way. A little uneven. A little messy. Still totally delicious.

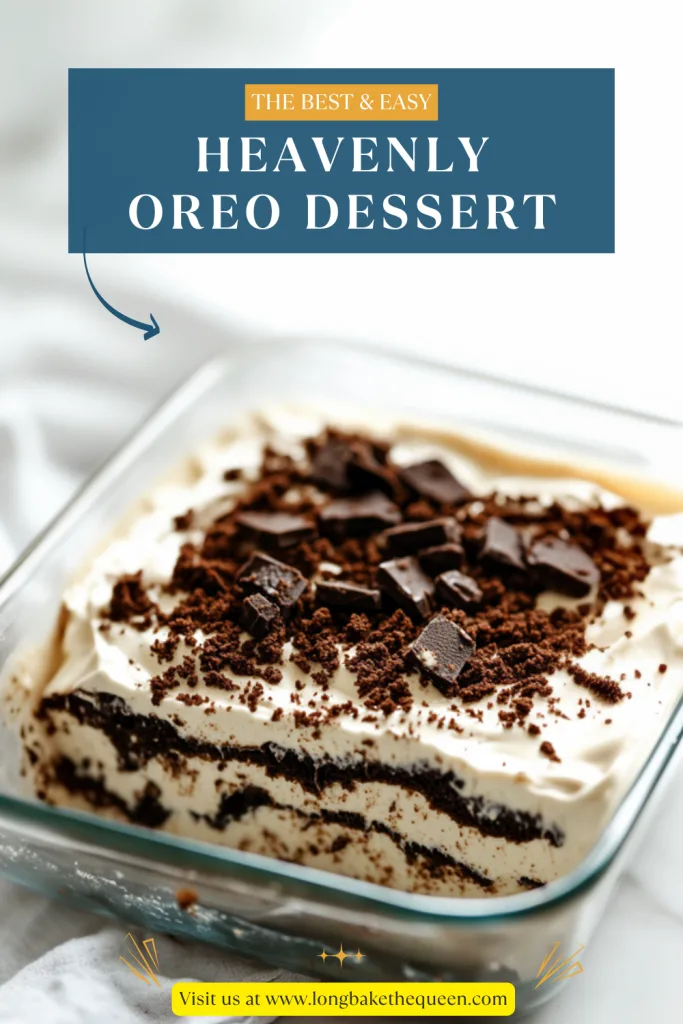
Why you’ll Love this Heavenly Oreo Dessert?
You’ll love this Heavenly Oreo Dessert because it gives you creamy, crunchy, fluffy, chocolatey layers without making you bake a thing. The Oreo crust is buttery and rich, the cream cheese layer is soft and sweet, the chocolate pudding brings that smooth cocoa flavor, and the Cool Whip topping keeps everything light. Every bite has a bit of cookie, cream, pudding, and fluff. Honestly, that’s a strong lineup.
One of the biggest reasons this no-bake Oreo dessert is such a keeper is convenience. You don’t need to preheat the oven, wait for cake layers to cool, or worry about anything cracking, sinking, or burning. It’s a fridge dessert, and sometimes that’s exactly what we need. Especially in summer. Or during holidays. Or any day when the oven is already occupied and you are, frankly, over it.
This recipe also uses simple ingredients. Double-Stuffed Oreos, butter, instant chocolate pudding mix, milk, Cool Whip, cream cheese, and powdered sugar. Nothing rare. Nothing you have to hunt down in a specialty store. It’s the kind of dessert you can make with grocery-store basics, which is part of its charm. I like a recipe that doesn’t make me feel like I need a treasure map.
The texture is probably my favorite part. This Oreo pudding dessert has a chunky cookie crust, smooth cream cheese filling, silky chocolate pudding, fluffy whipped topping, and crunchy Oreo crumbs on top. It’s soft but not boring. Sweet but not flat. Rich but still cold and light enough that you can eat a square after dinner and not feel like you just wrestled a chocolate brick.
It’s also a great make-ahead dessert. Since it needs at least 2 hours in the fridge, you can prepare it before guests arrive and forget about it until serving time. If you chill it overnight, the layers usually slice even better. I’m not always patient, but in this case, the fridge time really helps. Annoying? Slightly. Worth it? Yes.
This cookies and cream dessert is also easy to serve. It’s made in a 9×13 pan, so you can cut it into neat squares for a party or slightly bigger pieces for a family dessert. And if the first slice comes out messy, don’t panic. The first slice of any layered dessert is often the “sacrifice slice.” It still tastes amazing, and somebody will absolutely eat it.
Another reason to love Heavenly Oreo Dessert is that it’s easy to customize. You can use different Oreo flavors, swap the pudding flavor, add chocolate drizzle, sprinkle on mini chocolate chips, or make individual dessert cups. The basic idea is flexible, so you can keep it classic or get a little playful depending on the occasion.
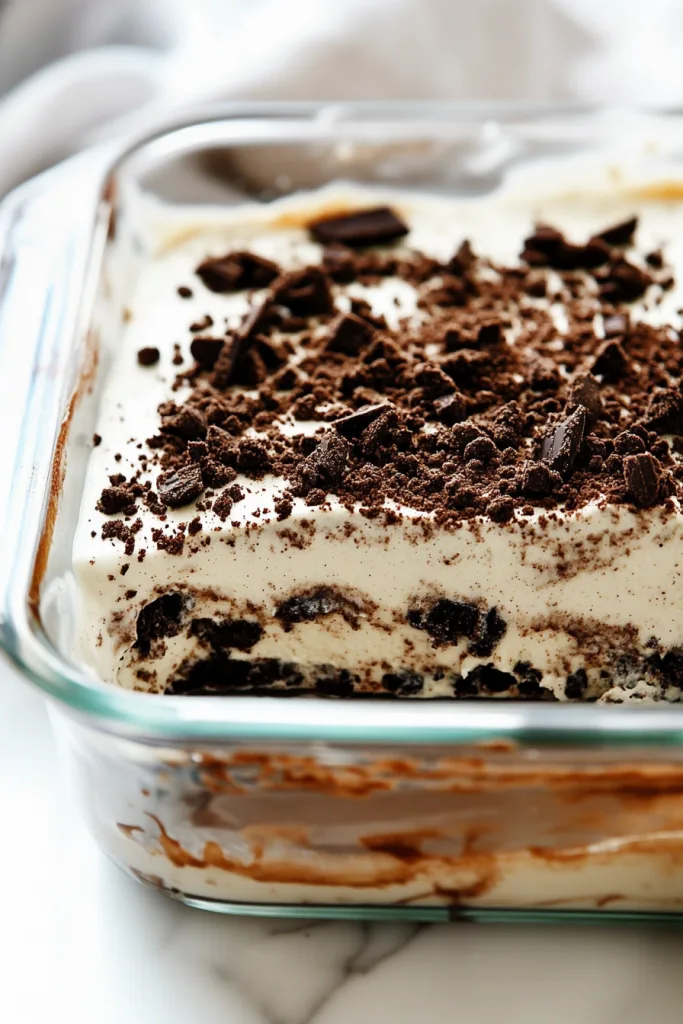
Ingredient Notes
The ingredients for Heavenly Oreo Dessert are simple, but each one helps build those dreamy layers. You’re making an Oreo crust, a cream cheese filling, a chocolate pudding layer, a Cool Whip topping, and a final sprinkle of cookie crumbs. It’s not complicated, but a few details make the dessert taste better and set up more nicely.
- Double-Stuffed Oreo cookies: Double-Stuffed Oreos are used for both the crust and the topping. The extra cream filling makes the crust sweeter, richer, and a little more tender. When crushing the cookies, try not to turn them into fine powder. You want small chunks and crumbs so the crust has texture and the topping looks nice. Think crushed cookies, not cookie sand.
- Melted butter: Melted butter helps bind the crushed Oreos into a crust. Once you mix the butter with the cookie crumbs, press everything firmly into the bottom of the pan. If some crumbs are dry, the crust may fall apart when sliced. Not a disaster, of course, but a firmer crust makes serving this Oreo layered dessert much easier.
- Instant chocolate pudding mix: Instant chocolate pudding gives this dessert its rich, creamy chocolate layer. Make sure it is instant pudding, not cook-and-serve pudding. The instant kind thickens quickly with cold milk, which is exactly what this no-bake recipe needs. It gives the dessert that classic chocolate pudding flavor without extra cooking.
- Cold milk: Cold milk helps the instant pudding set properly. If the milk is not cold enough, the pudding may take longer to thicken or may not set as nicely. Whisk it well with the pudding mix until smooth, then chill it while you make the cream cheese layer. It’s a small detail, but it matters.
- Cool Whip: Cool Whip is used in two layers: one container is folded into the cream cheese filling, and the other goes on top. It makes the dessert light, fluffy, and easy to spread. Make sure it is thawed before using it. Frozen Cool Whip is a stubborn little block, and trying to fold it into cream cheese is not a fun time.
- Cream cheese: Cream cheese gives the filling richness and a little tang, which helps balance the sweetness from the Oreos and pudding. Let it soften before mixing so it blends smoothly. If it’s too cold, you might end up with little lumps. Still edible, yes, but smooth filling is nicer.
- Powdered sugar: Powdered sugar sweetens the cream cheese filling and blends in easily. It helps make the filling smooth and almost cheesecake-like. Add it slowly so it mixes evenly with the cream cheese. This layer is what makes Heavenly Oreo Dessert feel a little more special than just pudding and cookies.
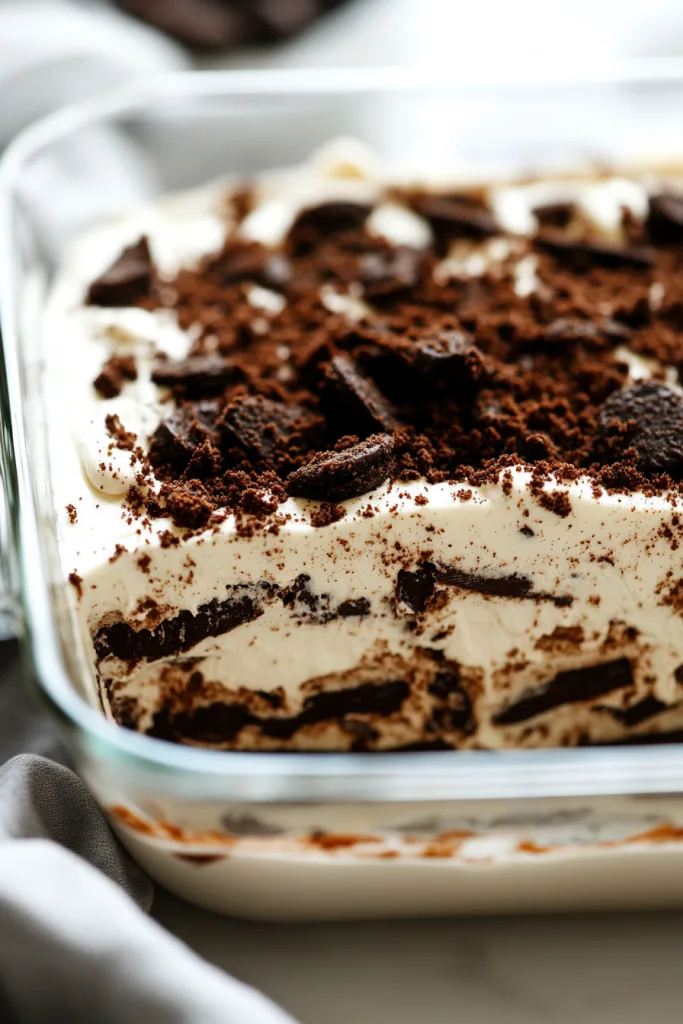
How to Make Heavenly Oreo Dessert?
Making Heavenly Oreo Dessert is mostly about layering and chilling. You’ll crush the Oreos, make the crust, prepare the pudding, mix the cream cheese filling, spread everything into a 9×13 pan, and let the fridge do the rest. It’s easy, but don’t rush the chilling time. The layers need a little time to settle into their best selves. Don’t we all?
Step 1: Crush the Oreo Cookies
Place all the Oreo cookies in a large zip-top bag. Seal the bag well, place it on the counter, and crush the cookies with a rolling pin. You want small chunks and crumbs, not fine crumbs. The chunky pieces give the crust and topping a better texture. Also, this step is weirdly therapeutic. A little cookie smashing never hurt anyone.
Step 2: Save Some Crumbs for the Topping
Set aside about 1/3 of the Oreo crumbs for the topping. This is one of those tiny steps that is easy to forget if you’re moving quickly. Keep those crumbs separate so you can sprinkle them over the top later. That final cookie layer gives this Heavenly Oreo Dessert its pretty cookies-and-cream finish.
Step 3: Make the Oreo Crust
Pour the remaining cookie crumbs into a 9×13 baking pan. Add the melted butter and mix until the crumbs are evenly coated. Then press the mixture firmly into the bottom of the pan to form the crust. You can use your hands, a spatula, or the bottom of a measuring cup. It doesn’t need to look perfect, but it should be packed firmly enough to hold the creamy layers.
Step 4: Prepare the Chocolate Pudding
In a bowl, whisk together the two boxes of instant chocolate pudding mix and the cold milk. Whisk until the mixture is smooth and starts to thicken. Cover the bowl and place it in the refrigerator while you prepare the cream cheese layer. This gives the pudding time to set a little, which makes spreading it much easier later.
Step 5: Make the Cream Cheese Filling
In a medium bowl, beat the softened cream cheese until smooth. Slowly add the powdered sugar and mix until creamy. Fold in one container of thawed Cool Whip until the filling is light and smooth. Folding gently keeps the mixture fluffy. This layer gives the dessert that creamy, slightly tangy flavor that makes it taste almost like an Oreo cheesecake dessert.
Step 6: Spread the Cream Cheese Layer
Spread the cream cheese filling over the Oreo crust. Go slowly and gently so you don’t pull up the crust underneath. An offset spatula or the back of a spoon works well. The layer doesn’t have to be perfectly smooth, because the chocolate pudding will cover it. This is a home dessert, not a museum exhibit.
Step 7: Add the Chocolate Pudding Layer
Remove the pudding from the fridge and spread it evenly over the cream cheese layer. Move gently so the layers stay mostly separate. The pudding should be thick, smooth, and easy to spread. This is where the Oreo pudding dessert really starts to look irresistible.
Step 8: Add the Cool Whip Topping
Spread the second container of Cool Whip over the chocolate pudding layer. Cover the pudding evenly and spread the topping all the way to the edges. This gives the dessert a soft, fluffy finish and helps balance the richer layers underneath.
Step 9: Sprinkle with Reserved Oreo Crumbs
Sprinkle the reserved Oreo crumbs over the Cool Whip topping. You can scatter them lightly or cover the entire top. Either way, those crumbs make the dessert look finished and add a little crunch. It’s a simple topping, but it works perfectly.
Step 10: Chill and Serve
Cover the pan and refrigerate the dessert for at least 2 hours before serving. This helps the layers firm up so you can slice clean squares. If you can chill it overnight, even better. Serve this Heavenly Oreo Dessert cold, straight from the fridge, and enjoy all those creamy, crunchy, chocolatey layers in one bite.
Storage Options
This Heavenly Oreo Dessert stores well in the refrigerator, which makes it a reliable make-ahead dessert. Since it contains cream cheese, pudding, milk, and Cool Whip, it needs to stay chilled. The Oreo crust may soften a little after a day or two, but the flavor stays delicious. Sometimes it even tastes better once the layers have had time to settle.
- Refrigerator: Store Heavenly Oreo Dessert covered in the refrigerator for up to 3 to 4 days. Use plastic wrap, foil, or a fitted lid if your pan has one. Keep it cold until serving so the cream cheese and pudding layers stay firm. For cleaner slices, cut it while it is well chilled.
- Make-ahead option: This no-bake Oreo dessert is perfect to make the night before. Overnight chilling helps the layers set and makes slicing easier. It’s a great choice for parties or holidays because you can make dessert ahead of time and not think about it again until serving. I love when dessert behaves like that.
- Freezer: You can freeze this dessert, but I’m a little mixed on it. It will still taste good, but the texture may change after thawing. The pudding and whipped topping can become softer or slightly watery. If you do freeze it, wrap it tightly and freeze for up to 1 month. Thaw it in the refrigerator before serving.
- Serving after storage: Serve this Oreo layered dessert cold from the fridge. It should not sit out too long because of the cream cheese, pudding, and whipped topping. If you’re serving it at a party, place it out near dessert time and return leftovers to the refrigerator afterward.
- Individual portions: Store leftover squares in individual airtight containers for easy servings. This is handy for lunches, dessert prep, or late-night fridge visits. And yes, individual containers make it easier to say, “This one is mine.” Very practical.
- Avoiding messy topping: When covering the dessert, try not to press plastic wrap directly onto the Cool Whip topping. It may stick and pull up the top layer. Use a lid, or tent the wrap slightly with toothpicks if needed. A tiny bit fussy, but it helps keep the top looking nice.
Variations & Substitutions
This Heavenly Oreo Dessert is easy to customize, which is part of why it’s so fun. Once you have the basic layers—Oreo crust, cream cheese filling, chocolate pudding, Cool Whip, and cookie crumbs—you can change the flavors in lots of simple ways. It’s the kind of dessert that can go classic, playful, extra chocolatey, or even birthday-party wild.
- Use regular Oreos: Double-Stuffed Oreos make the crust extra rich, but regular Oreos work well too. The crust may be slightly less creamy, but it will still taste delicious. If you already have regular Oreos in the pantry, use them. No need to make a special trip unless you’re looking for an excuse to buy more cookies.
- Try different Oreo flavors: Mint Oreos, Golden Oreos, Peanut Butter Oreos, Birthday Cake Oreos, or seasonal Oreos can all be used. Mint Oreos with chocolate pudding would taste like a cool chocolate-mint dessert, while Golden Oreos with vanilla pudding would make a lighter version. There are a lot of Oreo flavors out there now. It’s almost a sport.
- Change the pudding flavor: Chocolate pudding is classic, but vanilla, white chocolate, cheesecake, cookies and cream, or French vanilla pudding can work too. This is an easy way to change the whole personality of the dessert without changing the method. A cheesecake pudding layer would be especially nice if you want an Oreo cheesecake dessert feel.
- Add chocolate chips: Mini chocolate chips can be sprinkled between layers or over the top with the Oreo crumbs. They add a little crunch and extra chocolate flavor. Just don’t go too heavy unless you want the dessert very rich. Which, to be fair, might be exactly what you want.
- Add chocolate drizzle: A drizzle of chocolate syrup or melted chocolate over the top makes this cookies and cream dessert look even more special. You can add it right before serving or after the final Oreo crumbs. A caramel drizzle would also be delicious if you want an extra sweet touch.
- Use homemade whipped cream: You can use stabilized homemade whipped cream instead of Cool Whip. Regular whipped cream may soften faster, so stabilized whipped cream works best if you’re making the dessert ahead. Cool Whip is easier, but homemade whipped cream can be lovely if you prefer it.
- Make individual dessert cups: Layer the Oreo crumbs, cream cheese filling, pudding, Cool Whip, and cookie crumbs in small cups or jars. This is great for parties, picnics, or dessert tables. Individual cups also make serving easier, and they look cute with very little effort.
- Add peanut butter: Mix a little peanut butter into the cream cheese layer for a chocolate peanut butter Oreo dessert. Start small and taste as you go. Peanut butter is wonderful, but it can take over quickly. It has main-character energy.
- Make it extra chocolatey: Use chocolate Cool Whip if available, add mini chocolate chips, or drizzle melted chocolate over the top. This turns the dessert into a deeper chocolate Oreo lush-style treat. Chocolate lovers will not complain.
- Use a different pan size: A 9×13 pan is best for this recipe, but you can use a smaller pan for thicker layers. Just remember that thicker layers may need more chilling time before slicing. The dessert will still work, but it may be a little softer in the center if rushed.
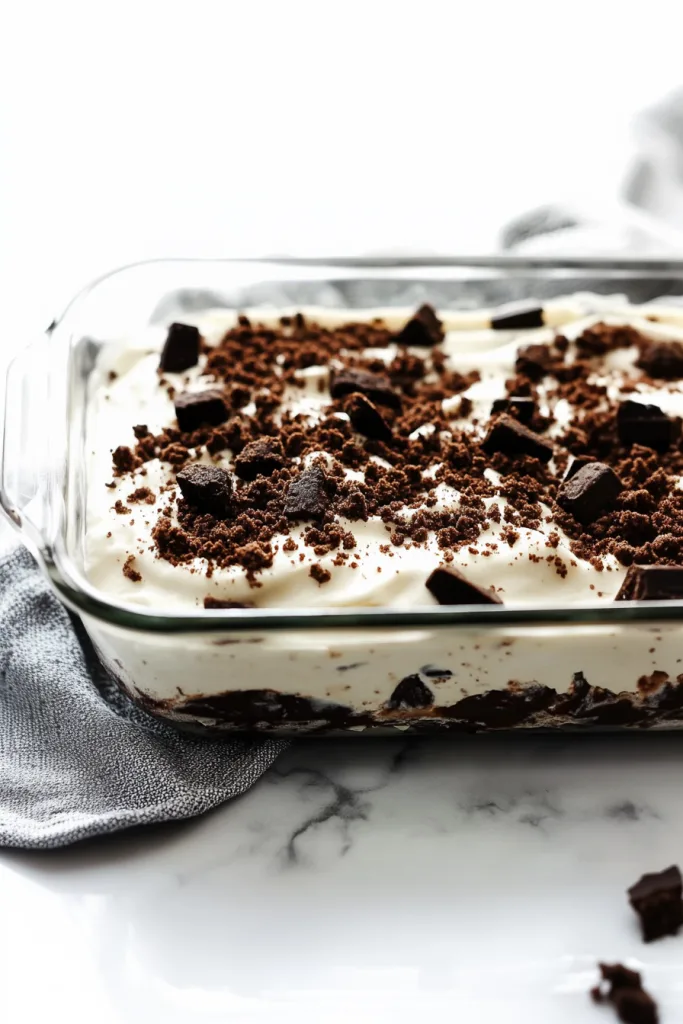
What to Serve With Heavenly Oreo Dessert?
This Heavenly Oreo Dessert is rich, creamy, and sweet, so it pairs best with simple drinks and lighter sides. You don’t need much with it, because the dessert already brings plenty of chocolate and cookies-and-cream flavor. Still, a few little extras can make it feel even more fun for parties, birthdays, or family dinners.
- Cold milk: Milk and Oreos are a classic pairing, so a cold glass of milk is an easy win. It balances the sweetness and makes the dessert feel nostalgic. Honestly, Heavenly Oreo Dessert with cold milk feels like childhood snack time got upgraded.
- Hot coffee: Coffee pairs beautifully with the chocolate pudding and cream cheese layers. A square of this Oreo pudding dessert with hot coffee makes a cozy after-dinner treat. The coffee helps balance the sweetness, especially if you like rich desserts but don’t want them to feel too heavy.
- Iced coffee: Iced coffee is great with this dessert, especially in warmer weather. The cold drink and chilled Oreo dessert together feel refreshing and sweet. It’s almost like a little café treat, except you’re at home and probably wearing slippers. Better, honestly.
- Fresh berries: Strawberries, raspberries, or blueberries add a fresh pop next to the rich dessert. The tartness helps balance the sweetness, and the color makes each serving look prettier. A few berries on the plate can make a simple square look slightly fancy.
- Vanilla ice cream: Serve a square of Heavenly Oreo Dessert with a scoop of vanilla ice cream if you want to go big. Is it extra? Absolutely. But sometimes dessert should be extra. Especially for birthdays or celebrations.
- Chocolate sauce: A light drizzle of chocolate sauce can make each slice look more decadent. It adds more chocolate flavor and makes the dessert feel a bit more like something from an ice cream shop. Use a little, or use more. I’m not standing in your kitchen.
- Caramel sauce: Caramel sauce pairs nicely with Oreos and chocolate pudding. A small drizzle adds buttery sweetness and makes the dessert feel even richer. Just don’t overdo it unless you really love sweet desserts.
- Whipped cream: A small dollop of whipped cream on each serving can make the dessert look more finished. Add a few extra Oreo crumbs on top, and suddenly it looks like you planned a whole plated dessert situation.
- Dessert boards: Add squares of this no-bake Oreo dessert to a dessert board with brownies, cookies, fruit, and chocolate candies. It adds a creamy option alongside firmer treats. Just keep it chilled until serving so the layers stay neat.
- Birthday party treats: Serve this dessert with cupcakes, chocolate-covered pretzels, ice cream cups, or candy bowls for a fun party spread. Oreo desserts are kid-friendly, yes, but adults love them just as much. Sometimes more. We just pretend to be casual about it.
FAQ
Do I need to remove the Oreo filling before crushing the cookies?
No, keep the filling in the cookies. The filling adds sweetness and helps make the crust richer. Since this recipe uses Double-Stuffed Oreos, the crust has extra cookies-and-cream flavor.
Why is my Oreo crust crumbly?
The crust may be crumbly if the cookie crumbs were too dry, too finely crushed, or not mixed well enough with the butter. Press the crust firmly into the pan, and leave some cookie texture instead of crushing everything into dust.
How long does Heavenly Oreo Dessert need to chill?
It needs at least 2 hours in the refrigerator before serving. If you have time, chill it overnight. The longer chill makes the layers firmer and gives you cleaner slices.
Can I use a different pudding flavor?
Absolutely. Vanilla, cheesecake, white chocolate, cookies and cream, or peanut butter pudding can all work. Chocolate pudding gives the classic version, but switching pudding flavors is an easy way to make a new version of this Oreo layered dessert.
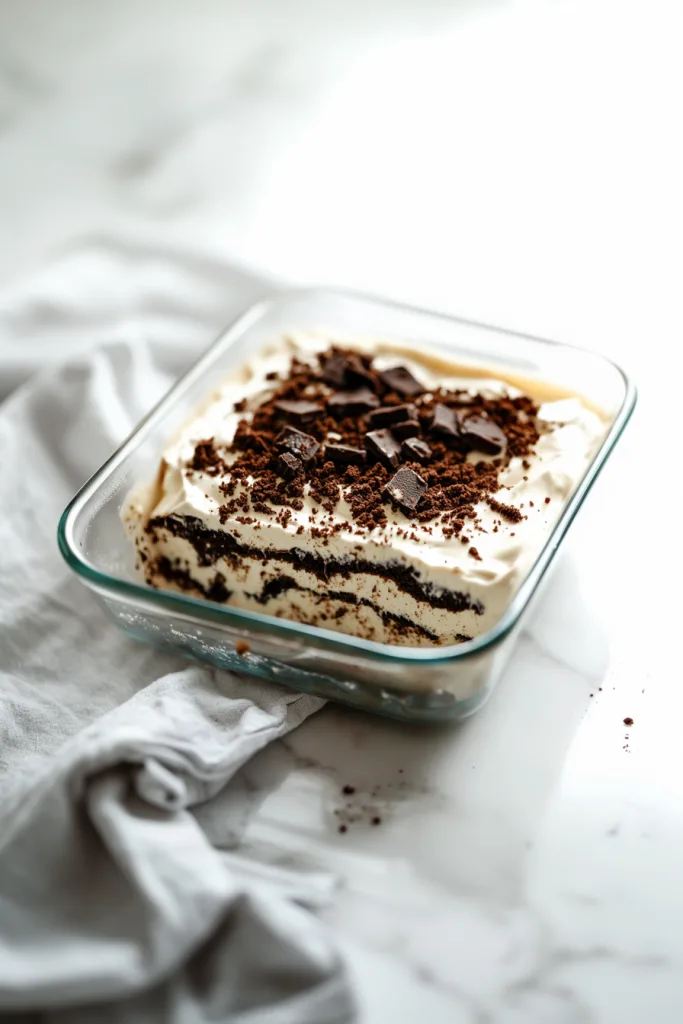
This Heavenly Oreo Dessert is creamy, fluffy, chocolatey, and full of cookies-and-cream comfort. With a buttery Oreo crust, sweet cream cheese filling, smooth chocolate pudding, Cool Whip, and crunchy Oreo crumbs on top, it’s the kind of no-bake dessert that feels easy but still gets people excited when it hits the table.
Make this no-bake Oreo dessert for potlucks, birthdays, holidays, family dinners, summer cookouts, or any day when you want something sweet without turning on the oven. Would you keep it classic with chocolate pudding, or try a fun Oreo flavor next time? Can’t wait to hear what you think!
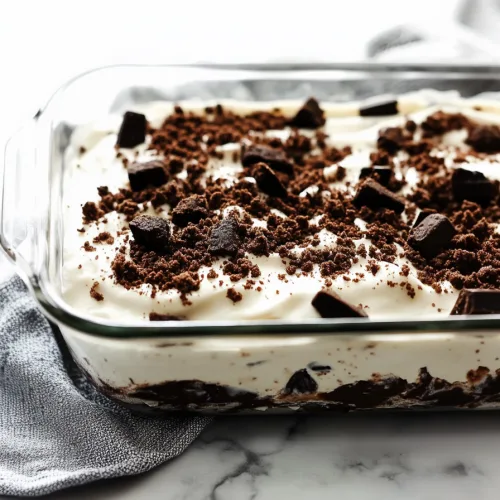
Heavenly Oreo Dessert
Ingredients
- 1 package Double-Stuffed Oreo cookies 15.35 oz
- 1/2 cup butter melted
- 2 boxes instant chocolate pudding mix 3.9 oz each
- 3 1/4 cups cold milk
- 2 containers Cool Whip 8 oz each, thawed
- 1 block cream cheese 8 oz, softened
- 1 cup powdered sugar
Instructions
- Place all Oreo cookies in a large zip-top bag.
- Seal the bag securely and place it on a flat counter surface.
- Using a rolling pin, crush the cookies into small chunks and crumbs. The cookies should remain slightly chunky and should not be crushed into fine crumbs.
- Reserve approximately 1/3 of the crushed Oreo cookies for the topping.
- Transfer the remaining crushed Oreo cookies to a 9×13-inch baking pan.
- Pour the melted butter over the crushed cookies.
- Stir until the cookie crumbs and butter are evenly combined.
- Press the Oreo mixture firmly and evenly into the bottom of the pan to form a crust.
- In a separate mixing bowl, combine the instant chocolate pudding mixes and cold milk.
- Whisk until smooth and slightly thickened.
- Cover the pudding mixture and refrigerate until set.
- In a medium mixing bowl, beat the softened cream cheese until smooth.
- Gradually add the powdered sugar.
- Continue mixing until the cream cheese and powdered sugar are fully combined and smooth.
- Gently fold in one container of thawed Cool Whip until evenly incorporated.
- Spread the cream cheese mixture evenly over the prepared Oreo crust.
- Remove the chilled chocolate pudding from the refrigerator.
- Spread the chocolate pudding evenly over the cream cheese layer.
- Spread the second container of thawed Cool Whip evenly over the chocolate pudding layer.
- Sprinkle the reserved Oreo crumbs evenly over the top.
- Cover the pan with plastic wrap or foil.
- Refrigerate for at least 2 hours before serving to allow the layers to set.
- Slice into squares.
- Serve chilled.
Notes