King’s Hawaiian rolls, ham, Swiss or provolone cheese, butter, Worcestershire sauce, mustard, brown sugar, onion powder, and poppy seeds.
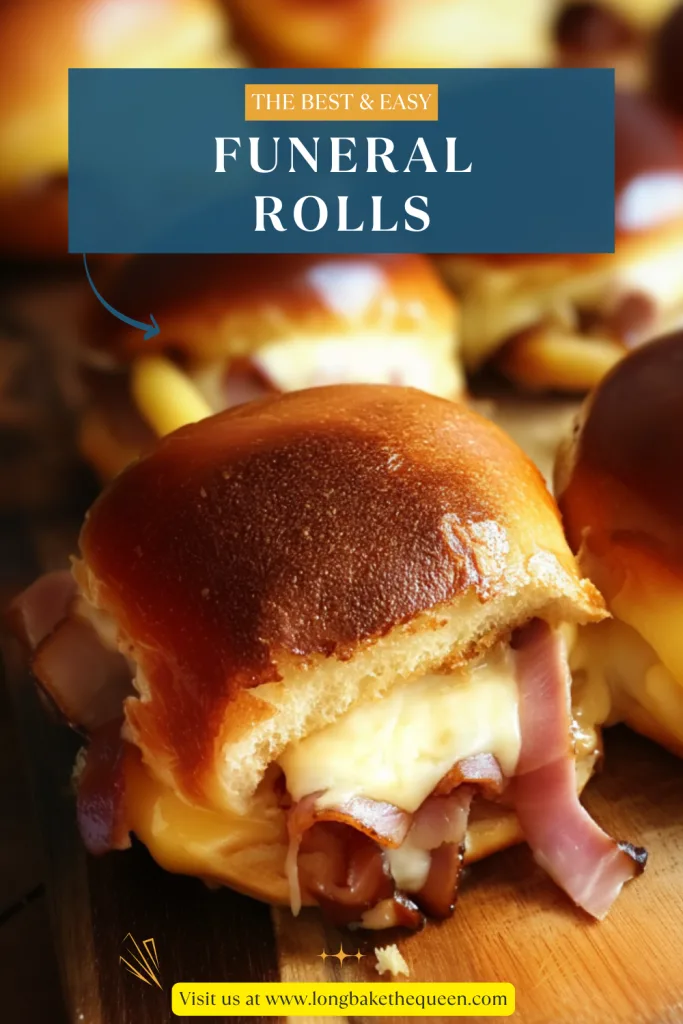
I know, I know. The name Funeral Rolls sounds like something you’d whisper about quietly in a church basement. But honestly? These little baked ham and cheese sliders are anything but sad. They’re warm, buttery, cheesy, a little sweet, a little tangy, and the kind of thing people grab “just one” of before somehow circling back for a second and third. I’ve seen it happen. I’ve been the person doing it. No shame.
These Funeral Rolls are made with soft King’s Hawaiian rolls, thinly sliced ham, Swiss or provolone cheese, and a buttery sauce that soaks right into the bread. The sauce is a simple mix of melted butter, Worcestershire sauce, mustard, brown sugar, and onion powder, but once it bakes into those rolls, it tastes like you did something much more complicated. Which, of course, you didn’t. And that’s exactly why I love them.
They’re one of those recipes that feels old-school in the best way. Like something you’d find at a family reunion, church supper, tailgate, baby shower, holiday table, or the kind of potluck where there are three pasta salads and someone’s aunt brought a mysterious but delicious casserole. Sound familiar? Funeral Rolls belong at those tables because they’re easy, filling, and comforting. They don’t ask for attention, but they get it anyway.
What I really like about these ham and cheese Funeral Rolls is that you can make them ahead of time. You assemble the sliders, pour the sauce over the top, cover the pan, and let them hang out in the fridge for a few hours or overnight. Then when it’s time to eat, you just bake them. That’s it. Future-you gets to feel calm and organized, even if present-you is still looking for the serving platter.
And can we talk about the smell when they bake? The butter, mustard, ham, and sweet rolls all warm up together, and suddenly the kitchen smells like game day, holiday lunch, and “come get a plate before it’s gone” all rolled into one. The tops get golden, the cheese melts, and the edges get just a little crisp. Not fancy. Not fussy. Just really, really good.
These Funeral Rolls may have a dramatic name, but they’re really just cozy little party sandwiches with a big personality. They’re the kind of food that makes people feel taken care of. And sometimes, that’s exactly what a recipe should do.
The first time I heard someone call them Funeral Rolls, I remember pausing for a second like, “Wait… we’re eating what?” The name felt a bit much, but then I tasted one warm from the pan and understood immediately. These rolls are comfort food. They’re the kind of recipe people bring when there’s a crowd to feed, a family to comfort, or a table that needs something warm and dependable.
I grew up around foods like this. Not always this exact recipe, but the same idea. Big pans of something baked, buttery, cheesy, and easy to serve. You’d see them at church gatherings, neighborhood potlucks, school events, holiday buffets, and those family get-togethers where everyone says they’re “not that hungry” and then somehow fills a plate anyway. There’s usually a foil-covered dish on the counter, someone asking who brought the rolls, and a kid sneaking chips before dinner. Very normal. Very human.
These make-ahead Funeral Rolls remind me of that kind of gathering. They’re not delicate or overly polished. They’re generous. You make one whole tray at once, slice it into little sandwiches, and let everyone help themselves. There’s something nice about food that doesn’t need a lot of explaining. You set down a pan of warm ham and cheese sliders, and people just know what to do.
I personally like making them the night before. The sauce gets time to soak into the rolls, and the flavor is better the next day, at least in my opinion. Some people bake them right away, and that works too, especially if you’re in a hurry. But overnight? That’s my favorite. It gives the rolls that buttery, savory-sweet flavor all the way through. Also, I love any recipe that lets me do the messy part before guests show up. I’m not trying to be heroic with melted butter while people are standing in the kitchen asking where the cups are.
And yes, the name comes from the fact that these kinds of rolls often show up at funeral luncheons and church meals. That might sound heavy, but I think there’s something tender about it too. Food like this is practical, but it’s also caring. It says, “Here, eat something warm.” That matters. Whether you’re making Funeral Rolls for a tailgate or a family gathering, they carry that same comforting feeling.
Plus, let’s be honest, they taste way too good to save only for sad occasions. These rolls are welcome at game days, birthday parties, holiday brunches, casual dinners, and random Saturday afternoons when everyone wants snacky food. A little dramatic name, yes. A very delicious sandwich, also yes.

Why you’ll Love these Funeral Rolls?
You’ll love these Funeral Rolls because they’re easy, flavorful, and very good at feeding a crowd without making you lose your mind. The rolls are soft and slightly sweet, the ham is salty and savory, the cheese melts into everything, and the buttery sauce gives the whole pan that rich, tangy, sweet-salty flavor. It’s a simple recipe, but it works in a way that makes people remember it.
One of the biggest reasons these Funeral Rolls are so handy is that they’re make-ahead friendly. You can assemble the whole pan, pour the sauce over the rolls, cover it, and refrigerate it for 4 to 24 hours. When it’s time to serve, you bake them uncovered until the cheese melts and the tops turn golden. That makes them perfect for holidays, tailgates, church suppers, potlucks, parties, brunches, or those slightly chaotic days when guests are arriving and you’re still wiping crumbs off the counter.
They’re also flexible. You can serve these ham and cheese sliders as an appetizer, party snack, lunch, or casual dinner. Put them next to chips and pickles, and you’ve got an easy meal. Add soup or salad, and suddenly it feels like you planned something. I love food that can switch jobs like that. It’s appetizer one minute, dinner the next. Very hardworking little sandwich.
The sauce is what really makes these Funeral Rolls special. Melted butter makes the rolls rich and golden. Worcestershire sauce adds savory depth. Mustard gives a little tang. Brown sugar adds sweetness. Onion powder brings flavor without making you chop anything. And honestly, any recipe that spares me from chopping an onion when I’m trying to get party food ready deserves a small round of applause.
Another reason to love these baked ham and cheese rolls is that they’re crowd-friendly. Kids like them. Adults like them. Picky eaters usually don’t argue with soft rolls, ham, and melted cheese. They’re easy to grab, easy to slice, and easy to transport if you’re bringing them to someone else’s house. No fancy plates. No tiny garnish. No stress.
And, maybe most importantly, Funeral Rolls have that comforting, old-fashioned feeling. They’re not trendy. They’re not trying to reinvent lunch. They’re just warm, buttery sandwiches that make people happy. Sometimes that’s exactly what you need, don’t you think?
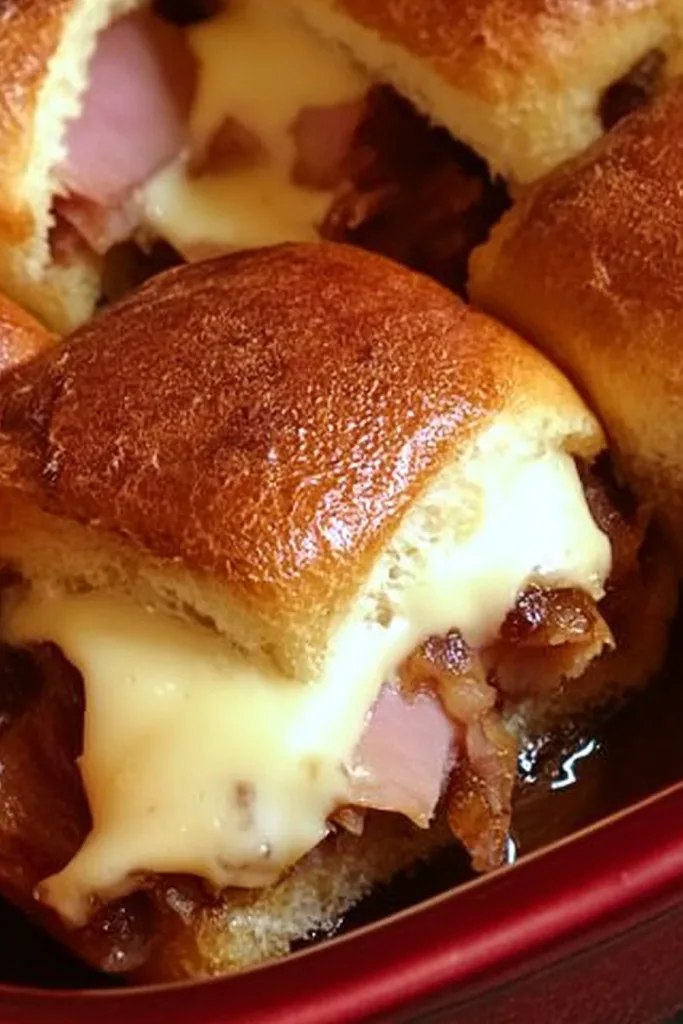
Ingredient Notes
The ingredients for Funeral Rolls are simple, but each one has a job to do. Since there aren’t many ingredients, the rolls, ham, cheese, and sauce really matter. This is one of those recipes where a few basic things come together and somehow taste much better than you expect. Not magic exactly, but close enough.
- King’s Hawaiian Rolls: King’s Hawaiian rolls are the classic choice for Funeral Rolls because they’re soft, slightly sweet, and sturdy enough to soak up the buttery sauce without falling apart immediately. You can use another brand of soft dinner rolls if you want, but Hawaiian-style rolls give that sweet-and-savory flavor people love. I like slicing the whole slab in half lengthwise with a bread knife instead of pulling each roll apart first. It feels a little like performing sandwich surgery, but it’s much faster and cleaner.
- Ham: Thinly sliced ham works best because it layers evenly and is easy to bite through. You’ll need about 1 pound, which gives the rolls plenty of filling without turning them into oversized sandwiches. Deli ham, smoked ham, honey ham, or leftover baked ham can all work. If your ham is very moist, pat it dry a little before layering. Nobody invited soggy bread to the party.
- Swiss or Provolone Cheese: Swiss cheese gives these ham and cheese Funeral Rolls a classic flavor with a slightly nutty taste. Provolone is milder and melts beautifully, so it’s a great option too. I go back and forth depending on what I have. Swiss feels a little more traditional. Provolone feels softer and creamier. Both are good, so don’t overthink it.
- Unsalted Butter: Melted unsalted butter is the base of the sauce. It makes the tops golden and helps carry all the mustard, Worcestershire, brown sugar, and onion flavor into the rolls. Unsalted butter is helpful because ham and cheese are already salty. If salted butter is all you have, use it, but just know the rolls may taste a little saltier.
- Worcestershire Sauce: Worcestershire sauce adds savory flavor that makes the butter sauce taste deeper and more interesting. It can smell strong when you first mix it, but don’t panic. Once baked, it blends into the rolls and gives them that “why are these so good?” flavor. It’s one of those behind-the-scenes ingredients doing serious work.
- Prepared Mustard: Mustard adds tang and keeps the rolls from tasting too rich. Yellow mustard works well and gives that classic flavor, while Dijon makes the sauce a little sharper. I like both, honestly. Use whatever fits your crowd. If you’re serving kids or picky eaters, yellow mustard is usually a safe choice.
- Brown Sugar: Brown sugar adds just enough sweetness to balance the mustard and Worcestershire sauce. It also works really well with the sweet rolls and salty ham. You only need 2 tablespoons, but it gives the sauce a warmer, rounder flavor.
- Onion Powder: Onion powder adds savory flavor without chopped onions. It keeps the sauce smooth and easy to pour, which I appreciate. Sometimes I want onion flavor without onion pieces sneaking around in the rolls. This does the job quietly.
- Poppy Seeds: Poppy seeds are optional, but they give Funeral Rolls that classic party-slider look. They add a tiny bit of texture and make the tops look finished. If you don’t have them, skip them. Truly, nobody is going to turn down a buttery ham and cheese slider because it lacks poppy seeds.
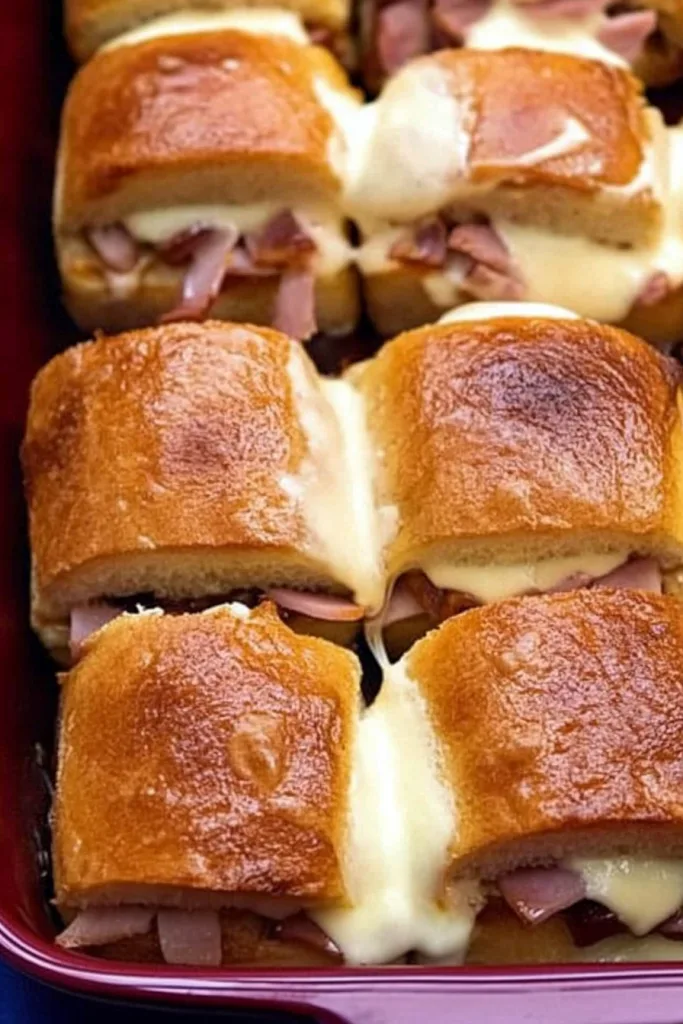
How to Make Funeral Rolls?
Making Funeral Rolls is simple, and that’s part of why people keep making them. You slice the rolls, layer ham and cheese, pour over the buttery sauce, let everything marinate, then bake until warm and golden. The marinating time is technically optional if you’re in a rush, but it really does help the flavor soak in. I like doing it overnight because it makes the rolls taste more seasoned and also makes me feel unusually organized. A rare but pleasant feeling.
Step 1: Slice the Rolls
Cut the rolls in half lengthwise, keeping the bottoms connected and the tops connected if possible. A serrated bread knife works best for this. I like cutting through the entire package at once instead of separating each roll, because it’s quicker and keeps everything lined up. Place the bottom half of the rolls in a baking pan.
Step 2: Add the Ham
Layer the thinly sliced ham evenly over the bottom half of the rolls. Try to cover the rolls from edge to edge so every little sandwich gets a good amount of ham. Fold or overlap the slices if needed. This is the savory base of your Funeral Rolls, so don’t leave any lonely corners.
Step 3: Add the Cheese
Place the Swiss or provolone cheese over the ham. Spread it evenly so every slider gets a melty layer. Swiss gives a classic flavor, while provolone is mild and creamy. Both melt nicely, so choose the one your family likes best or the one already sitting in your fridge. Practical cooking is still cooking.
Step 4: Add the Roll Tops
Place the top half of the rolls over the ham and cheese. Line them up with the bottom half as best as you can. If they’re a little crooked, it’s fine. Once the rolls bake and the cheese melts, nobody will care. The sandwiches are going to be eaten, not judged in a beauty pageant.
Step 5: Prepare the Butter Sauce
In a small mixing bowl, stir together the melted butter, Worcestershire sauce, prepared mustard, brown sugar, and onion powder. Mix until everything is well combined. The sauce should smell buttery, tangy, a little sweet, and very promising. This sauce is the reason make-ahead Funeral Rolls taste so flavorful.
Step 6: Pour the Sauce Over the Rolls
Pour the butter mixture evenly over the tops of the rolls. Use a spoon or pastry brush if needed to spread the sauce across the surface. Some of it will run down into the pan, and that’s okay. As the rolls sit, the sauce soaks into the bread and gives the sliders their rich flavor.
Step 7: Cover and Marinate
Cover the baking pan tightly and refrigerate the rolls for 4 to 24 hours. I personally prefer marinating them overnight because the flavor gets deeper and the rolls taste better all the way through. If you only have 4 hours, that still works. If you’re truly in a hurry, you can bake them sooner, but the longer rest is worth it when possible.
Step 8: Preheat the Oven
When you’re ready to bake, preheat the oven to 350°F. Take the rolls out of the refrigerator while the oven heats so the pan isn’t extremely cold going into the oven. This helps everything warm more evenly.
Step 9: Add Poppy Seeds
If using poppy seeds, sprinkle them over the tops of the rolls before baking. They add that classic slider look and a little texture. If you skip them, your Funeral Rolls will still be delicious. Poppy seeds are nice, not mandatory.
Step 10: Bake Until Golden
Bake the rolls uncovered for about 15 minutes, or until the cheese is melted and the tops are golden. Keep an eye on them near the end because sweet rolls can brown quickly. You want golden and glossy, not burnt and regretful.
Step 11: Slice and Serve
Remove the pan from the oven and let the rolls rest for a couple of minutes. Slice them into individual sliders and serve warm. The cheese should be melty, the tops buttery, and the whole pan should smell ridiculously good. This is usually the moment when people start hovering, which is a compliment in snack form.
Storage Options
Funeral Rolls are best when served warm from the oven, but leftovers are still worth keeping. Because they include ham, cheese, and butter sauce, they should be refrigerated after serving. The bread may soften as it sits, but reheating helps bring back some of that warm, melty goodness.
- Refrigerator: Store leftover Funeral Rolls in an airtight container or tightly covered baking dish in the refrigerator for up to 3 days. Let the rolls cool before covering them so steam doesn’t make the tops extra soggy. They’ll soften a little either way, but that’s normal.
- Reheating in the oven: For the best texture, place the rolls in a baking dish and cover loosely with foil. Reheat at 325°F for about 10 to 15 minutes, or until warmed through. Remove the foil for the last few minutes if you want the tops to crisp slightly. This method is slower than the microwave, but the rolls taste closer to freshly baked.
- Reheating in the microwave: The microwave is fine when you’re hungry and patience has left the building. Heat one or two sliders for about 20 to 30 seconds, or until warm. The bread will be softer, but they’ll still taste good. Sometimes quick wins.
- Freezer: You can freeze baked ham and cheese Funeral Rolls for up to 1 month. Wrap them tightly in foil, then place them in a freezer-safe bag or container. Thaw in the refrigerator overnight before reheating. The bread may be softer after freezing, so the oven is the best way to reheat them.
- Make-ahead storage: Assemble the rolls with the sauce, cover tightly, and refrigerate for 4 to 24 hours before baking. This is the best make-ahead method because the rolls bake fresh right before serving. I like this option for parties because it keeps the last-minute work low.
- Keeping warm for a party: After baking, keep the rolls loosely covered with foil if they need to sit for a short time. You can also place them in a low oven briefly, but don’t leave them too long or the bread may dry out. They’re best served soon after baking while the cheese is still melty.
Variations & Substitutions
One of the best things about Funeral Rolls is how easy they are to adjust. The classic ham and Swiss version is always a safe bet, but you can swap the meat, change the cheese, play with the sauce, or add a little spice. This is a forgiving recipe, which is exactly what you want when feeding people. Party food should not require deep breathing exercises.
- Use turkey instead of ham: Thinly sliced turkey works well if you want something a little lighter. Pair it with Swiss, provolone, cheddar, or pepper jack. Turkey also tastes great with Dijon mustard in the sauce.
- Try roast beef: For a heartier version, use thinly sliced roast beef and provolone cheese. You can add a little Dijon mustard or horseradish to the sauce for a sharper flavor. It gives the rolls a hot roast beef sandwich vibe.
- Use different cheese: Swiss and provolone are classic, but cheddar, Monterey Jack, mozzarella, Havarti, or pepper jack can work too. Pepper jack adds heat, while cheddar makes the rolls taste a little bolder. Use what your crowd likes. Or what you forgot you had in the cheese drawer.
- Add Dijon mustard: Swap the prepared yellow mustard for Dijon if you want a tangier, slightly sharper sauce. Dijon works especially well with ham and Swiss, and it gives the rolls a tiny grown-up twist.
- Use honey mustard: For a sweeter version of Funeral Rolls, use honey mustard instead of regular mustard. This pairs nicely with the ham and Hawaiian rolls. It’s a good option if you like sweet-savory sandwiches.
- Skip the poppy seeds: Poppy seeds are optional. You can leave them off or use sesame seeds, dried minced onion, or everything bagel seasoning instead. The rolls will still taste buttery and delicious.
- Add pickles: Thin pickle slices add a tangy bite. Place them between the ham and cheese, but pat them dry first so the bread doesn’t get soggy. Pickles make the rolls taste a little more like deli sliders.
- Make them spicy: Add sliced jalapeños, pepper jack cheese, crushed red pepper, or a pinch of cayenne to the butter sauce. This gives the sliders a little kick without changing the basic recipe too much.
- Use different rolls: Hawaiian rolls are classic, but any soft dinner rolls or slider buns can work. Brioche slider buns are also delicious. Choose rolls that are soft but sturdy enough to handle the sauce.
- Make them vegetarian: Skip the ham and use extra cheese, sautéed mushrooms, roasted peppers, or roasted vegetables. The flavor will be different, of course, but the buttery sauce still makes the rolls rich and satisfying.
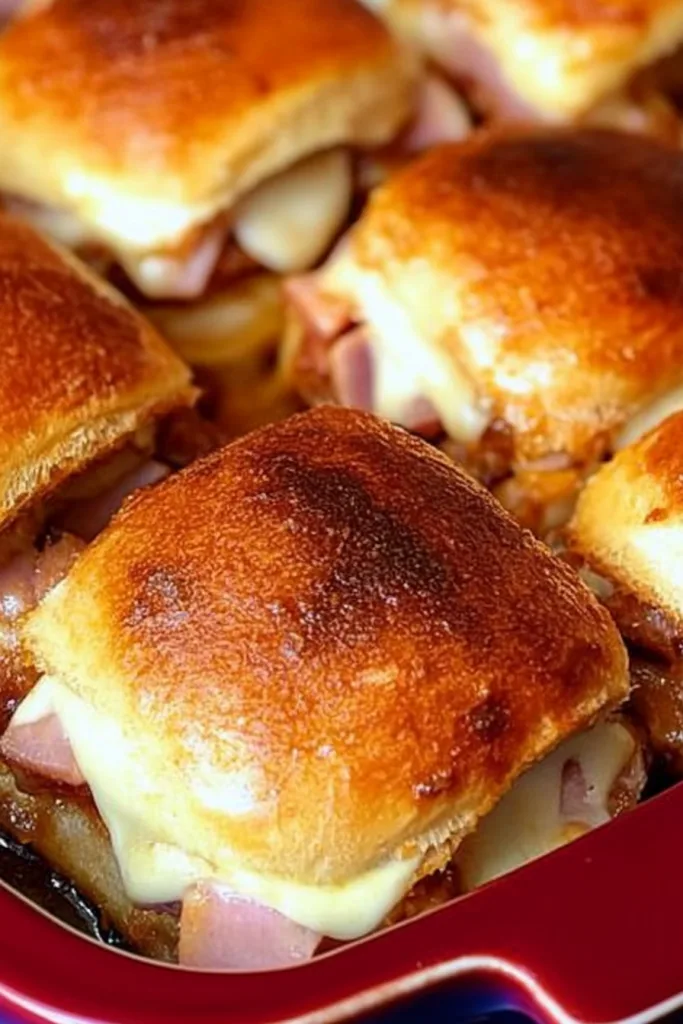
What to Serve With Funeral Rolls?
Funeral Rolls are rich, buttery, cheesy, and savory, so they pair nicely with sides that are crunchy, fresh, tangy, or light. You can serve them as appetizers or turn them into a casual meal. They fit right into game day spreads, potlucks, family dinners, and holiday snack tables. Basically, if there’s a table and hungry people, they belong.
- Potato chips: Potato chips are the easiest side for Funeral Rolls. They add crunch and keep the meal casual. Plain, barbecue, kettle, sour cream and onion—honestly, most chips work here. No need to overcomplicate the plate.
- Coleslaw: Coleslaw adds cool crunch next to the warm, buttery sliders. Creamy slaw is classic, but vinegar-based slaw is great if you want something lighter and tangier. It’s especially nice for tailgates and summer gatherings.
- Pickles: Pickles cut through the richness of the ham, cheese, and butter sauce. Serve pickle spears on the side or set out sliced pickles so people can add them to their rolls. Tangy crunch is always welcome.
- Pasta salad: A chilled pasta salad pairs well with warm baked sliders. Italian pasta salad, ranch pasta salad, or creamy macaroni salad all work. This is a great combo for potlucks or casual lunches.
- Green salad: A simple green salad helps balance the richness of ham and cheese Funeral Rolls. Lettuce, cucumbers, tomatoes, and a tangy vinaigrette keep things fresh. It also makes the meal feel a little more responsible. We’ll take it.
- Soup: Serve these rolls with tomato soup, potato soup, chicken noodle soup, or broccoli cheddar soup for a cozy meal. A warm slider with soup feels like comfort food doing its job properly.
- Fruit salad: Fruit salad adds brightness and sweetness. Grapes, berries, melon, pineapple, and apples all pair well with the salty ham and cheese. It’s a nice contrast on a party table.
- Deviled eggs: Deviled eggs and Funeral Rolls feel like they belong at the same gathering. They’re both classic, crowd-friendly, and easy to serve. Together, they make a great brunch, holiday, or potluck spread.
- Veggie tray: A crisp veggie tray with ranch or dip helps lighten things up. Carrots, celery, cucumbers, peppers, and broccoli all work well. People appreciate having something crunchy next to warm sliders.
- Game day snacks: Serve Funeral Rolls with wings, nachos, chips and dip, pretzels, snack mix, or other sliders. They fit perfectly on a tailgate or game day table and usually disappear fast. Like, suspiciously fast.
FAQ
Do I have to use King’s Hawaiian Rolls?
No, you can use another brand of soft dinner rolls or slider buns. King’s Hawaiian rolls are popular because they’re soft and slightly sweet, which works beautifully with ham, cheese, and the buttery sauce.
Can I bake Funeral Rolls right away?
Yes, you can bake them right away if you’re short on time. They’ll still be good. But if you can let them marinate for a few hours, the sauce has more time to soak into the rolls and the flavor gets better.
Do I need to cover the rolls while baking?
No, bake the rolls uncovered so the tops can turn golden and the cheese can melt. If the tops start browning too quickly, loosely cover the pan with foil near the end.
How do I keep the rolls from getting soggy?
Use the correct amount of sauce, avoid overly wet fillings, and pat ingredients like pickles dry before adding them. Baking the rolls uncovered also helps the tops brown and keeps them from being too soft.
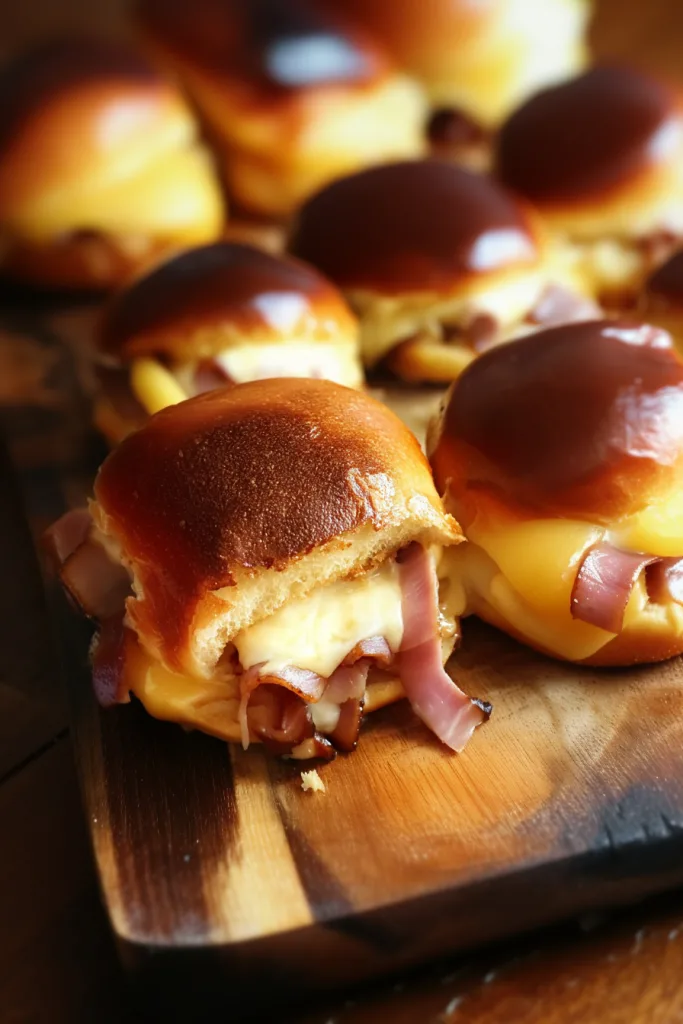
Funeral Rolls may have a serious-sounding name, but they’re really warm, buttery, cheesy ham and cheese sliders made for sharing. They’re simple, make-ahead friendly, and always welcome at a party, tailgate, potluck, church supper, or snacky family dinner. The sweet rolls, savory ham, melty cheese, and buttery mustard sauce make every bite cozy and satisfying.
Make these Funeral Rolls the next time you need an easy crowd-pleaser, and tell me—would you stick with ham and Swiss, or try a spicy pepper jack version?
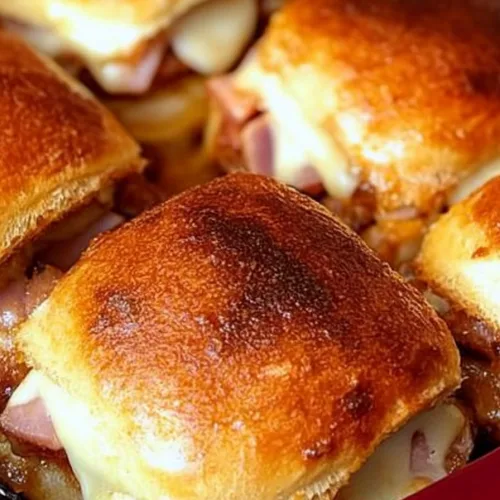
Funeral Rolls
Ingredients
- 1 package King’s Hawaiian Rolls or other soft dinner rolls, 12-count
- 1 lb thinly sliced ham
- 1 package Swiss or provolone cheese
- 1/2 cup unsalted butter melted
- 3 tbsp Worcestershire sauce
- 2 tbsp prepared mustard
- 2 tbsp brown sugar
- 1/4 tsp onion powder
- Poppy seeds optional
Instructions
- Using a serrated bread knife, cut the rolls in half lengthwise, keeping the bottom halves attached and the top halves attached.
- Place the bottom half of the rolls in the bottom of a baking pan.
- Arrange the thinly sliced ham evenly over the bottom half of the rolls.
- Place the Swiss or provolone cheese evenly over the ham.
- Place the top half of the rolls over the ham and cheese layer.
- In a small mixing bowl, combine the melted butter, Worcestershire sauce, prepared mustard, brown sugar, and onion powder.
- Stir until the sauce is fully combined and smooth.
- Pour the butter mixture evenly over the tops of the sandwiches.
- Cover the baking pan tightly with foil or plastic wrap.
- Refrigerate the rolls for 4 to 24 hours to allow the sauce to absorb into the bread. For best flavor, marinate overnight.
- When ready to bake, preheat the oven to 350°F.
- Remove the rolls from the refrigerator while the oven preheats.
- If using poppy seeds, sprinkle them evenly over the tops of the rolls.
- Bake the rolls uncovered for 15 minutes, or until the cheese is melted and the tops of the buns are golden.
- Remove the pan from the oven and allow the rolls to rest for a few minutes.
- Slice into individual sandwiches and serve warm.
Notes