Sugar, heavy cream, chocolate almond bark, and holiday sprinkles.
There’s something about making candy during Christmas that makes the whole kitchen feel a little more magical, even when the counter is covered in chocolate smears and sprinkles are somehow on the floor. These Christmas Chocolate Caramel Cups have that kind of cozy holiday energy. They’re small, festive, shiny, and filled with soft homemade caramel that gives you that sweet little surprise in the middle. You know that first bite where the chocolate cracks just a bit and the caramel shows up? That’s the moment. That’s why we make them.
The first time I made these Christmas Chocolate Caramel Cups, I was trying to put together a holiday treat tray that didn’t feel like the same old cookies and fudge. Not that I’m against cookies. Please, I would never betray cookies. But sometimes you want something that looks a little more “candy shop” without actually spending the whole afternoon doing complicated candy work. These chocolate caramel cups felt like the perfect middle ground: homemade, festive, rich, but not too fussy.
I remember melting the chocolate almond bark in the microwave and thinking, “Okay, this is going well… suspiciously well.” Then came the caramel, and I got a little nervous. Homemade caramel can be a tiny diva. It looks calm, then suddenly it’s bubbling, steaming, and demanding your full attention like it’s the star of a Christmas pageant. But once the sugar melts into that warm amber color and the heavy cream gets whisked in, the smell alone makes you feel like you did something very impressive.
These Christmas candy cups remind me of the little homemade treats people bring to holiday gatherings in tins lined with wax paper. There’s always one candy that disappears first, right? Everyone says, “Oh, I’ll just have one,” and then suddenly the tray has suspicious empty spaces. Sound familiar? These cups have that same danger. They’re small enough to seem harmless, but rich enough that you remember them after one bite.
What I love most is that these homemade caramel cups feel personal. They don’t look factory-perfect, and honestly, I like that. Some chocolate shells may be a little thicker than others. One cup might get extra sprinkles because your hand slipped. Another may have a tiny lopsided top. That’s fine. Actually, that’s kind of the charm. Homemade Christmas treats should look like a real person made them in a real kitchen with Christmas music playing and maybe a sink full of dishes waiting nearby.
The sprinkles make these festive chocolate treats feel instantly cheerful. Red and green sprinkles are classic, of course, but I’ve also used gold sprinkles when I wanted them to look a little fancy. Snowflake sprinkles are cute too, if you can find them before they somehow vanish into the back of the pantry. If kids are helping, prepare yourself. Sprinkles will travel. They may end up on the counter, on sleeves, maybe even in someone’s hair. It happens. That’s holiday baking.
I also appreciate that these are no-bake holiday candy treats, because during December, the oven is usually already working overtime. Cookies, casseroles, rolls, pies — it’s a lot. So having a candy recipe that uses the microwave, stovetop, and refrigerator feels like a gift. You still get something homemade and pretty, but you don’t have to negotiate oven space like it’s a family meeting.
These Christmas Chocolate Caramel Cups are perfect for cookie exchanges, holiday dessert boards, edible gift boxes, office parties, neighbor gifts, or cozy movie nights when you want something sweet beside your hot cocoa. They make 36 cups, which sounds like plenty. But let me tell you, 36 can disappear quickly when people realize there’s caramel inside. Tiny desserts are sneaky like that.
If you love the chocolate-and-caramel combination, this recipe feels like a holiday win. It’s simple, festive, sweet, and just a little dramatic in the best way. These Christmas Chocolate Caramel Cups are the kind of treat that makes the season feel homemade, even if the wrapping paper is still half-finished and someone lost the tape again.

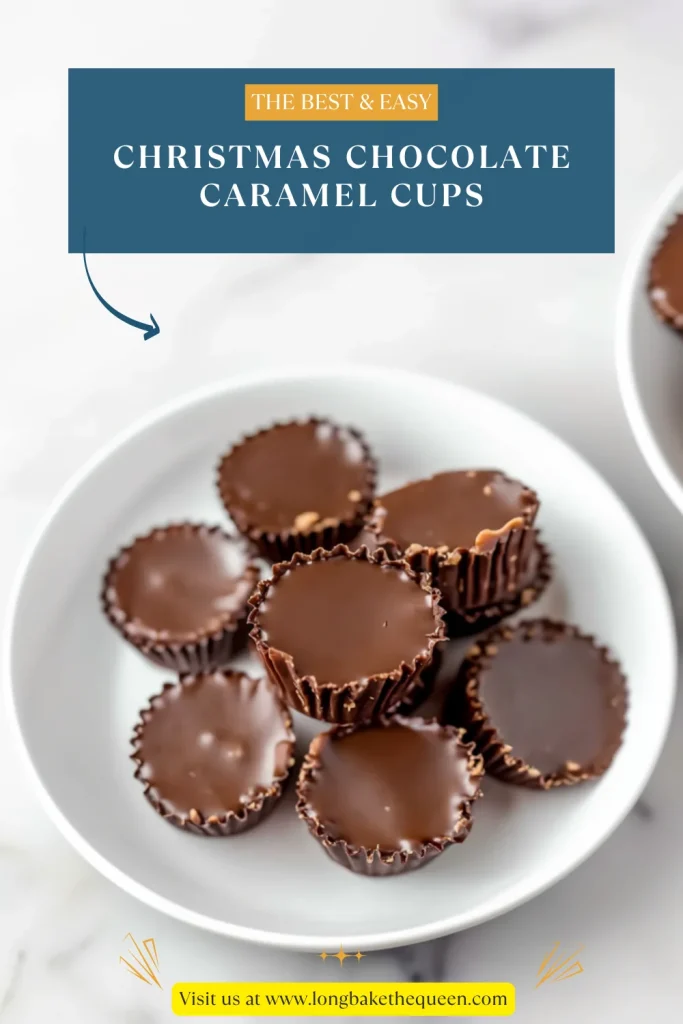
Why you’ll Love these Christmas Chocolate Caramel Cups?
You’ll love these Christmas Chocolate Caramel Cups because they combine chocolate, caramel, and sprinkles in the cutest little holiday bite. Each cup has a smooth chocolate shell, a soft caramel center, and a chocolate top covered with festive sprinkles. They look cheerful on a dessert tray and taste like the kind of candy people hope someone brings to the party.
These chocolate caramel cups are also easier than they look. You don’t need fancy molds, candy-making tools, or the confidence of someone who owns a marble pastry slab. Mini cupcake liners do the shaping for you. The chocolate almond bark melts smoothly, coats the liners nicely, and sets into a firm little shell. It’s simple, but the result looks so polished.
The homemade caramel is what makes these Christmas candy cups feel extra special. It’s made with just sugar and heavy cream, but the flavor is deep, sweet, and creamy. I’ll be honest, caramel can feel a little intimidating the first time you make it. But once you learn to watch the color and move slowly, it becomes much less scary. Still a bit dramatic, yes. But lots of good things are.
Another reason I love these no-bake holiday candy cups is that they don’t need the oven. That matters during the holidays. If your oven is already full of cookies, ham, rolls, or something bubbling in a casserole dish, this recipe politely stays out of the way. You melt the chocolate, make the caramel, assemble the cups, and let the fridge do the rest. Very considerate.
These homemade caramel cups are also great for gifting. Since they’re already portioned in mini liners, they package beautifully in tins, treat bags, or little candy boxes. Add parchment paper between layers, tie on a ribbon, and suddenly you look deeply organized and thoughtful. Even if you wrapped everything at midnight. We don’t need to discuss that part.
I also love how flexible these festive chocolate treats can be. Red and green sprinkles make them Christmas-ready, but you can change the sprinkles for other holidays or parties. Add flaky sea salt if you want a sweet-salty version, crushed peppermint for a stronger Christmas flavor, or chopped nuts for crunch. The basic chocolate-caramel idea works all year, honestly.
And maybe best of all, these Christmas Chocolate Caramel Cups are just fun. They’re small, rich, and a little bit fancy without being fussy. They’re the kind of candy that makes people ask, “Did you make these?” And you get to say yes, very casually, even though inside you’re doing a tiny proud dance.
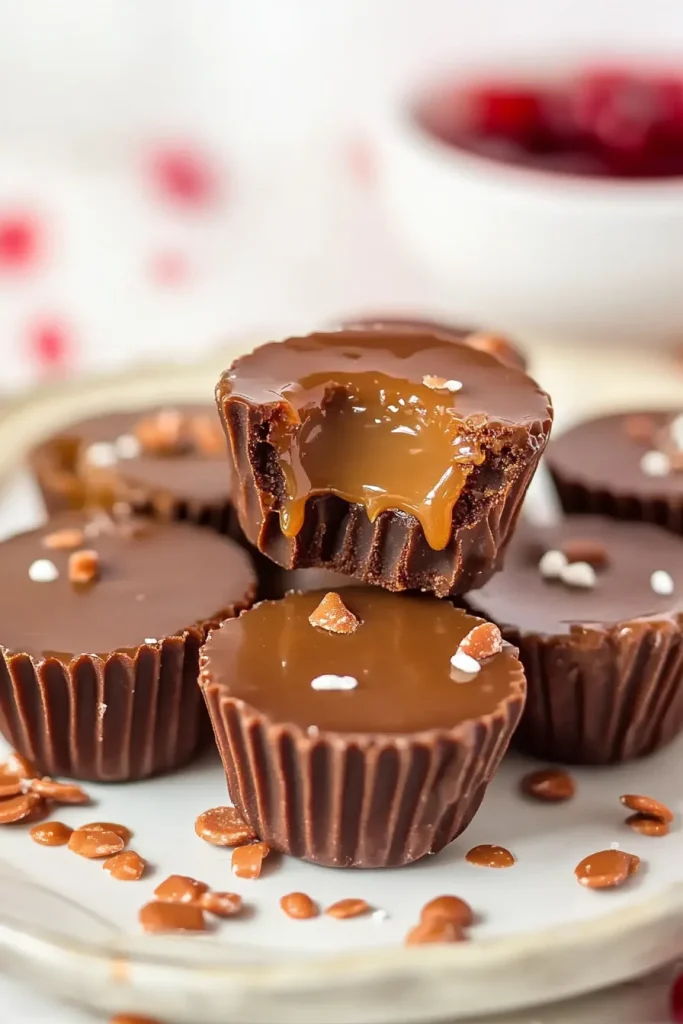
Ingredient Notes
The ingredient list for Christmas Chocolate Caramel Cups is short, which is one of the reasons I like this recipe so much. Sugar and heavy cream turn into homemade caramel, chocolate almond bark makes the shell and topping, and holiday sprinkles add that colorful Christmas finish. Simple ingredients, but they come together in such a satisfying way.
- Sugar: Sugar is the base of the homemade caramel filling. As it melts, it changes from plain white sugar into a golden amber caramel with a deep, sweet flavor. This is the step where patience matters most. Let the sugar melt slowly over medium heat, and try not to stir too much. If it gets too dark, the caramel can taste bitter, and nobody wants bitter caramel hiding inside their Christmas Chocolate Caramel Cups. You’re looking for warm amber, not “oops, I walked away.”
- Heavy Cream: Heavy cream turns the melted sugar into smooth caramel. Once the sugar reaches the right color, the cream gets whisked in slowly. It may bubble and steam, so don’t panic, but do be careful. This part always feels a little theatrical to me, like caramel is making a grand entrance. The cream gives these homemade caramel cups their soft, rich center, which is the best surprise when you bite into them.
- Chocolate Almond Bark: Chocolate almond bark creates both the shell and the top layer for these chocolate caramel cups. It melts easily in the microwave and sets nicely, which makes it perfect for homemade candy. You’ll use half to coat the mini cupcake liners, then the other half to seal the caramel inside. Almond bark is more forgiving than regular chocolate, and during Christmas treat season, I will happily accept forgiving ingredients.
- Holiday Sprinkles: Holiday sprinkles make these Christmas candy cups look festive and cheerful. Add them while the top chocolate layer is still soft so they stick properly. Red and green sprinkles are classic, but snowflakes, gold sugar, white nonpareils, or mixed holiday sprinkles all work. Sprinkles are basically edible confetti, and I think Christmas candy deserves a little confetti. Maybe a lot.
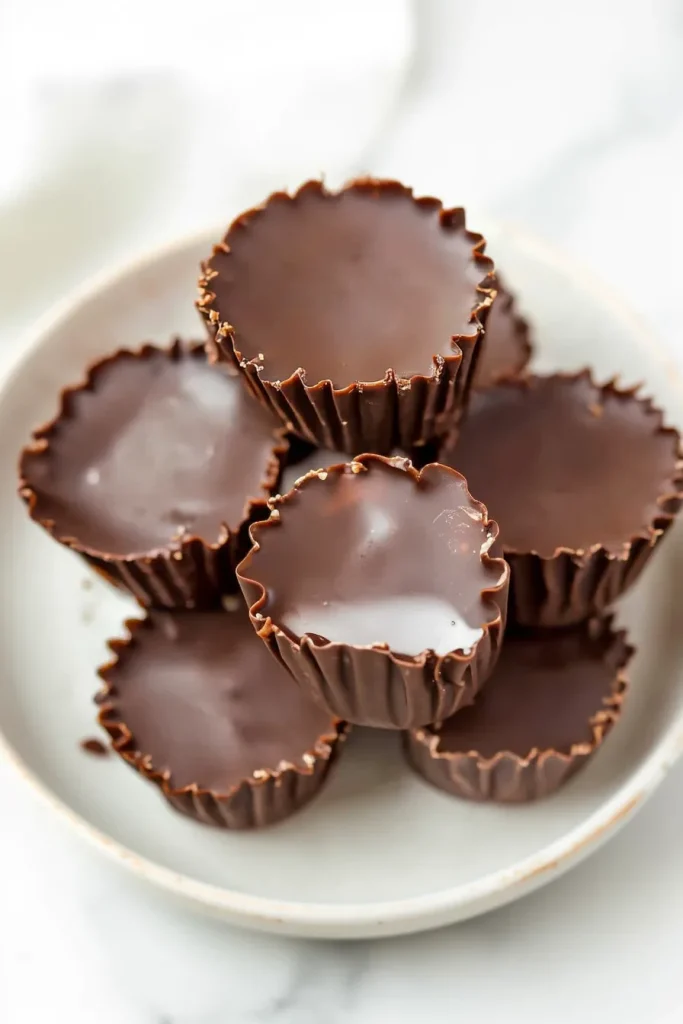
How to Make Christmas Chocolate Caramel Cups?
Making Christmas Chocolate Caramel Cups is easier when you think of the recipe in three parts: chocolate shells, caramel filling, and chocolate topping. The chocolate shells need to harden before filling, the caramel needs to thicken before spooning, and the finished cups need time to set. None of it is difficult, but the little waiting steps help the candy turn out neat and gift-worthy.
Step 1: Gather the ingredients
Start by gathering all your ingredients before you begin. You’ll need sugar, heavy cream, chocolate almond bark, and holiday sprinkles. This may sound obvious, but it really helps, especially when working with caramel. Once the sugar starts turning amber, you don’t want to be rummaging through the refrigerator looking for cream. Caramel does not wait patiently. It has places to be.
Step 2: Prepare the mini cupcake tin
Place 36 mini cupcake liners into a mini cupcake tin. The liners help form the candy cups, and the tin keeps them steady while you add the chocolate and caramel. If you try to do this without the tin, the liners can wobble around, and then you’re chasing tiny chocolate cups across the counter. Not impossible, just annoying. The tin keeps everything calm.
Step 3: Melt half of the chocolate almond bark
Place half of the chocolate almond bark in a large microwave-safe bowl. Microwave it in 30-second increments, stirring after each round, until it is melted and smooth. Stirring between intervals helps the chocolate melt evenly and keeps it from overheating. The chocolate should be smooth enough to spoon into the liners easily, with no big lumps hiding in there.
Step 4: Spoon chocolate into the liners
Spoon a small amount of melted chocolate into each mini cupcake liner. You do not need to fill the liners completely. You only need enough chocolate to cover the bottom and start building the sides. This chocolate becomes the shell that holds the caramel. Try to divide it evenly, but don’t worry if some cups get a little more than others. Homemade candy is allowed to be a bit uneven.
Step 5: Spread the chocolate up the sides
Use a spoon or a small food-safe paintbrush to spread the chocolate up the sides of each liner. Make sure the bottom is completely covered and that you cannot see the liner through the chocolate. If the layer looks too thin, add a little more melted chocolate and spread it again. This step matters because thin shells can crack or leak caramel. And yes, caramel leaks are delicious, but they are also sticky little problems.
Step 6: Let the chocolate shells harden
Set the chocolate-lined cups aside until the shells harden. You can let them firm up at room temperature if your kitchen is cool, or place the tin in the refrigerator to speed things along. The shells should feel firm before you add the caramel. If they’re too soft, the warm-ish caramel can make things messy, and we’re trying to keep these Christmas Chocolate Caramel Cups cute.
Step 7: Melt the sugar for the caramel
Add the sugar to a heavy-bottomed pot over medium heat. Let it slowly melt, stirring as little as possible and only very gently when needed. At first, the sugar may clump, and you might wonder if something has gone wrong. Usually it hasn’t. It will slowly melt into a smooth liquid as it cooks. Keep your eyes on it, though. Caramel rewards attention and punishes wandering off to check your phone.
Step 8: Watch the caramel color
Continue cooking the sugar until there are no lumps and the melted sugar turns amber. You don’t want it too pale, but you definitely don’t want it too dark either. Dark caramel can turn bitter quickly. If you’re unsure, I’d rather pull it from the heat a little early than a little late. The color should look warm and golden, like honey with a tiny bit of drama.
Step 9: Whisk in the heavy cream
Once the sugar reaches the right color, remove the pot from the heat. Slowly whisk in the heavy cream in a thin stream until everything is combined. Be careful here because the mixture can bubble and steam. Keep whisking until the caramel becomes smooth. This is the point where your kitchen starts smelling like a little Christmas candy shop, and honestly, it feels very rewarding.
Step 10: Chill the caramel
Carefully pour the caramel into a bowl and place it in the refrigerator for 30 minutes to thicken. You want the caramel thick enough to spoon into the chocolate shells without running everywhere. It should still be soft, not hard. Think creamy caramel filling, not caramel soup and not caramel brick. Somewhere in that happy middle.
Step 11: Fill the chocolate cups
Once the caramel has thickened, spoon it into the hardened chocolate-lined liners. Fill each shell almost to the top of where the chocolate ends, but do not overfill. You need a little room for the top chocolate layer to seal everything inside. This is where the cups start looking like real homemade caramel cups, and it’s very satisfying.
Step 12: Melt the remaining chocolate
Melt the remaining chocolate almond bark in the microwave using the same method as before. Heat it in 30-second increments, stirring after each round, until smooth and melted. This chocolate will become the top layer that seals the caramel inside the cups. Try not to overheat it, because smooth chocolate is much easier to spread.
Step 13: Cover the caramel
Spoon melted chocolate over the caramel in each cup. Gently spread it to the edges of the liner so the caramel is fully covered. Try to connect the top chocolate layer to the chocolate shell underneath. This helps seal the caramel inside like a tiny chocolate lid. A tiny chocolate lid is not a technical term, but it makes sense, right?
Step 14: Add the holiday sprinkles
While the top chocolate layer is still soft, add the holiday sprinkles. Do this right away so the sprinkles stick before the chocolate sets. This is the fun part. Also the messy part. Sprinkles bounce, roll, and generally behave like they pay rent in your kitchen. Just let it happen. It’s Christmas.
Step 15: Chill until fully set
Place the cups in the refrigerator for about 1 hour, or until they are completely set. The chocolate should be firm, and the caramel should be soft but stable inside. Once set, remove the cups from the tin and serve. These Christmas Chocolate Caramel Cups are ready for dessert trays, edible gifts, or a quick “quality control” taste. For safety, obviously.
Storage Options
Christmas Chocolate Caramel Cups store well, which is exactly what we need during the holiday season. Anything that can be made ahead is a small blessing when there are cookies to bake, gifts to wrap, and someone suddenly asking where the tape went. Since these cups are made with chocolate almond bark and homemade caramel, they should be kept cool so the chocolate stays firm and the caramel stays nicely set.
Store the caramel cups in an airtight container in the refrigerator for up to 2 weeks. If you need to stack them, place parchment paper between the layers so the tops stay neat and the sprinkles do not rub off too much. Let the cups sit at room temperature for a few minutes before serving if you prefer a softer caramel center. Cold is fine, but slightly softened caramel is lovely.
You can also keep these chocolate caramel cups at cool room temperature for up to 3 days, as long as your kitchen is not warm or humid. If your house runs warm, the refrigerator is the safer choice. Chocolate can soften quickly, and nobody wants the candy cups sliding around on a platter like tiny holiday ice skaters.
For longer storage, freeze the Christmas candy cups for up to 2 months. Place them in a freezer-safe container with parchment paper between layers. Thaw them in the refrigerator before serving. The caramel may be a little firmer after freezing, but the cups will still taste delicious. I’d freeze them only after the chocolate has fully set so they keep their shape nicely.
If you’re giving these homemade caramel cups as gifts, keep them chilled until you are ready to package them. Candy boxes, small tins, mini cupcake liners, and little treat bags all work beautifully. Just try not to leave them in a warm car while running holiday errands. Melted chocolate is festive in theory, but in real life it’s mostly a cleanup project.
Variations & Substitutions
These Christmas Chocolate Caramel Cups are wonderful as written, but you can definitely make them your own. The basic idea is simple: chocolate shell, caramel center, chocolate top, and something festive on top. Once you’ve got that, you can change the chocolate, add salt, sprinkle on peppermint, mix in nuts, or use different decorations for other holidays.
- Use Dark Chocolate Almond Bark: If you want a deeper chocolate flavor, use dark chocolate almond bark instead of regular chocolate almond bark. Dark chocolate balances the sweet caramel beautifully and makes these chocolate caramel cups taste a little richer. It’s a nice option if you want them to feel slightly more grown-up, especially on a holiday dessert board with coffee.
- Use White Almond Bark: White almond bark gives the cups a snowy Christmas look. You can make the full cup with white almond bark or drizzle it over the chocolate tops for contrast. White chocolate-style cups look beautiful with red and green sprinkles, gold sugar, or snowflake decorations. It gives these festive chocolate treats a cute candy-shop feeling.
- Add Sea Salt: A small sprinkle of flaky sea salt can make these homemade caramel cups taste even better. Add it over the caramel before sealing, or sprinkle it on top of the melted chocolate before it sets. Salt balances the sweetness and makes the caramel flavor stand out. Just use a light hand. We want salted caramel, not “accidentally dropped it in the ocean.”
- Use Different Sprinkles: Change the sprinkles to match any holiday or party theme. Red and green sprinkles are classic for Christmas Chocolate Caramel Cups, but pink and red work for Valentine’s Day, pastels work for Easter, orange and black work for Halloween, and rainbow sprinkles work for birthdays. Chocolate and caramel are not picky. They celebrate everything.
- Add Chopped Nuts: Chopped pecans, almonds, or peanuts can be added to the caramel filling or sprinkled on top before the chocolate sets. Nuts add crunch and make these Christmas candy cups feel a little like turtle candies. I like this option when I want a little texture, but I’d keep the pieces small so the cups still bite neatly.
- Add Crushed Peppermint: Crushed peppermint candies make these cups feel even more Christmas-ready. Sprinkle them on top instead of, or alongside, the holiday sprinkles. Peppermint and chocolate are a classic holiday pair, but go lightly if you still want the caramel to shine. Peppermint has main-character energy and will absolutely take over if you let it.
- Use Store-Bought Caramel: If homemade caramel makes you nervous, you can use thick store-bought caramel sauce or melted soft caramel candies. The texture may be different, but it can still work. Choose caramel that holds its shape when chilled. Thin caramel sauce may leak from the cups, and while a little caramel leak is not tragic, it’s not exactly tidy.
- Make Mini Gift Boxes: These Christmas Chocolate Caramel Cups are perfect for gift boxes. Place a few in a small candy box, tuck parchment between layers, and tie the box with a ribbon. They make sweet gifts for neighbors, teachers, coworkers, hosts, or anyone who deserves a little chocolate-caramel happiness. Which, honestly, is most people in December.
- Add Espresso Powder: A tiny pinch of espresso powder in the melted chocolate can deepen the chocolate flavor without making the cups taste strongly like coffee. This is a nice little trick if you want the chocolate to feel richer against the caramel. It’s subtle, but it works.
- Try Caramel Flavoring: If you want a stronger caramel flavor, you can add a very small amount of caramel extract after the cream is mixed into the sugar. Use a light hand because extracts can be strong. The homemade caramel already has good flavor, so this is optional. But if you’re a caramel person, I understand the temptation.
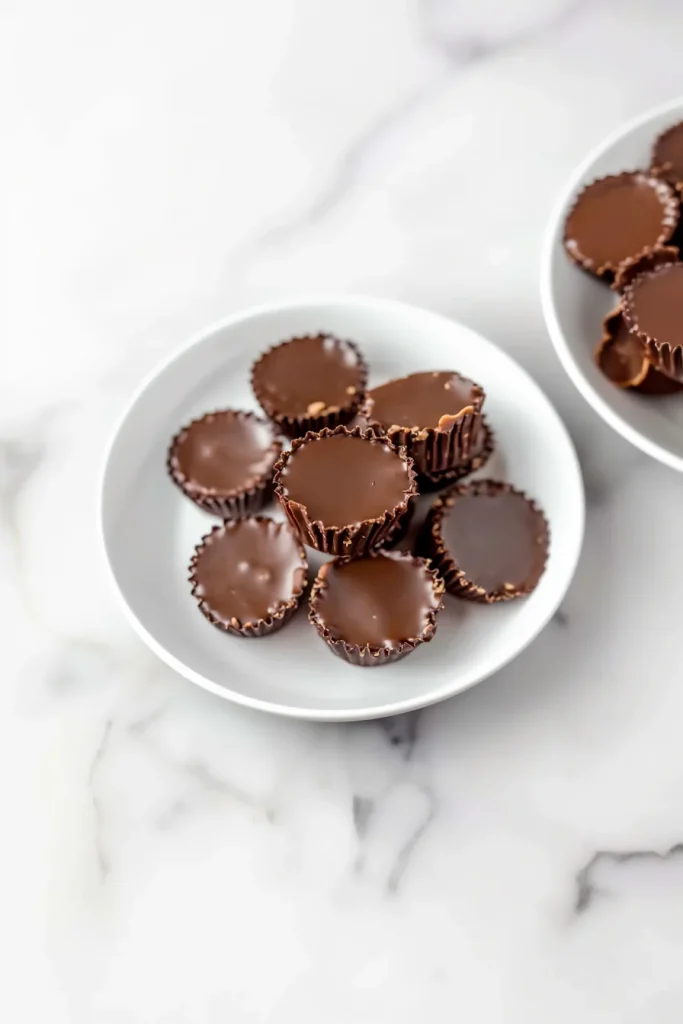
What to Serve With Christmas Chocolate Caramel Cups?
Christmas Chocolate Caramel Cups are rich, sweet, and festive, so they pair best with simple drinks and lighter treats. Since each cup already has chocolate and caramel, you don’t need anything too heavy beside them. They fit beautifully on holiday dessert trays, candy boards, cookie boxes, and cozy Christmas movie-night plates.
- Hot Cocoa: Hot cocoa and Christmas Chocolate Caramel Cups are a very festive pairing. Is it sweet? Yes. Is that kind of the point in December? Also yes. Add whipped cream, marshmallows, or a candy cane if you want the full cozy holiday moment. This pairing is rich, but it feels right when you’re watching Christmas movies under a blanket.
- Coffee: Coffee balances the sweetness of these chocolate caramel cups really well. A hot cup of coffee, espresso, or cold brew cuts through the richness of the caramel and chocolate. This pairing is especially nice after dinner or during a holiday gathering when everyone wants “just one little sweet thing.” Famous last words.
- Milk: A cold glass of milk is simple and classic with chocolate candy. It softens the richness and makes the caramel center taste even creamier. This is a great option for kids, family movie nights, or anyone who still believes milk and chocolate are best friends. They are correct.
- Peppermint Tea: Peppermint tea adds a fresh, minty contrast to the chocolate and caramel. It feels festive without adding more sweetness, which is nice because these Christmas candy cups already bring plenty. This is a great warm drink option when hot cocoa feels like too much but you still want something cozy.
- Christmas Cookie Tray: Add these cups to a tray with sugar cookies, gingerbread cookies, shortbread, thumbprints, and fudge. Their glossy chocolate tops and sprinkles make the tray look extra cheerful. Plus, the soft caramel center gives guests something different from the usual cookie bite. Every tray needs a little surprise.
- Fruit Platter: Fresh strawberries, raspberries, apple slices, and orange segments help balance the sweetness of these festive chocolate treats. Fruit adds brightness and color to the dessert table. It also makes everyone feel like balance is happening. Maybe it is, maybe it isn’t, but it looks nice.
- Vanilla Ice Cream: Serve one caramel cup with a small scoop of vanilla ice cream for a simple plated dessert. The cold ice cream pairs beautifully with the chocolate shell and soft caramel filling. You can also chop a cup and sprinkle it over ice cream like a homemade candy topping. That is a very good little idea, actually.
- Holiday Dessert Board: Place these homemade caramel cups on a dessert board with pretzels, marshmallows, cookies, nuts, berries, peppermint bark, and chocolate-covered treats. They add shine, color, and rich caramel flavor. Dessert boards are wonderful because they make everything look intentional, even if you’re arranging snacks five minutes before guests arrive.
- Sparkling Water: Sparkling water is a nice lighter drink option with rich candy. Plain, berry-flavored, or citrus-flavored sparkling water can refresh your palate between bites. Not every pairing needs to be creamy or sweet. Sometimes simple bubbles are enough.
- Holiday Coffee Bar: These Christmas Chocolate Caramel Cups are perfect beside a holiday coffee bar with flavored creamers, whipped cream, cinnamon, cocoa powder, and candy canes. Guests can grab a coffee and a candy cup, and suddenly your kitchen feels like a tiny Christmas café. Maybe a slightly chaotic café, but still cute.
FAQ
Can I use regular chocolate instead of almond bark?
Yes, you can use melting chocolate or chocolate wafers if you prefer. Almond bark is easy because it melts smoothly and sets firmly without tempering. Regular chocolate can work, but it may need more careful melting and may set a little softer depending on the type. So yes, but almond bark keeps the process easier.
Why did my caramel turn bitter?
Caramel can turn bitter if the sugar cooks too long or gets too dark. For these homemade caramel cups, you want the melted sugar to reach a warm amber color, not a deep brown. Once it gets to that golden color, remove it from the heat and slowly whisk in the heavy cream. Don’t walk away during this step. Caramel notices.
Why did my caramel clump when I added the cream?
Caramel can clump if the heavy cream is added too quickly or if the temperature difference shocks the melted sugar. Add the cream slowly in a thin stream while whisking constantly. If small clumps form, keep whisking gently. Sometimes they smooth out as the caramel comes together. It’s a stressful little moment, but it doesn’t always mean the caramel is ruined.
How do I keep the caramel from leaking out?
Make sure the chocolate shell is thick enough and fully covers the bottom and sides of each liner. You should not be able to see the liner through the chocolate. Also, do not overfill the caramel. Leave enough room for the top chocolate layer to seal the cup properly. Think of it as tucking the caramel safely inside its chocolate coat.
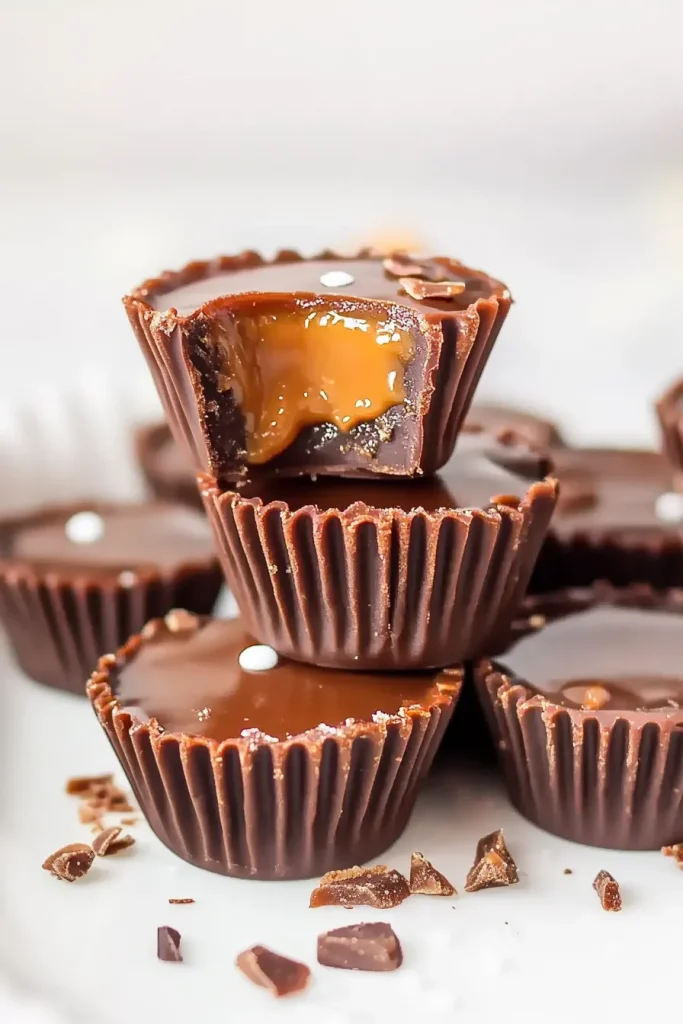
These Christmas Chocolate Caramel Cups are sweet, festive, and honestly just fun to make. They have a smooth chocolate shell, a soft homemade caramel center, and a sprinkle-covered top that makes them perfect for holiday trays, edible gifts, and Christmas parties. They’re small, rich, and the kind of treat people reach for before they even ask what they are.
I love that this recipe feels homemade without being overly complicated. You melt chocolate, make caramel, fill the cups, add sprinkles, and let the fridge do the final work. There may be a few chocolate smudges along the way. There may be sprinkles in places sprinkles do not belong. That’s okay. That’s December baking, and it has its own messy little charm.
Make these Christmas Chocolate Caramel Cups for your next cookie exchange, Christmas party, edible gift box, or cozy movie night. And tell me — would you keep them classic with red and green sprinkles, add sea salt, or go full holiday mode with crushed peppermint? Can’t wait to hear what you think!
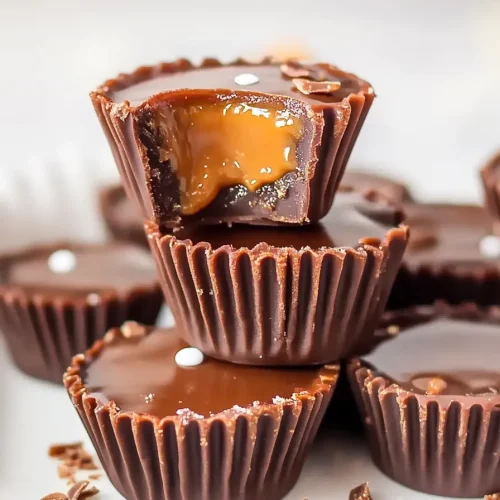
Christmas Chocolate Caramel Cups
Ingredients
- 1 cup granulated sugar
- ⅔ cup heavy cream
- 1 lb chocolate almond bark divided
- Holiday sprinkles for topping
Instructions
Prepare the ingredients.
- Gather all ingredients before beginning the recipe.
Prepare the mini cupcake tin.
- Place 36 mini cupcake liners into a mini cupcake tin.
Melt the first portion of chocolate.
- Place half of the chocolate almond bark in a large microwave-safe bowl. Microwave in 30-second intervals, stirring after each interval, until the chocolate is completely melted and smooth.
Add chocolate to the liners.
- Spoon a small amount of melted chocolate into each mini cupcake liner.
Coat the liners.
- Using a spoon or a small food-safe brush, spread the melted chocolate up the sides of each liner to form a shell.
Check the shell thickness.
- Ensure the bottom and sides of each liner are fully coated. If the chocolate layer appears too thin or the liner is visible, add a small amount of additional melted chocolate and spread again.
Allow the shells to harden.
- Set the chocolate-lined cups aside until the chocolate is firm.
Prepare the caramel.
- In a heavy-bottomed pot set over medium heat, add the granulated sugar.
Melt the sugar.
- Allow the sugar to melt slowly, stirring as little as possible and only very gently when necessary.
Cook to amber color.
- Continue cooking the sugar until all lumps have dissolved and the mixture reaches an amber color. Do not allow the caramel to become too dark, as it may burn and develop a bitter flavor.
Add the heavy cream.
- Remove the pot from the heat. Slowly whisk in the heavy cream in a thin stream until the caramel is smooth and fully combined. Use caution, as the mixture may bubble and steam.
Chill the caramel.
- Carefully pour the caramel into a bowl. Place it in the refrigerator for 30 minutes, or until it thickens enough to spoon into the chocolate shells.
Fill the chocolate shells.
- Spoon the thickened caramel into each hardened chocolate shell. Fill each cup almost to the top of the chocolate shell, but do not overfill.
Melt the remaining chocolate.
- Place the remaining chocolate almond bark in a microwave-safe bowl. Microwave in 30-second intervals, stirring after each interval, until melted and smooth.
Seal the caramel cups.
- Spoon the melted chocolate over the caramel filling in each cup. Gently spread the chocolate to the edges to fully cover and seal the caramel.
Add sprinkles.
- While the top layer of chocolate is still soft, sprinkle each cup with holiday sprinkles.
Chill until set.
- Place the caramel cups in the refrigerator for 1 hour, or until completely firm.
Serve.
- Once set, remove the cups from the mini cupcake tin and serve.
Notes