Flour, salt, lard, cold water, lemon juice, cornstarch, coconut water, all-purpose cream, sugar, young coconut meat, egg, milk.
There’s something about a good Buko Pie Recipe that feels like opening a little box of comfort. Not loud comfort. Not flashy comfort. More like that quiet, familiar feeling you get when someone brings home a dessert after a long trip and everyone suddenly gathers around the table. In the Philippines, buko pie has that pasalubong energy, you know? The kind of treat that says, “I thought of you,” even if the box gets opened before anyone has properly washed their hands. It happens. We’re human.
I always think of buko pie as one of those desserts that sits somewhere between snack and celebration. You can have it with coffee in the afternoon, with tea after dinner, or straight from the fridge when you only meant to “check” if it was still good. Sound familiar? It’s creamy, flaky, tropical, and homey all at once. That’s not always easy for a dessert to pull off, but this one does it quietly.
The first time I tried making a homemade Buko Pie Recipe, I was a little too confident with the crust. I thought, How hard can it be? Famous last words in baking, right? The dough cracked a little, my edge crimping looked more “rustic auntie energy” than bakery display, and I may have sighed at least twice. But once the pie came out golden and the coconut filling had set, none of that mattered. A slightly imperfect crust still tastes amazing when it’s wrapped around creamy young coconut filling.
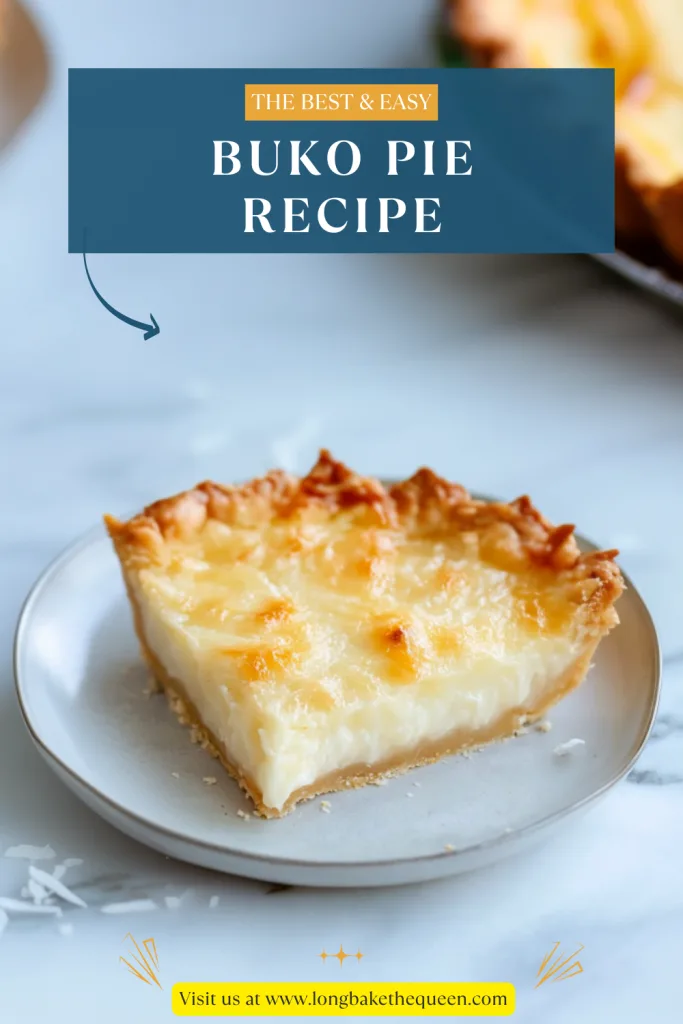
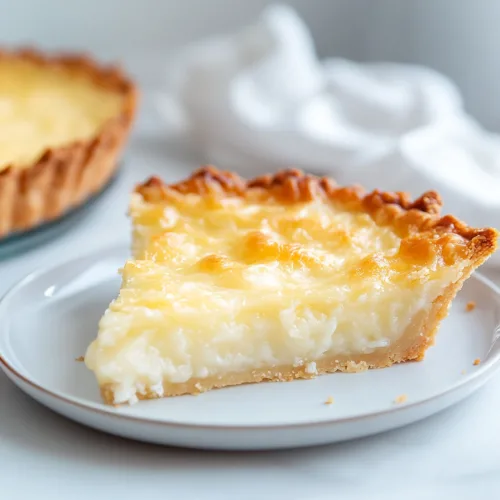
That’s what I love about this Filipino coconut pie. It doesn’t have to look perfect to feel special. The filling is made with young coconut meat, coconut water, all-purpose cream, sugar, and cornstarch, so it turns thick, creamy, and gently sweet. The crust is flaky and rich from chilled lard, and the egg wash gives the top that golden finish. It’s simple, but it has soul. And honestly, I’ll take that over picture-perfect any day.
This young coconut pie recipe also reminds me of merienda moments, rainy afternoons, and those family tables where someone always says, “Just a small slice,” then somehow ends up with another one. I’m not judging. I fully understand. Buko pie has a way of being soft, creamy, and comforting without feeling too heavy. It’s tropical, but not trying too hard. Sweet, but not screaming about it. Just lovely.

Why you’ll Love this Buko Pie Recipe?
You’ll love this Buko Pie Recipe because it brings together two of the best dessert textures: a flaky homemade crust and a creamy young coconut filling. The crust has that tender, buttery-feeling flake from chilled lard, while the filling is soft, thick, and full of tender coconut meat. It’s the kind of bite that makes you pause for half a second. Not dramatic, just happy.
One thing I really like about this Filipino buko pie is that the filling is cooked on the stovetop first. That may seem like one extra step, but it helps so much. The cornstarch is dissolved in coconut water, then stirred into cream, sugar, and young coconut meat until the filling thickens into an almost paste-like texture. That means when the pie bakes, the filling already has structure. Translation? Cleaner slices and less coconut lava running across the plate.
This Buko Pie Recipe is also great for sharing. It serves 8, which makes it perfect for family dessert, potlucks, holidays, weekend baking, or a cozy merienda with coffee. It’s not a dessert that demands a fancy plate or a dramatic entrance. You can serve it warm, cold, or somewhere in between, and people will still find their way back for another slice. Funny how coconut pie does that.
I also love that this coconut pie recipe feels special without needing a long list of fancy ingredients. You’re using flour, salt, lard, cold water, lemon juice or vinegar, cornstarch, coconut water, cream, sugar, young coconut meat, egg, and milk. Very simple things. But when they come together? Suddenly you’ve got a dessert that tastes like something from a bakery box, the kind you bring home and guard carefully in the car.
Another reason this Buko Pie Recipe is a keeper is that it works both warm and cold. Warm buko pie is soft, cozy, and a little more relaxed. Cold buko pie is firmer, creamier, and easier to slice neatly. I go back and forth on which one I like better. Some days I want the warm slice with coffee. Other days, cold from the fridge wins because the filling feels extra creamy. Do you agree, or are you firmly team warm?
Ingredient Notes
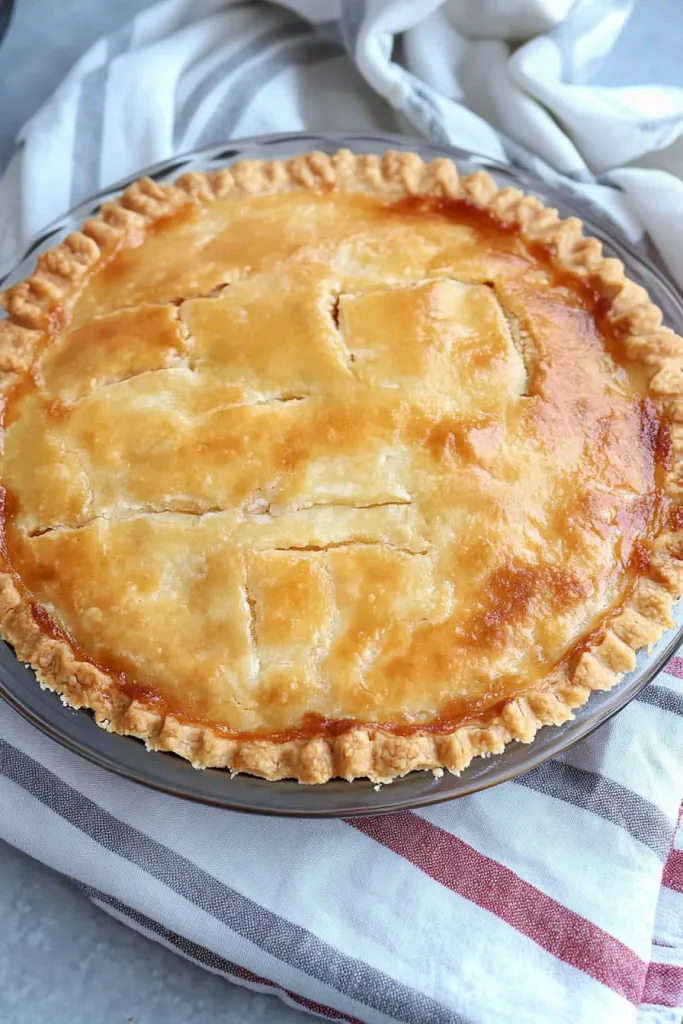
The ingredients in this Buko Pie Recipe are divided into three simple parts: the flaky pie crust, the creamy buko filling, and the egg wash. The crust gives the pie structure and flakiness, the filling brings all that sweet young coconut flavor, and the egg wash helps the top bake golden and pretty. Nothing here is complicated, but each ingredient has a job to do.
- Flour: Flour is the base of the flaky crust in this Buko Pie Recipe. Sifting it with salt helps remove lumps and makes the mixture lighter before the lard goes in. Once you add the liquid, try not to overwork the dough. Pie dough likes gentle hands. If you push it too hard, it gets tough, and nobody wants a crust with an attitude.
- Salt: Salt may seem small, but it matters. It gives the crust flavor and balances the sweetness of the coconut filling. Without salt, even a sweet pie can taste a little flat. Just 1 teaspoon helps the crust taste complete.
- Chilled lard: Chilled lard is what gives the crust its flakiness. When small pieces of cold lard stay in the dough, they melt in the oven and create little pockets. That’s how you get a tender, flaky crust. The recipe says to cut the lard until it looks like small peas, and that’s a helpful visual. Don’t make it too tiny, or the crust may turn crumbly instead of flaky.
- Cold water: Cold water brings the dough together without melting the lard. Add just enough to form a ball. Too much water can make the dough sticky and harder to handle, which is when pie crust starts testing your patience.
- Lemon juice or vinegar: Lemon juice or vinegar helps tenderize the dough and makes it easier to work with. You won’t really taste it in the finished crust, so don’t worry. It’s just there in the background helping the crust behave.
- Cornstarch: Cornstarch thickens the filling for this Filipino coconut pie. It’s dissolved in coconut water first so it can blend smoothly into the cream mixture. This helps prevent lumps and gives the filling that creamy, sliceable texture.
- Coconut water: Coconut water adds natural coconut flavor and helps dissolve the cornstarch. Fresh coconut water is lovely if you have it, but bottled or packaged coconut water can also work. Just choose one that tastes clean and not overly sweetened.
- All-purpose cream: All-purpose cream makes the filling rich and smooth. It gives the Buko Pie Recipe that soft, creamy texture without making it too heavy. It also helps the young coconut meat feel nicely coated in every bite.
- Sugar: Sugar sweetens the filling. This recipe uses ¾ cup, which gives the pie a gentle sweetness. It lets the young coconut flavor shine instead of covering it up. If your coconut meat is naturally sweet, this amount usually feels just right.
- Young coconut meat: Young coconut meat is the heart of this young coconut pie recipe. It should be tender, soft, and mildly sweet. Mature coconut is much firmer and can feel too chewy in the filling, so young coconut really is the best choice here.
- Egg: The egg is used for the egg wash. It helps the top crust brown and gives it a lovely golden finish. It’s a small step, but it makes the pie look more polished.
- Milk: Milk is mixed with the egg to make the egg wash easier to brush over the crust. It helps the top crust bake with a nice color and subtle shine.
How to Make Buko Pie Recipe?
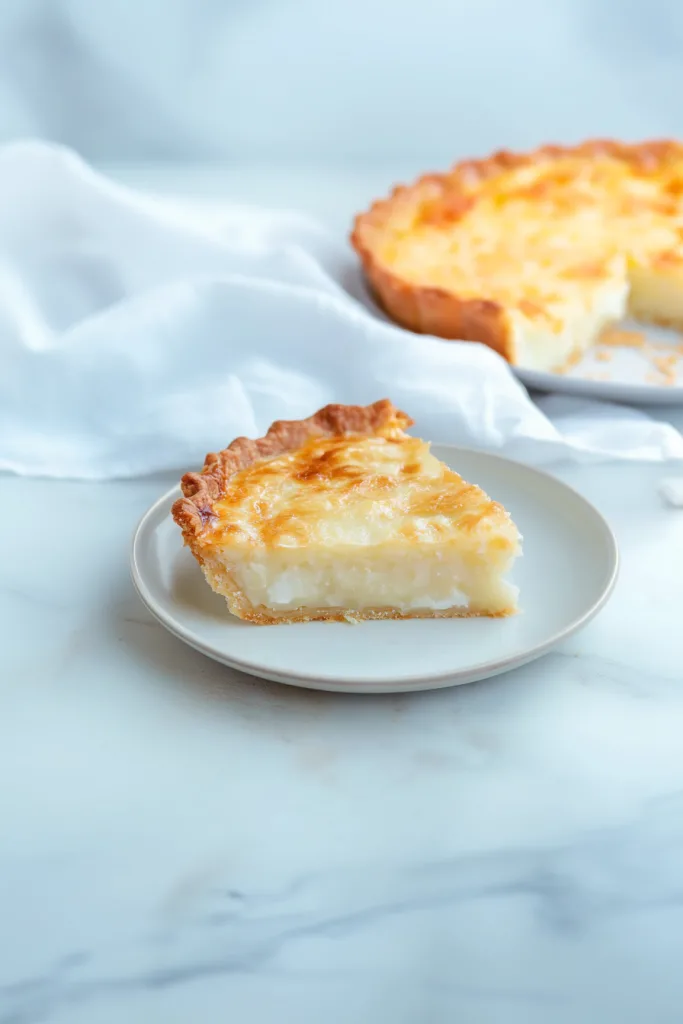
Making this Buko Pie Recipe is easier when you break it into stages. First, prepare the coconut filling and let it cool completely. Then make the flaky pie dough, chill it, roll out the bottom and top crusts, assemble the pie, bake it at high heat, brush it with egg wash, and finish baking at a lower temperature. It sounds like a lot written out, I know, but once you start, it moves along naturally.
Step 1: Dissolve the Cornstarch
Start by dissolving the cornstarch in the coconut water. Stir it until smooth, then set it aside. This helps the cornstarch blend into the filling later without clumping. It’s a tiny step, but it makes a big difference. Smooth coconut filling is the goal. Lumpy filling? Not invited.
Step 2: Heat the Cream and Sugar
In a saucepan over medium-low heat, combine the all-purpose cream and sugar. Bring the mixture to a gentle simmer and stir until the sugar completely dissolves. Don’t rush this with high heat. Cream can scorch, and once that happens, the mood changes fast. Keep it gentle and steady.
Step 3: Add the Young Coconut Meat
Add the young coconut meat to the cream and sugar mixture. Stir gently so the coconut is evenly coated. This is when the filling starts to look like real buko pie filling, creamy and full of tender coconut strips. It’s also when the kitchen starts smelling a little tropical, which is never a bad thing.
Step 4: Thicken the Filling
Slowly pour in the coconut water and cornstarch mixture while stirring regularly. Keep cooking and stirring for about 3 to 5 minutes, or until the filling thickens to an almost paste-like consistency. It should look thick, creamy, and able to hold itself together. This is important because it helps the Buko Pie Recipe set properly after baking.
Step 5: Cool the Filling Completely
Remove the filling from the heat and let it cool completely. I know waiting is not exciting, especially when the filling already looks good enough to eat with a spoon. But hot filling can soften the crust too quickly, so let it cool first. Your future flaky crust will thank you.
Step 6: Sift the Flour and Salt
For the crust, sift the flour and salt into a bowl. This helps combine them evenly and gives the dough a lighter start. It’s simple, but pie crust is one of those things where small steps add up.
Step 7: Cut in the Chilled Lard
Add the chilled lard to the flour mixture. Cut it in with a knife until the pieces resemble small peas. Try not to cut the lard too small. Those little pieces are what create flaky layers when the pie bakes. I know visible bits of fat in dough can look suspicious, but in pie crust, they’re actually a good sign. Baking is weird like that.
Step 8: Add the Cold Water Mixture
Mix the lemon juice or vinegar into the cold water. Sprinkle just enough of this cold mixture into the flour while tossing lightly with a fork. Add it gradually until the dough forms a ball. Don’t overmix. The dough should come together, but it doesn’t need to be perfectly smooth. A little roughness is fine. Pie dough has character.
Step 9: Chill and Divide the Dough
Chill the dough if possible to make it easier to handle. Then divide it into two equal parts, one for the bottom crust and one for the top crust. Chilling helps keep the lard cold, which helps the crust stay flaky. It also makes rolling less frustrating, and I am always in favor of less frustration.
Step 10: Roll Out the Bottom Crust
Take one part of the dough and place it on a floured surface. Roll it out thinly to fit a 28 x 4 cm pie pan, leaving about an extra inch around the edges. Try to roll evenly, but don’t stress if it isn’t a perfect circle. Homemade pie crust rarely behaves like a perfect circle. That’s okay. It’s still pie.
Step 11: Transfer the Dough to the Pie Pan
Gently fold the rolled dough in half, then fold it into a quarter. Place it over the pie pan with the pointed part in the center, then unfold it carefully. Fit the dough into the bottom and sides of the pan without stretching it. If it tears a little, patch it with extra dough. No one needs to know. This is between you and the crust.
Step 12: Trim, Seal, and Chill the Bottom Crust
Using kitchen shears, trim the dough to a 1-inch overhang. Fold the overhang under and press gently to seal. Crimp the edges if you like. Refrigerate the crust for 30 minutes to 1 hour before using. This helps prevent shrinking and gives the dough time to firm up.
Step 13: Prepare the Top Crust
Take the remaining dough and roll it into a circle about the same diameter as the top of the pie pan, around 28 cm. Place it on parchment paper and roll it together into a cylinder. Refrigerate it until ready to use. This keeps the top crust cold and makes it easier to unroll over the filling.
Step 14: Preheat the Oven
Preheat the oven to 425°F. Starting with high heat helps the crust begin baking quickly and gives it a better texture. It’s like giving the pie a strong start before settling into the slower bake.
Step 15: Fill the Pie
Pour the cooled coconut filling into the chilled bottom crust. Spread it evenly and make sure the young coconut meat is distributed throughout the pie. Every slice should get plenty of buko. No one wants a sad slice with only cream and no coconut. That would feel personal.
Step 16: Add the Top Crust
Unroll the second crust dough with the parchment paper and place it over the filling. Cut away any excess dough from the edges if needed. Pinch the sides to seal the top crust together with the bottom crust. A good seal helps keep the filling inside while baking.
Step 17: Vent the Top Crust
Use the tines of a fork to poke holes in the top crust. These vents allow steam to escape while the pie bakes. Without vents, the crust can puff or crack in random places. Pie needs breathing room too, apparently.
Step 18: Bake at High Heat
Bake the pie in the 425°F oven for 10 minutes. This first bake helps set the crust and gives it a head start before the temperature is lowered. It’s a quick blast of heat to wake everything up.
Step 19: Brush with Egg Wash
In a small bowl, whisk together the egg and milk. Remove the pie from the oven after the first 10 minutes and brush the top crust with the egg wash. This helps the crust turn golden and gives it that pretty finish. It’s a small step, but it makes the pie look loved.
Step 20: Lower the Temperature and Finish Baking
Lower the oven temperature to 350°F and bake for another 30 to 40 minutes, or until the crust is golden and fully baked. Keep an eye on it near the end. If the crust edges brown too quickly, cover them loosely with foil. Pie crust can go from golden to “oops” faster than expected.
Step 21: Cool and Serve
Remove the pie from the oven and let it cool so the filling can set. This waiting time matters. If you slice too early, the filling may be too soft. Serve this Buko Pie Recipe warm or cold, depending on your mood. Warm is cozy and soft. Cold is firmer and creamier. I honestly don’t think there’s a wrong answer.
Storage Options
This Buko Pie Recipe stores well, but because it has a creamy coconut filling, it should be kept in the refrigerator after cooling. The crust is at its flakiest the day it’s baked, but the filling stays delicious for several days. And cold buko pie straight from the fridge? I won’t say it’s the best part, but I also won’t argue with anyone who says it is.
- Refrigerator: Store cooled buko pie in an airtight container or cover it tightly with plastic wrap or foil. Keep it refrigerated for up to 4 days. The filling will stay creamy and set, though the crust may soften a little over time.
- Room temperature: Buko pie can sit out briefly while serving, but it should not stay at room temperature for too long because of the cream filling. Refrigerate leftovers within 2 hours. I know it’s easy to forget when everyone is chatting after dessert, but the fridge is your friend here.
- Freezer: You can freeze Filipino coconut pie for up to 2 months, although the texture may change slightly after thawing. Wrap the cooled pie tightly in plastic wrap and foil, then thaw it in the refrigerator overnight before serving.
- Freezing slices: For easier serving, freeze individual slices. Wrap each slice tightly and place them in a freezer-safe container. This is perfect for those random moments when you want one slice of Buko Pie Recipe without committing to a whole pie.
- Reheating: If you prefer warm buko pie, reheat slices in a 300°F oven until gently warmed. Avoid microwaving too long because the crust can become soft and the filling may heat unevenly. Oven reheating takes longer, but it treats the crust better.
Variations & Substitutions
This Buko Pie Recipe is classic and comforting as written, but it can be adjusted depending on your kitchen and your taste. Some people like it richer, some like it less sweet, some add pandan, and some go for a shortcut crust because life is busy. That’s okay. Recipes live in real kitchens, not perfect little recipe clouds.
- Use butter instead of lard: If you don’t want to use lard, chilled butter can work. Butter gives the crust a richer flavor, while lard usually gives a flakier texture. You can also use half butter and half lard if you want both flavor and flake. A diplomatic crust solution.
- Use store-bought pie crust: If making dough from scratch feels like too much, use store-bought pie crust. It won’t have exactly the same homemade texture, but it will make the Buko Pie Recipe faster and easier. No shame. The coconut filling still does a lot of the heavy lifting.
- Adjust the sugar: If your young coconut meat is already sweet, you can reduce the sugar slightly. If you like a sweeter filling, keep the full amount or add a little more. I’d start with the recipe amount and adjust from there.
- Add vanilla: A small splash of vanilla extract can add warmth to the filling. It’s not necessary, but it pairs nicely with coconut and cream. Just don’t add too much, or it may cover the delicate buko flavor.
- Add pandan flavor: A little pandan extract gives the pie a fragrant Filipino dessert twist. Use a light hand because pandan can get strong quickly. A few drops can make the filling feel extra special.
- Use coconut cream: For a richer filling, replace some of the all-purpose cream with coconut cream. This gives the Filipino coconut pie a deeper coconut flavor and a creamier texture. It may feel a little heavier, but in a delicious way.
- Use fresh coconut water: Fresh coconut water from young coconut gives the best flavor if you have it. Packaged coconut water can also work, but choose one without strong added flavors or too much sweetness.
- Make mini buko pies: Use small pie pans or tart pans to make individual pies. They’re cute, easier to serve, and great for parties. Just reduce the baking time and watch for a golden crust.
- Add a little cheese: Some Filipino desserts pair coconut with cheese, and a small amount of mild grated cheese can add a salty contrast. It changes the classic flavor, so I’d call this a fun variation rather than the standard version. Know your crowd, as they say.
- Make it less sweet: Reduce the sugar slightly if you want a gentler dessert. This is especially nice if you plan to serve the pie with sweet drinks, ice cream, or other desserts.
What to Serve With Buko Pie Recipe?
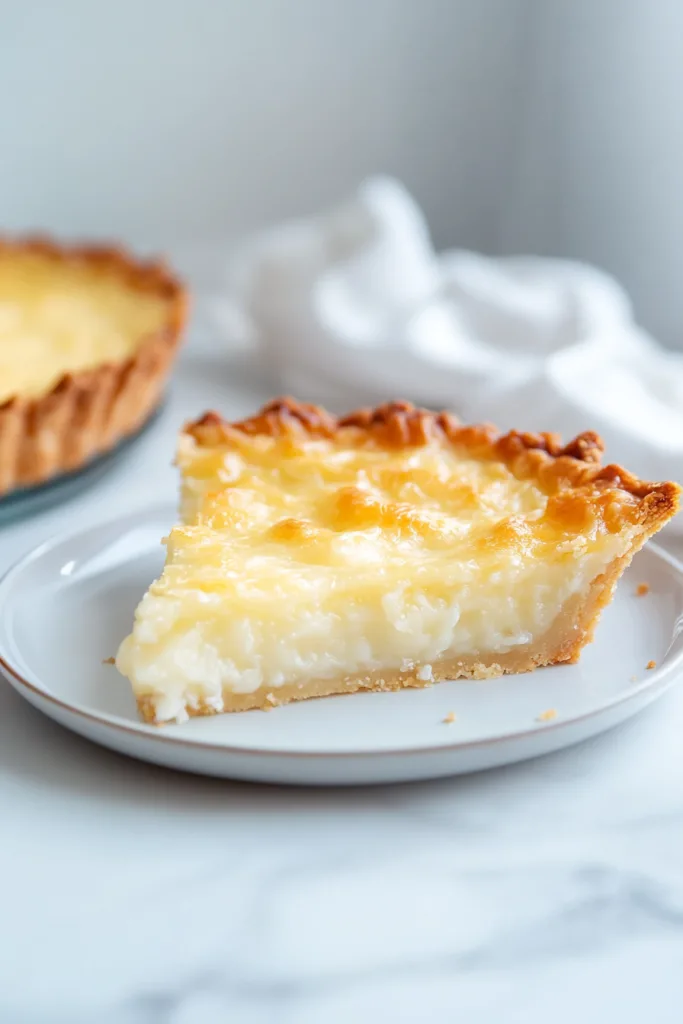
This Buko Pie Recipe is creamy, coconut-filled, and lightly sweet, so it pairs beautifully with coffee, tea, fruit, and simple creamy toppings. It works as dessert, snack, or merienda. You don’t need a lot beside it. The pie already has plenty going on in its quiet, coconutty way.
- Coffee: Coffee is one of the best pairings for buko pie. The slight bitterness balances the creamy sweetness of the coconut filling. Hot coffee, iced coffee, or strong brewed coffee all work beautifully. It gives the whole thing a cozy afternoon café feeling.
- Hot tea: Black tea, green tea, or jasmine tea pairs nicely with this Filipino coconut pie. Tea keeps the dessert light and comforting, especially if you’re serving it after a meal.
- Iced tea: Iced tea is refreshing with buko pie, especially on a warm day. Lemon iced tea or lightly sweetened black tea works well with the tropical coconut flavor. Very merienda-friendly.
- Hot chocolate: Hot chocolate makes a warm slice of Buko Pie Recipe feel extra cozy. It’s especially nice on rainy afternoons, the kind where staying inside with dessert feels like the correct life choice.
- Fresh fruit: Mango, pineapple, or fresh berries add brightness and color. They make the plate feel tropical without making the dessert too heavy.
- Vanilla ice cream: Warm buko pie with vanilla ice cream is a very good idea. The ice cream melts into the creamy filling and flaky crust. Is it a little indulgent? Yes. Is that a problem? Not for me.
- Whipped cream: A small dollop of lightly sweetened whipped cream makes the pie feel extra special. Keep it simple so the coconut flavor still shines.
- Coconut ice cream: If you love coconut, serve Buko Pie Recipe with coconut ice cream. Too much coconut? I don’t believe in that here. This is a coconut dessert, after all. Let it commit.
- Milk: A glass of cold milk is simple and comforting with buko pie. It works especially well if you’re serving the pie as an afternoon snack.
- Salabat: Salabat, or Filipino ginger tea, pairs beautifully with coconut desserts. The warm ginger flavor balances the creamy sweetness and gives the whole pairing a cozy Filipino touch.
FAQ
Can I use mature coconut instead of young coconut?
Young coconut is best for this Buko Pie Recipe because it is tender. Mature coconut is firmer and can be too chewy for the filling. You can use it if needed, but the texture will not be the same.
Can I use canned young coconut meat?
Yes, canned or jarred young coconut meat can work if fresh buko is not available. Drain it well before using. Fresh young coconut gives the best flavor, but canned young coconut is a helpful shortcut.
Why is my buko pie filling runny?
The filling may be runny if it was not cooked long enough with the cornstarch mixture or if it did not cool and set properly. Cook the filling until it becomes almost paste-like before assembling the pie.
How do I keep the crust flaky?
Keep the lard and water cold, avoid overworking the dough, and chill the crust before baking. Cold fat creates flaky layers as the pie bakes, which is exactly what you want in this Buko Pie Recipe.
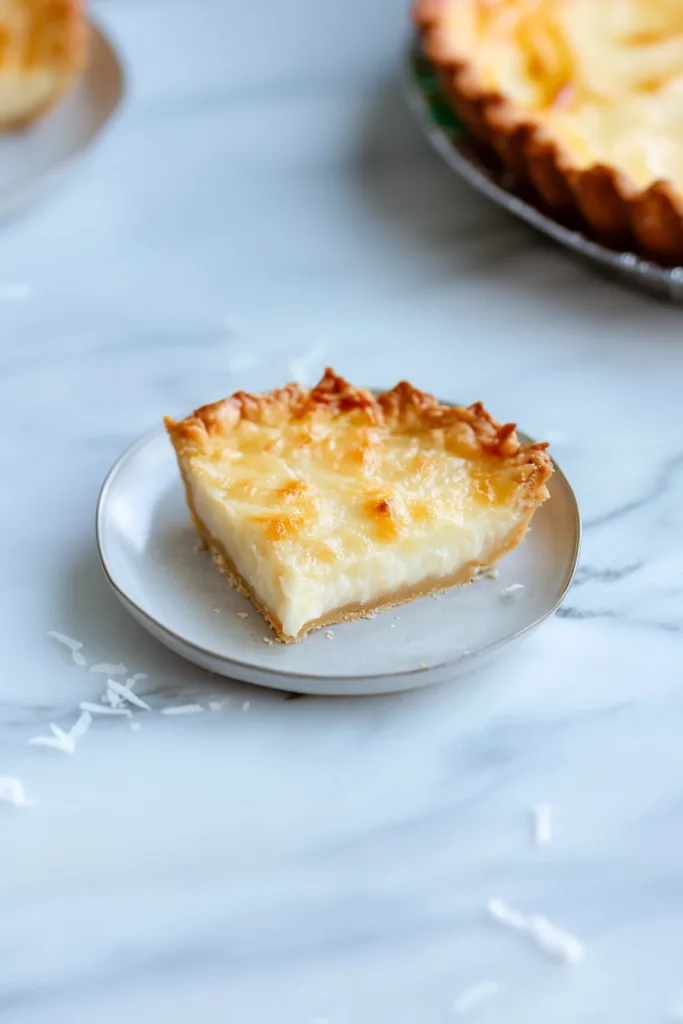
This Buko Pie Recipe is creamy, flaky, tropical, and full of comforting Filipino dessert flavor. It has tender young coconut meat, coconut water, cream, sugar, and cornstarch wrapped in a homemade crust and baked until golden. It’s not overly fancy, but it feels special. Like something you’d bring home for family, slice after dinner, or enjoy quietly with coffee when the house finally calms down.
So if you’re craving a cozy coconut dessert that feels like a little taste of the Philippines, try this Buko Pie Recipe. Serve it warm, serve it cold, pair it with coffee, tea, or salabat, and enjoy every creamy, flaky bite. Can’t wait to hear what you think!
Buko Pie Recipe
Ingredients
For the Flaky Pie Crust
- 3 cups flour sifted
- 1 tsp salt
- 3/4 cup lard chilled
- 6 tbsp cold water
- 2 tbsp lemon juice or vinegar
For the Pie Filling
- 1/3 cup cornstarch
- 1/2 cup coconut water
- 1/2 cup all-purpose cream
- 3/4 cup sugar
- 4 cups young coconut meat
For the Egg Wash
- 1 small egg
- 1 tbsp milk
Instructions
Prepare the Pie Filling
- In a small bowl, dissolve the cornstarch in the coconut water.
- Stir until the mixture is smooth and free from lumps.
- Set the cornstarch mixture aside.
- In a saucepan over medium-low heat, combine the all-purpose cream and sugar.
- Bring the mixture to a gentle simmer.
- Cook, stirring regularly, until the sugar is completely dissolved.
- Add the young coconut meat to the saucepan.
- Stir gently until the coconut meat is evenly coated with the cream mixture.
- Slowly add the coconut water and cornstarch mixture while stirring continuously.
- Continue cooking, stirring frequently, for 3 to 5 minutes, or until the filling thickens to an almost paste-like consistency.
- Remove the filling from the heat.
- Allow the filling to cool completely before using.
Prepare the Flaky Pie Dough
- In a mixing bowl, sift together the flour and salt.
- Add the chilled lard to the flour mixture.
- Cut the lard into the flour using a knife until the mixture resembles small peas.
- Do not cut the lard too finely, as larger small pieces help create a flaky crust.
- In a separate small bowl, combine the cold water with the lemon juice or vinegar.
- Sprinkle the cold water mixture gradually into the flour mixture.
- Toss lightly with a fork while adding only enough liquid for the dough to form a ball.
- Avoid overmixing the dough.
- Chill the dough, if possible, to make it easier to handle.
- Divide the dough into two equal portions, one for the bottom crust and one for the top crust.
Prepare the Bottom Crust
- Place one portion of the dough on a lightly floured surface.
- Roll the dough thinly to fit a 28 x 4 cm pie pan, allowing an additional 1 inch for the edges.
- Gently fold the rolled dough in half.
- Fold it again into a quarter.
- Place the folded dough over the pie pan, positioning the pointed part at the center.
- Carefully unfold the dough over the pie pan.
- Gently fit the dough into the bottom and sides of the pan without tearing or stretching it.
- Using kitchen shears, trim the dough to a 1-inch overhang.
- Fold the overhang under.
- Press gently to seal.
- Crimp the edges if desired.
- Refrigerate the bottom crust for 30 minutes to 1 hour before filling.
Prepare the Top Crust
- Place the remaining portion of dough on a lightly floured surface.
- Roll the dough into a circle approximately the same diameter as the top of the pie pan, about 28 cm.
- Place the rolled dough on parchment paper.
- Roll the dough and parchment paper together into a cylinder.
- Refrigerate until ready to use.
Assemble and Bake the Pie
- Preheat the oven to 425°F.
- Pour the cooled coconut filling into the chilled bottom crust.
- Spread the filling evenly, ensuring the young coconut meat is well distributed.
- Unroll the second crust with the parchment paper.
- Place the top crust over the filling.
- Trim any excess dough from the edges, if necessary.
- Pinch the edges to seal the top crust with the bottom crust.
- Using the tines of a fork, poke several holes in the top crust to create steam vents.
- Bake the pie in the preheated 425°F oven for 10 minutes.
- In a small bowl, whisk together the egg and milk.
- Remove the pie from the oven after the initial baking time.
- Brush the top crust evenly with the egg wash.
- Lower the oven temperature to 350°F.
- Return the pie to the oven.
- Bake for an additional 30 to 40 minutes, or until the crust is golden brown and fully baked.
- Remove the pie from the oven.
- Allow the pie to cool until the filling is set.
- Serve warm or cold.
Notes