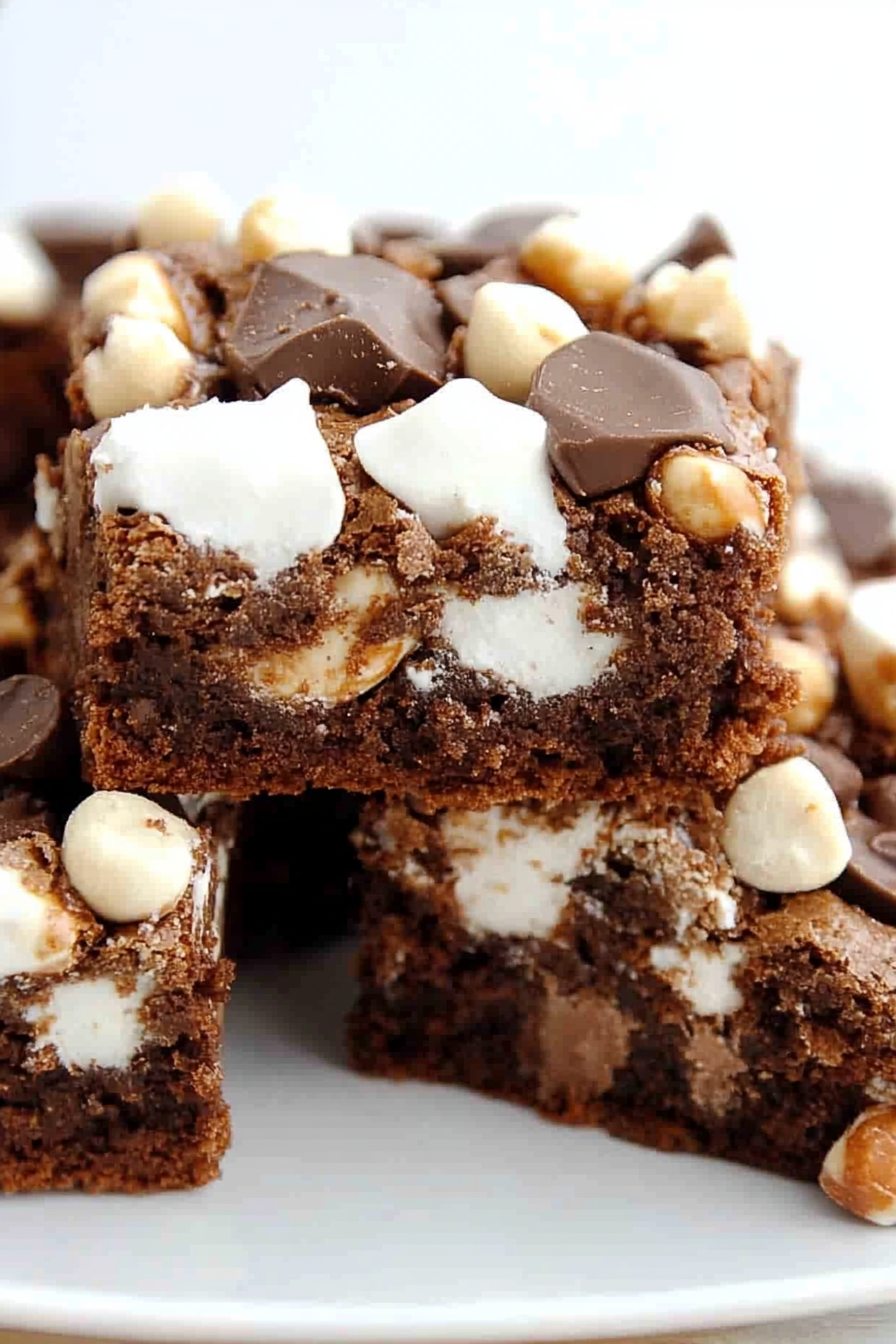
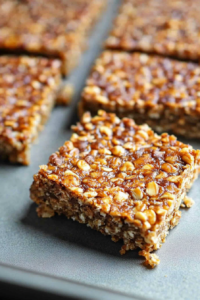
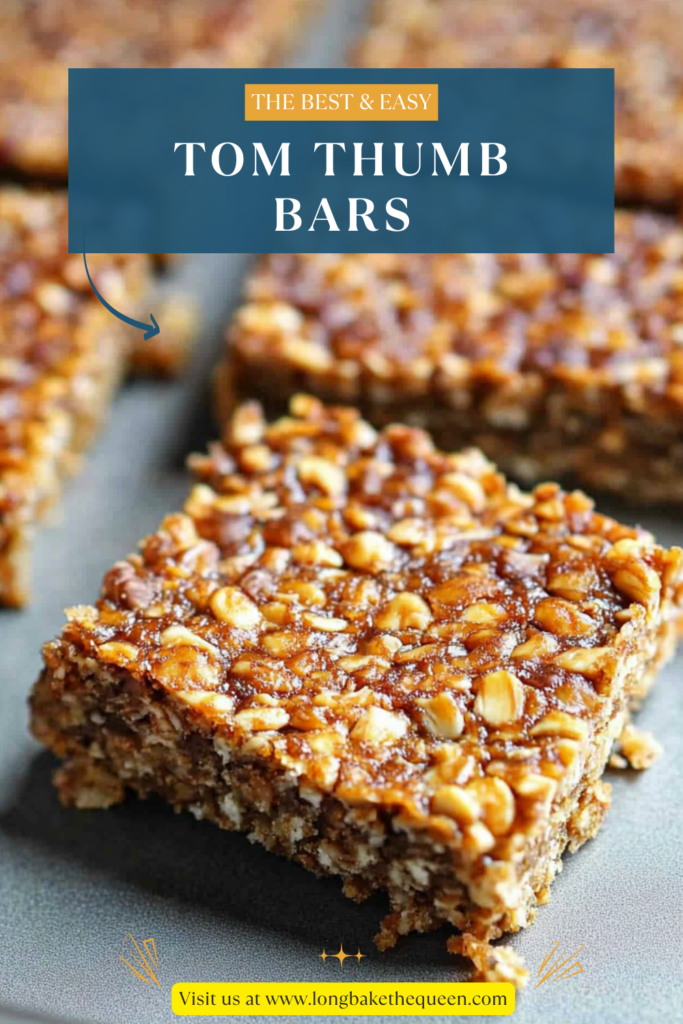
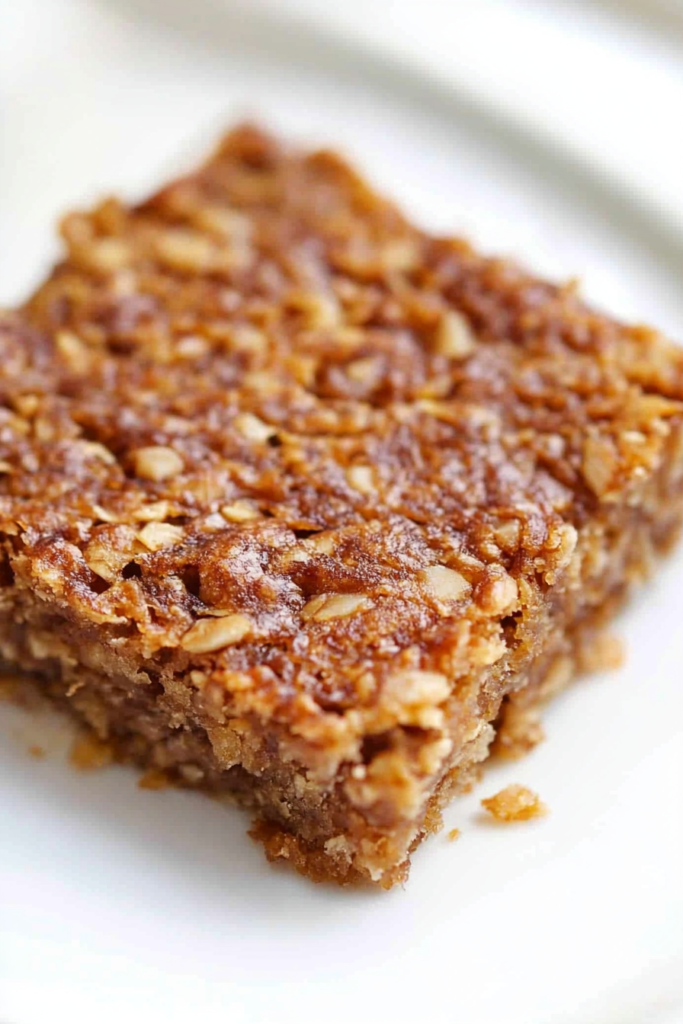
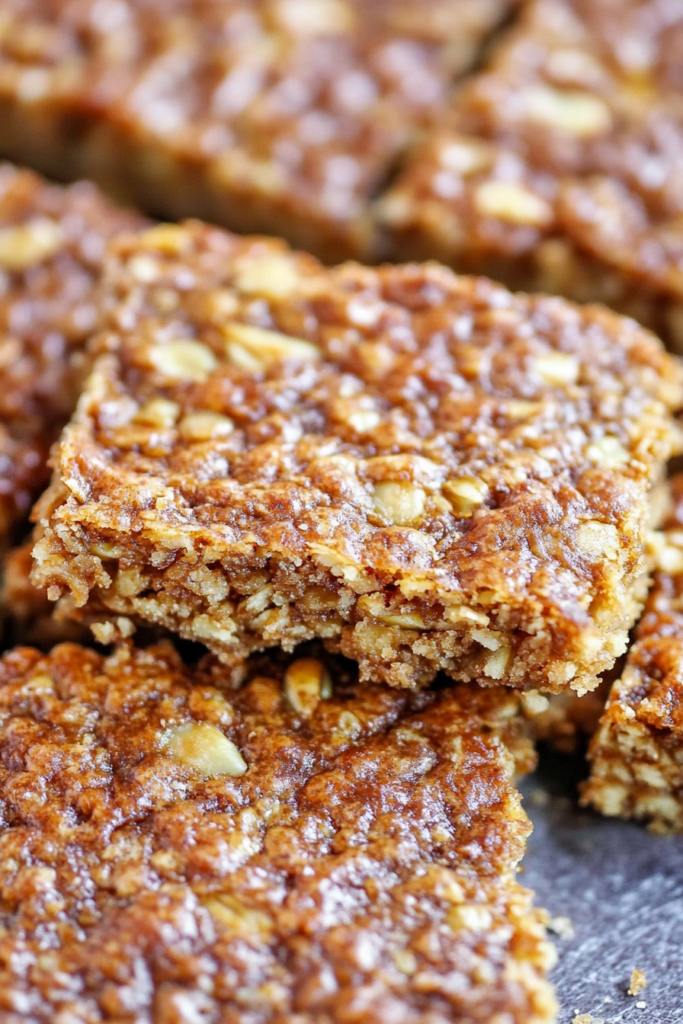
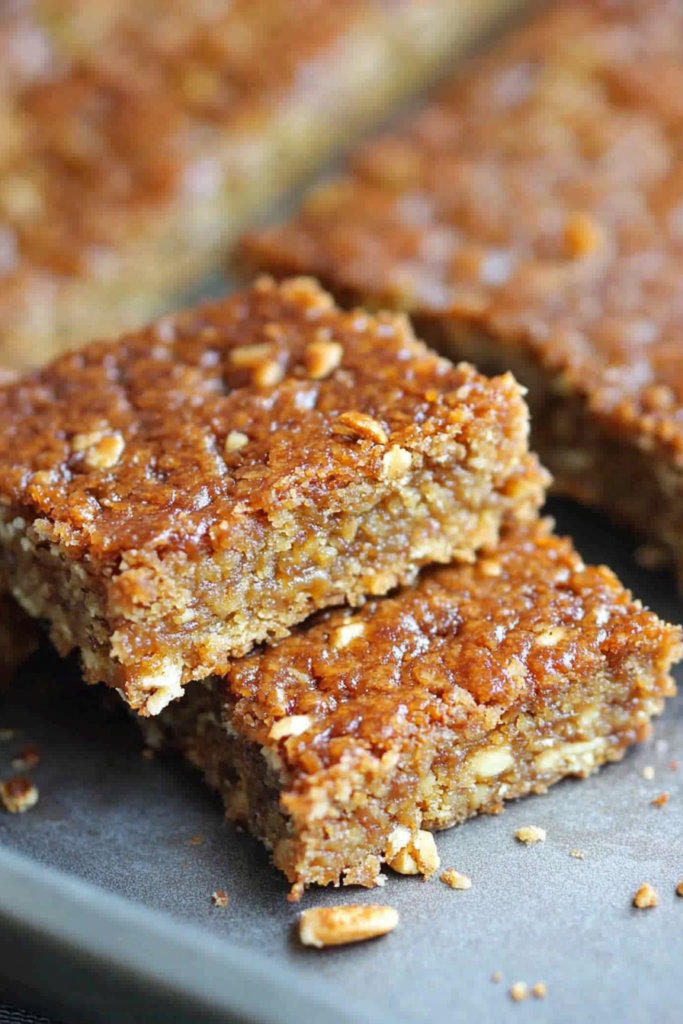
These Tom Thumb Bars are made with butter, brown sugar, flour, eggs, vanilla, coconut, and walnuts or pecans for a rich, chewy dessert bar.
I have a real weakness for recipes like these Tom Thumb Bars. The slightly old-fashioned name. The very little-fuss ingredient list. The feeling that this dessert probably lived on an index card in somebody’s kitchen drawer for years, right next to a recipe for potato salad and something called “company casserole.” You know the vibe? The kind of recipe that doesn’t try to impress you with a trendy title or a fancy garnish. It just shows up, tastes incredible, and quietly makes itself important.
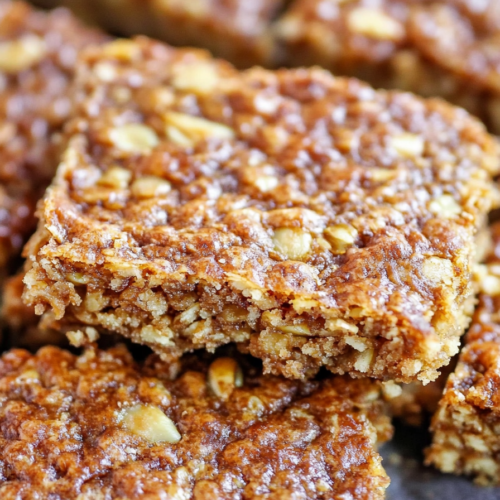
The first time I made this Tom Thumb Bars recipe, I wasn’t totally sure what I was getting into. The name is cute, but it tells you absolutely nothing. Which honestly feels a little bold. I expected maybe something blondie-like. Or maybe coconut bars. Or maybe one of those old bake-sale bars that look plain and then mysteriously disappear first. Turns out, it’s sort of all of that. And I mean that lovingly. These chewy dessert bars have a buttery crust, a soft and rich topping, plenty of coconut, and just enough crunch from the nuts to keep every bite from feeling too soft. The whole thing lands somewhere between nostalgic and wildly snackable.
What I love most about Tom Thumb Bars is that they feel like the kind of treat people underestimate. They don’t have swirls of frosting or dramatic layers or a finishing drizzle that requires a steady hand and emotional stability. They just sit there in neat little squares, looking almost too simple, and then suddenly everyone’s cutting “just a tiny second piece.” Sound familiar? Those are the desserts I trust. The quiet overachievers. The ones that don’t scream for attention because they know they don’t need to.
And maybe that’s why this Tom Thumb Bars recipe feels so charming to me. It reminds me of church potlucks, school bake sales, family reunions, all those places where the best desserts were often the least flashy ones. The recipe you almost skipped over is suddenly the one you’re thinking about later, while washing dishes, wondering if there’s one square left in the pan. That’s a very specific kind of success. And honestly, I think these bars have it.
Why you’ll Love these Tom Thumb Bars?
The first reason to love these Tom Thumb Bars is the texture. That’s the hook. The crust is buttery and firm enough to hold everything together, but not hard. Then the topping comes in all chewy and rich and coconutty, with little crunchy bits from the nuts. So every bite gives you something slightly different. A little soft here. A little crisp at the edge. A little chew from the coconut. It’s the sort of dessert bar that keeps your mouth interested, which I think is half the battle with sweets. Do you agree? A bar can be sweet and still boring. These are not boring.
Another reason this Tom Thumb Bars recipe works so well is that it tastes bigger than the ingredient list suggests. Brown sugar is doing a lot here, and I say that with respect. It brings that warm, almost caramel-like depth that makes these bars feel richer than a plain sugar bar would. Then the vanilla rounds everything out, and the coconut gives the topping that old-school dessert personality that makes it feel familiar, even if you’ve never made them before. It’s one of those recipes that feels like it belongs to a whole category of “grandma-adjacent excellent baking,” even if no grandma actually handed it to you.
I also really like that these Tom Thumb Bars don’t need any extra decoration to be good. No frosting. No glaze. No sea salt sprinkle trying to make everything seem more serious than it is. The bars are already complete. The buttery base does its job, the chewy topping does its job, and the whole thing comes together into something that feels cozy and complete and very hard to stop nibbling. That kind of built-in confidence is pretty appealing in a dessert, honestly.
And then there’s the ease. This is not one of those desserts where you’ll end up with every bowl in your kitchen dirty and a mild grudge by the end. You make a crust, pre-bake it, mix the topping, bake again, cool, slice. That’s it. It’s a very kind recipe. I always appreciate a dessert that tastes like effort without requiring a full emotional support playlist to get through it.

Ingredient Notes
One thing I appreciate about this Tom Thumb Bars recipe is how sensible the ingredient list is. Not boring-sensible. More like dependable-sensible. The kind of ingredients most home bakers actually have around, or at least recognize without needing a little internet detective work. And because there aren’t many of them, each one matters more. There’s nowhere to hide in a simple dessert bar. The ingredients have to carry their weight, and thankfully these do.
For the Crust
- Butter gives the crust that rich, soft, slightly crumbly base that makes these Tom Thumb Bars feel buttery right from the first bite. This isn’t the place for skimping emotionally. Butter is one of the main reasons the crust tastes like more than just a support system.
- All-purpose flour gives the crust structure. Nothing flashy. Just reliable. Sometimes I think flour is the most unglamorous overachiever in baking.
- Dark brown sugar gives the crust a deeper flavor than white sugar would. It brings warmth, a little molasses note, and that old-school richness that makes the whole bar feel more comforting.
- Salt matters more than people think in sweet baking. It keeps the crust from tasting flat and makes the brown sugar taste more like itself.
For the Topping
- Dark brown sugar shows up again, and honestly, it’s the flavor backbone of this Tom Thumb Bars recipe. It makes the topping chewy, rich, and deeply sweet without being one-note.
- All-purpose flour helps pull the topping together so it bakes up set but still soft.
- Baking powder gives the topping a little lift. Not a dramatic one. Just enough to keep it from being too dense.
- Eggs bind everything together and help give the topping that soft-chewy bar texture that makes these so satisfying.
- Vanilla extract adds that warm bakery note that softens all the brown sugar richness and makes everything taste more complete.
- Walnuts or pecans bring crunch and a little nutty contrast. I genuinely think either one works well. Walnuts lean a little earthier. Pecans feel a little sweeter and richer. I’m annoyingly fond of both.
- Shredded sweetened coconut flakes are a huge part of what makes these Tom Thumb Bars feel like themselves. They add chew, sweetness, and that unmistakable old-school dessert-bar energy.
What I like most is that nothing here feels random. These are practical ingredients, but they come together in a way that feels deeply comforting. It’s a very no-nonsense little lineup, and I mean that as praise.
How to Make Tom Thumb Bars?
Making Tom Thumb Bars is one of those baking projects that feels very calm. There’s no tricky technique hiding around the corner. No dramatic turning point. No “temper carefully while whisking constantly over steam” nonsense. It’s just a good, sturdy, old-school bar recipe that asks you to trust the process and maybe not hover over the oven too nervously. Though I still do that part, obviously.
Step 1. Preheat the oven and prepare the pan
Start by preheating your oven to 325°F and greasing a 9×13-inch baking dish. I like getting the pan ready first because it makes everything else feel more under control, which may or may not be an illusion, but I’ll take it.
Step 2. Make the crust
In a large bowl, mix the butter and brown sugar until well combined. Then add the flour and salt and stir until the dough comes together. It won’t be fancy-looking. It’ll just be a simple, soft dough, and that’s right. The crust in these Tom Thumb Bars is meant to be thin and buttery, not thick and attention-seeking.
Step 3. Press the crust into the pan
Transfer the dough to your prepared pan and press it into an even layer across the bottom. The crust will be thin. That’s supposed to happen. I know thin crusts can look a little suspicious sometimes, like maybe the recipe forgot a step or betrayed you personally. But this one knows what it’s doing.
Step 4. Bake the crust
Bake the crust for 13 to 15 minutes, or until it’s just beginning to turn golden. Not deeply browned. Just lightly golden and set. It’s going back in with the topping, so you’re only giving it a head start here.
Step 5. Make the topping
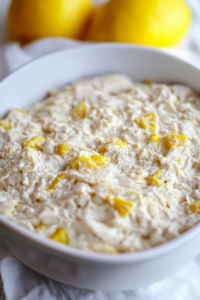
While the crust bakes, start on the topping. In a large bowl, combine the brown sugar, flour, and baking powder. Add the eggs and vanilla and mix for about 1 to 2 minutes until the mixture looks airy and well blended. Then fold in the coconut and nuts. This is the point where the bowl starts looking very hopeful. Very full of promise. Very likely to become something you’ll think about later.
Step 6. Spread the topping over the crust
Pour or spread the topping over the hot crust and gently smooth it out so it reaches the corners. Corner pieces matter. I know some people are center-piece people, but I’ve had corner-bar loyalties before and I stand by them.
Step 7. Bake again
Return the pan to the oven and bake for 20 to 25 minutes, or until the edges are turning golden and the center looks set. It may still seem a little soft while warm, and that’s okay. These Tom Thumb Bars finish settling as they cool. Don’t overbake them trying to chase firmness that belongs to later.
Step 8. Cool before slicing
Let the bars cool completely before slicing. Yes, this is the most annoying instruction in baking. Yes, I understand. But if you slice too soon, the topping will be much softer and messier. Still delicious, obviously. Just less bar, more enthusiastic spoon situation.
This Tom Thumb Bars recipe is beautifully straightforward, and I think that’s part of the appeal. Nothing fancy, just a very solid pan of dessert that somehow feels even more comforting because of that.
Storage Options
These Tom Thumb Bars store really well, which is one of the reasons I think they’re such a smart make-ahead dessert. Once they’re completely cool, keep them in an airtight container at room temperature for up to 3 days. They stay soft, chewy, and easy to slice, which is really all I ask from a dessert bar after day one.
If your kitchen is warm, or if you just like a slightly firmer bar, you can refrigerate them. They’ll keep for about 5 days in the fridge. I do think the texture changes a little there. They get a touch firmer, a touch more set, which isn’t bad at all. Just different. Day-one Tom Thumb Bars feel a little softer and looser. Day-two or fridge bars feel a little more settled, more confident somehow. Both have their own charm.
They also freeze beautifully. Wrap the bars tightly or layer them in a freezer-safe container with parchment between them and freeze for up to 2 months. Thaw at room temperature before serving. I’ve always thought finding dessert in the freezer feels like past-you leaving a little note that says, “I was looking out for you.” Very considerate behavior, honestly.
And maybe this is just me being too sentimental about bars, but I think these chewy coconut bars age especially nicely. The flavors seem to cozy up to each other a bit more after a day. Not always true with desserts, but here? I’d say yes.
Variations & Substitutions
One thing I like about this Tom Thumb Bars recipe is that it has a strong personality, but not in a fragile way. It can handle a few little changes and still come out tasting like itself. I wouldn’t overhaul the whole thing, because the simple crust-plus-chewy-topping balance is really the point. But small adjustments? Totally fair game.
- Use pecans instead of walnuts if you want a slightly sweeter, richer nut flavor. Pecans make the bars feel a bit softer and warmer somehow. Walnuts give a little more earthy bite. I go back and forth depending on mood and pantry status.
- Add chocolate chips if you want to tilt these more toward a modern dessert-bar moment. Not traditional, but definitely not unwelcome.
- Use unsweetened coconut if you want the topping less sweet overall. The bars will still be chewy and flavorful, just a little more restrained.
- Add a tiny pinch of cinnamon if you want a little extra warmth. Not enough to make them cinnamon bars. Just enough to whisper in the background.
- Use light brown sugar if that’s what you have, though I really do think dark brown sugar gives these Tom Thumb Bars their deepest flavor.
What I like is that even with little changes, the bars still stay buttery, chewy, nutty, and very easy to get attached to. That feels like a pretty stable foundation for a recipe.
What to Serve With Tom Thumb Bars?
These Tom Thumb Bars are perfectly good all on their own, which I think is always a great sign in a dessert. But if you want to turn them into more of a dessert moment, there are some really nice pairings that make a lot of sense.
- Coffee is probably my favorite thing to serve with them. The bitterness balances the sweetness beautifully, and something about coffee with a chewy bar just feels correct.
- Tea works really well too, especially if you want a slightly calmer, cozier pairing. Very afternoon-snack energy. In a good way.
- Vanilla ice cream is lovely if you want to turn these into more of a plated dessert. A warm-ish bar and cold ice cream? Hard to argue with that.
- Fresh berries add brightness and make the plate feel a little lighter next to all that rich brown sugar and coconut.
- Cold milk is classic for a reason. Some desserts want coffee. Some want milk. I think these bars are happy with either, which feels diplomatic.
Personally, I think Tom Thumb Bars are happiest with coffee. But if you handed me one with a scoop of vanilla ice cream, I would not put up much resistance. Not even a little.
FAQ
What are Tom Thumb Bars?
They’re rich dessert bars with a buttery crust and a chewy topping made with brown sugar, coconut, and nuts. They land somewhere between a blondie, a coconut bar, and an old-school bake sale favorite.
Can I make Tom Thumb Bars ahead of time?
Yes, absolutely. They store really well, which makes them great for baking a day ahead.
Can I freeze them?
Yes, they freeze very well for up to 2 months.
Are Tom Thumb Bars very sweet?
They are definitely sweet, yes, but the buttery crust, coconut, and nuts keep the sweetness from feeling flat or too one-note.
There’s something really lovable about Tom Thumb Bars. They’re buttery, chewy, sweet, a little old-school, and completely unconcerned with dessert trends. I admire that. They don’t need frosting. They don’t need glittery finishing salt or a dramatic reveal. They just show up as rich little bars full of texture and flavor and let people figure out for themselves that they’re excellent.
What I love most about this Tom Thumb Bars recipe is that it feels like a recipe people keep for a reason. Not because it’s flashy. Because it works. Because it’s comforting. Because it’s the sort of dessert you bake once and then quietly keep in rotation.
So if you’ve been craving something chewy, buttery, coconutty, and just a little retro in the best possible way, I really think these Tom Thumb Bars are worth making. And now I’m curious — are you team walnut or team pecan when you make a bar like this?
Tom Thumb Bars
Ingredients
For the Crust
- 2/3 c butter room temperature
- 1 1/4 c all-purpose flour
- 2/3 c dark brown sugar
- 1 tsp salt
For the Topping
- 1 c dark brown sugar packed
- 2 tbsp all-purpose flour
- 1 tsp baking powder
- 3 large eggs
- 1 tsp vanilla extract
- 1 c chopped walnuts or pecans
- 1 3/4 c shredded sweetened coconut flakes
Instructions
Prepare the Oven and Baking Dish
- Preheat the oven to 325°F. Grease a 9×13-inch baking dish and set aside.
Make the Crust
- In a large mixing bowl, combine the butter and dark brown sugar. Mix until well blended. Add the flour and salt, then continue mixing until the dough comes together.
Press the Crust into the Pan
- Transfer the crust dough to the prepared baking dish. Press it into an even layer across the bottom of the pan. The crust layer will be thin.
Bake the Crust
- Bake the crust for 13 to 15 minutes, or until it is just beginning to turn lightly golden.
Prepare the Topping
- While the crust is baking, prepare the topping. In a large bowl, combine the brown sugar, flour, and baking powder. Stir until evenly mixed. Add the eggs and vanilla extract and mix for 1 to 2 minutes, or until the mixture is airy and well combined. Fold in the shredded coconut and chopped walnuts or pecans.
Add the Topping
- Spread the topping evenly over the partially baked crust.
Bake the Bars
- Return the pan to the oven and bake for 20 to 25 minutes, or until the edges are golden and the topping is set.
Cool and Slice
- Allow the bars to cool completely before slicing and serving.
Notes