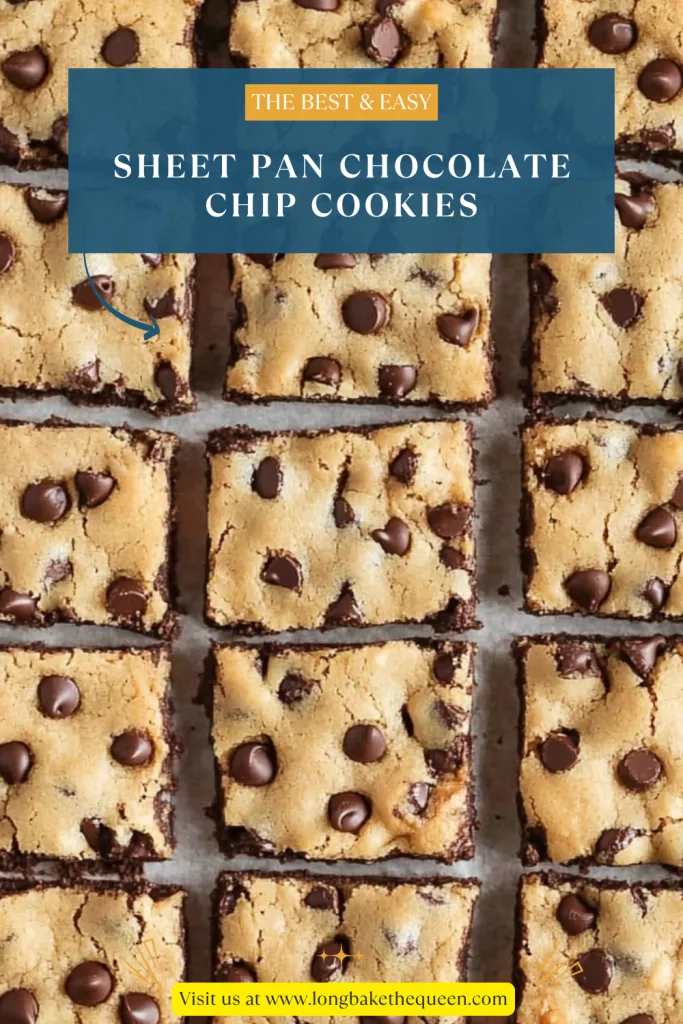
Soft sheet pan chocolate chip cookies made with butter, brown sugar, eggs, vanilla, flour, cornstarch, and chocolate chips.
I’ll be honest, I didn’t start making Sheet Pan Chocolate Chip Cookies because I was trying to be clever. I started making them because I was tired. Not dramatic tired, just that normal kitchen tired where you want something homemade and cozy, but you also don’t want to stand there scooping dough for what feels like half your life. You know that feeling, right? The one where you’re already picturing warm cookies, but then you remember there’s still tray after tray to bake, and suddenly store-bought snacks start looking very attractive. I’ve been there more times than I probably should admit.
The first time I made chocolate chip cookies in a sheet pan, it was one of those “let’s just see what happens” baking moments. I had softened butter on the counter, chocolate chips waiting like tiny little promises, and absolutely no patience for scooping individual cookies. So I pressed the dough into a big pan, slid it into the oven, and hoped for the best. And honestly? I was almost annoyed by how good they turned out. The middle stayed soft and chewy, the edges got that golden little bite, and the whole thing sliced into neat cookie bars like it had been the plan all along. Funny how some of the best recipes come from not wanting to do extra dishes.
These Sheet Pan Chocolate Chip Cookies remind me of the kind of dessert you bring out when family is hanging around the kitchen after dinner, pretending they’re not waiting for something sweet. My cousins used to do that at family gatherings — everyone suddenly needed “just water” once dessert came out. Sound familiar? These cookie bars have that same pull. They’re casual, warm, chocolatey, and not fussy at all. I like that about them. They don’t try too hard, but somehow everyone still reaches for a second piece.

Why you’ll Love these Sheet Pan Chocolate Chip Cookies?
There’s something very satisfying about making Sheet Pan Chocolate Chip Cookies because they give you the flavor of classic homemade chocolate chip cookies without all the cookie-by-cookie fuss. I love a traditional round cookie, I really do, but sometimes the scooping, spacing, baking, cooling, and repeating can feel like running a tiny bakery with no employees. With this recipe, you spread the dough into one pan, bake it once, and slice it into bars. That’s it. It feels a little rebellious, like skipping the line at the cookie shop, except you’re still doing the baking yourself.
The texture is probably my favorite part. These sheet pan cookie bars are soft in the center, chewy around the edges, and packed with semi-sweet chocolate chips. They’re not exactly a blondie, and they’re not exactly a regular cookie either. They sit somewhere in the middle, in that very happy dessert neighborhood where nobody complains. The brown sugar gives them a cozy caramel-like flavor, the extra egg yolks make them rich and tender, and the cornstarch helps keep the texture soft instead of dry. It’s a simple recipe, but the little details matter. Not in a stressful way, just in a “oh, that’s why these taste so good” way.
Another reason I really like this sheet pan cookies recipe is that it makes enough for sharing. You get about 24 bars, which means it works beautifully for potlucks, birthday tables, bake sales, holiday trays, game nights, or just a busy week when everyone keeps asking, “Is there anything sweet?” And let’s be real, sometimes the answer needs to be yes. These cookie bars are easy to carry, easy to slice, and very easy to eat while standing at the counter pretending you only came into the kitchen for coffee.
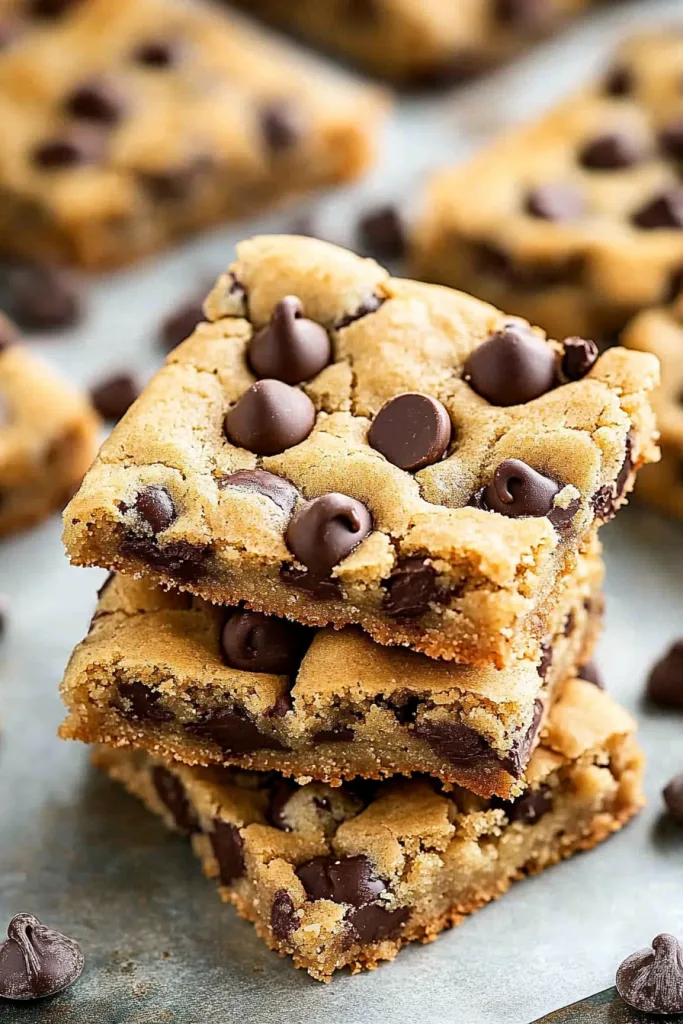
Ingredient Notes
The ingredients in these Sheet Pan Chocolate Chip Cookies are simple, familiar, and probably already hanging around your pantry. But each one has a little job to do, even if it doesn’t make a big fuss about it. This isn’t one of those recipes where you need fancy chocolate imported from somewhere with a mountain view or butter churned by moonlight. Though, if you have that, invite me over. For the rest of us, basic baking ingredients work beautifully here.
- Unsalted Butter: Butter gives these cookie bars their rich, classic flavor. You’ll want it softened to room temperature so it blends smoothly with the sugars. Not melted, not cold like a brick, just soft enough that you can press it gently. I always forget to take butter out early, so yes, I’ve done the “cut it into tiny pieces and hope it softens faster” routine many times. The butter helps create that tender, chewy cookie texture, so it’s worth giving it a few minutes to soften properly.
- Light Brown Sugar: Brown sugar is what makes these chocolate chip cookie bars soft, chewy, and a little caramel-like. It brings moisture and deeper flavor, which is why this recipe uses more brown sugar than white sugar. Make sure to pack it into the measuring cup. I know that sounds like one of those small baking rules nobody wants to follow, but it really does make a difference.
- Granulated Sugar: Granulated sugar balances the brown sugar and helps the top bake up lightly golden. It also adds a little structure, so the bars slice nicely instead of collapsing into one big delicious mess. Although, to be fair, a delicious mess still has its place. Maybe not at a bake sale, but definitely at home with a spoon.
- Eggs and Egg Yolks: This recipe uses two whole eggs plus two extra yolks, and that’s part of what gives these Sheet Pan Chocolate Chip Cookies their soft, rich bite. The whole eggs help bind everything together, while the yolks add tenderness and moisture. It may feel like a tiny extra step, but it’s one of those little bakery-style tricks that makes the bars feel more special.
- Vanilla Extract: A full tablespoon of vanilla gives these cookie bars that warm, sweet smell that makes people wander into the kitchen asking, “What are you making?” It rounds out the butter, brown sugar, and chocolate. Use real vanilla if you have it, but if imitation vanilla is what’s in the cabinet, that’s fine too. We’re baking cookies, not applying for a pastry award.
- All-Purpose Flour: Flour gives the bars their structure. Too much flour can make the cookies dry, so try to measure it gently. Spoon it into the measuring cup and level it off instead of packing it down. I know, it’s tempting to scoop straight from the bag. I do it when I’m in a hurry too, but for cookies like this, a lighter hand helps.
- Cornstarch: Cornstarch is one of those quiet little ingredients that makes a big difference. It helps keep the cookie bars tender and soft, almost like a safety net against dry cookies. You don’t taste it, but you feel it in the texture. Kind of like good lighting in a photo — you may not notice it right away, but it’s doing important work.
- Baking Soda: Baking soda gives the cookie bars a little lift and helps them brown nicely. We’re not making a tall cake here, so the rise is gentle, but it keeps the bars from feeling too heavy. It also helps give them that classic chocolate chip cookie flavor and color.
- Salt: Salt keeps all the sweetness in balance. Without it, the bars can taste a bit flat, even with all that chocolate. If you add flaky sea salt on top, the flavor gets even better. That little salty crunch with the sweet dough and melty chocolate? I mean… come on. It’s hard to argue with that.
- Semi-Sweet Chocolate Chips: Semi-sweet chocolate chips are perfect here because they’re rich without making the bars overly sweet. You’ll mix them into the dough and sprinkle extra on top if you want that pretty bakery-style look. I usually add the extra chips because, honestly, when has more chocolate on top ever hurt morale?
- Flaky Sea Salt: This is optional, but I do love it. A light sprinkle makes the cookies taste a little more grown-up, like they put on earrings before going out. Just don’t overdo it. A pinch is lovely. A handful is a snack emergency.
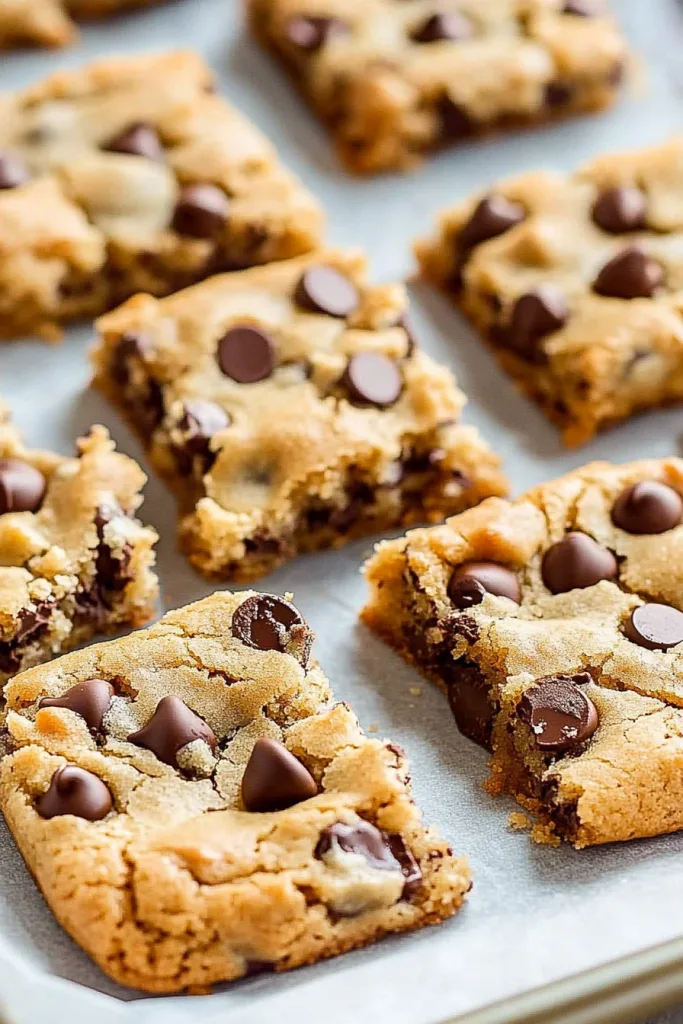
How to Make Sheet Pan Chocolate Chip Cookies?
Making Sheet Pan Chocolate Chip Cookies is one of those baking projects that feels relaxed from the start. You’re not rolling dough balls, chilling anything for hours, or setting timers for multiple batches. You mix, press, bake, cool, slice, and enjoy. That’s the beauty of it. And if your dough isn’t perfectly smooth in the pan? That’s okay. Homemade desserts are allowed to have little bumps and uneven corners. Honestly, I think they look better that way.
Step 1: Prepare the Pan
Start by preheating your oven to 350°F and lining a 13×18-inch rimmed baking sheet with parchment paper. The rimmed pan is important because the dough needs edges to hold it in place as it bakes. A flat cookie sheet is not the move here unless you enjoy cleaning cookie dough off your oven floor, which I personally do not recommend as a lifestyle choice.
The parchment paper makes it easier to lift the cookie slab out once it cools. If you leave a little overhang on the sides, you can use it like handles later. It’s one of those tiny tricks that makes you feel very organized, even if the rest of the kitchen looks like flour had a small argument with the counter.
Step 2: Cream the Butter and Sugars
In a large bowl, beat the softened butter, light brown sugar, and granulated sugar together until the mixture looks light and fluffy, about 2 minutes. This step helps create a softer texture because it blends the butter and sugars into a creamy base. If you rush this part, the bars will still taste good, but they may not have quite the same tender bite.
Scrape down the bottom and sides of the bowl before moving on. Butter loves to hide in little pockets, especially at the bottom, and then show up later like an uninvited guest. A quick scrape keeps everything mixed evenly. It’s not glamorous, but it helps.
Step 3: Add the Eggs, Yolks, and Vanilla
Add the eggs and extra egg yolks one at a time, mixing well after each addition. This keeps the dough smooth and helps the ingredients blend properly. The extra yolks are what make these Sheet Pan Chocolate Chip Cookies taste richer and softer, so don’t skip them unless you absolutely have to.
Once the eggs are mixed in, add the vanilla extract. This is usually the moment when the dough starts smelling like an actual cookie shop, and yes, it’s unfair because it’s still not ready to eat. I always have to remind myself that cookie dough with raw eggs is not technically dinner, even if my heart disagrees.
Step 4: Add the Dry Ingredients
Add the flour, cornstarch, baking soda, and salt to the bowl. Stir gently with a spatula until the dry ingredients are almost combined. You don’t need to beat the life out of it. In fact, please don’t. Once flour goes in, too much mixing can make the bars tougher, and we want soft, chewy sheet pan cookie bars, not cookie bricks.
It’s okay if you still see a few streaks of flour before adding the chocolate chips. The dough will finish coming together in the next step. This is one of those times where “almost mixed” is exactly right, which feels a little weird but works beautifully.
Step 5: Fold in the Chocolate Chips
Add the semi-sweet chocolate chips and fold them in until no flour streaks remain. The dough will be thick, soft, and full of chocolate, which is exactly where we want to be emotionally. Try to spread the chocolate chips evenly so every slice has a good amount.
I usually save a small handful of chocolate chips for the top. It makes the bars look prettier after baking, and it gives everyone a little visual promise that yes, there is plenty of chocolate happening here. Because we’ve all had that one cookie where the chocolate chips seemed to vanish. Tragic, honestly.
Step 6: Press the Dough Into the Sheet Pan
Transfer the dough to the prepared sheet pan and press it evenly from corner to corner. You can use a spatula, clean hands, or slightly damp fingers if the dough is sticking. Try to keep the thickness even so the bars bake at the same rate.
Don’t worry about making the top perfectly smooth. A few little ridges and bumps are fine. I actually like when cookie bars look a bit homemade. It makes them feel warm and real, like something you’d find on a family dessert table next to a stack of paper plates and someone’s aunt saying, “Just take one more.”
Sprinkle extra chocolate chips over the top, and add flaky sea salt if you’re using it. That little finishing touch makes the bars look inviting before they even bake.
Step 7: Bake Until Lightly Golden
Bake the cookie bars for 20 to 25 minutes, or until the top is lightly golden brown and the center looks set. The edges may be a little deeper in color, and that’s totally fine. In my house, the edge pieces are always claimed first by the people who say they “don’t really want dessert” and then somehow take two.
Start checking around 20 minutes because ovens can be moody. Some run hot, some run cool, and some just seem to have personal opinions. The cookie bars will continue to firm up as they cool, so don’t wait until the center looks completely dry. If you do, they may turn out a little overbaked. Still edible, of course, but we’re aiming for chewy and soft.
Step 8: Cool Before Slicing
Remove the pan from the oven and let the cookies cool for at least 20 minutes before lifting them out or slicing. I know this part is hard. Warm chocolate chip cookie bars smell like they were designed specifically to test your patience. But cooling helps them set, which means cleaner slices and a better chewy texture.
If you slice too soon, the bars may fall apart a little. Is that the end of the world? No. A messy warm cookie bar with melted chocolate is still a very respectable dessert. But if you want tidy squares for sharing, cooling is your friend.
Step 9: Slice and Serve
Once the bars have cooled, slice them into 24 pieces. You can serve them warm, at room temperature, or slightly reheated. They’re sweet, buttery, chewy, and full of chocolate chips, so they don’t need much help. But if you want to add vanilla ice cream on top, I’m certainly not going to stop you.
These Sheet Pan Chocolate Chip Cookies are great for parties, lunchboxes, bake sales, or a casual weekend treat. They’re also excellent for those nights when everyone says they’re full, but then suddenly they’re all very interested once dessert appears. Funny how that works.
Storage Options
Once your Sheet Pan Chocolate Chip Cookies are completely cooled, store them in an airtight container at room temperature for about 4 to 5 days. If you’re stacking them, place parchment paper between the layers so the chocolate chips don’t stick. They stay soft and chewy for several days, which makes them great for packing into lunchboxes or setting out for an easy dessert. Though, in my experience, they rarely survive long enough for storage to become a serious problem.
You can also keep the cookie bars in the refrigerator for up to 1 week. They’ll become a little firmer when chilled, so I like to let them sit at room temperature for a few minutes before serving. Or, if I’m impatient, I warm one in the microwave for about 8 to 12 seconds. Just enough to soften the chocolate again. Not so long that it becomes lava, because I have made that mistake and my fingertips still remember.
For longer storage, freeze the bars for up to 2 to 3 months. Wrap them individually or place them in a freezer-safe container with parchment paper between layers. When you want one, thaw it at room temperature or warm it gently. Finding homemade cookie bars in the freezer on a random tired Tuesday feels like discovering buried treasure. Small treasure, yes, but still treasure.
Variations & Substitutions
One thing I love about this sheet pan chocolate chip cookie recipe is how easy it is to play around with. The base is simple and buttery, so you can add different chocolates, nuts, candies, or flavors without making things complicated. I’d probably make the original once first, just to get a feel for it, but after that? Have fun. Cookies should leave room for a little chaos.
- Use Different Chocolate: You can swap the semi-sweet chocolate chips for milk chocolate, dark chocolate, white chocolate, or chopped chocolate. Chopped chocolate melts into little pools, which makes the bars look extra bakery-style. I’m slightly partial to a mix of semi-sweet and dark chocolate because it keeps the sweetness balanced, but honestly, use what you love.
- Add Nuts: Chopped walnuts or pecans give the bars a nice crunch and a warm, toasty flavor. Add about 1 cup with the chocolate chips. I know nuts in cookies can be a divisive topic — some people love them, some people act personally betrayed — so if you’re baking for a crowd, maybe check first.
- Make Them Salty-Sweet: Flaky sea salt on top is such a simple upgrade. It balances the sweetness and makes the chocolate taste richer. It’s one of those small touches that makes people ask what you did differently, and you can just smile mysteriously like a cookie wizard.
- Try Mini Chocolate Chips: Mini chocolate chips spread more evenly through the dough, so every bite gets chocolate. This is especially nice if you’re slicing the bars smaller for parties or kids. Regular chips give you bigger pockets of chocolate, though, so there’s no wrong choice here.
- Add Candy Pieces: Stir in chopped candy bars, toffee bits, or colorful candy-coated chocolates for a fun version. This works really well for birthdays, holidays, or bake sales. Just don’t overload the dough too much, or the bars may get overly sweet and a little crumbly.
- Make a Seasonal Batch: Use red and green candies for Christmas, pastel candies for spring, or orange and brown candies for fall. It’s an easy way to make these Sheet Pan Chocolate Chip Cookies match the moment without needing frosting, piping bags, or emotional strength.
- Use Salted Butter if Needed: If salted butter is all you have, you can use it. Just reduce the added salt slightly. The flavor might be a bit different depending on the brand, but it still works. Baking doesn’t always have to be perfect to be delicious, and I stand by that.
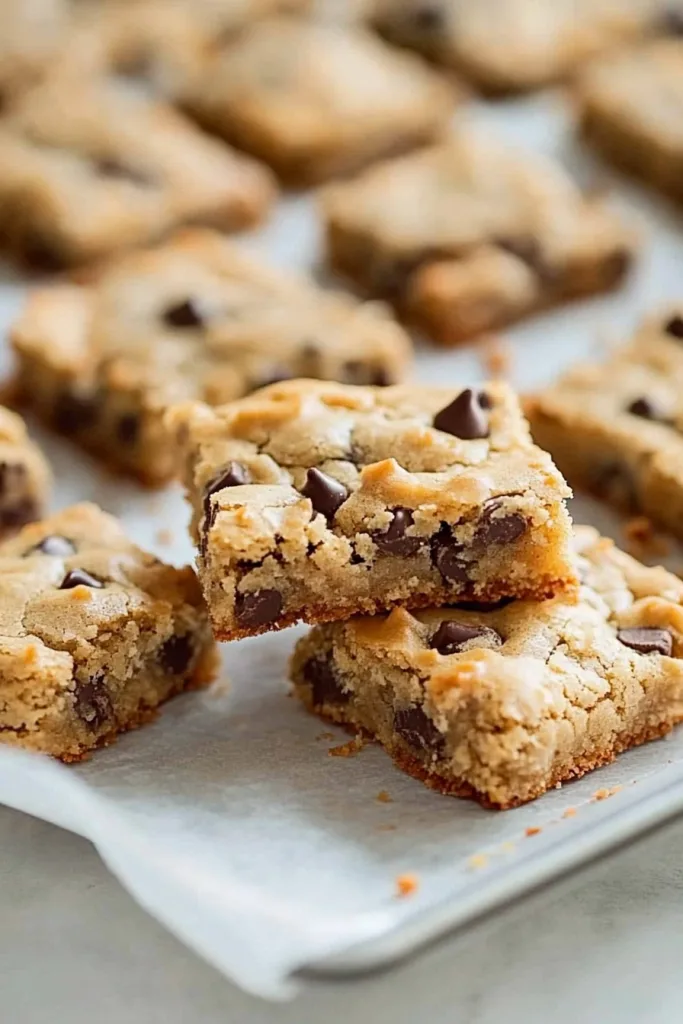
What to Serve With Sheet Pan Chocolate Chip Cookies?
These Sheet Pan Chocolate Chip Cookies are wonderful on their own, but the right pairing can make them feel even more special. Since they’re rich, buttery, and sweet, they go beautifully with cold, creamy, or slightly bitter drinks and toppings. Or you can simply eat one while leaning over the kitchen counter. That is also a serving style, and I respect it.
- Cold Milk: Milk and chocolate chip cookies are a classic for a reason. The cold milk balances the sweetness and makes the bars feel nostalgic. It’s simple, comforting, and honestly hard to improve on.
- Coffee or Espresso: A warm cup of coffee pairs so well with these cookie bars. The slight bitterness balances the brown sugar and chocolate, making it a perfect afternoon treat. I especially love this combo when I need a little break and don’t want to admit I’m hiding from my to-do list.
- Vanilla Ice Cream: Warm a cookie bar slightly and add a scoop of vanilla ice cream. The chocolate softens, the ice cream melts into the cookie, and suddenly your easy dessert feels like something from a diner menu in the best way.
- Hot Chocolate: If you’re making these during cooler months, serve them with hot chocolate. It’s rich on rich, yes, but sometimes dessert doesn’t need to apologize. Add whipped cream if you’re feeling cozy and maybe a little dramatic.
- Fresh Berries: Strawberries, raspberries, or blueberries add a fresh, slightly tart bite next to the sweet cookie bars. They also make the plate look pretty, which is helpful if you want dessert to seem a little more balanced. We love a fruit cameo.
- Caramel Sauce: A drizzle of caramel makes these bars extra indulgent. Add a pinch of flaky sea salt and you’ve got a salted caramel chocolate chip cookie bar situation. Very dangerous. Very delicious.
- Whipped Cream: A small spoonful of whipped cream can turn these cookie bars into a more dressed-up dessert. It’s simple, but it works, especially if you’re serving them after dinner with friends or family.
FAQ
Why do these cookie bars use extra egg yolks?
The extra egg yolks make the bars richer, softer, and chewier. Whole eggs help bind the dough, while the yolks add moisture and tenderness. It’s one of those details that feels small, but you notice it in the final texture. These sheet pan chocolate chip cookie bars have that soft middle partly because of those extra yolks. It’s not magic, but it feels close.
How do I know when the cookie bars are done?
The bars are done when the top is lightly golden, the edges look set, and the center no longer looks wet. The middle may still seem a little soft, and that’s okay. They’ll continue to firm up as they cool. If you bake them until they look fully firm in the oven, they may end up dry. I usually start checking at 20 minutes and trust my eyes more than the timer. Timers are helpful, but they don’t know your oven’s personality.
Can I use a different pan size?
A 13×18-inch rimmed baking sheet is best for this recipe because it gives the right thickness and baking time. If you use a smaller pan, the bars will be thicker and may need more time. If you use a larger pan, they’ll be thinner and bake faster. You can adjust, but keep an eye on the color and texture. Baking is part science, part instinct, and part hoping your oven behaves.
Why did my cookie bars turn out dry?
Dry cookie bars usually happen because of too much flour, overmixing, or overbaking. Measure the flour gently, mix only until the dough comes together, and pull the bars from the oven when the center is set but still soft. These Sheet Pan Chocolate Chip Cookies continue to firm as they cool, so don’t wait for them to look completely done in the oven. That little bit of patience makes a big difference.
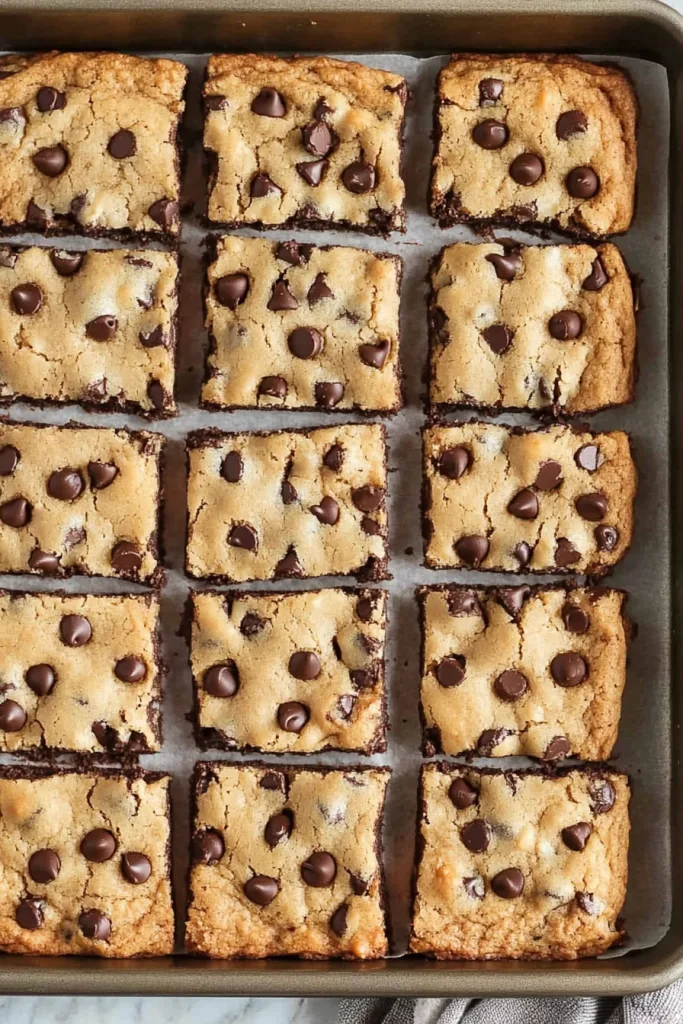
These Sheet Pan Chocolate Chip Cookies are soft, chewy, buttery, and full of chocolate chips in every slice. They’re the kind of easy dessert that feels homemade and comforting without making you work too hard for it. I love them for parties, casual weekends, lunchbox treats, or those evenings when you just want something sweet and familiar. They’re simple, but not boring. Easy, but still special. And maybe that’s why they disappear so quickly.
So tell me, are you an edge-piece person or a soft-center person? I go back and forth, depending on my mood, which feels very reasonable. Either way, I hope you try these cookie bars soon — and I can’t wait to hear what you think!
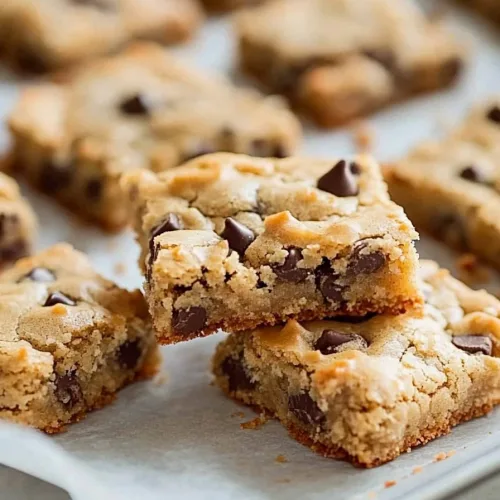
Sheet Pan Chocolate Chip Cookies
Ingredients
- 1 cup unsalted butter softened to room temperature
- 1 1/2 cups packed light brown sugar
- 1/2 cup granulated sugar
- 2 large eggs
- 2 large egg yolks
- 1 tablespoon vanilla extract
- 3 cups all-purpose flour
- 1 tablespoon cornstarch
- 2 teaspoons baking soda
- 1 teaspoon salt
- 2 cups semi-sweet chocolate chips plus additional for topping
- Flaky sea salt optional
Instructions
- Preheat the oven to 350°F. Line a 13×18-inch rimmed baking sheet with parchment paper and set aside.
- In a large mixing bowl, beat the softened butter, light brown sugar, and granulated sugar with an electric mixer on medium speed until the mixture is light and fluffy, about 2 minutes.
- Scrape the bottom and sides of the bowl. Add the eggs and egg yolks one at a time, beating well after each addition. Add the vanilla extract and mix until fully incorporated.
- Add the all-purpose flour, cornstarch, baking soda, and salt to the bowl. Stir gently with a spatula until the dry ingredients are almost combined.
- Add the semi-sweet chocolate chips and continue folding the dough until no visible flour streaks remain.
- Transfer the cookie dough to the prepared baking sheet. Press the dough evenly into the pan, spreading it to the edges and corners.
- Sprinkle additional chocolate chips over the top, if desired. Add a light sprinkle of flaky sea salt, if using.
- Bake for 20 to 25 minutes, or until the top is lightly golden brown and the center appears set.
- Remove the baking sheet from the oven and allow the cookies to cool in the pan for at least 20 minutes.
- Carefully lift the cookie slab from the pan and transfer it to a wire rack to cool completely.
- Slice into 24 bars. Serve warm or at room temperature.
Notes