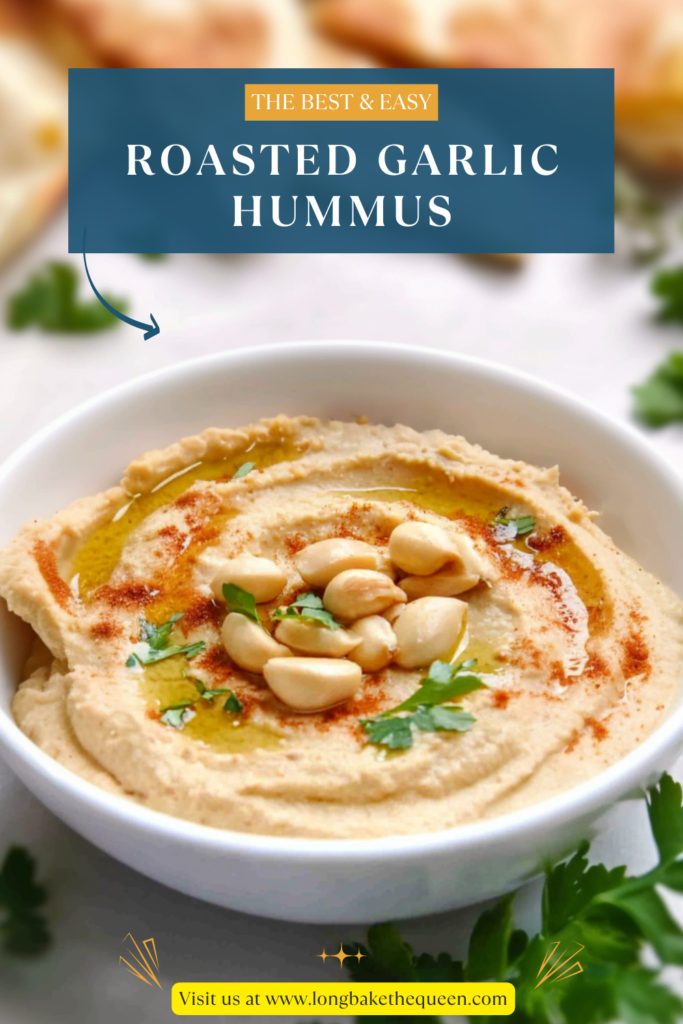
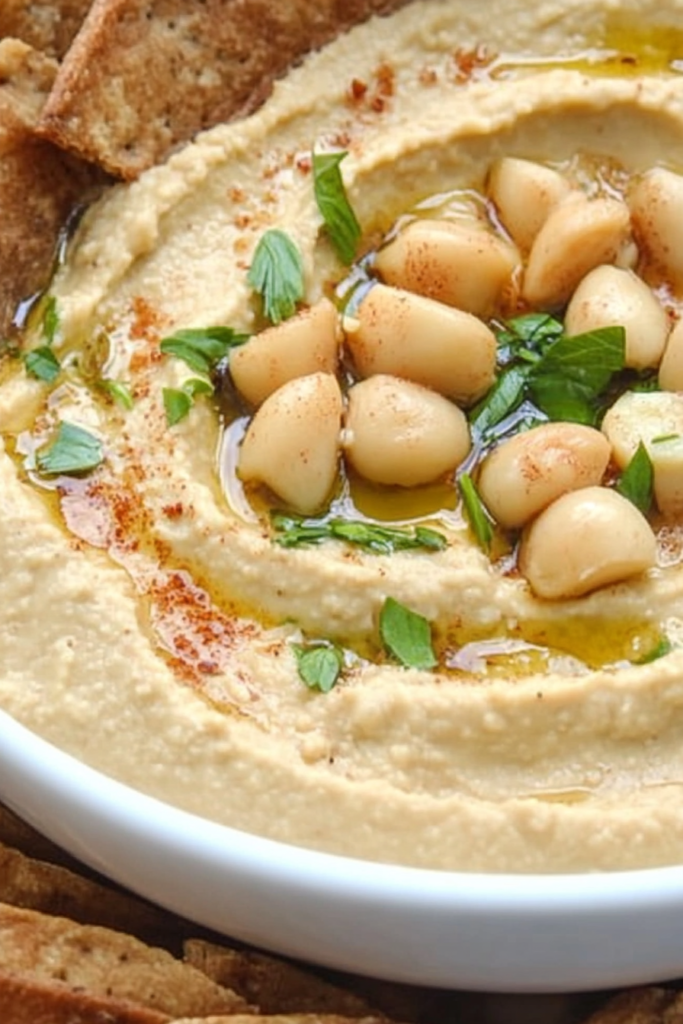
Creamy roasted garlic hummus made with chickpeas, tahini, lemon juice, olive oil, and slow-roasted garlic for deep, cozy flavor.
I don’t remember the first time I ever made roasted garlic hummus, but I do remember the moment it became a habit. It was one of those afternoons where I wasn’t really hungry, but also couldn’t stop opening the fridge. You know the one. I had just come back from the store with no plan, no list, and somehow two full heads of garlic because that felt reasonable at the time. I roasted them mostly for the smell. Honestly. That warm, sweet, slightly nutty garlic smell that fills the kitchen and makes everything feel calmer than it actually is.
Once the garlic came out of the oven, soft and golden and basically begging to be squished, I knew hummus was happening. Not fancy hummus. Not “I followed a strict recipe” hummus. Just roasted garlic hummus the way normal people make it—taste, blend, taste again, maybe add more lemon, maybe not. I stood at the counter eating it with a spoon while scrolling my phone, thinking, yeah… this one’s staying. It reminded me of those shared snack plates you get at casual cafés—nothing dramatic, just really good food that makes you linger longer than you planned.
Why you’ll Love this Roasted Garlic Hummus?
There’s something about roasted garlic hummus that feels comforting without being boring. The garlic isn’t sharp or aggressive—it’s mellow, almost sweet, like it’s trying to be your friend instead of shouting at you. The chickpeas keep it grounded, the tahini adds richness, and the lemon juice gives it that little spark so it doesn’t feel heavy.
What I love most, though, is how forgiving it is. You don’t need exact measurements. Some days I want it lemony. Some days I want it thicker. Some days I accidentally add too much garlic and then pretend it was intentional. It always works out. This roasted garlic hummus doesn’t judge. It just shows up and tastes good.
Ingredient Notes
Before you dump everything into the food processor and hope for magic, let’s talk through the ingredients—because with roasted garlic hummus, they matter more than you’d think.
- Garlic (yes, two whole heads): It sounds like overkill. It’s not. Roasting changes garlic completely. It goes from sharp to soft, from loud to gentle. If raw garlic is a megaphone, roasted garlic is a warm conversation.
- Olive Oil: Use one you’d actually dip bread into. This roasted garlic hummus leans on olive oil for flavor, especially when it’s infused with those golden garlic slices.
- Tahini: Stir it. Then stir it again. Tahini likes to separate like it’s being dramatic. When it’s fully mixed, it gives hummus that classic creamy body and slightly nutty depth.
- Chickpeas: Canned chickpeas are fine. Great, actually. Rinse them well. Peeling the skins makes smoother hummus, but I’ll be honest—I only do that when I’m trying to impress someone.
- Lemon Juice: Fresh lemon makes a difference. Bottled lemon juice works in a pinch, but fresh just feels brighter, like opening a window.
- Seasoning: Salt pulls everything together. Cayenne adds warmth without heat. Parsley keeps things from feeling too rich. It’s balance, not perfection.
How to Make Roasted Garlic Hummus?
This roasted garlic hummus isn’t complicated—it just asks you to slow down a little. Which, let’s be real, most of us could use.
Step 1: Roasting the Garlic
Preheat your oven to 350°F. Peel away the loose skins from the garlic heads, slice off the top so the cloves are exposed, wrap them in foil, and let them roast for about an hour. Don’t rush this. Roasted garlic takes its time, and it’s worth it. This is when your kitchen starts smelling like something good is happening.
Step 2: Making the Garlic Oil
While the garlic is roasting, gently heat olive oil with thinly sliced garlic over medium-low heat. Low and slow. When the slices turn golden, scoop them out and save the oil. That oil is flavor. Real flavor. The kind you don’t throw away.
Step 3: Prepping the Roasted Garlic
Once the roasted garlic cools enough to touch, squeeze the cloves out of their skins. They should slide out easily. If you eat one straight from the foil, that’s normal behavior.
Step 4: Blending the Base
Add the chickpeas, roasted garlic, minced garlic, salt, and cayenne to your food processor. Pulse until it looks mostly smooth, then scrape the bowl. Always scrape the bowl. This is not optional.
Step 5: Bringing It All Together
With the processor running, slowly pour in the lemon juice mixed with water. Then drizzle in the tahini mixed with that reserved garlic oil. Blend until the roasted garlic hummus looks smooth and creamy. Taste it. Adjust it. Trust your instincts here—they’re probably right.
Step 6: Letting It Rest
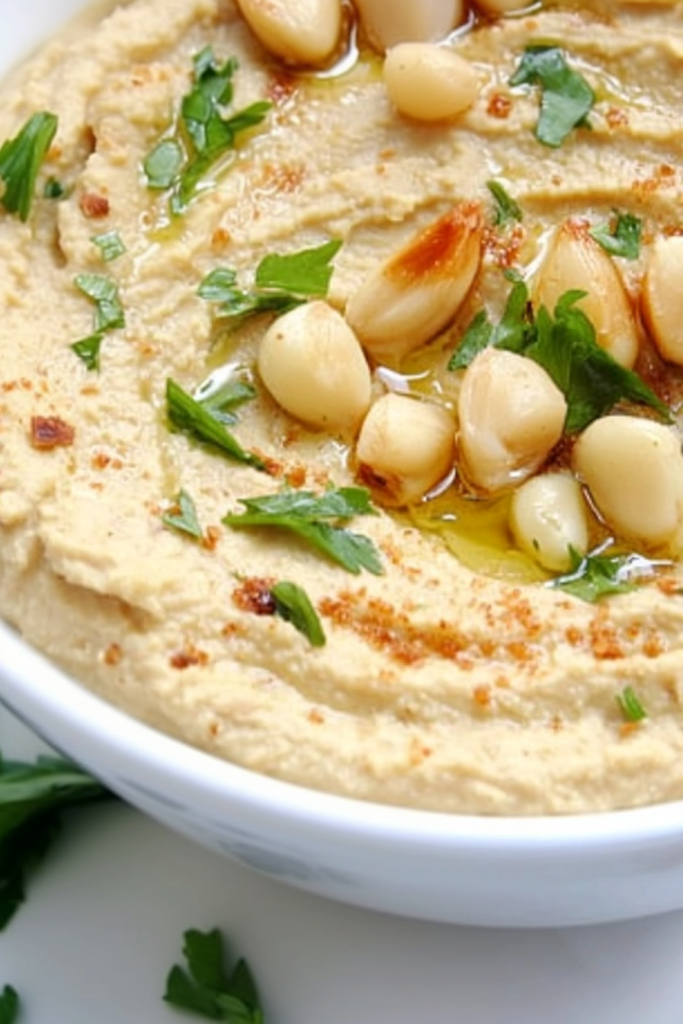
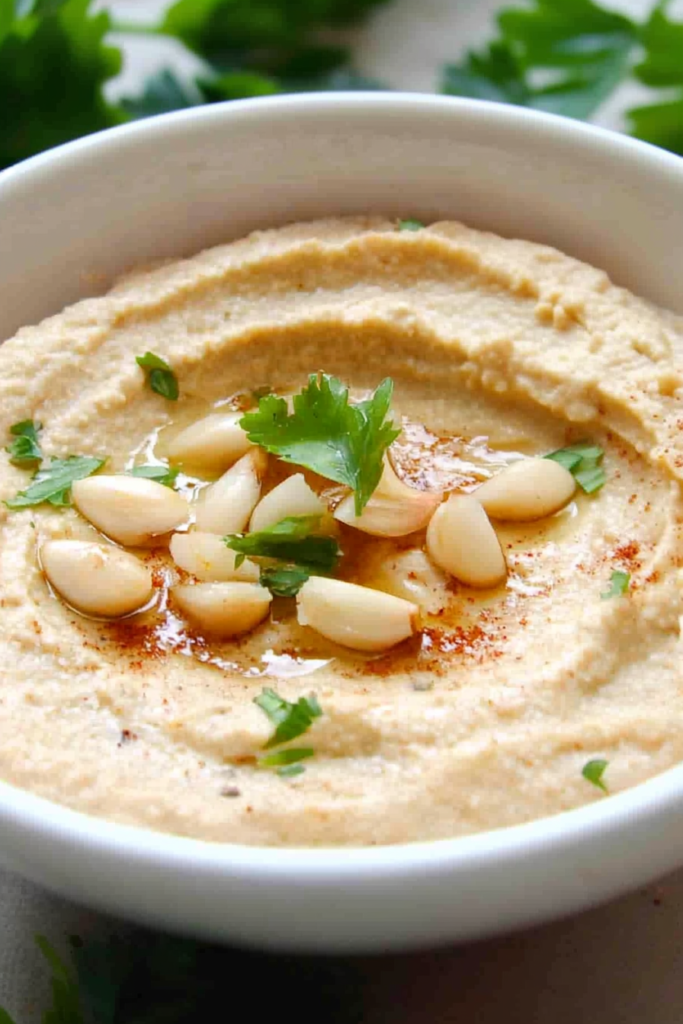
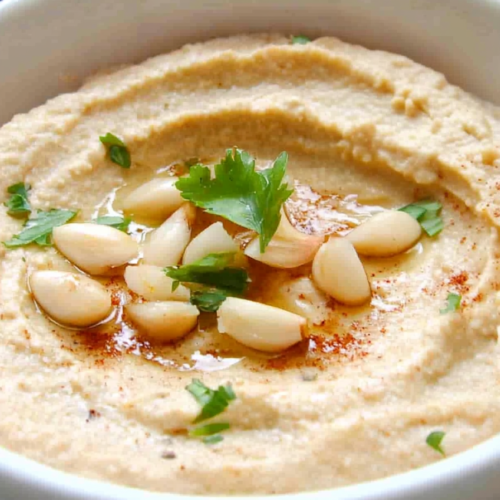
Scoop the hummus into a bowl, top with the crispy garlic slices and parsley, cover it, and let it sit for at least 30 minutes. This is when the roasted garlic hummus really becomes itself. Flavors need time to settle. Just like people.
Storage Options
Roasted garlic hummus keeps well in the fridge for up to five days in an airtight container. It might thicken a little—that’s normal. Just stir in a splash of water or olive oil and it comes right back. Freezing? I’ve tried it. It’s fine, but not great. The texture changes, and this hummus deserves better than “fine.”
Variations & Substitutions
Roasted garlic hummus is flexible. You can tweak it depending on your mood—or what’s left in the fridge.
- Extra Creamy: Add more tahini or olive oil if you want that ultra-smooth café-style texture.
- Spicy: Swap cayenne for smoked paprika or chili flakes if you’re feeling bold.
- No Tahini: Olive oil or a dairy-free yogurt works if tahini isn’t your thing. Different, but still good.
- Brighter Flavor: Add more lemon juice or even a pinch of zest for extra freshness.
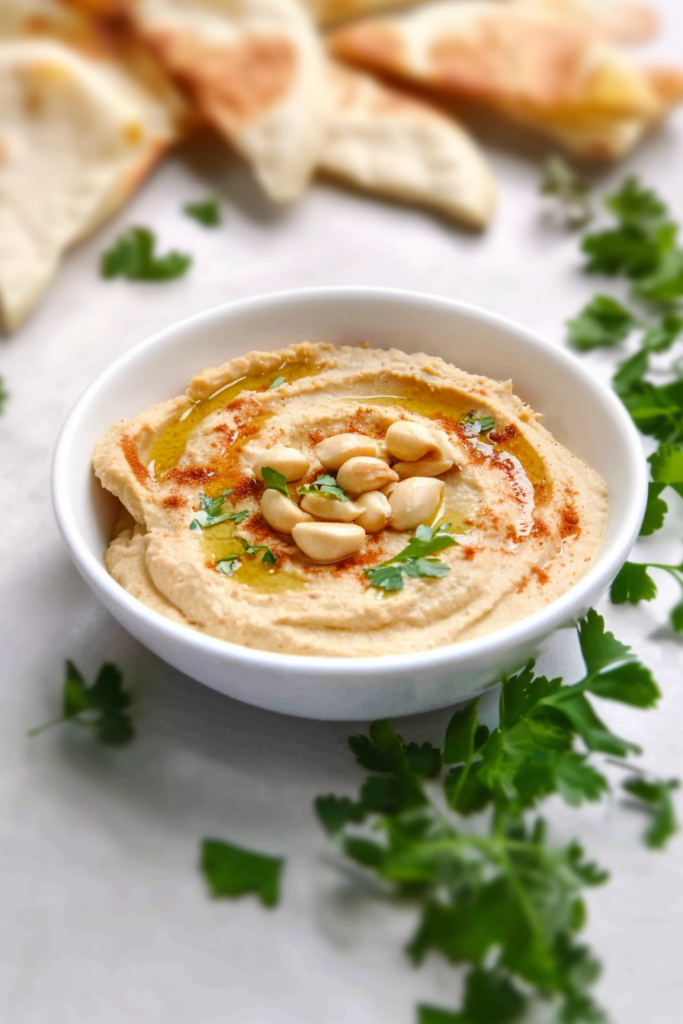
What to Serve With Roasted Garlic Hummus?
This roasted garlic hummus doesn’t need much help, but it plays well with others.
- Fresh Veggies: Carrots, cucumbers, bell peppers—simple, classic, reliable.
- Bread: Warm pita, naan, or crusty bread for scooping. Lots of scooping.
- Mediterranean Plates: Olives, roasted vegetables, grilled chicken, falafel—it all works.
- Sandwiches: Use it instead of mayo. Seriously. Have you tried that yet?
FAQ
Can I make roasted garlic hummus ahead of time?
Yes—and you probably should. It tastes better after sitting for a few hours. Everything mellows and blends together.
Is this hummus super garlicky?
Not in a sharp way. Roasting changes the garlic completely. It’s rich and mellow, not overwhelming.
Why isn’t my hummus perfectly smooth?
It might need more blending time or a little more liquid. Add water or olive oil slowly and keep going. Hummus isn’t a race.
If you’ve been craving something simple but comforting, familiar but still special, this roasted garlic hummus might be exactly what you didn’t know you needed. Make it once, tweak it the next time, and tell me—do you eat hummus properly with crackers… or straight from the bowl with a spoon like the rest of us?
Roasted Garlic Hummus
Ingredients
- 2 heads garlic intact
- 2 tbsp olive oil
- 2 cloves garlic peeled and thinly sliced
- 3 tbsp fresh lemon juice from 1–2 lemons
- ¼ c water
- 6 tbsp tahini well stirred
- 1 14-oz can chickpeas drained and rinsed
- 1 clove garlic minced (about ½ tsp)
- ½ tsp salt
- Pinch of cayenne pepper
- 1 tbsp fresh parsley finely minced
Instructions
Roast the Garlic
- Preheat the oven to 350°F (175°C). Remove the outer papery skins from the garlic heads, leaving the cloves intact. Slice off the top quarter of each head to expose the cloves. Wrap tightly in foil and roast until very soft and fragrant, approximately 60 minutes. Remove from the oven and allow to cool for about 10 minutes, then squeeze the roasted cloves from their skins and set aside.
Prepare the Garlic Oil
- While the garlic roasts, heat the olive oil and sliced garlic in a small skillet over medium-low heat. Cook gently, stirring occasionally, until the garlic turns golden brown, about 15 minutes. Using a slotted spoon, transfer the garlic slices to a paper towel–lined plate. Reserve the infused oil for later use.
Prepare the Liquid Components
- In a small bowl, combine the lemon juice and water. In a separate bowl, whisk together the tahini and the reserved garlic-infused oil until smooth and fully emulsified.
Blend the Hummus Base
- In the bowl of a food processor, combine the chickpeas, roasted garlic, minced garlic, salt, and cayenne pepper. Process until the mixture is finely ground, about 15 seconds. Stop and scrape down the sides of the bowl.
Finish the Hummus
- With the processor running, slowly add the lemon juice and water mixture through the feed tube in a steady stream. Stop and scrape the bowl, then process for 1 minute. With the processor running again, gradually add the tahini mixture. Continue processing until the hummus is smooth, creamy, and well blended.
Rest and Serve
- Transfer the hummus to a serving bowl. Top with the reserved toasted garlic slices and minced parsley. Cover and allow the hummus to rest at room temperature for at least 30 minutes to allow the flavors to fully develop. Drizzle with additional olive oil before serving, if desired.
Notes