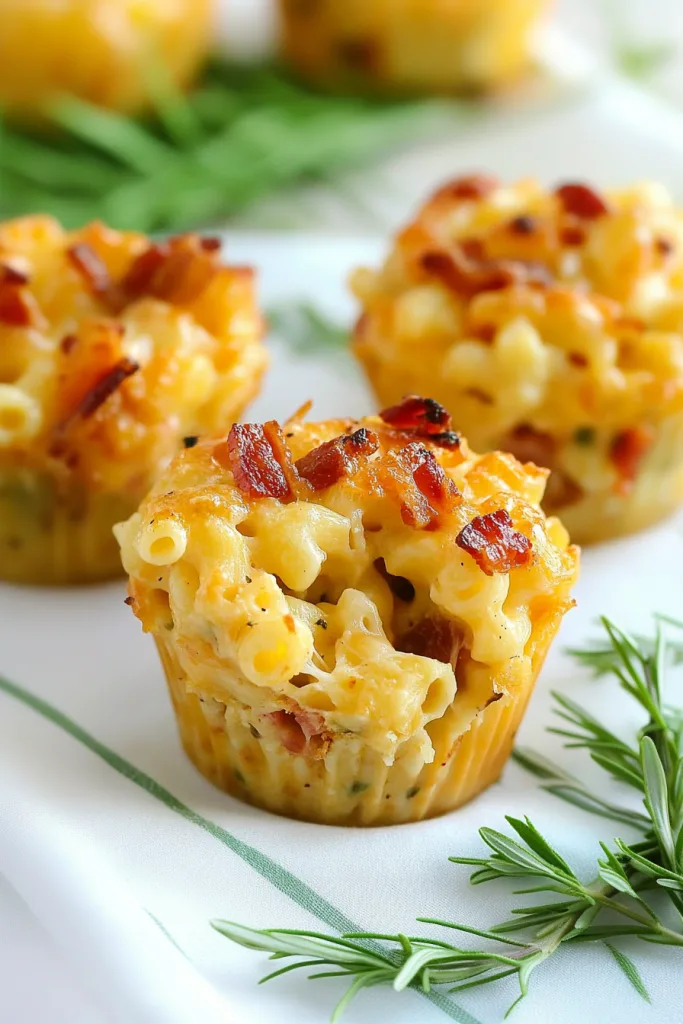
Macaroni or rotini, bacon, egg, sharp cheddar cheese, ricotta cheese, yogurt or sour cream, ranch seasoning, milk, and dill.
There are days when regular mac and cheese is exactly what you need. And then there are days when you want mac and cheese that can be picked up with your hands, tucked into a lunch box, or served on a game day table without needing a big spoon and a cleanup committee. That’s where these Ranch Bacon Mac and Cheese Cups come in. They’re creamy, cheesy, smoky from the bacon, a little tangy from the ranch, and baked into cute little muffin-sized portions. Honestly, they feel like mac and cheese decided to become a party snack, and I’m not mad about it.
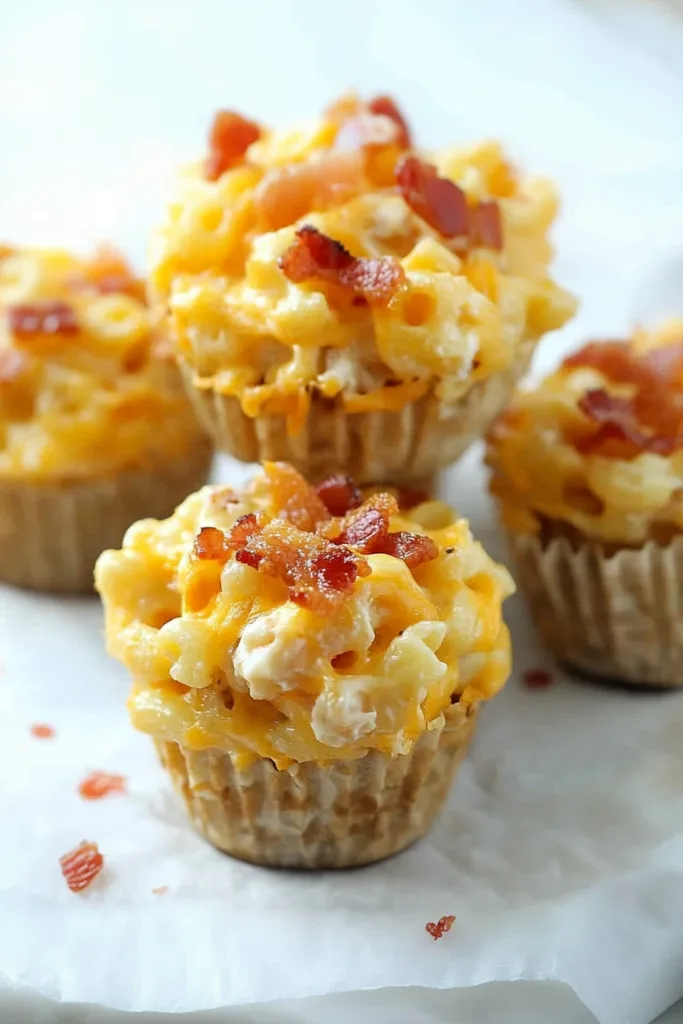
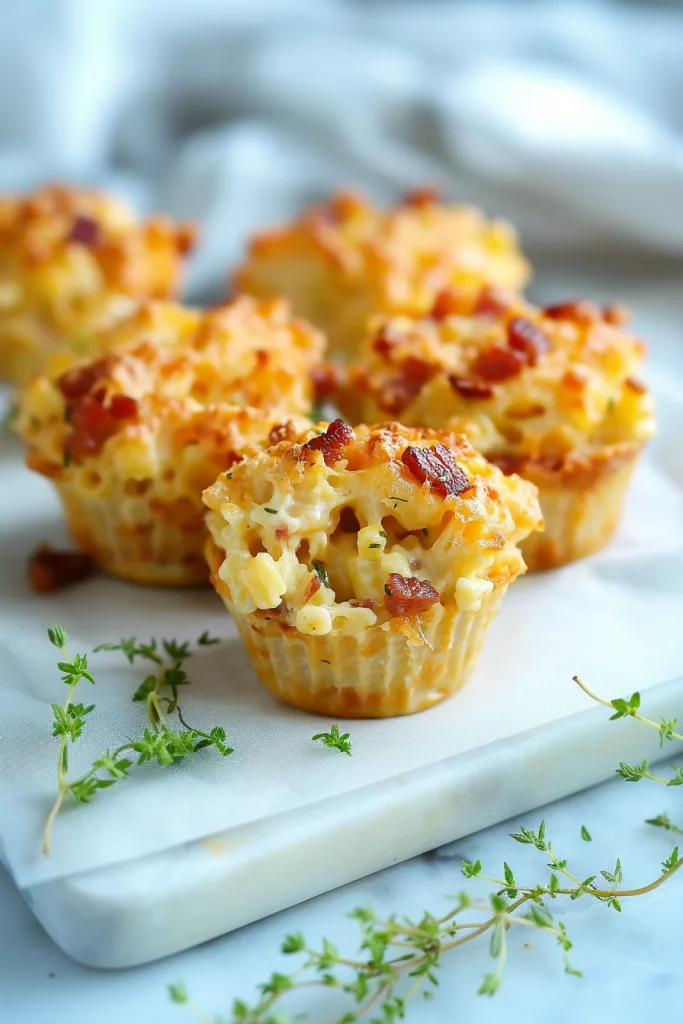
These Ranch Bacon Mac and Cheese Cups are made with macaroni or rotini, crispy diced bacon, sharp cheddar cheese, ricotta cheese, plain yogurt or sour cream, ranch seasoning, milk, egg, and fresh dill. The mixture gets scooped into a muffin tin, topped with more cheese, bacon, and dill, then baked until the edges are browned and the tops are bubbly. The outside gets a little golden, while the inside stays soft and creamy. That crispy edge situation? Very important. Some people pretend they don’t care about crispy mac and cheese edges, but I have doubts.
I love this recipe because it fits real life. Not the perfectly styled, quiet-kitchen kind of life. I mean the “someone needs a lunch packed, someone else is asking what’s for dinner, and there’s a potluck text thread going off” kind of life. Sound familiar? These bacon ranch mac and cheese cups work for tailgating, lunch boxes, potlucks, parties, game days, after-school snacks, or casual dinners when you want something cozy but not too serious.
There’s also something oddly satisfying about food baked in a muffin tin. Maybe it’s because each little cup feels personal, like, “Here, this one is yours.” No messy scooping. No trying to cut neat squares from a casserole dish. No cheese stretching halfway across the table like it has big dreams. Just grab a cup and go. Well, maybe let it cool first unless you enjoy molten cheese surprises. I’ve learned that lesson the dramatic way.
What makes these Ranch Bacon Mac and Cheese Cups especially fun is that they taste like comfort food but behave like party food. The cheddar gives that classic mac and cheese flavor, the ranch seasoning adds herby tang, the bacon brings smoky saltiness, and the ricotta keeps everything creamy without needing a whole stovetop cheese sauce. The dill on top gives it a fresh little lift, which I appreciate because otherwise I’d just keep saying “cheese, bacon, cheese, bacon” and call it dinner. Not that there’s anything wrong with that.
And yes, these cheesy ranch pasta cups are flexible. You can use regular pasta or gluten-free pasta. Macaroni or rotini. Sour cream or yogurt. Fresh dill or dried dill. Store-bought ranch seasoning or homemade ranch mix. It’s one of those recipes that gives you a plan but doesn’t boss you around. Some days, that’s exactly the kind of recipe I need.
I think mini food just has a way of making people happy. Maybe it’s because it feels a little playful, or maybe because anything served in a muffin tin automatically looks like you tried harder than you did. The first time I made Ranch Bacon Mac and Cheese Cups, I remember looking at the pan and thinking, “Well, these are kind of adorable.” And I don’t usually call pasta adorable, so that was a moment.
I made them for one of those casual snacky meals where nobody really wanted a formal dinner, but everyone still wanted something warm and filling. You know those nights? The kind where a salad sounds responsible, but mac and cheese sounds emotionally correct. I had bacon, pasta, cheddar, and ranch seasoning, and it just made sense. Ranch and bacon already get along like old friends, and mac and cheese was happy to join the group.
These bacon ranch mac and cheese cups remind me of tailgate tables and school lunch boxes and potluck afternoons where everyone brings “just a little something,” but somehow the table ends up packed. There’s always chips, dip, sliders, maybe a veggie tray that people approach politely, and then something cheesy that disappears first. These cups definitely belong in that last category. They’re not fancy, but they have that “oh, I’ll take one more” quality. Dangerous, but in a friendly way.
I also like that this recipe doesn’t need a traditional cheese sauce. Don’t get me wrong, I love a good cheese sauce, but sometimes I don’t want to stand at the stove whisking like I’m auditioning for a cooking show. Here, ricotta, yogurt or sour cream, cheddar, milk, egg, and ranch seasoning come together in one bowl. It’s creamy and simple, and it bakes into the pasta nicely. Is it the exact same texture as stovetop mac and cheese? Not exactly. But that’s the point. These are mac and cheese muffins, so they need to be creamy and sturdy. A little balance.
The first batch I made had a couple of cups that stuck to the pan because I was a little too casual with the cooking spray. Learn from me: spray the muffin tin like you mean it. Cheese is delicious, but it has attachment issues. Also, let the cups cool before removing them. I know waiting ten minutes feels unfair when the tops are bubbling and the bacon smells amazing, but it helps them set. If you rush, you may end up with a cheesy pasta landslide. Still edible, but less cute.
What I love most about Ranch Bacon Mac and Cheese Cups is that they’re practical but still fun. They’re good for kids, adults, parties, lunch prep, and those odd little meals where everyone eats at different times. They’re comforting without being fussy. And sometimes that’s the food I come back to most.


Why you’ll Love these Ranch Bacon Mac and Cheese Cups?
You’ll love these Ranch Bacon Mac and Cheese Cups because they take classic comfort food and make it portable. That sounds simple, but it really does change how you can serve them. Instead of one big pan of mac and cheese, you get individual cups with creamy centers, cheesy tops, crispy edges, and bacon tucked all through. It’s like every serving gets its fair share of the best bits. No one has to secretly aim for the corner piece. Though, let’s be honest, some of us still would.
One of the biggest reasons these Ranch Bacon Mac and Cheese Cups are so useful is that they’re easy to serve. They come out already portioned, which makes them perfect for tailgates, game day snacks, birthday parties, lunch boxes, potlucks, picnics, or easy family dinners. You don’t need bowls. You don’t need a serving spoon. You don’t have to hover over a casserole dish trying to make equal scoops while people politely wait. Just place them on a tray and let everyone grab one.
The flavor is also a big win. Ranch seasoning gives the pasta that familiar herby, tangy taste. Bacon adds saltiness and smoky crunch. Sharp cheddar brings the bold cheese flavor you expect from mac and cheese. Ricotta makes the cups creamy, while yogurt or sour cream adds moisture and a little tang. Then the dill comes in at the end with a fresh note that keeps the whole thing from feeling too heavy. I wouldn’t call them light, exactly. They’re still cheesy pasta with bacon. But they don’t feel flat or boring.
Texture is another reason these bacon ranch mac and cheese cups work so well. The pasta holds together in the muffin tin, the edges brown slightly, and the topping melts into a bubbly little cap of cheese and bacon. The inside stays soft and creamy, but the outside gives each cup enough structure to pick up or pack. That’s the tricky part with baked pasta cups: they need to hold their shape without turning dry. These do a nice job of landing in the middle.
They’re also great for meal prep. You can bake the cups ahead, cool them, and store them in the fridge or freezer. They reheat well in the oven, microwave, or air fryer, depending on how much time and patience you have. I like the air fryer for bringing back a little crispness, but the microwave works when lunch needs to happen now. We’ve all been there.
And maybe my favorite thing is that Ranch Bacon Mac and Cheese Cups feel fun without requiring fancy ingredients. They’re familiar enough that kids will usually go for them, but flavorful enough that adults won’t feel like they’re eating plain cafeteria mac. They’re cozy, snackable, and a little unexpected. Do you agree that muffin-tin recipes somehow make dinner feel less boring?
Ingredient Notes
The ingredients for Ranch Bacon Mac and Cheese Cups are simple, but they all matter in their own way. This recipe doesn’t ask you to make a complicated sauce or hunt down unusual ingredients. It’s pasta, bacon, cheese, ranch, and a few creamy helpers that make everything hold together. Very normal ingredients, just arranged in a clever little muffin-tin situation.
- Macaroni or Rotini: Macaroni is the classic choice, but rotini works really well because those twists catch the creamy ranch cheese mixture. I used gluten-free pasta, and it worked nicely, though I’d be careful not to overcook it. Gluten-free pasta can go from tender to mushy faster than you expect, especially since it bakes again. Small shapes like macaroni, rotini, small shells, or elbows are best because they fit into the muffin cups and help the Ranch Bacon Mac and Cheese Cups hold together.
- Bacon: Bacon brings smoky, salty flavor and a little crunch. Dice it first, then cook it until browned and most of the fat has rendered. You’ll stir most of the bacon into the pasta mixture and save some for the topping, which gives each cup a little bacon sparkle on top. And yes, it’s completely normal to want to snack on the bacon while assembling. I won’t say it’s ideal, but I understand.
- Egg: The egg helps bind the mixture so the cups don’t fall apart when you remove them from the muffin tin. It doesn’t make the finished cups taste eggy. It just quietly does its job in the background, like the responsible person at a potluck who remembers napkins.
- Sharp Cheddar Cheese: Sharp cheddar gives these bacon ranch mac and cheese cups that bold, classic cheesy flavor. The recipe uses 2 1/2 cups, divided between the filling and the topping. Using cheese in both places gives you creamy pasta inside and a melted, bubbly top. Mild cheddar works too, but sharp cheddar has more personality.
- Ricotta Cheese: Ricotta adds creaminess and helps give the cups a soft, rich texture without needing a separate cheese sauce. It’s mild, so it doesn’t compete with the ranch, bacon, or cheddar. It just makes everything feel creamy and a little more substantial.
- Plain Yogurt or Sour Cream: Plain yogurt or sour cream adds tang and moisture. Sour cream gives a richer taste, while yogurt can feel a bit lighter. I’d avoid fat-free versions because they can make the mixture thinner and less creamy. This is mac and cheese, after all. We’re not here to make it sad.
- Ranch Dressing Mix: Ranch mix gives these Ranch Bacon Mac and Cheese Cups their signature flavor. You can use one packet of buttermilk ranch dressing mix or 2 tablespoons of homemade ranch mix. It adds herbs, garlic, onion, and tang without needing to measure a bunch of separate seasonings. Convenient? Yes. Delicious? Also yes.
- Milk: Milk loosens the cheese mixture just enough so it coats the pasta evenly. You only need 1/2 cup. Too much liquid can make the cups softer and harder to remove cleanly, so this is one of those times where more is not necessarily better.
- Fresh Dill: Fresh dill adds brightness and works really nicely with ranch and bacon. It gives the topping a little fresh flavor, which helps balance all that cheese. If you don’t have fresh dill, use 1 teaspoon dried dill instead. Dried dill is stronger, so a little goes a long way.
- Cooking Spray: Cooking spray matters more than you might think. Since the cups bake directly in a muffin tin, you want to spray the pan very well. Cheese likes to stick, and pasta cups are not shy about clinging to corners. Silicone muffin liners can help too, especially if you’re nervous about removing them neatly.
How to Make Ranch Bacon Mac and Cheese Cups?
Making Ranch Bacon Mac and Cheese Cups is pretty straightforward, but a few little details help them come out neatly. Cook the pasta just until tender, crisp the bacon, whisk together the creamy cheese mixture, scoop everything into a well-greased muffin tin, and bake until bubbly. Then—and this is the part I always have to remind myself—let them cool before removing them. Cheese needs a minute. Apparently we all do.
Step 1: Preheat the Oven and Prepare the Muffin Tin
Preheat your oven to 350°F. Spray a standard muffin tin generously with cooking spray, making sure to coat the bottoms and sides of each cup. This helps the Ranch Bacon Mac and Cheese Cups release after baking. Don’t be shy here. A lightly sprayed muffin tin can turn into a small pasta disaster, and nobody needs that.
Step 2: Boil the Pasta Water
Bring a large pot of lightly salted water to a boil. The salt helps flavor the pasta from the inside as it cooks. It’s not a dramatic step, but it helps the finished cups taste better. Pasta needs a little seasoning too.
Step 3: Cook the Pasta
Cook the macaroni or rotini according to the package directions, then drain it well and set it aside. Try to cook the pasta just until tender. If you’re using gluten-free pasta, keep an especially close eye on it because it can soften quickly. Since the pasta will bake again, you don’t want it mushy before it even reaches the muffin tin.
Step 4: Cook the Bacon
While the pasta cooks, heat a skillet over medium-high heat. Add the diced bacon and cook, stirring occasionally, until browned and most of the fat has rendered. Use a slotted spoon to transfer the bacon to a paper towel-lined plate. This drains off extra grease and keeps the bacon ranch mac and cheese cups from turning oily.
Step 5: Beat the Egg
In a large mixing bowl, lightly beat the egg. This helps it mix evenly into the cheeses and dairy. The egg is what helps the pasta cups set into little muffin shapes, so don’t skip it unless you’re prepared for a much looser result.
Step 6: Make the Creamy Ranch Cheese Mixture
Add 2 cups shredded sharp cheddar cheese, ricotta cheese, plain yogurt or sour cream, ranch seasoning, and milk to the bowl with the egg. Whisk until the mixture is smooth and creamy. It should look thick but scoopable. This mixture brings the ranch flavor, the creamy texture, and the structure that helps the cups hold together.
Step 7: Add the Pasta and Bacon
Stir the cooked pasta into the cheese mixture until it is evenly coated. Add most of the cooked bacon, saving about 1/4 cup for the topping. Mix gently so the pasta doesn’t break apart. At this point, the mixture will look creamy, cheesy, and honestly very tempting. A small taste happens sometimes. It’s fine. We’re human.
Step 8: Fill the Muffin Tin
Scoop the macaroni mixture into the prepared muffin tin. It’s okay if the pasta is slightly mounded above the edge of each cup. The mixture will settle a bit as it bakes. Press gently if needed, but don’t pack it down too hard. You want the Ranch Bacon Mac and Cheese Cups to hold together while still staying creamy inside.
Step 9: Prepare the Topping
In a small bowl, stir together the remaining 1/2 cup shredded cheddar cheese, the reserved 1/4 cup cooked bacon, and minced fresh dill. Sprinkle about 1 tablespoon of the topping over each mac and cheese cup. This gives every cup that melted, bubbly, bacon-dotted finish. The dill makes it look pretty too, which never hurts.
Step 10: Bake Until Bubbly
Bake for 20 to 25 minutes, or until the edges are browned and the topping is melted and bubbly. The cups should look set, and the edges should have a little golden color. Those browned edges are part of the charm, so don’t worry if they get a bit crisp. That’s flavor doing its thing.
Step 11: Let the Cups Cool
Let the Ranch Bacon Mac and Cheese Cups cool in the pan for at least 10 minutes. I know this is the hardest step because the kitchen smells like bacon, ranch, and melted cheese. But cooling helps the cups firm up, which makes them much easier to remove. If you rush, they may fall apart. Still tasty, but less “cute party cup” and more “cheesy pasta pile.”
Step 12: Loosen and Serve
Carefully run a butter knife around the edge of each cup to loosen it from the pan. Lift each cup out gently and serve warm, or place them on a wire rack to cool before storing. They’re best warm when the cheese is still soft, but they also work beautifully for meal prep, lunch boxes, and leftovers.
Storage Options
Ranch Bacon Mac and Cheese Cups store well, which is one reason I like them for busy weeks and make-ahead snacks. Because they have cheese, egg, bacon, yogurt or sour cream, and pasta, you’ll want to cool them properly and keep them refrigerated. They do firm up once chilled, but reheating brings back that cozy cheesy texture.
- Refrigerator: Store cooled Ranch Bacon Mac and Cheese Cups in an airtight container in the refrigerator for up to 4 days. If you stack them, place parchment paper between the layers so they don’t stick together. They’ll be firmer cold, which actually makes them easier to pack, but they taste best reheated.
- Freezer: You can freeze these cups for up to 2 months. Let them cool completely first, then wrap each cup individually or place them in a freezer-safe container with parchment between layers. I like the individual wrapping idea because it makes lunch planning easier. Pull out one or two, and future-you gets a little cheesy reward.
- Reheating in the oven: For the best texture, reheat the cups in a 325°F oven for about 10 to 15 minutes, or until warmed through. The oven helps bring back some crispness around the edges and keeps the topping from getting too soft. It takes a little longer, but it’s worth it when you have time.
- Reheating in the microwave: The microwave works well when you need food fast. Place one or two cups on a microwave-safe plate and heat for 30 to 45 seconds, or until warm. The edges will be softer than they are in the oven, but the flavor is still good. Sometimes speed matters more than crispy edges. I don’t love admitting that, but it’s true.
- Reheating in the air fryer: If you have an air fryer, reheat the cups at 325°F for about 4 to 6 minutes, or until warmed through. This is one of my favorite reheating methods because it helps the edges crisp back up without turning on the oven.
- Lunch Box Storage: These bacon ranch mac and cheese cups are great for lunch boxes because they hold their shape better than a scoop of regular mac and cheese. Pack them cold with an ice pack if they won’t be reheated, or warm them and place them in a thermos. They’re sturdy, flavorful, and not too messy, which is a lunch box win.
- Make-Ahead Option: You can bake the cups ahead, cool them completely, and refrigerate them until needed. Reheat just before serving. This works especially well for potlucks, tailgates, meal prep, and busy weeknights when you want something ready without starting from scratch.
Variations & Substitutions
These Ranch Bacon Mac and Cheese Cups are easy to adjust, which is good because real kitchens are rarely perfect. Maybe you’re out of rotini. Maybe someone ate half the bacon. Maybe you have sour cream but no yogurt. It happens. This recipe has enough flexibility to handle a few swaps without falling apart.
- Use a Different Pasta Shape: Macaroni and rotini are great, but small shells, elbows, cavatappi, or mini penne can also work. Choose small pasta shapes that hold sauce and fit neatly into the muffin tin. Long noodles don’t work as well here unless you enjoy wrestling pasta into muffin cups, which I personally do not recommend.
- Make It Gluten Free: Use gluten-free macaroni or rotini, as the recipe notes. Cook it just until tender so it doesn’t become too soft during baking. Also check that your ranch seasoning and bacon are gluten free. Gluten-free pasta can be a little dramatic sometimes, but it works well when you don’t overcook it.
- Swap the Bacon: Turkey bacon, pancetta, diced ham, or cooked sausage can be used instead of classic bacon. Each one changes the flavor a bit. Turkey bacon is lighter, ham is milder, sausage makes the cups heartier, and pancetta feels a little fancy in that tiny way that makes you feel like you planned harder.
- Use Different Cheese: Sharp cheddar is classic, but Monterey Jack, Colby Jack, mozzarella, pepper jack, gouda, or a cheddar blend can work too. Pepper jack adds heat, gouda adds richness, and mozzarella gives a softer, stretchier melt. I’d still keep at least some cheddar in the mix because it gives that familiar mac and cheese flavor.
- Use Sour Cream Instead of Yogurt: Sour cream and plain yogurt both work. Sour cream gives a richer, tangier flavor, while yogurt can taste a little lighter. Avoid fat-free versions because they can make the mixture thinner and less creamy. A little richness helps the cups hold together and taste better.
- Use Homemade Ranch Mix: If you prefer homemade seasoning, use 2 tablespoons homemade ranch mix instead of one packet. This is helpful if you want to control the salt level or avoid certain additives. Plus, homemade ranch mix makes you feel slightly more organized than you may actually be. I enjoy that illusion.
- Add Vegetables: Stir in finely chopped broccoli, peas, spinach, roasted red peppers, or green onions. Keep the vegetables small and avoid adding too much moisture. If using frozen vegetables, thaw and pat them dry first. Otherwise, the cups may turn softer than you want.
- Make Them Spicy: Add diced jalapeños, crushed red pepper flakes, hot sauce, or pepper jack cheese. Ranch, bacon, cheese, and heat are a very good team. Just think about your crowd before going wild. A little kick is fun; accidental fire-mouth is less fun.
- Add Breadcrumbs: For extra crunch, sprinkle buttered breadcrumbs or crushed crackers over the topping before baking. This gives the cups more of a baked mac and cheese feel. If making gluten-free Ranch Bacon Mac and Cheese Cups, use gluten-free breadcrumbs or crushed gluten-free crackers.
- Make Mini Mac and Cheese Cups: Use a mini muffin tin for bite-sized party appetizers. Reduce the baking time and watch closely because mini cups bake faster. These are great for game day trays, but fair warning: people eat mini foods like they don’t count. They do. Unfortunately.
What to Serve With Ranch Bacon Mac and Cheese Cups?
Ranch Bacon Mac and Cheese Cups are rich, cheesy, and savory, so they pair nicely with sides that bring freshness, crunch, or tang. You can serve them as an appetizer, lunch box item, potluck side, tailgate snack, or casual dinner. Basically, they fit wherever cheesy pasta is welcome, which is most places I want to be.
- Green Salad: A fresh green salad balances the richness of these Ranch Bacon Mac and Cheese Cups. Lettuce, cucumbers, tomatoes, carrots, and a tangy vinaigrette work well. It makes the plate feel a little lighter and maybe slightly responsible. We love balance, even if it’s sitting next to bacon mac and cheese.
- Fresh Fruit: Fruit adds sweetness and freshness next to the salty bacon and cheddar. Grapes, apple slices, berries, pineapple, or melon are all good options. This is especially nice for lunch boxes or kid-friendly meals because the fruit keeps the plate from feeling too heavy.
- Veggie Sticks: Carrots, celery, cucumber slices, bell pepper strips, and cherry tomatoes are easy sides. Serve them with ranch dip if you want to go all-in on the ranch theme. Is that too much ranch? Maybe. But probably not.
- Tomato Soup: Tomato soup and mac and cheese are comfort food best friends. The bright tomato flavor balances the creamy pasta cups and makes the meal feel cozy without being too rich. It’s a great pairing for chilly days or simple lunches.
- Chicken Tenders: Serve bacon ranch mac and cheese cups with chicken tenders for a fun kid-friendly meal or game day spread. It’s casual, filling, and very likely to make everyone at the table happy. Not elegant, maybe, but deeply satisfying.
- BBQ Meatballs: BBQ meatballs pair well with the ranch, bacon, and cheddar flavors. The sweet and smoky sauce works nicely with the creamy pasta. This is a great party table combo if you want something hearty and easy to grab.
- Pulled Pork: Pulled pork and these Ranch Bacon Mac and Cheese Cups make a big, cozy tailgate-style plate. Add coleslaw on the side, and suddenly you have a full meal that feels like weekend food. The best kind.
- Grilled Chicken: Grilled chicken keeps the meal satisfying but a little more balanced. A simple seasoned chicken breast or chicken kabob works well because the mac and cheese cups already bring plenty of flavor.
- Pickles: Pickles add tang and crunch, which helps cut through the richness of the cheese and bacon. Serve pickle spears or sliced pickles on the side. It’s a small thing, but it really works.
- Game Day Snacks: Add these Ranch Bacon Mac and Cheese Cups to a game day spread with wings, sliders, chips, dips, veggie trays, deviled eggs, and maybe a tray of brownies because balance is a journey. These cups fit right in and are easy for guests to grab.
FAQ
Why do I need an egg in the recipe?
The egg helps bind the pasta and cheese mixture so the cups hold their shape. It doesn’t make them taste eggy. It just helps everything set into muffin-sized portions. Think of it as the quiet little helper holding the cheesy chaos together.
What pasta shape works best?
Macaroni, rotini, small shells, elbows, and cavatappi work well. Smaller shapes are best because they fit into the muffin tin and hold the cheese mixture. Big or long pasta shapes can be awkward here.
How do I keep the mac and cheese cups from sticking?
Spray the muffin tin generously with cooking spray before filling it. You can also use silicone muffin liners. Let the cups cool for at least 10 minutes before loosening them with a butter knife. That cooling time really helps.
How do I know when they’re done baking?
The cups are done when the edges are browned, the topping is melted and bubbly, and the centers look set. Let them cool before removing so they hold their shape. If they look golden and smell like everyone is about to wander into the kitchen, you’re probably there.
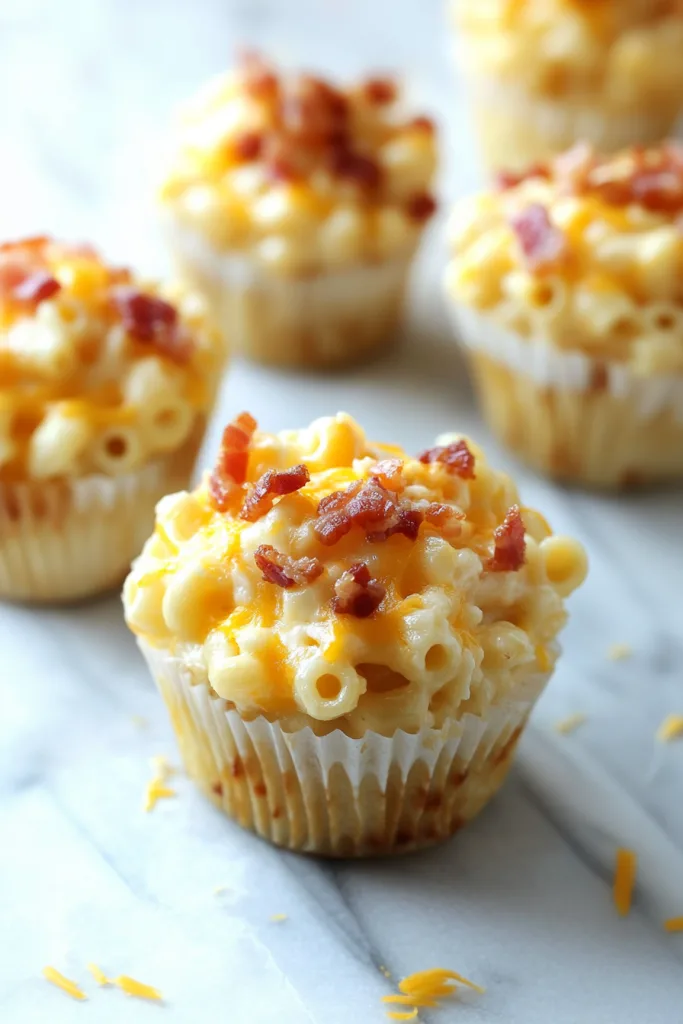
These Ranch Bacon Mac and Cheese Cups are creamy, cheesy, savory, and just a little playful. They turn classic mac and cheese into portable, muffin-sized bites with ranch flavor, crispy bacon, sharp cheddar, and golden edges. They’re perfect for tailgating, lunch boxes, potlucks, game days, parties, or those snacky dinner nights when a regular meal sounds too serious.
Make these bacon ranch mac and cheese cups when you want comfort food that’s easy to share and fun to eat. Would you pack them for lunch, serve them at a party, or keep a few hidden in the fridge for yourself? Can’t wait to hear what you think!

Ranch Bacon Mac and Cheese Cups
Ingredients
- 12 oz macaroni or rotini regular or gluten-free
- 10 slices classic-cut bacon diced
- 1 large egg
- 2 1/2 cups shredded sharp cheddar cheese divided
- 16 oz ricotta cheese
- 1 cup plain yogurt or sour cream preferably 2% or full-fat
- 1 packet buttermilk ranch dressing mix or 2 tbsp homemade ranch mix
- 1/2 cup milk
- 2 tbsp fresh dill minced, or 1 tsp dried dill
- Cooking spray for greasing the muffin tin
Instructions
- Preheat the oven to 350°F.
- Generously coat a standard 12-cup muffin tin with cooking spray.
- Bring a large pot of lightly salted water to a boil.
- Add the macaroni or rotini and cook according to the package directions.
- Drain the pasta thoroughly and set it aside.
- While the pasta cooks, place the diced bacon in a skillet over medium-high heat.
- Cook the bacon, stirring occasionally, until browned and most of the fat has rendered.
- Using a slotted spoon, transfer the cooked bacon to a paper towel-lined plate to drain.
- In a large mixing bowl, lightly beat the egg.
- Add 2 cups of the shredded sharp cheddar cheese, ricotta cheese, plain yogurt or sour cream, ranch dressing mix, and milk.
- Whisk until the mixture is smooth and evenly combined.
- Add the cooked pasta to the cheese mixture.
- Stir until the pasta is fully coated.
- Add most of the cooked bacon, reserving approximately 1/4 cup for the topping.
- Stir gently until the bacon is evenly distributed throughout the pasta mixture.
- Divide the macaroni mixture evenly among the prepared muffin cups.
- The pasta may be slightly mounded above the edge of each muffin cup.
- In a small bowl, combine the remaining 1/2 cup shredded cheddar cheese, the reserved 1/4 cup cooked bacon, and the minced dill.
- Sprinkle approximately 1 tbsp of the cheese, bacon, and dill topping over each mac and cheese cup.
- Bake for 20 to 25 minutes, or until the edges are browned and the topping is melted and bubbly.
- Remove the muffin tin from the oven.
- Allow the mac and cheese cups to cool in the pan for at least 10 minutes.
- Carefully run a butter knife around the edge of each cup to loosen it from the pan.
- Remove the cups gently and serve warm, or transfer them to a wire rack to cool before storing.
Notes