Flour, caster sugar, pumpkin spice, dairy-free butter, pumpkin puree, maple syrup, cornstarch, icing sugar, dairy-free milk.
The first time I made Pumpkin Pop Tarts, I wasn’t trying to be cute or clever. I just wanted pumpkin pie without making a pumpkin pie. That’s the honest truth. It was one of those afternoons where the weather had cooled down just enough to make me believe I was suddenly a fall person, even though five minutes earlier I was complaining about how quickly the day disappeared. Sound familiar?
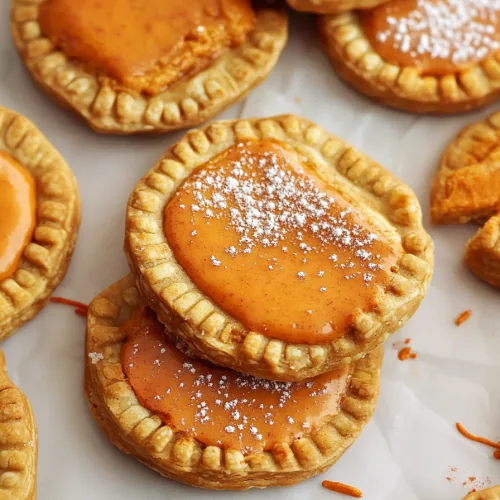
I had a tin of pumpkin puree open, a block of dairy-free butter in the fridge, and just enough motivation to bake something fun. Not a full pie. Not a layer cake. Definitely not anything that required perfect crimping, blind baking, or pretending I know where my rolling pin is at all times. These Pumpkin Pop Tarts felt like the happy middle ground: flaky pastry, spiced pumpkin filling, and maple glaze, all in a little hand-held treat that looks way more impressive than the effort level suggests.
There’s something nostalgic about homemade pop tarts, isn’t there? They remind me of the boxed breakfast pastries from childhood, the ones that were somehow both breakfast and dessert and maybe neither, depending on who you asked. But these vegan Pumpkin Pop Tarts feel softer, cozier, and a little more grown-up. They still have that playful pop tart charm, but with pumpkin spice, maple icing, and pastry that actually melts a bit when you bite into it. Very autumn. Very “I lit a candle and now I’m a new person.”
I also love the pumpkin shape. Is it necessary? No. Does it make me ridiculously happy? Yes. Cutting pastry into little pumpkins feels like one of those cozy seasonal activities you see in a movie where everyone is wearing sweaters and the kitchen is suspiciously clean. My kitchen, for the record, is not suspiciously clean during this process. There is usually flour somewhere it shouldn’t be. Still worth it.
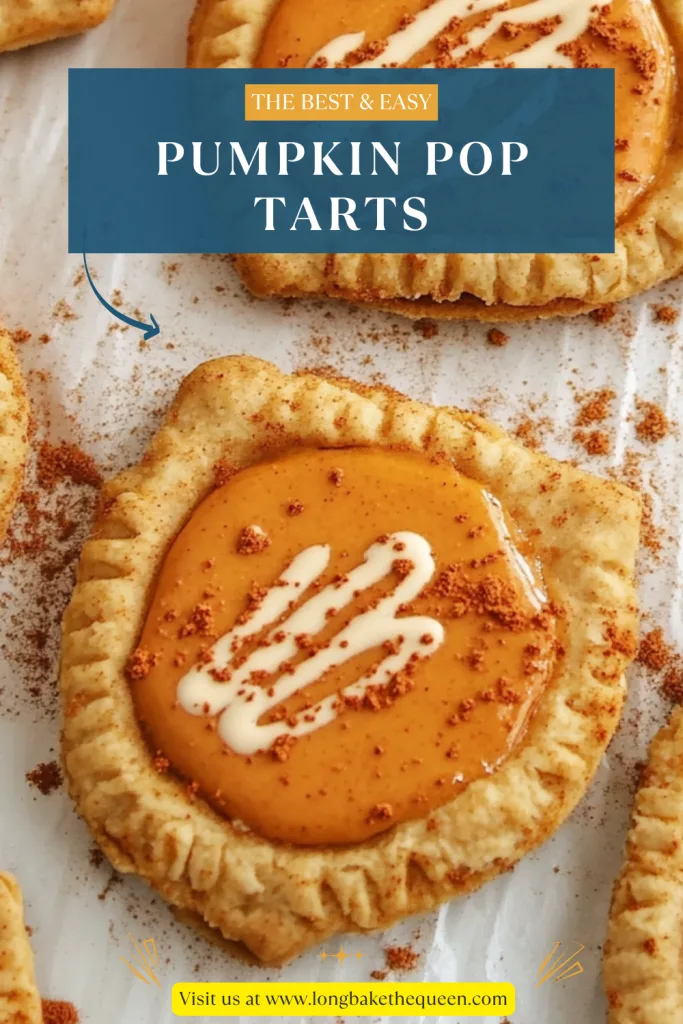
These homemade Pumpkin Pop Tarts are made with a simple spiced pastry, a maple-sweetened pumpkin pie filling, and a thick maple glaze that sets beautifully on top. They’re vegan, no-egg, no-dairy, and honestly not as fussy as they look. A little hands-on, yes. But difficult? I don’t think so. The dough chills, the filling comes together in a bowl, and the glaze is basically whisk-and-adjust until it behaves.
What I like most is that these maple glazed Pumpkin Pop Tarts feel festive without being too serious. You can make them for Halloween, Thanksgiving brunch, a cozy weekend snack, or just because pumpkin season has taken over your brain and you’re not fighting it anymore. Ever tried something similar? If you love pumpkin pie but wish it came in a cute pastry pocket, this recipe might be your new little fall project.

Why you’ll Love these Pumpkin Pop Tarts?
You’ll love these Pumpkin Pop Tarts because they have all the cozy parts of pumpkin pie, but in a fun hand-held pastry. They’re flaky, lightly spiced, sweet but not wildly sweet, and finished with a maple glaze that makes them feel special. I wouldn’t call them an everyday breakfast exactly, but I also wouldn’t judge anyone for eating one with coffee in the morning. That feels like a very reasonable life choice.
One of the best things about this Pumpkin Pop Tarts recipe is the pastry. It’s made with plain flour, caster sugar, pumpkin spice, cold dairy-free block butter, and a little ice water. The cold butter is what gives the pastry that soft, melt-in-the-mouth texture. It’s not quite puff pastry, not quite pie crust, but somewhere in that lovely homemade pastry zone where crumbs happen and nobody minds.
The filling is simple, but it does its job beautifully. Pumpkin puree, pumpkin spice, maple syrup, and cornstarch come together into a thick, warmly spiced center. It tastes like pumpkin pie filling’s quieter cousin, the one who shows up in a cute outfit and doesn’t cause drama. The cornstarch helps keep the filling from running all over the tray, which is important because pumpkin filling can get ambitious if you overfill these little parcels.
These vegan Pumpkin Pop Tarts are also made without eggs or dairy, which makes them a great option if you’re baking for plant-based friends or family. Instead of egg wash, the edges and tops are brushed with dairy-free milk. It helps seal the pastry and gives the tops a little color. Simple, practical, no fuss. I always appreciate a recipe that doesn’t make you hunt down six specialty ingredients just to replace one egg.
And then there’s the glaze. The maple glaze is made with icing sugar, maple syrup, a tiny bit of pumpkin puree, pumpkin spice, and dairy-free milk if needed. It should be thick, almost like toothpaste. I know that sounds deeply unromantic, but it’s the easiest way to explain it. If the glaze is too thin, it slides off like it has somewhere better to be. If it’s thick, it sits nicely on top of the homemade Pumpkin Pop Tarts and looks pretty with hardly any effort.
Another reason to love these Pumpkin Pop Tarts is that they’re flexible. You can make them pumpkin-shaped, classic rectangles, mini-sized, extra spiced, or topped with sprinkles. You can keep them neat, or you can accept that some will look a little homemade in the most charming way. Honestly, the slightly wonky ones are often my favorites. They look like they have personality.
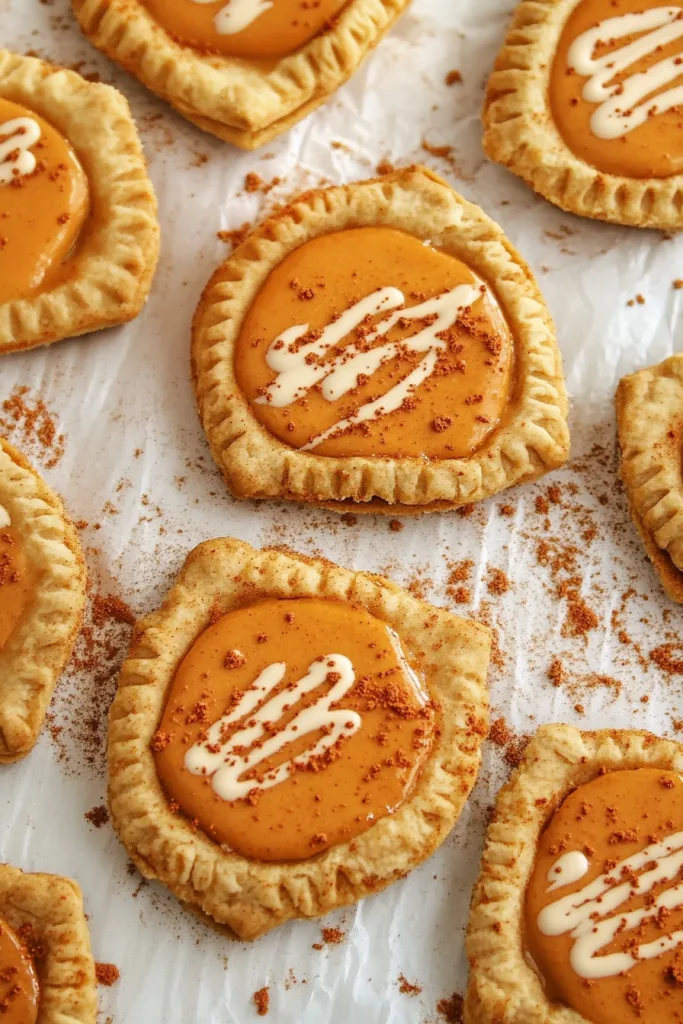
Ingredient Notes
The ingredients for these Pumpkin Pop Tarts are cozy and straightforward. Nothing too fancy, nothing that should make you wander around the grocery store feeling betrayed. The pastry uses cold dairy-free butter for tenderness, the pumpkin filling uses cornstarch to stay thick, and the maple glaze brings everything together with that sweet fall flavor we all pretend not to obsess over. Or maybe we fully admit it. Depends on the day.
- All-purpose / plain flour: Plain flour forms the base of the pastry and helps the Pumpkin Pop Tarts hold their shape. You can use gluten-free flour if needed, but the dough may be a bit more fragile, so go gently when rolling and cutting. Think soft hands, not wrestling match.
- Caster sugar: Caster sugar adds a light sweetness to the pastry. It doesn’t make the dough taste sugary, but it gives it a more dessert-like finish. Since the filling and glaze are sweet too, you don’t need much here.
- Pumpkin spice: Pumpkin spice goes into the pastry, the filling, and the glaze, so it gives these maple glazed Pumpkin Pop Tarts warm flavor all the way through. It usually brings cinnamon, nutmeg, ginger, cloves, and sometimes allspice. If you love spice, add a little extra. If you’re more cautious, stick to the recipe. Pumpkin spice can go from cozy to bossy pretty fast.
- Dairy-free block butter: Cold dairy-free block butter is important for the pastry. It helps create a tender, slightly crumbly texture that makes these vegan Pumpkin Pop Tarts feel rich without using dairy. Try to use block butter rather than spreadable margarine because spreadable versions can contain more water and may make the dough too soft.
- Ice water: Ice water brings the dough together while keeping the butter cold. Add it slowly, about 1/2 tablespoon at a time. You may only need 1 to 2 tablespoons. Dough has moods, and the amount of water can depend on your flour, butter, and even the temperature of your kitchen.
- Pumpkin puree: Pumpkin puree is the heart of the filling and also sneaks into the glaze. Use plain pumpkin puree, not pumpkin pie filling. Pumpkin pie filling already has sugar and spices added, so it can throw off the flavor and texture. Canned pumpkin puree works perfectly well here, which is good because convenience is a blessing.
- Maple syrup: Maple syrup sweetens the pumpkin filling and adds flavor to the glaze. It gives these Pumpkin Pop Tarts a deeper, warmer sweetness than plain sugar would. Pumpkin and maple together just feel right, like sweaters and chilly mornings.
- Cornstarch / cornflour: Cornstarch thickens the pumpkin filling so it stays inside the pastry instead of escaping. If you skip it, the filling may be looser and more likely to leak. A little leak is not the end of the world, but a lot of leaking is how pastry trays become sticky little crime scenes.
- Dairy-free milk: Dairy-free milk is used to seal the edges, brush the tops, and loosen the glaze if needed. Oat, soy, almond, or coconut milk can work. Use what you like or what’s already in your fridge.
- Icing sugar: Icing sugar creates the smooth maple glaze. It mixes easily and gives the homemade Pumpkin Pop Tarts that classic frosted look. If your glaze is too runny, add more icing sugar. It’s a very fixable situation.
- Optional pumpkin spice and sugar topping: A sprinkle of pumpkin spice and sugar over the wet glaze adds a sweet little finish. It’s optional, but it makes the pop tarts look more festive, and sometimes festive is exactly the point.
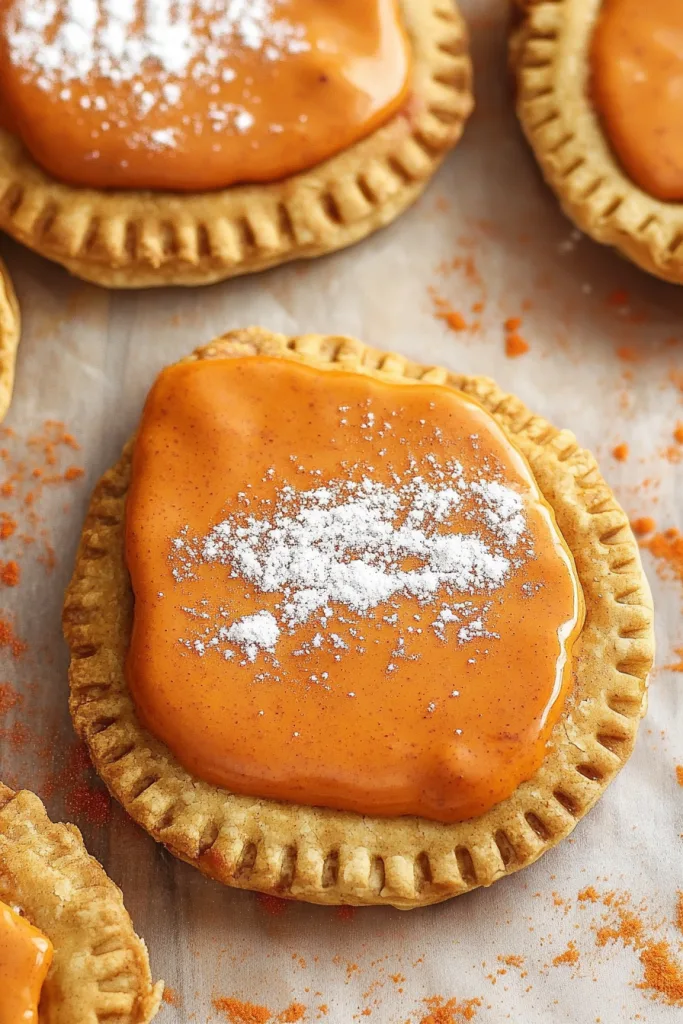
How to Make Pumpkin Pop Tarts?
Making Pumpkin Pop Tarts is a little like doing a cozy kitchen craft project. You make the pastry, chill it, cut out shapes, spoon in the filling, seal everything up, bake, then add the maple glaze. It’s not hard, but it does ask you to slow down for a minute. Put on some music, clear a little counter space, and accept that flour may travel. Flour always travels.
Step 1: Start the Pastry Dough
In a medium mixing bowl, sift together the flour, caster sugar, and pumpkin spice. This helps remove lumps and spreads the spice through the flour evenly. You want every bite of these Pumpkin Pop Tarts to have a little warm spice flavor, not one random corner tasting like the whole spice jar showed up.
Step 2: Cut in the Cold Dairy-Free Butter
Add the cold, cubed dairy-free block butter to the flour mixture. You can rub it in by hand or use a food processor. Mix until the texture looks like sand. If you’re doing it by hand, work quickly so the butter doesn’t melt too much. Cold butter is what gives the pastry its tender texture. Warm butter is where things start getting sticky and dramatic.
Step 3: Add Ice Water Slowly
Add ice water 1/2 tablespoon at a time, mixing gently after each addition, until the dough comes together. You may need 1 to 2 tablespoons total. The dough should be smooth and slightly sticky, but not wet. If it crumbles apart, it needs a little more water. If it sticks to everything like it has separation anxiety, add a tiny dusting of flour.
Step 4: Chill the Dough
Wrap the dough in greaseproof paper and refrigerate it for 30 minutes. This helps the butter firm up again and makes the dough easier to roll. I know chilling dough feels like the recipe telling you to pause when you were just getting started, but this step really helps. Sticky dough is no fun. Chilled dough is much more polite.
Step 5: Preheat the Oven
Preheat the oven to 180°C fan and line 2 baking trays with greaseproof paper. Having everything ready before assembly makes the process smoother, especially once the pastry shapes are cut and waiting.
Step 6: Roll Out the Dough
Place a sheet of greaseproof paper on your worktop and dust it lightly with flour. Add the chilled dough, dust the top with a little more flour, and cover it with another sheet of greaseproof paper. Roll the dough between the two sheets until it forms a large, thin rectangle. Rolling between paper helps stop the dough from sticking, and it makes cleanup much easier. Always a gift.
Step 7: Cut the Shapes
Use a pumpkin-shaped cookie cutter to cut out the pastry shapes, then place them on the lined trays. Re-roll the excess dough and keep cutting until you’ve used as much as possible. Try to cut an even number of shapes because each Pumpkin Pop Tart needs a top and bottom. This is the kind of math I can support.
Step 8: Mix the Pumpkin Pie Filling
In a medium bowl, stir together the pumpkin puree, pumpkin spice, maple syrup, and cornstarch until fully combined. The filling should be smooth and thick. This maple-sweetened pumpkin filling is what gives these vegan Pumpkin Pop Tarts their cozy pumpkin pie flavor.
Step 9: Fill Half of the Pastry Shapes
Add about 1 teaspoon of pumpkin filling to the middle of half of the pastry shapes. Leave about 1/3 inch of space around the edge. It is very tempting to add more filling. I know. But try to resist. Overfilled pop tarts often leak, and while a tiny leak is fine, a full pumpkin escape situation is less cute.
Step 10: Brush the Edges
Brush the pastry edges with a little dairy-free milk. This helps the top pastry layer stick to the bottom layer and creates a better seal. Think of it as the glue that keeps the pumpkin filling from making a break for it.
Step 11: Seal the Pop Tarts
Place another pumpkin-shaped pastry piece over each filled one. Press the edges down with your finger, then use a fork to crimp and seal them. The fork marks also give the homemade Pumpkin Pop Tarts that classic, slightly rustic look. If they aren’t perfect, that’s fine. Homemade pastries are allowed to have character.
Step 12: Prick and Brush the Tops
Prick the tops of the pastries with a fork to let steam escape during baking. Then brush the tops with dairy-free milk. This helps the pop tarts bake up lightly golden and prevents them from puffing too much.
Step 13: Bake Until Lightly Golden
Bake the Pumpkin Pop Tarts in the middle of the oven for 15 to 20 minutes, or until lightly golden brown. Keep an eye on them near the end. Pastry can go from “beautifully golden” to “hmm, we’ll call that rustic” very quickly.
Step 14: Cool Before Glazing
Remove the pop tarts from the oven and let them cool before adding the glaze. This part matters. If the pastries are too warm, the glaze will melt and slide off, and suddenly your cute pop tarts look like they’ve been caught in a maple rainstorm.
Step 15: Make the Maple Pumpkin Glaze
In a bowl, whisk together the icing sugar, maple syrup, pumpkin puree, and pumpkin spice. The glaze should be thick, about the consistency of toothpaste. Not a glamorous comparison, I admit, but useful. If the glaze is too thick, add a tiny splash of dairy-free milk. If it’s too thin, add more icing sugar and whisk again.
Step 16: Glaze the Pop Tarts
Drizzle the glaze over the cooled Pumpkin Pop Tarts and spread it gently with the back of a spoon. While the icing is still wet, sprinkle over a little pumpkin spice and sugar if you like. Let the glaze set at room temperature or in the fridge before serving.
Step 17: Serve and Enjoy
Once the glaze has set, the pop tarts are ready to serve. They’re flaky, spiced, sweet, and full of pumpkin flavor. Serve them with coffee, tea, apple cider, or whatever cozy drink is currently making your day better.
Storage Options
These Pumpkin Pop Tarts are best when freshly baked and glazed, but they can still be stored for later. The pastry will soften a little over time, especially once glazed, but the flavor stays lovely. Honestly, a slightly softer pop tart with coffee the next day is not a bad situation at all.
- Room temperature: Store the homemade Pumpkin Pop Tarts in an airtight container at room temperature for up to 1 day. This works best in a cool kitchen once the glaze has fully set. If your kitchen is warm, the fridge is a safer choice.
- Refrigerator: Store Pumpkin Pop Tarts in an airtight container in the refrigerator for up to 3 to 4 days. The pastry may soften, but the pumpkin filling and maple glaze will still taste delicious. Let them sit at room temperature for a few minutes before serving if you prefer a softer bite.
- Freezer: Freeze unglazed vegan Pumpkin Pop Tarts for up to 2 months. Place parchment paper between layers and store them in a freezer-safe container. For the best texture, thaw, warm, and glaze them just before serving.
- Reheating: Reheat unglazed or lightly glazed pop tarts in a low oven until warmed through. Avoid the microwave if you want the pastry to stay crisp. The microwave is convenient, yes, but it does have a talent for making pastry a bit floppy. Still edible, just less magical.
- Make-ahead pastry: The pastry dough can be made up to 24 hours ahead and kept in the refrigerator. If it becomes very firm, let it rest at room temperature for a few minutes before rolling.
- Make-ahead filling: The pumpkin filling can be prepared up to 2 days ahead and stored in the refrigerator. Stir it before using so it spreads evenly.
Variations & Substitutions
These Pumpkin Pop Tarts are easy to customize, which is one of the reasons they’re so fun. You can change the shape, adjust the spice, switch up the glaze, add toppings, or make them gluten-free. They’re festive, but not bossy. That’s the kind of recipe energy I like.
- Make classic rectangles: If you don’t have a pumpkin-shaped cookie cutter, cut the dough into rectangles. They’ll look more like traditional pop tarts and taste just as cozy. Honestly, rectangles are easier and very dependable.
- Use gluten-free flour: You can make gluten-free Pumpkin Pop Tarts by using a gluten-free all-purpose baking flour blend. The dough may be more delicate, so roll it between sheets of greaseproof paper and handle it gently.
- Add extra pumpkin spice: Add a little extra pumpkin spice to the filling if you want a stronger flavor. You can also add cinnamon, ginger, nutmeg, or cloves separately. Just go slowly because spices can take over if invited too enthusiastically.
- Sweeten with brown sugar: Add a small spoonful of brown sugar to the pumpkin filling for a deeper, caramel-like sweetness. Maple syrup already adds sweetness, but brown sugar gives the filling a slightly richer flavor.
- Add finely chopped pecans: Stir a small amount of finely chopped pecans into the pumpkin filling for crunch. Keep the pieces tiny so the pastry still seals properly.
- Try a cinnamon glaze: Replace the maple glaze with a simple cinnamon glaze made from icing sugar, dairy-free milk, and cinnamon. It’s sweet, simple, and still very fall.
- Add dairy-free chocolate drizzle: Drizzle the cooled Pumpkin Pop Tarts with melted dairy-free chocolate instead of maple glaze. Pumpkin and chocolate may sound a little unexpected, but they work together better than you might think.
- Make mini pop tarts: Use a smaller cutter to make bite-sized homemade Pumpkin Pop Tarts. Reduce the baking time and check early, because mini pastries bake quickly and are very easy to over-brown.
- Use vegan ready-made pastry: If you want a shortcut, use vegan ready-made pastry. The texture will be different from homemade dough, but it saves time. And sometimes, especially during a busy week, shortcuts are not cheating. They’re survival.
- Add festive sprinkles: Add sprinkles over the wet glaze for Halloween, Thanksgiving, or fall parties. Will sprinkles make them taste better? Maybe not. Will they make them happier? Absolutely.
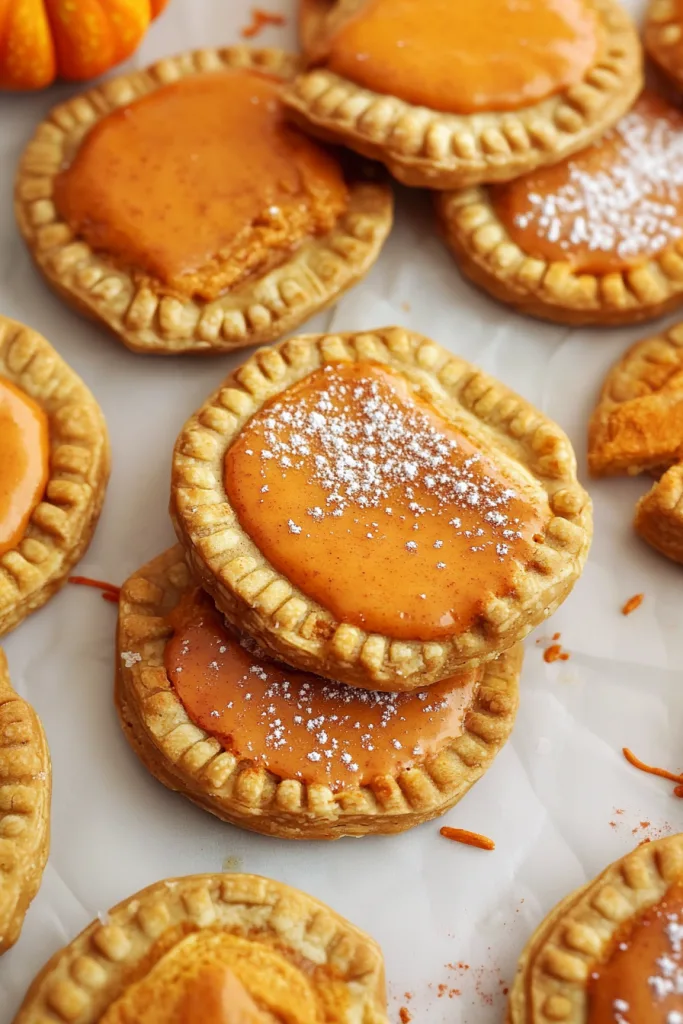
What to Serve With Pumpkin Pop Tarts?
These Pumpkin Pop Tarts pair beautifully with cozy drinks, fresh fruit, and simple brunch sides. Since they’re flaky, sweet, and warmly spiced, they fit right into fall breakfasts, dessert trays, and snack moments. If pumpkin spice season had a snack table, these would definitely be invited.
- Coffee: Coffee is a perfect match for Pumpkin Pop Tarts because it balances the sweet maple glaze and warm spice. A pop tart and hot coffee in the morning feels like a tiny fall celebration.
- Chai tea: Chai tea pairs beautifully with the pumpkin spice in the pastry, filling, and glaze. The spices echo each other in a cozy way without feeling too heavy.
- Hot chocolate: Dairy-free hot chocolate makes these vegan Pumpkin Pop Tarts feel more like dessert. This pairing is especially fun on chilly evenings or after a long day when you need something sweet and warm.
- Apple cider: Warm apple cider and pumpkin spice are basically best friends. The fruity cider flavor balances the rich pastry and sweet glaze.
- Dairy-free milk: A cold glass of oat milk, almond milk, soy milk, or coconut milk keeps things simple and nostalgic. It brings back that classic pop tart feeling, but in a homemade fall version.
- Fresh fruit: Apple slices, pear wedges, grapes, or berries add freshness beside the sweet pastry. The fruit keeps the plate from feeling too heavy.
- Vegan yogurt: Dairy-free yogurt adds creaminess and makes the homemade Pumpkin Pop Tarts feel a little more breakfast-friendly. Add granola or sliced fruit if you want a fuller plate.
- Maple latte: Pair these maple glazed Pumpkin Pop Tarts with a maple latte if you want to go fully cozy. Is it extra? Yes. But sometimes extra is exactly the right amount.
- Roasted nuts or seeds: Roasted pecans, walnuts, or pumpkin seeds add crunch and a savory contrast. Just keep allergies in mind if serving to guests.
- Fall brunch board: Add these Pumpkin Pop Tarts to a fall brunch board with fruit, muffins, dairy-free yogurt, granola, hot drinks, and maybe a few chocolate pieces. They’ll probably be the first thing people reach for, because cute pastries have unfair power.
FAQ
Are Pumpkin Pop Tarts vegan?
Yes, these Pumpkin Pop Tarts are vegan. They are made with dairy-free block butter and dairy-free milk, and they do not contain eggs or dairy.
Why is my pastry dough too sticky?
The dough may have too much water, or the dairy-free butter may have softened too much. Chill the dough longer and dust lightly with flour before rolling. If your kitchen is warm, work quickly and keep the dough as cool as possible.
How do I stop the pumpkin filling from leaking?
Do not overfill the Pumpkin Pop Tarts. Use about 1 teaspoon of filling, leave about 1/3 inch of space around the edges, brush with dairy-free milk, press the pastry together, and seal with a fork.
How thick should the maple glaze be?
The maple glaze should be thick, almost like toothpaste. If it is too thick, add a tiny splash of dairy-free milk. If it is too thin, whisk in more icing sugar until it holds its shape on top.
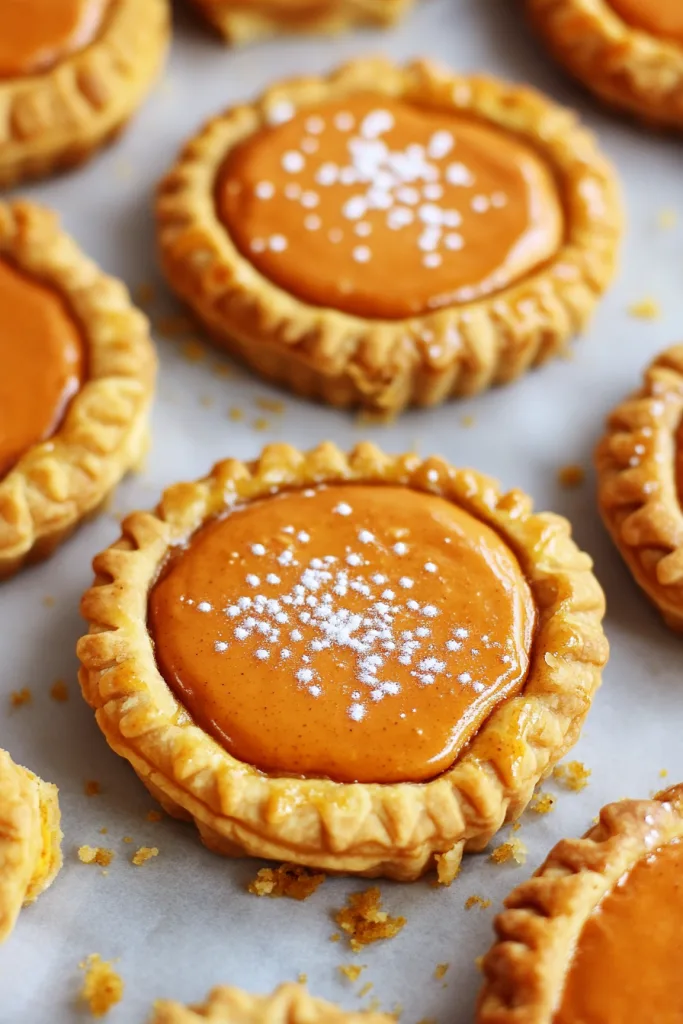
These Pumpkin Pop Tarts are flaky, sweet, cozy, and full of pumpkin spice flavor. They have a tender vegan pastry, a maple-sweetened pumpkin filling, and a thick maple glaze that makes them feel like a proper little fall treat.
Make them for Halloween, Thanksgiving brunch, weekend baking, autumn snack trays, or just because you saw pumpkin puree at the store and suddenly became a seasonal baking person. It happens. Would you make your Pumpkin Pop Tarts pumpkin-shaped, classic rectangles, or tiny minis? Can’t wait to hear what you think!
Pumpkin Pop Tarts
Ingredients
For the Pastry
- 240 g all-purpose flour or plain flour
- 2 tbsp caster sugar
- 1 tsp pumpkin spice
- 220 g dairy-free block butter cold and cut into small cubes
- 1 to 2 tbsp ice water added as needed
For the Pumpkin Pie Filling
- 100 g pumpkin puree
- 1 1/2 tsp pumpkin spice
- 50 g maple syrup
- 2 tsp cornstarch or cornflour
- Dairy-free milk for brushing the pastry edges
For the Maple Pumpkin Glaze
- 100 g icing sugar
- 1 tsp maple syrup
- 1/2 tsp pumpkin puree
- 1/4 tsp pumpkin spice
- Dairy-free milk added as needed
Optional Topping
- Pumpkin spice and sugar for sprinkling
Instructions
Prepare the Pastry
- In a medium mixing bowl, sift together the flour, caster sugar, and pumpkin spice.
- Add the cold, cubed dairy-free block butter to the flour mixture.
- Rub the butter into the dry ingredients by hand, or pulse in a food processor, until the mixture resembles fine sand.
- Add the ice water 1/2 tbsp at a time, mixing gently after each addition.
- Continue adding ice water only until the dough comes together. The dough should be smooth and slightly sticky, but not overly wet or dry.
- Wrap the dough in greaseproof paper.
- Refrigerate the dough for 30 minutes to firm it before rolling.
- Preheat the oven to 180°C fan.
- Line 2 baking trays with greaseproof paper.
- Place a sheet of greaseproof paper on a work surface and dust it lightly with flour.
- Place the chilled dough on the prepared surface.
- Dust the top of the dough lightly with flour, then cover with a second sheet of greaseproof paper.
- Roll the dough between the sheets of greaseproof paper until it forms a large, thin rectangle.
- Use a pumpkin-shaped cookie cutter to cut out pastry shapes.
- Transfer the pastry shapes to the prepared baking trays.
- Re-roll the excess dough and continue cutting shapes until the dough has been used.
Prepare the Pumpkin Filling
- In a medium mixing bowl, combine the pumpkin puree, pumpkin spice, maple syrup, and cornstarch.
- Mix until the filling is smooth and fully combined.
- Spoon approximately 1 tsp of pumpkin filling into the center of half of the pastry shapes.
- Leave approximately 1/3 inch of open space around the edge of each filled pastry shape.
- Brush the edges of the filled pastry shapes with dairy-free milk.
- Place a second pastry shape over each filled piece.
- Press the edges gently with your fingers to seal.
- Crimp the edges with a fork to secure the pastry parcels.
- Prick the tops of the pastries with a fork to allow steam to escape during baking.
- Brush the tops of the pastries with dairy-free milk.
- Bake in the center of the oven for 15 to 20 minutes, or until the pop tarts are lightly golden brown.
- Remove the pop tarts from the oven.
- Allow them to cool completely before glazing.
Prepare the Maple Pumpkin Glaze
- In a mixing bowl, whisk together the icing sugar, maple syrup, pumpkin puree, and pumpkin spice.
- Mix until a thick glaze forms. The consistency should be similar to toothpaste.
- If the glaze is too thick, add a very small splash of dairy-free milk and mix again.
- If the glaze is too thin, add more icing sugar and mix until thickened.
- Drizzle the glaze over the cooled Pumpkin Pop Tarts.
- Use the back of a spoon to gently spread the glaze over the tops.
- While the glaze is still wet, sprinkle with pumpkin spice and sugar, if desired.
- Allow the glaze to set at room temperature or in the refrigerator.
- Serve once the glaze has set.
Notes