Unsalted butter, powdered sugar, smooth peanut butter, graham cracker crumbs, and milk chocolate chips.
I have a very soft spot for desserts that taste like they took effort, but secretly required almost none. These No-Bake Peanut Butter Cup Bars are exactly that kind of treat. They’re rich, sweet, chocolatey, peanut buttery, and dangerously easy to make. No oven. No mixer. No fancy steps where you have to wonder if you’re doing it “right.” Just melt, stir, spread, chill, and slice. Honestly, it’s the kind of recipe that makes me feel like I got away with something.
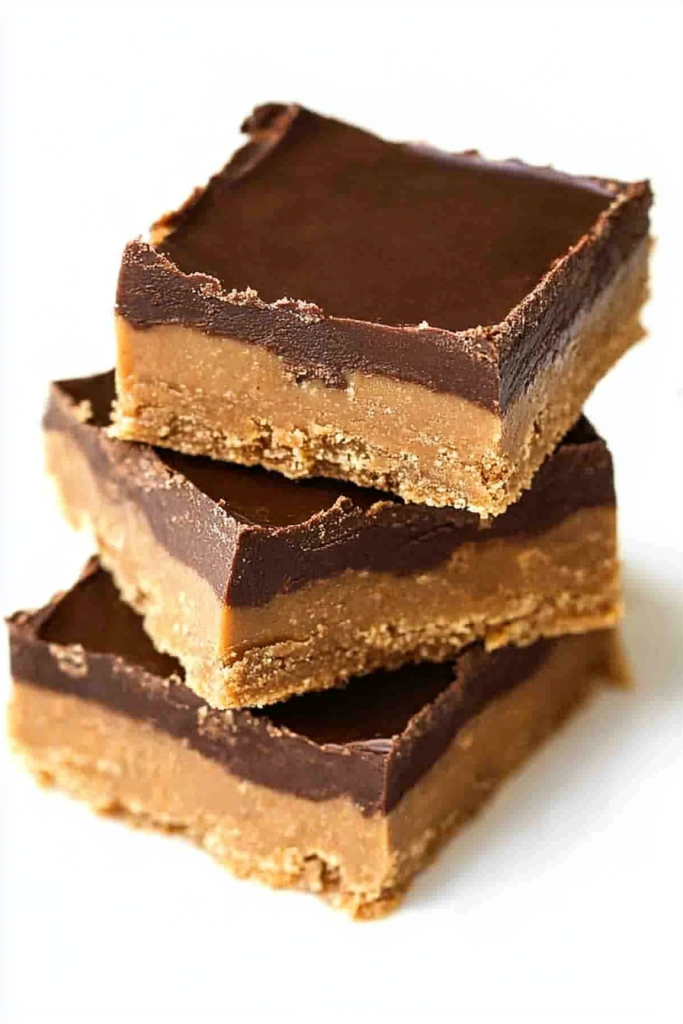
The first time I made these No-Bake Peanut Butter Cup Bars, I remember standing at the counter thinking, “That’s it?” because the whole thing came together so quickly. I melted the butter, stirred in the powdered sugar, peanut butter, and graham cracker crumbs, then poured chocolate over the top. Into the fridge it went. Thirty minutes later, I had these neat little bars that tasted like homemade peanut butter cups. And yes, I absolutely trimmed the edges “for presentation.” You know. Very professional. Very necessary.
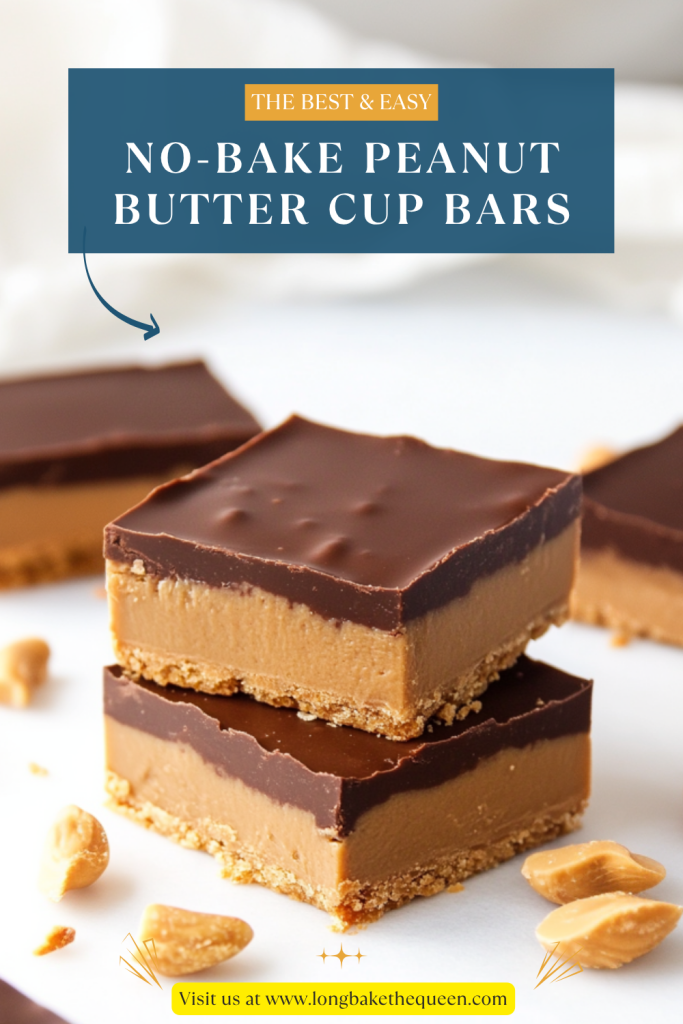
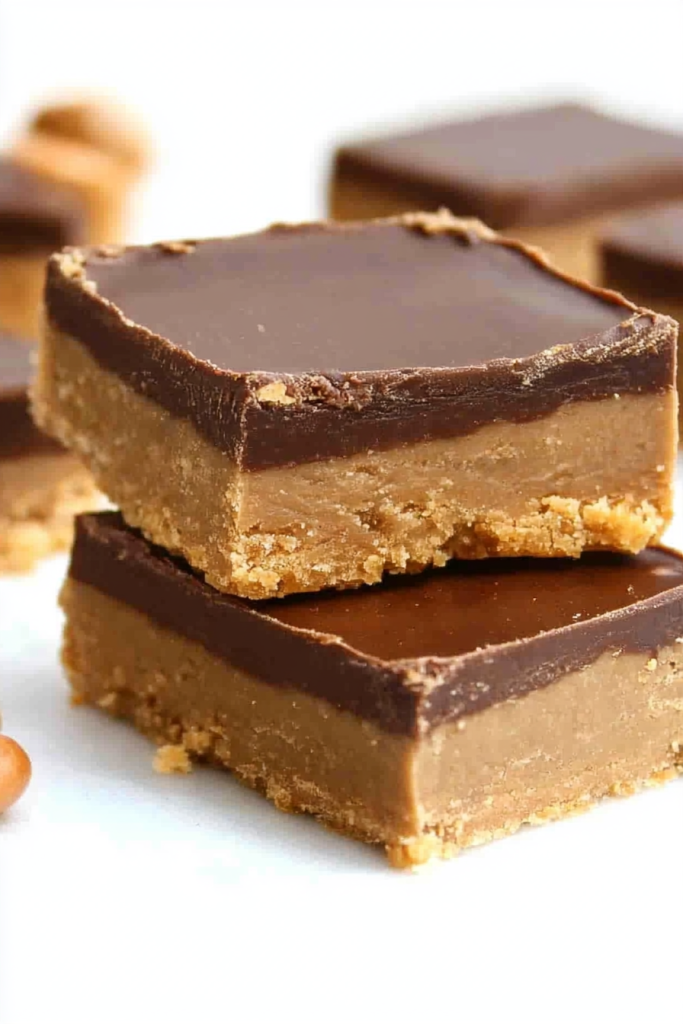
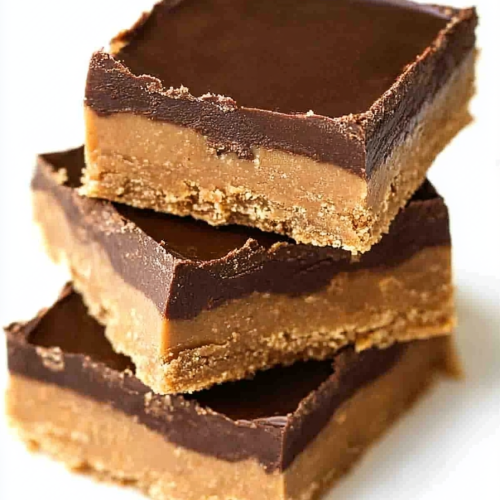
What I love most is that these bars have that nostalgic candy-cup flavor, but they feel homemade in the best way. The peanut butter layer is soft and dense, with just enough graham cracker crumbs to give it that slightly crumbly, candy-like texture. The chocolate top is smooth and sweet, and when you bite into both layers together, it’s pure peanut butter-and-chocolate happiness. Not complicated. Not fussy. Just good.
These no-bake peanut butter chocolate bars are the kind of dessert I’d make for potlucks, holiday trays, summer gatherings, after-school snacks, or one of those evenings when the sweet tooth hits at full volume. Sound familiar? Sometimes you don’t want to bake a cake. Sometimes you want something cold from the fridge that tastes like a peanut butter cup and makes everyone ask for the recipe. These No-Bake Peanut Butter Cup Bars do that job beautifully.
Why you’ll Love these No-Bake Peanut Butter Cup Bars?
The biggest reason these No-Bake Peanut Butter Cup Bars are such a keeper is that they give you all the flavor of a peanut butter cup without the work of making candy. You don’t have to roll, dip, temper chocolate, or do anything that sounds like it belongs on a baking competition. You just press the peanut butter layer into a pan, spread melted chocolate on top, chill, and cut. Simple. Very satisfying. Almost suspiciously easy.
Another thing I love is the short ingredient list. You only need unsalted butter, powdered sugar, smooth peanut butter, graham cracker crumbs, and milk chocolate chips. That’s it. No rare ingredients hiding in the baking aisle. No extra trip to the store because you forgot something with a complicated name. These homemade peanut butter cup bars are made from pantry-friendly staples, which makes them perfect for last-minute dessert moments.
These No-Bake Peanut Butter Cup Bars also set quickly, which is such a gift when you’re impatient. And I am, especially when chocolate and peanut butter are involved. After about 30 minutes in the fridge, the bars are firm enough to slice. That makes them great for busy days, holiday prep, casual parties, or when you remember you promised dessert and have exactly one small window of time to make it happen.
The texture is another big win. The peanut butter layer is creamy, sweet, and slightly crumbly, almost like the inside of a peanut butter cup. The chocolate layer sets firm but still bites cleanly, especially with the butter mixed in. Together, it’s that classic sweet-salty, creamy-chocolatey bite that makes people go back for “just one more.” And honestly, I don’t blame them. These no-bake chocolate peanut butter bars have that effect.
Ingredient Notes
Before you make these No-Bake Peanut Butter Cup Bars, let’s talk about the ingredients. Since this recipe is so simple, each ingredient really matters. The butter helps bind everything together, powdered sugar gives the base a smooth sweetness, peanut butter brings the main flavor, graham cracker crumbs give the filling structure, and milk chocolate creates that classic candy-style topping.
- Unsalted butter: Butter is used in both the peanut butter layer and the chocolate topping, so it does double duty here. In the base, melted butter helps pull the powdered sugar, peanut butter, and graham cracker crumbs into a smooth, sliceable mixture. In the chocolate topping, butter helps the chocolate melt into a softer, glossier layer that doesn’t snap too hard when chilled. I like unsalted butter because peanut butter and graham crackers can already bring some saltiness, and it gives you better control over the flavor.
- Powdered sugar: Powdered sugar sweetens the peanut butter layer and helps create that smooth, candy-like texture. It blends into the melted butter and peanut butter much better than granulated sugar would. If it’s lumpy, you can sift it first, but I’ll be honest, I don’t always do that unless the powdered sugar is really clumpy. Real kitchen life, right? The goal is a smooth base, not perfection for perfection’s sake.
- Smooth peanut butter: Smooth peanut butter is the heart of these No-Bake Peanut Butter Cup Bars. It gives the bars that classic peanut butter cup flavor and helps the base hold together. A regular shelf-stable creamy peanut butter works best because it stays consistent and doesn’t separate as much. Natural peanut butter can work, but you really need to stir it well first. If it’s too oily, the bars may turn out softer than expected.
- Graham cracker crumbs: Graham cracker crumbs give the peanut butter layer structure and that slightly crumbly candy filling texture. They also add a gentle sweetness and a tiny toasted flavor that works beautifully with peanut butter. Fine crumbs are best because they mix in evenly and help the bars cut more neatly. Big crumbs can make the base a little uneven, though still tasty. We’re not wasting dessert over a crumb situation.
- Milk chocolate chips: Milk chocolate chips make the topping sweet, smooth, and very peanut-butter-cup-like. If you want that classic candy flavor, milk chocolate is the way to go. If you prefer something less sweet, semi-sweet chocolate chips work too. Just melt the chocolate gently with the butter so it stays smooth and doesn’t turn grainy.
How to Make No-Bake Peanut Butter Cup Bars?
These No-Bake Peanut Butter Cup Bars are simple enough for a weeknight dessert, but they taste like something you’d happily bring to a party. You’ll prep the pan, make the peanut butter base, spread it into the pan, melt the chocolate topping, chill everything until firm, and slice. No oven involved. No long waiting around. Just a little fridge time and a lot of peanut butter cup energy.
Step 1: Prepare the Pan
Butter the bottom and sides of an 8×8-inch square pan.
Place a long piece of parchment paper in the bottom of the pan, letting it extend up two sides and hang slightly over the edges. Butter the parchment as well. This makes it much easier to lift the bars out once they’re set. I know it feels like one extra little step, but it saves you from trying to dig the first bar out of the pan like you’re excavating treasure.
Step 2: Melt the Butter for the Base
Place ½ cup unsalted butter in a medium saucepan over low heat.
Let the butter melt gently. You don’t need it bubbling or browning; you just want it smooth and melted. Once it’s fully melted, remove the pan from the heat. This keeps the peanut butter mixture from getting too hot and helps everything stir together smoothly.
Step 3: Add the Powdered Sugar
Stir the powdered sugar into the melted butter until smooth.
At first, the mixture may look thick or a little stubborn. Keep stirring. It will come together. Powdered sugar is what gives the peanut butter layer that sweet, candy-like texture, so make sure it is well mixed before moving on.
Step 4: Add the Peanut Butter and Graham Cracker Crumbs
Stir in the smooth peanut butter and graham cracker crumbs.
Mix until everything is completely combined and smooth. The mixture should be thick, soft, and spreadable. If it looks crumbly for a minute, don’t panic. Just keep stirring until the peanut butter works through the crumbs. It should start looking like the inside of a peanut butter cup, which is exactly what we want.
Step 5: Press the Peanut Butter Layer Into the Pan
Transfer the peanut butter mixture to the prepared pan.
Spread it evenly across the bottom of the pan and smooth the top with a spatula. Press gently so the layer is compact and even. This helps the bars hold together when sliced. Think of it as building the peanut butter foundation. A delicious foundation, but still.
Step 6: Melt the Butter for the Chocolate Layer
In the now-empty saucepan, melt the remaining ¼ cup unsalted butter over low heat.
Using the same saucepan keeps cleanup easier, which I fully support. Fewer dishes are always welcome, especially when dessert is involved.
Step 7: Add the Chocolate Chips
Add the milk chocolate chips to the melted butter.
Stir until the chocolate is almost completely melted. Then remove the pan from the heat and continue stirring until the chocolate becomes fully melted and smooth. The leftover heat will finish the job without overheating the chocolate. It should look glossy and pourable.
Step 8: Pour the Chocolate Over the Peanut Butter Layer
Pour the melted chocolate over the peanut butter layer.
Use a spatula to spread it into an even layer, making sure the top is covered from edge to edge. This is where the bars really start looking like no-bake peanut butter cups in bar form. Very promising. Very hard not to drag a spoon through. Please resist, at least for now.
Step 9: Chill the Bars
Refrigerate the pan for at least 30 minutes.
The bars need time to firm up so the layers set properly. If they still feel soft after 30 minutes, give them a little longer. The fridge is doing the heavy lifting here, and honestly, we love that kind of teamwork.
Step 10: Remove and Slice
Use the parchment paper overhang to lift the bars out of the pan.
Place them on a cutting board and slice into 16 bars using a pizza cutter or sharp knife. If the chocolate layer is very firm, let the bars sit at room temperature for a few minutes before slicing. This helps prevent the chocolate from cracking too much.
Step 11: Serve and Enjoy
Serve the bars chilled or slightly softened at room temperature.
They’re rich, sweet, peanut buttery, and full of chocolate flavor. A small square goes a long way, but I won’t pretend I’ve never gone back for another one. These No-Bake Peanut Butter Cup Bars are sneaky like that.
Storage Options
These No-Bake Peanut Butter Cup Bars should be stored in an airtight container in the refrigerator. The cold keeps the chocolate topping firm and helps the peanut butter layer stay set. They’ll keep well for up to 1 week, which makes them a great make-ahead dessert for parties, holidays, or snacky little moments during the week.
If you need to stack the bars, place parchment paper or wax paper between layers so the chocolate tops don’t stick together. They hold up nicely when chilled, but the chocolate can soften if they sit out too long in a warm room. I usually keep them in the fridge until close to serving, especially in summer.
You can also freeze these no-bake peanut butter chocolate bars. Place them in a freezer-safe container with parchment between layers and freeze for up to 2 months. Thaw them in the refrigerator before serving. They’re also pretty good slightly chilled, if you’re the kind of person who likes cold chocolate and peanut butter. Which, honestly, I understand completely.
Variations & Substitutions
One thing I love about No-Bake Peanut Butter Cup Bars is that they’re easy to play with. The base recipe is already simple and delicious, but you can make the bars saltier, crunchier, thicker, or more chocolate-forward depending on your mood. They’re flexible in that lovely dessert way — not fussy, not dramatic, just happy to be here.
- Use semi-sweet chocolate: If milk chocolate feels too sweet, use semi-sweet chocolate chips instead. The topping will have a deeper chocolate flavor and a little less candy-style sweetness. I like both versions, but semi-sweet is nice when you want a more grown-up bite.
- Add flaky salt: Sprinkle a small pinch of flaky salt over the chocolate layer before chilling. It gives the bars a sweet-salty finish and makes the peanut butter flavor pop. Don’t overdo it, though. We want a little sparkle of salt, not a salt lick.
- Use crunchy peanut butter: Crunchy peanut butter adds texture to the base. The little peanut pieces make the bars feel more rustic and give each bite a bit of crunch. If you like texture, this is a fun swap.
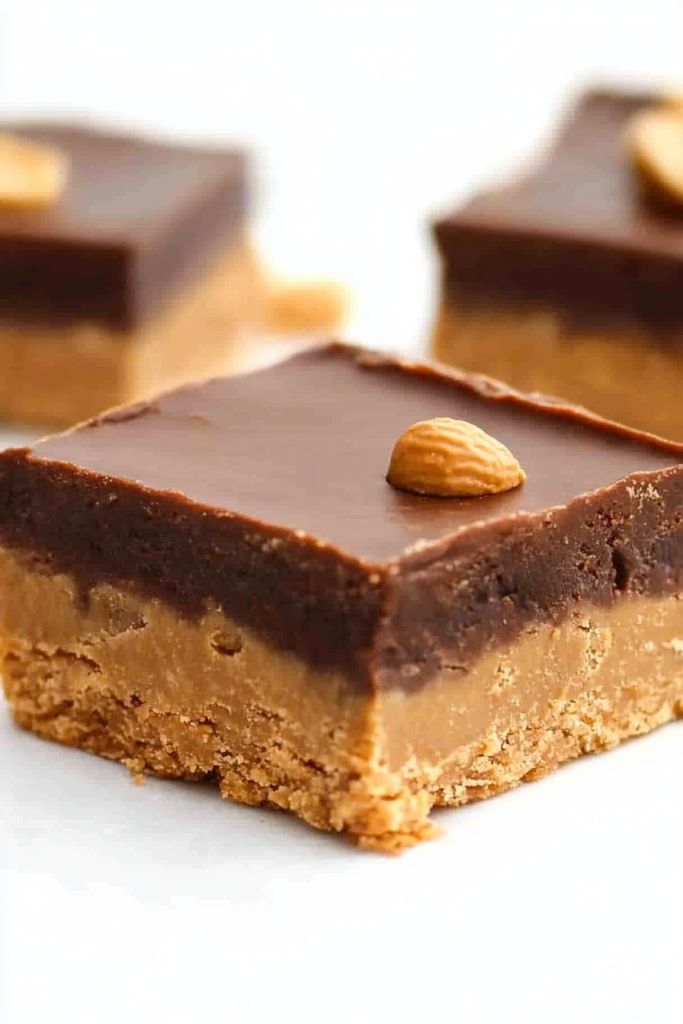
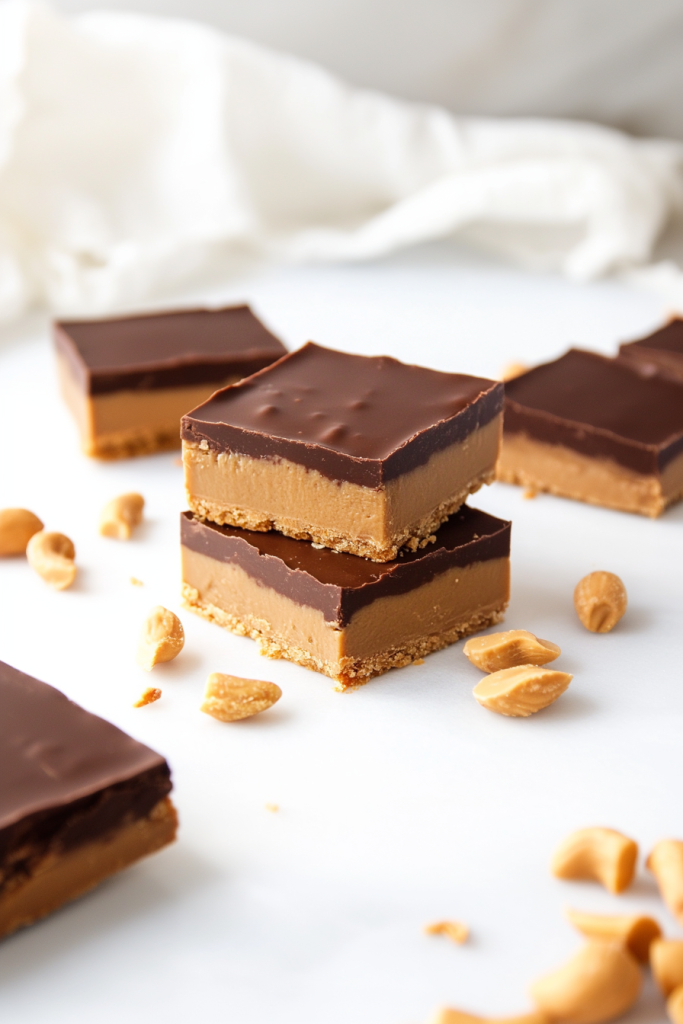
- Add chopped peanuts: Sprinkle chopped peanuts over the melted chocolate before it sets. It makes the bars look finished and adds a nice salty crunch on top. Great for potlucks or holiday trays when you want them to look slightly more dressed up.
- Use chocolate graham crackers: Chocolate graham cracker crumbs can replace regular graham cracker crumbs for extra chocolate flavor in the base. This makes the bars even richer, which is not exactly a problem.
- Make thicker bars: Use a slightly smaller pan if you want thicker bars. They may need a little extra chill time, but they’ll cut into chunky, rich squares. Small but mighty.
- Add mini peanut butter cups: Chop mini peanut butter cups and sprinkle them over the chocolate topping before it sets. Is it extra? Yes. Is it delicious? Also yes. Sometimes dessert needs to be a little extra.
What to Serve With No-Bake Peanut Butter Cup Bars?
No-Bake Peanut Butter Cup Bars are rich, sweet, and packed with chocolate peanut butter flavor, so they pair best with simple drinks or salty little sides. You don’t need much with them. They’re already doing a lot, in the best way. Still, the right pairing can make them feel even more satisfying.
- Cold milk: Milk is the classic pairing for peanut butter and chocolate. It balances the sweetness and gives the bars that nostalgic snack-time feeling. Simple and perfect.
- Coffee: Coffee works really well because the slight bitterness cuts through the sweet chocolate and peanut butter. It makes these no-bake peanut butter bars feel like a cozy afternoon treat.
- Iced coffee: Iced coffee is especially good if you’re serving these bars chilled in warmer weather. The cold drink with the cold bars feels refreshing, even though yes, we are still eating chocolate and peanut butter.
- Hot chocolate: Hot chocolate makes the whole dessert extra cozy. It’s sweet on sweet, but sometimes that’s exactly the mood. Especially for movie night or winter snack trays.
- Vanilla ice cream: A small scoop of vanilla ice cream turns these bars into a full dessert. The creamy ice cream softens the richness of the peanut butter and chocolate. It’s a little much, but in a very good way.
- Fresh berries: Strawberries or raspberries add freshness and a little tartness. That fruity bite helps balance the richness of the bars and makes the plate feel a bit brighter.
- Pretzels: Pretzels are one of my favorite pairings here. They add crunch and salt, and that sweet-salty combo with peanut butter and chocolate is honestly hard to beat. A bar, a few pretzels, maybe a coffee? That’s a very good snack situation.
FAQ
Do No-Bake Peanut Butter Cup Bars need to be refrigerated?
Yes, these bars should be stored in the refrigerator. The cold helps the chocolate topping stay firm and keeps the peanut butter layer set.
Can I use natural peanut butter?
You can use natural peanut butter, but regular creamy peanut butter usually works best. Natural peanut butter can separate and may make the bars softer or oilier. If you use it, stir it very well before measuring.
Why are my bars too soft?
The bars may need more chilling time, or the peanut butter may have been too oily. Chill them longer until firm. If using natural peanut butter, make sure it is fully stirred before adding it to the base.
How do I cut clean squares?
Chill the bars until firm, then lift them out using the parchment overhang. Use a sharp knife or pizza cutter. If the chocolate cracks, let the bars sit at room temperature for a few minutes before slicing.
These No-Bake Peanut Butter Cup Bars are rich, creamy, chocolatey, and full of that classic peanut butter cup flavor. They come together with simple ingredients, set quickly in the fridge, and don’t require a single minute of oven time. That alone makes them a little hero dessert in my book.
I love that they’re easy enough for a weeknight sweet craving but good enough for potlucks, holidays, bake sales, and summer dessert trays. They’re nostalgic, simple, and just a little dangerous to keep around. In the best way, of course.
So tell me — would you keep these No-Bake Peanut Butter Cup Bars classic, or would you add flaky salt, crunchy peanut butter, chopped peanuts, or mini peanut butter cups on top? I’d love to know how you’d make them your own.
No-Bake Peanut Butter Cup Bars
Ingredients
- ½ c unsalted butter
- 1 ¾ c powdered sugar
- 1 c smooth peanut butter
- ¾ c graham cracker crumbs
- ¼ c unsalted butter
- ½ c milk chocolate chips
Instructions
Step 1: Prepare the Pan
- Butter the bottom and sides of an 8×8-inch square pan.
- Place a long piece of parchment paper in the bottom of the pan, allowing it to extend up two sides and slightly overhang the edges.
- Butter the parchment paper.
Step 2: Prepare the Peanut Butter Base
- Place ½ c unsalted butter in a medium saucepan over low heat.
- Melt the butter completely, then remove the saucepan from the heat.
Step 3: Add the Powdered Sugar
- Add the powdered sugar to the melted butter.
- Stir until the mixture is smooth and evenly combined.
Step 4: Add the Peanut Butter and Graham Cracker Crumbs
- Add the smooth peanut butter and graham cracker crumbs to the saucepan.
- Stir until the mixture is fully combined, smooth, and thick.
Step 5: Spread the Peanut Butter Layer
- Transfer the peanut butter mixture to the prepared pan.
- Spread it evenly across the bottom of the pan.
- Smooth the top with a spatula.
Step 6: Prepare the Chocolate Topping
- In the same saucepan, melt the remaining ¼ c unsalted butter over low heat.
- Add the milk chocolate chips and stir until almost completely melted.
- Remove the saucepan from the heat and continue stirring until the chocolate is fully melted and smooth.
Step 7: Add the Chocolate Layer
- Pour the melted chocolate mixture over the peanut butter layer.
- Spread it evenly with a spatula to cover the surface.
Step 8: Chill
- Place the pan in the refrigerator.
- Chill for at least 30 minutes, or until the bars are fully set.
Step 9: Slice and Serve
- Use the parchment paper overhang to lift the bars from the pan.
- Transfer to a cutting board.
- Slice into 16 bars using a pizza cutter or sharp knife.
- Store in an airtight container in the refrigerator.
Notes