Key Lime Pie Bars made with graham cracker crumbs, sugar, butter, cream cheese, egg yolks, sweetened condensed milk, key lime juice, lime zest, heavy cream, and powdered sugar.
There’s something about Key Lime Pie Bars that makes me think of warm afternoons, cold drinks, and that one person at every gathering who says, “I’ll just have a small piece,” then comes back for another small piece five minutes later. No judgment. I’ve been that person. These bars are bright, creamy, tangy, and sweet in that very cheerful way citrus desserts have. They don’t feel heavy or too serious. They’re just… happy little squares.
I’ve always loved key lime pie, but I’ll be honest, pie can be a tiny bit dramatic. Delicious, yes. Worth it, yes. But the slicing? The first piece? The crust deciding whether it wants to cooperate? That part can feel like a small kitchen performance. These Key Lime Pie Bars give you the same creamy key lime flavor and buttery graham cracker crust, but in a much easier bar form. You chill them, lift them out, slice them into squares, and suddenly dessert feels calm again. Well, mostly calm.
I first made key lime dessert bars for a family get-together on a warm day when everyone kept saying they wanted “something light.” That phrase always makes me laugh a little because it usually means, “I still want dessert, but please don’t hand me something that feels like a winter sweater.” These bars were perfect for that. Cold from the fridge, tart from the lime, creamy from the filling, and topped with whipped cream. They felt refreshing, but still like a proper treat.
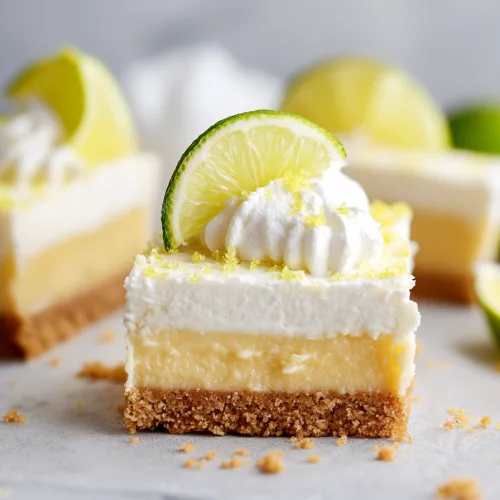
What I love about this Key Lime Pie Bars recipe is how balanced it is. The crust is buttery and slightly crisp. The filling is smooth, creamy, and tangy. The whipped cream topping softens the tartness just enough without stealing the show. It’s sweet, but not too sweet. Tart, but not painfully sour. Somewhere in the middle, which is where I think the best lime desserts live.
The filling gets its richness from cream cheese, egg yolks, and sweetened condensed milk. The key lime juice gives it that sharp, sunny flavor, while the lime zest makes everything taste fresher. I like using bottled key lime juice, especially Nellie and Joe’s, because it’s reliable and saves me from juicing a mountain of tiny key limes. Fresh key limes are lovely, of course, but they can be a little high-maintenance. Cute, but needy.
The graham cracker crust is wonderfully simple. Just crumbs, sugar, and melted butter pressed into the pan and baked until set. No rolling dough. No pastry stress. No staring at a pie crust wondering if it’s shrinking because it has personal issues. This crust behaves, and I appreciate that deeply.
The only slightly annoying part is the chilling time. These Key Lime Pie Bars need a few hours in the fridge so the filling sets properly and the slices come out clean. I know waiting for dessert feels rude, especially when the whole kitchen smells buttery and limey, but it’s worth it. The chill gives you that creamy, firm texture that makes each square hold together beautifully.
These bars are perfect for cookouts, brunches, potlucks, holidays, baby showers, summer dinners, or just a random night when you want something bright from the fridge. And honestly, I’d eat them in the middle of winter too. Citrus doesn’t need permission.

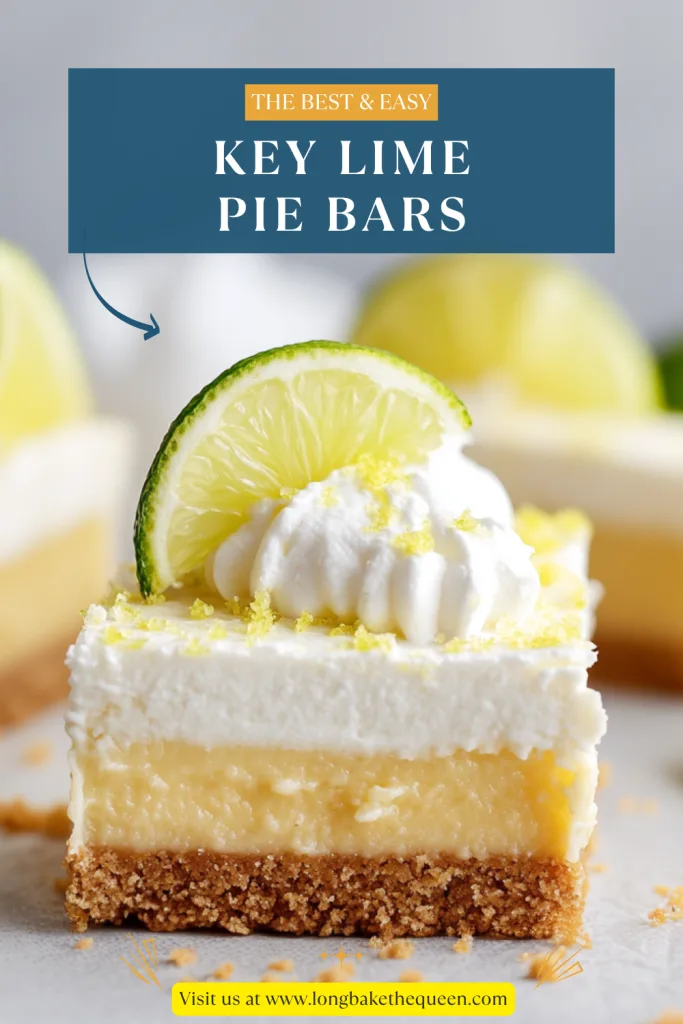
Why you’ll Love these Key Lime Pie Bars?
You’ll love these Key Lime Pie Bars because they bring all the charm of classic key lime pie, but they’re easier to slice, serve, and share. Instead of fussing with a pie plate and hoping the first slice survives, you get neat little squares with a buttery crust, creamy lime filling, and soft whipped topping. It’s classic key lime pie energy, just a bit more relaxed.
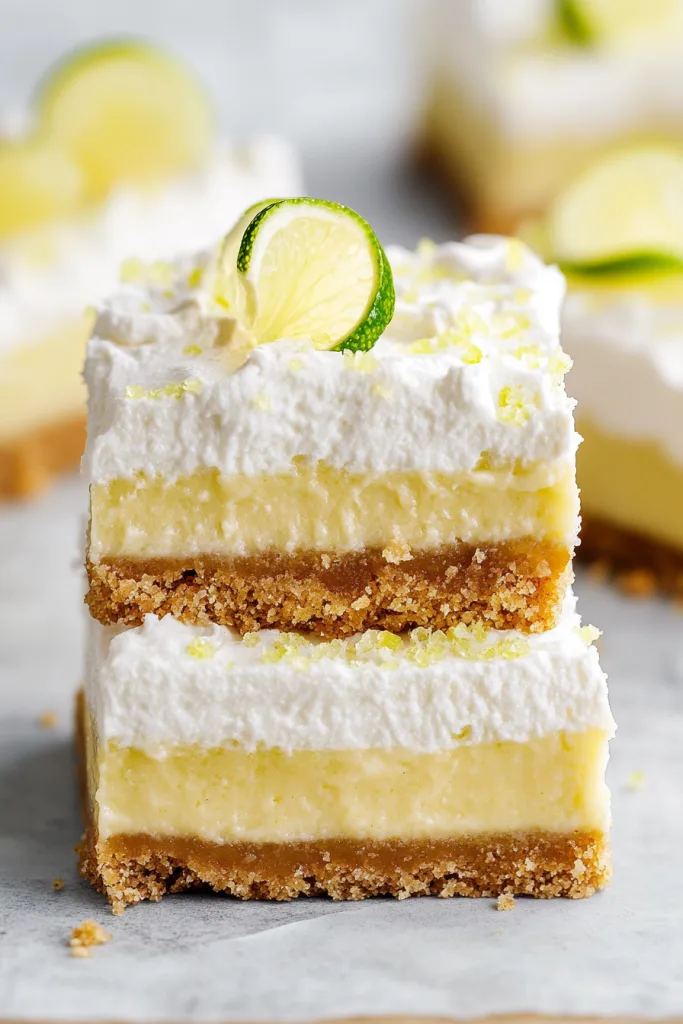
One thing I really like about these key lime pie squares is the texture. The crust bakes first, so it holds up nicely under the filling. The lime layer is creamy and smooth, but it sets well after chilling. Then the whipped cream on top adds that soft, cool finish. It’s a simple combination, but it works so well. Crunchy, creamy, tart, sweet. All the good stuff.
These bars are also great for making ahead. Actually, they need to be made ahead, at least a little, because the filling has to chill. That makes them perfect for hosting. You can bake them the day before, add the whipped cream later, and slice them when you’re ready. I love desserts like that because they don’t make you panic 20 minutes before guests arrive.
Another reason this Key Lime Pie Bars recipe is a keeper is that it feels special without being fussy. The ingredients are familiar, the steps are simple, and the finished bars look pretty with just a little lime zest on top. It’s one of those desserts that looks like you put in more effort than you actually did, which is honestly one of my favorite kitchen tricks.
The flavor is refreshing too. The key lime juice gives the bars a bright tartness, but the sweetened condensed milk keeps everything creamy and sweet. If you’re someone who likes desserts that don’t feel overly rich after a big meal, these key lime dessert bars are a lovely choice. They wake up your taste buds a little.
And maybe this is just me, but cold desserts from the fridge always feel a little magical. You make them earlier, forget about them for a bit, then come back to a pan of chilled, creamy lime bars waiting patiently. That’s the kind of kitchen surprise I enjoy.
Ingredient Notes
The ingredients for these Key Lime Pie Bars are simple, but each one has a clear purpose. The crust gives you crunch and buttery flavor. The filling gives you that creamy, tangy key lime pie taste. The whipped cream topping adds softness and a little sweetness. For the best texture, use softened cream cheese, cold heavy cream, and enough chill time. The fridge is doing important work here, even if it looks like nothing is happening.
- Graham cracker crumbs: Graham cracker crumbs make the base of the crust. You can use store-bought crumbs or crush about 12 full sheets yourself. Try to crush them finely so the crust presses together well. Big chunks can make the crust a little crumbly.
- Granulated sugar: Sugar sweetens the crust and balances the tart filling. It also helps the crust bake into a firmer layer.
- Unsalted butter: Melted butter holds the graham cracker crumbs together and gives the crust that rich, buttery flavor. Make sure the crumbs are evenly coated so the crust doesn’t fall apart when sliced.
- Cream cheese: Softened cream cheese makes the filling smooth and slightly tangy. It blends into the sweetened condensed milk and helps give the bars a creamy texture. Room temperature cream cheese is best because cold cream cheese can leave lumps, and those little lumps are stubborn.
- Egg yolks: Egg yolks help the filling set as it bakes. They also add richness, which makes the lime layer taste smooth and custardy.
- Sweetened condensed milk: Sweetened condensed milk is what gives these Key Lime Pie Bars that classic creamy sweetness. It’s thick, sweet, and honestly kind of magical in citrus desserts.
- Key lime juice: Key lime juice brings the tart, bright flavor. Bottled key lime juice works very well, especially if fresh key limes are hard to find. Regular lime juice can work too, but the flavor will be a little different.
- Lime zest: Lime zest adds fresh citrus aroma and makes the filling taste brighter. You can use zest from regular limes or key limes. I like adding zest because it gives that extra “fresh lime” feeling without adding more liquid.
- Heavy cream: Cold heavy cream whips into the topping. It adds a soft, creamy finish that balances the tart filling beautifully.
- Powdered sugar: Powdered sugar lightly sweetens the whipped cream and keeps it smooth. You don’t need much because the bars are already sweet.
- Extra lime zest for garnish: A sprinkle of lime zest on top adds color and fresh flavor. It’s simple, but it makes the bars look bakery-pretty.
How to Make Key Lime Pie Bars?
Making Key Lime Pie Bars is easier than making a full pie, but it still helps to follow the steps in order. You’ll bake the crust first, lower the oven temperature, mix the filling, bake the bars gently, chill them fully, then add whipped cream. None of it is hard. The only real challenge is not cutting into them too early. And yes, I say that as someone who has absolutely been tempted.
Step 1: Prepare the pan.
Preheat the oven to 350°F. Line an 8×8-inch baking pan with parchment paper or foil, leaving extra hanging over the sides. Spray it with cooking spray. That overhang might seem like a tiny detail, but it makes lifting the chilled bars out of the pan so much easier later.
Step 2: Make the graham cracker crust.
Mix the graham cracker crumbs, granulated sugar, and melted butter until everything is evenly combined. The mixture should look like damp sand. Not glamorous, I know, but that’s exactly what you want. If the crumbs still look dry in spots, keep stirring until the butter is spread through.
Step 3: Press and bake the crust.
Press the crust mixture firmly into the bottom of the prepared pan. I like using the bottom of a measuring cup to pack it down evenly. Bake the crust for 10 minutes, then reduce the oven temperature to 300°F. Let the crust cool slightly while you make the filling.
Step 4: Beat the cream cheese.
In a large bowl, beat the softened cream cheese with an electric mixer until smooth. Scrape the sides and bottom of the bowl, then beat again. Cream cheese likes to hide little lumps in the corners of the bowl, and once the rest of the filling goes in, those lumps are harder to fix.
Step 5: Add the egg yolks.
Blend the egg yolks into the cream cheese until the mixture is smooth and fully combined. The yolks help the filling set in the oven and give the bars that rich, creamy texture.
Step 6: Add the sweetened condensed milk, key lime juice, and zest.
With the mixer on low speed, add the sweetened condensed milk, key lime juice, and lime zest. Mix until the filling is smooth and evenly combined. It should look creamy and pourable. Try not to overbeat it; just mix until everything comes together.
Step 7: Pour the filling over the crust.
Pour the key lime filling over the baked graham cracker crust. Spread it into an even layer with a spatula. An even layer helps the bars bake evenly and makes the slices look nicer later.
Step 8: Bake the bars.
Bake at 300°F for 35 to 40 minutes. The filling should look set around the edges with a slight jiggle in the center. You want a gentle wobble, not a liquid wave. The bars will firm up more as they cool and chill.
Step 9: Cool and chill.
Let the bars cool at room temperature for about 30 minutes, then refrigerate for at least 2 to 3 hours. This chilling time is what gives the bars their clean slice and creamy texture. I know waiting is not fun, but it really matters here.
Step 10: Make the whipped cream topping.
Beat the cold heavy cream and powdered sugar on low speed until it starts to thicken. Increase the speed to medium-high and whip until stiff peaks form. The whipped cream should hold its shape but still look smooth and soft.
Step 11: Spread the topping and chill again.
Spread the whipped cream evenly over the chilled Key Lime Pie Bars. Refrigerate for another 30 minutes so the topping firms slightly before slicing. This little extra chill helps everything look neater.
Step 12: Slice and garnish.
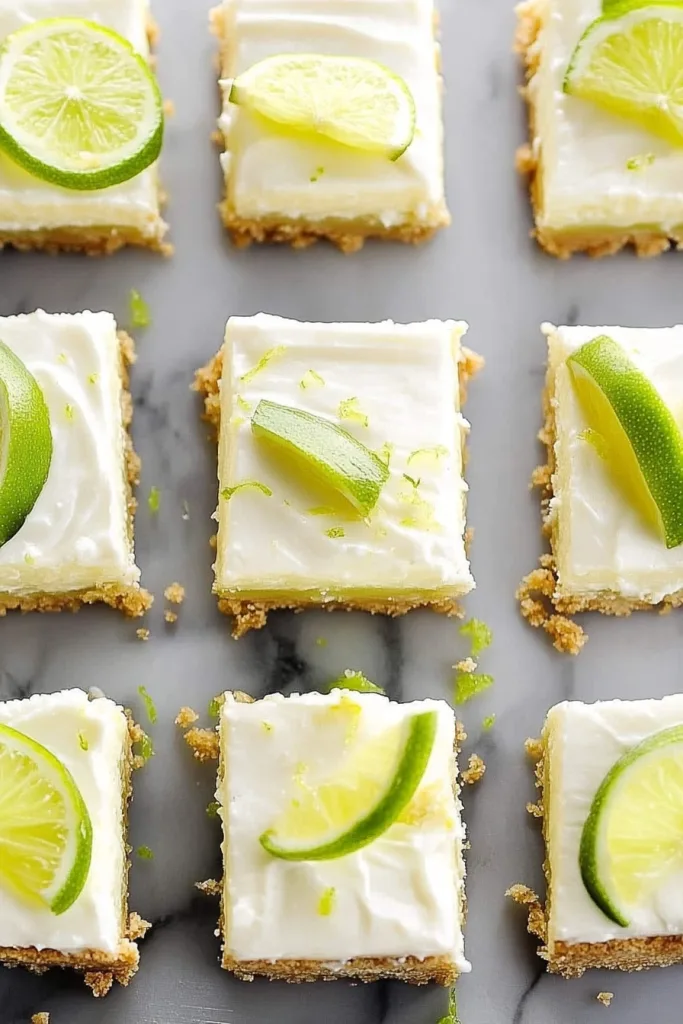
Use the parchment overhang to lift the bars out of the pan. Cut into squares with a sharp knife, wiping the knife between cuts if you want cleaner edges. Sprinkle with lime zest before serving. The zest makes them look fresh and cheerful, like they put on a little green confetti.
Storage Options
These Key Lime Pie Bars store beautifully, which is one of the reasons I like them so much for gatherings. They’re a make-ahead dessert by nature, and they actually taste best cold. That means you can prepare them earlier, tuck them into the fridge, and not think about dessert until it’s time to serve. Very civilized.
Store the bars in an airtight container in the refrigerator for up to 4 days. If they already have whipped cream on top, cover them gently so the topping stays fresh and doesn’t pick up any fridge smells. Nobody wants key lime bars with a hint of leftover onion. Horrifying.
If you’re making these bars for a party, you can bake and chill the base the day before, then add the whipped cream topping closer to serving. This keeps the topping light and pretty. You can also garnish with lime zest right before serving for the freshest look.
For the cleanest slices, chill the bars completely before cutting. If they feel too soft, give them more fridge time. It can be tempting to rush, but soft bars are harder to slice and can get messy. Still tasty, of course. Just not as neat.
You can freeze Key Lime Pie Bars, but I recommend freezing them without the whipped cream topping. Wrap the fully cooled and chilled bars tightly in plastic wrap, then place them in a freezer-safe container. Freeze for up to 2 months. Thaw overnight in the refrigerator, then add fresh whipped cream before serving.
Freezing them with whipped cream on top isn’t ideal because the topping can become watery or lose its fluffy texture. It’s not the end of the world, but fresh whipped cream is much better.
If you’re serving these bars outdoors or at a warm-weather cookout, keep them chilled until just before serving. They’re refreshing and lovely cold, but creamy desserts do not enjoy sitting in the sun for long. Same, honestly.
Variations & Substitutions
These Key Lime Pie Bars are delicious as written, but you can adjust them depending on what you have in the kitchen or the kind of flavor you want. The base recipe is pretty reliable, so little changes can make it feel fresh without sending you into experimental baking territory. We like creativity, but we also like dessert that sets properly.
- Use regular lime juice: If key lime juice isn’t available, regular lime juice works. The flavor will be slightly different and a little less floral, but the bars will still be bright, creamy, and tart.
- Use bottled key lime juice: Bottled key lime juice is convenient and consistent. Nellie and Joe’s is a popular choice, and it saves you from squeezing lots of tiny key limes. Tiny limes are adorable until you need a full cup of juice.
- Add coconut: Sprinkle toasted coconut over the whipped cream topping for a tropical twist. Coconut and lime together always feel a little beachy, even if you’re eating dessert at the kitchen counter.
- Use a vanilla wafer crust: Replace the graham cracker crumbs with crushed vanilla wafers for a sweeter crust. It gives the bars a softer, cookie-like flavor.
- Use digestive biscuits: Digestive biscuits can replace graham crackers if that’s what you have. They make a slightly different crust but still work beautifully.
- Make it extra tart: Add a little more lime zest for a stronger citrus flavor. I’d be careful adding much extra juice, though, because too much liquid can affect the filling.
- Make mini bars: You can make mini versions in a lined muffin pan for individual servings. Just watch the baking time because smaller portions will bake faster.
- Pipe the whipped cream: Instead of spreading the whipped cream, pipe it on top for a more polished look. This is great for holidays, showers, or when you want the bars to look like they came from a bakery.
- Skip the whipped topping: If you prefer a stronger tart lime flavor, you can skip the whipped cream and finish with lime zest or a light dusting of powdered sugar.
What to Serve With Key Lime Pie Bars?
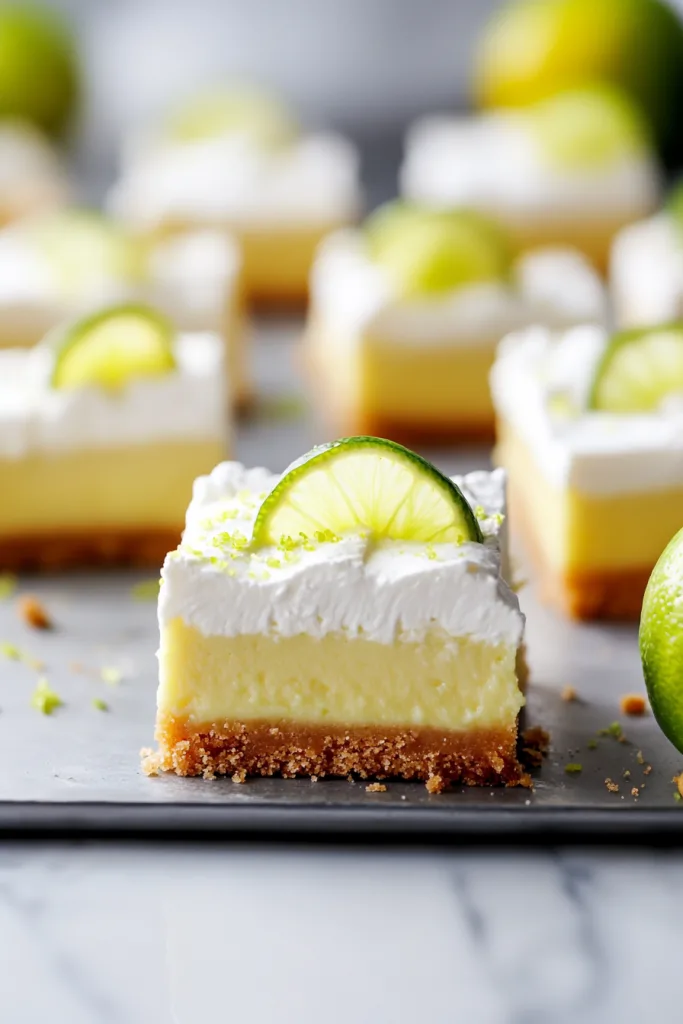
These Key Lime Pie Bars are bright, cool, and creamy, so they pair well with fresh fruit, simple drinks, and meals that need a refreshing finish. I especially like serving them after something savory or smoky because that tart lime flavor cuts through richness beautifully. It’s like dessert showed up with a little breeze.
- Fresh berries: Strawberries, raspberries, blueberries, and blackberries all pair nicely with lime. They add color, freshness, and a little natural sweetness.
- Iced tea: Sweet tea, unsweetened iced tea, or citrus iced tea all work well with these chilled bars. It’s a very porch-sitting kind of pairing.
- Coffee: Coffee balances the sweetness of the bars. It’s especially nice if you’re serving them after brunch or dinner.
- Extra whipped cream: A little extra whipped cream on the side is never a bad thing. Some people like more creaminess with each bite, and I understand them.
- Toasted coconut: Toasted coconut adds crunch and a tropical flavor that works beautifully with key lime.
- Vanilla ice cream: A small scoop of vanilla ice cream makes the dessert extra creamy and a little more indulgent.
- Grilled seafood dinner: These bars are wonderful after grilled shrimp, fish tacos, or seafood because the citrus flavor feels fresh and light.
- Summer cookout foods: Serve Key Lime Pie Bars after burgers, barbecue chicken, grilled vegetables, or picnic sides. The chilled lime filling is especially nice after smoky or savory food.
- Brunch spread: Add them to a brunch table with fruit, muffins, quiche, and coffee. They bring a bright, sweet finish without feeling too heavy.
- Sparkling water: Lime sparkling water or plain sparkling water keeps the dessert feeling refreshing and light.
FAQ
Can I use regular lime juice instead of key lime juice?
Yes, regular lime juice works if you can’t find key lime juice. The flavor will be a little different, but the bars will still be creamy, tart, and delicious.
How do I know when the bars are done baking?
The edges should look set, and the center should have a slight jiggle. It should not look liquid. The filling will continue to firm up as it cools and chills.
Why is my crust crumbly?
The crumbs may not have been coated evenly with butter, or the crust may not have been pressed firmly enough into the pan. Press it down well before baking so it holds together.
Can I use whipped topping instead of homemade whipped cream?
Yes, you can use whipped topping if you prefer. Homemade whipped cream tastes fresher, but whipped topping is convenient and works well too.
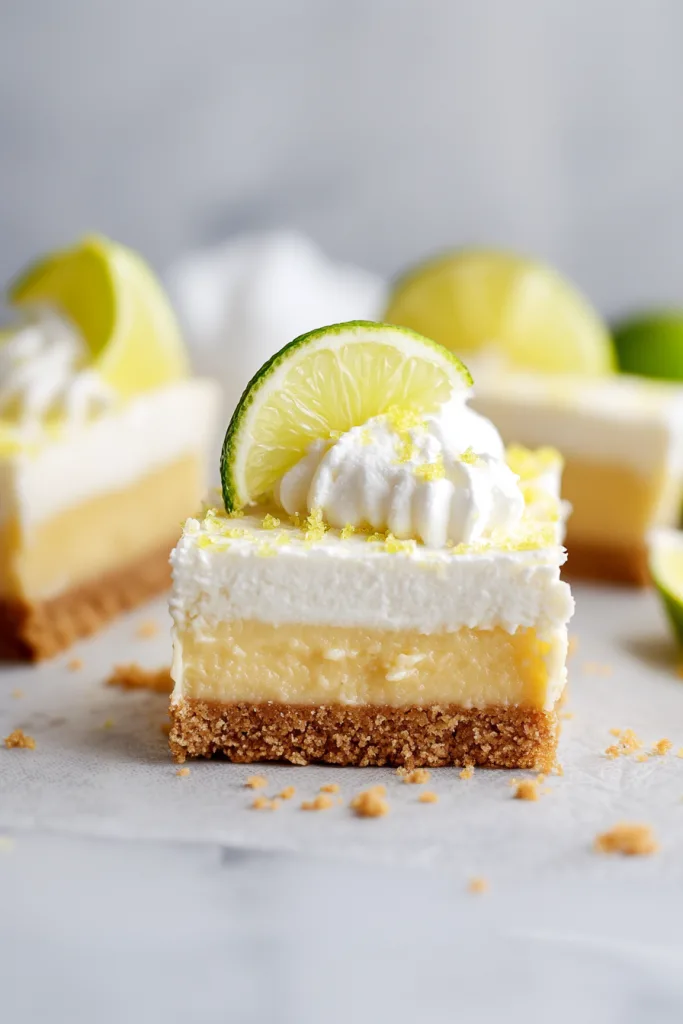
These Key Lime Pie Bars are creamy, tangy, buttery, and refreshing in the best way. They take everything wonderful about classic key lime pie and turn it into an easy dessert bar with a crisp graham cracker crust, smooth lime filling, and soft whipped cream topping.
Make these Key Lime Pie Bars for brunch, cookouts, holidays, potlucks, or whenever you want a bright little dessert from the fridge. Can’t wait to hear what you think — are you serving them with berries, toasted coconut, or sneaking one cold straight from the pan?
Key Lime Pie Bars
Ingredients
For the Crust
- 1 1/2 c graham cracker crumbs crushed, about 12 full sheets
- 1/4 c granulated sugar
- 6 tbsp unsalted butter melted
For the Filling
- 4 oz cream cheese softened
- 6 egg yolks
- 2 cans sweetened condensed milk 14 oz each
- 1 c key lime juice preferably Nellie and Joe’s brand
- Zest of 2 regular limes or 4 key limes
For the Topping
- 1 c cold heavy cream
- 1 tbsp powdered sugar
- Lime zest for garnish
Instructions
Prepare the baking pan.
- Preheat the oven to 350°F. Line an 8×8-inch baking pan with parchment paper or foil, leaving an overhang on the sides. Lightly coat with cooking spray and set aside.
Prepare the crust mixture.
- In a medium bowl, combine the graham cracker crumbs, granulated sugar, and melted butter. Mix until the crumbs are evenly moistened.
Form the crust.
- Press the graham cracker mixture firmly and evenly into the bottom of the prepared baking pan.
Bake the crust.
- Bake the crust for 10 minutes. Remove from the oven and set aside to cool slightly.
Reduce the oven temperature.
- Lower the oven temperature to 300°F.
Prepare the cream cheese base.
- In a large mixing bowl, beat the softened cream cheese with an electric mixer on medium speed until smooth.
Add the egg yolks.
- Scrape the bottom and sides of the bowl. Add the egg yolks and beat until fully incorporated and smooth.
Add the remaining filling ingredients.
- With the mixer on low speed, add the sweetened condensed milk, key lime juice, and lime zest. Mix until fully combined.
Fill the crust.
- Pour the key lime filling over the prepared graham cracker crust. Spread into an even layer.
Bake the bars.
- Bake for 35 to 40 minutes, or until the filling is set but still slightly jiggly in the center.
Cool the bars.
- Remove the pan from the oven and allow the bars to cool at room temperature for 30 minutes.
Chill the bars.
- Transfer the pan to the refrigerator and chill for at least 2 to 3 hours, or until fully set.
Prepare the whipped topping.
- In a large bowl, beat the cold heavy cream and powdered sugar on low speed until thickened. Increase the speed to medium-high and whip until stiff peaks form.
Top the bars.
- Spread the whipped cream evenly over the chilled key lime bars. Refrigerate for an additional 30 minutes.
Slice and garnish.
- Use the parchment or foil overhang to carefully lift the bars from the pan. Cut into squares with a sharp knife. Garnish with lime zest before serving.
Notes