Plain flour, unsalted butter, icing sugar, egg, cornflakes, light brown sugar, golden syrup, sea salt, raspberry jam.
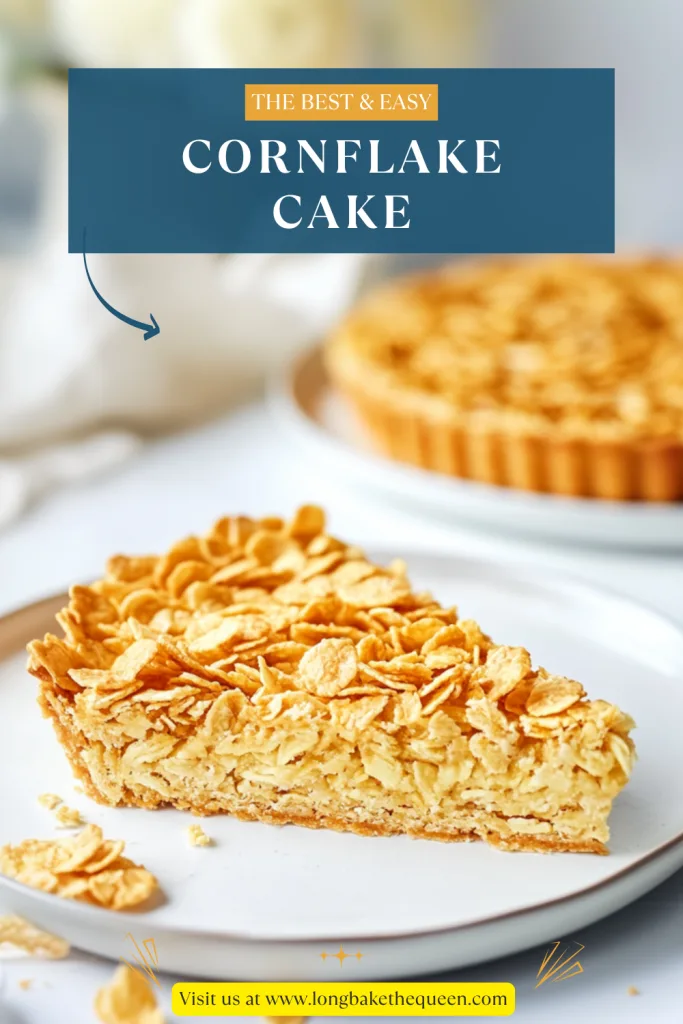
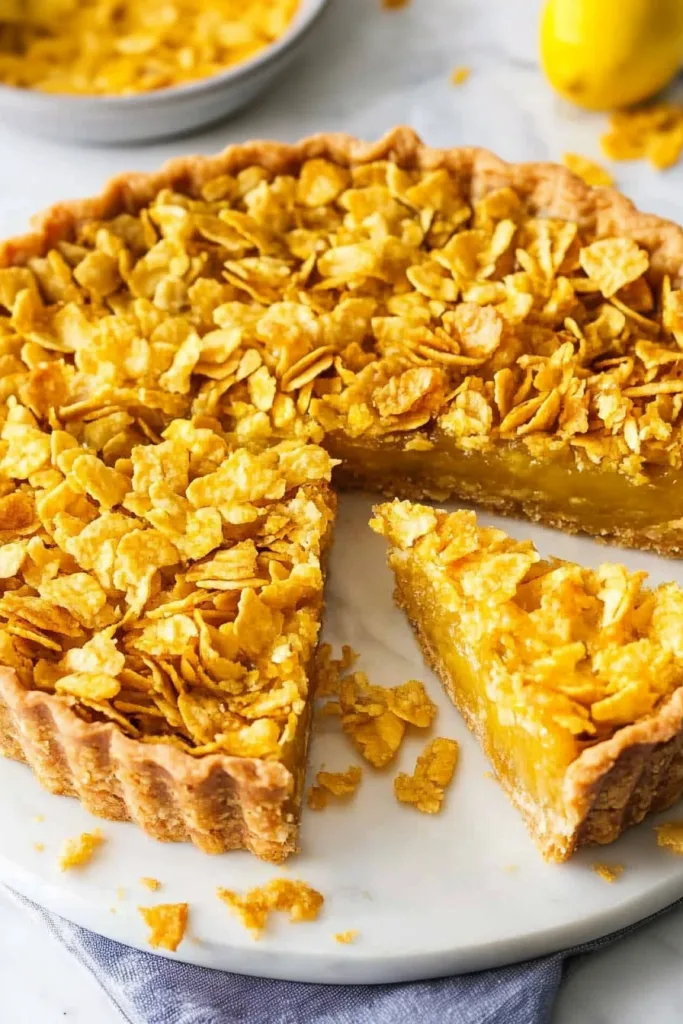
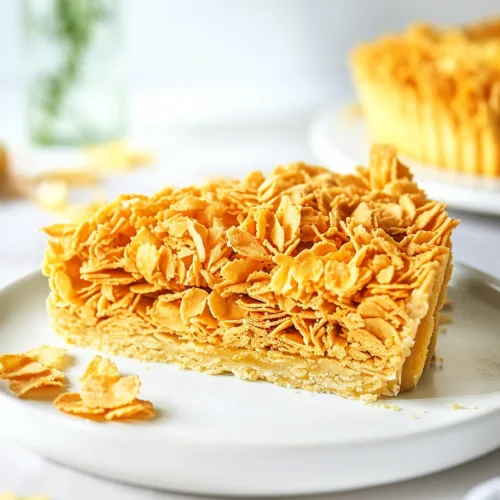
There’s something about Cornflake Cake that feels like it belongs next to a cup of tea, a slightly chipped plate, and someone saying, “Go on then, just have another little slice.” It’s not fancy in that glossy bakery-window kind of way. It’s more humble than that. More familiar. A crisp pastry base, a layer of raspberry jam, and sticky golden cornflakes on top. Honestly, it has the same cozy energy as an old family recipe card with a butter stain in the corner.
Now, I should say right away that Cornflake Cake is really more like a cornflake tart than a soft cake. I know, the name can be a little confusing. If you’re picturing a fluffy sponge, this isn’t that. This is crunchy, jammy, sticky, buttery, and very British in spirit. It reminds me of school-dinner desserts, bake sales, church halls, and those retro puddings that somehow taste even better because they don’t try too hard.
The first time I made this Cornflake Cake recipe, I wasn’t completely sure what to expect. Cornflakes in a tart? It sounded a bit like breakfast had wandered into dessert by accident. But then the golden syrup melted with butter and brown sugar, the cornflakes turned glossy, and the raspberry jam peeked out from underneath like it knew exactly what it was doing. One bite in, and I got it. I really did. Crunchy top, crisp pastry, sweet-tart jam. It just works.
I also love how this British Cornflake Cake feels nostalgic even if you didn’t grow up eating it. That’s the funny thing about old-school desserts. They have a way of feeling familiar. Like something your auntie might bring to a family gathering, or something you’d see at a village fete next to fairy cakes and a handwritten sign. Maybe it’s the golden syrup. Maybe it’s the cornflakes. Maybe it’s just the kind of dessert that doesn’t need to explain itself too much.
And yes, this easy Cornflake Cake takes a little time because the pastry has to chill and blind bake. But it’s not hard. It’s more of a “put on some music and enjoy the process” bake. You make the pastry, let it chill, bake it until crisp, spread over the jam, pile on the sticky cornflake topping, and bake it just long enough to get a little toasty. Not instant, but worth it. Sound familiar? Sometimes the best bakes make you slow down a bit.

Why you’ll Love this Cornflake Cake?
You’ll love Cornflake Cake because it’s full of texture. And I mean proper texture. The shortcrust pastry is crisp and buttery, the raspberry jam is soft and fruity, and the cornflake topping is sweet, sticky, and crunchy. It’s the kind of dessert where every bite gives you something different. A little crunch, a little jam, a little buttery pastry. Very simple. Very satisfying.
One of the things I like most about this Cornflake Cake recipe is that it turns ordinary ingredients into something surprisingly memorable. Cornflakes usually sit in the cupboard quietly waiting for milk, but here they get promoted to dessert status. Mix them with golden syrup, butter, brown sugar, and a tiny bit of salt, and suddenly they’re glossy and crunchy and completely irresistible. It’s a small kitchen magic trick, really.
This cornflake tart also has that lovely retro British flavor. If you grew up with school puddings, jam tarts, custard, or golden syrup bakes, this will probably feel familiar. If you didn’t, it still has a cozy, old-fashioned charm. It’s not trying to be elegant. It’s not delicate. It’s a little sticky, a little rustic, and honestly, I think that’s why people love it.
Another reason Cornflake Cake is such a keeper is that it serves about 10 people, so it’s great for sharing. It works for afternoon tea, family dessert, bake sales, lunchbox treats, weekend baking, or a casual get-together where you want something sweet but not too fussy. It slices nicely once cooled, and the golden cornflake topping makes it look cheerful without needing any decoration.
I also appreciate that the tart shell can be made ahead. You can make the pastry up to 3 days ahead and keep it chilled until you’re ready. That makes the whole recipe feel less intense. Pastry can be a little intimidating, I know. But breaking it into steps makes it much calmer. And calmer baking is always welcome, especially when there’s flour on your shirt and the sink is already full.
Ingredient Notes
The ingredients for Cornflake Cake are simple, but they all have a job to do. The pastry gives you that crisp buttery shell, the jam adds a fruity layer, and the cornflake topping brings the sticky crunch. Golden syrup is really the heart of the filling, giving everything that classic sweet, slightly caramel-like flavor.
- Plain flour: Plain flour, also known as all-purpose flour, forms the base of the shortcrust pastry. It gives the tart shell structure while still letting it bake up crisp and tender. Try not to overwork the dough after the egg goes in. Pastry is a bit sensitive like that. Treat it gently and it usually behaves.
- Unsalted butter: Cold unsalted butter is used in the pastry, while more butter goes into the cornflake filling. For the pastry, the butter needs to be cold and cubed so it cuts into the flour properly. For the topping, butter melts with the sugar, golden syrup, and salt to coat the cornflakes. Butter is basically holding this whole Cornflake Cake together emotionally and structurally.
- Icing sugar: Icing sugar, also called powdered sugar or confectioners’ sugar, lightly sweetens the pastry. It blends smoothly into the dough and helps create a delicate texture. Since the cornflake topping is already sweet, the pastry only needs a gentle sweetness.
- Egg: The cold egg brings the pastry dough together. Once it’s added, the dough should start forming large clumps in the food processor. Stop once it begins to come together. This is not the moment to keep mixing just because it feels satisfying. I’ve done that. Pastry did not thank me.
- Cornflakes: Cornflakes are the star of this Cornflake Cake recipe. They add crunch, texture, and that familiar cereal flavor. Kellogg’s Cornflakes are used here, but another plain cornflake cereal can work too. Stir gently when coating them so they stay mostly whole. You want crunchy pieces, not cornflake confetti.
- Light brown sugar: Light brown sugar adds sweetness and a soft caramel flavor to the filling. It melts with the butter and golden syrup to create that sticky coating for the cornflakes. It gives the topping a warmer flavor than white sugar would.
- Golden syrup: Golden syrup gives this British Cornflake Cake its classic flavor. It’s thick, sticky, sweet, and slightly buttery-caramel tasting. It helps the cornflakes cling together and gives the topping that glossy finish. If golden syrup is new to you, this recipe is a lovely excuse to try it.
- Fine sea salt: Fine sea salt balances the sweetness. Between the jam, brown sugar, golden syrup, and cornflakes, there’s a lot of sweet going on. The salt keeps it from becoming too much. It won’t make the tart salty. It just makes the flavors sharper and better.
- Raspberry jam: Raspberry jam creates the fruity layer between the pastry and cornflake topping. It adds a little tartness, which balances the sweet syrupy cornflakes beautifully. Raspberry is classic, but strawberry, blackcurrant, cherry, or apricot jam can work too. I’m especially fond of raspberry because it cuts through the sweetness nicely.
How to Make Cornflake Cake?
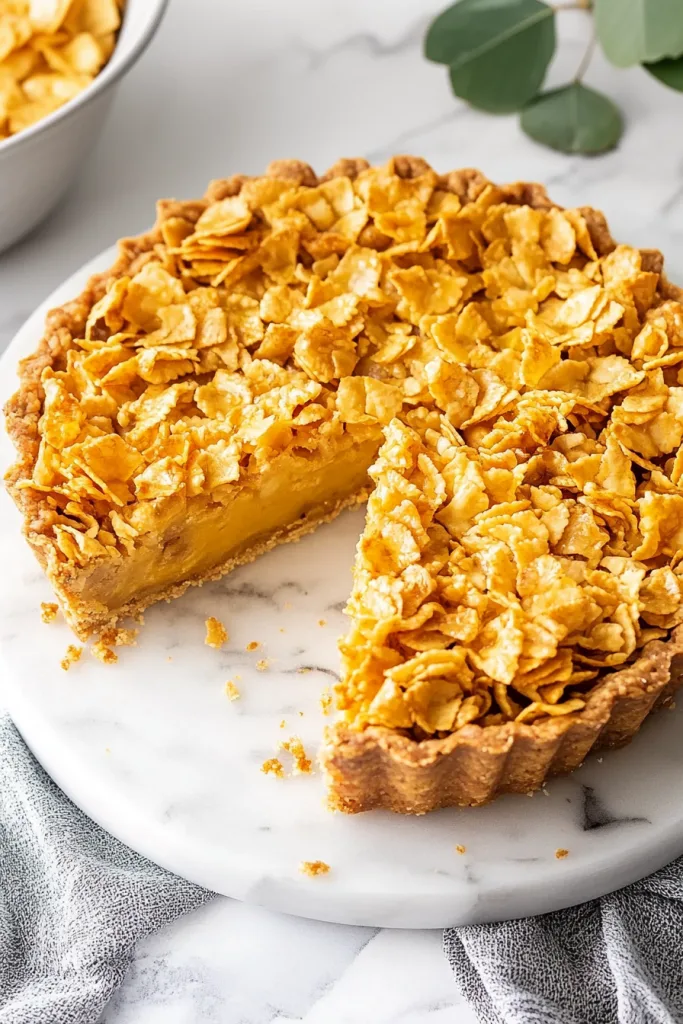
Making Cornflake Cake is all about layers. First you make the shortcrust pastry shell, then you blind bake it until crisp, then you add raspberry jam and the sticky cornflake topping. It sounds like a lot written out, but each step is pretty straightforward. Take your time, keep the pastry cool, and don’t panic if it looks a bit rustic. Rustic is allowed. Encouraged, even.
Step 1: Make the Pastry Base
Add the plain flour, icing sugar, and cold cubed butter to a food processor. Process until the mixture looks like fine breadcrumbs and the butter is cut into very small pieces, about half the size of a lentil. That little crumbly texture is what helps the pastry bake up crisp. If it looks a tiny bit uneven, that’s okay. Pastry is not asking for laboratory precision.
Step 2: Add the Egg
Add the cold egg and process on low until the mixture starts forming large clumps. Stop as soon as it begins coming together. This part is important because overmixing can make the pastry tougher. Think of it like mixing just until the dough says, “Okay, I’m ready.” Then believe it.
Step 3: Shape the Dough
Turn the dough out onto a clean work surface and gently bring it together with your hands. Shape it into a smooth ball, then press it into a disk about 1 inch thick. Try not to handle it too much because warm hands can soften the butter. A quick, gentle touch gives you better pastry later.
Step 4: Roll Out the Pastry
Lightly flour your work surface and dust the top of the dough with just a little flour. Roll the pastry gently and gradually, turning it often, until it is about 4 to 5mm thick, or around 11 inches in diameter. If the edges crack a little, don’t stress. You can patch small cracks with your fingers. This cornflake tart is forgiving enough.
Step 5: Transfer the Pastry to the Tart Pan
Place the rolling pin in the middle of the pastry and fold one side of the dough over it. Lift the rolling pin so the pastry hangs over it, then lightly brush away any excess flour from underneath. Carefully lay the pastry into a 9-inch round tart pan with a removable base. This method helps you move the dough without stretching it too much.
Step 6: Press the Pastry Into the Pan
Press the dough into the corners from the sides, not from the middle. Then gently press it up against the sides of the tart pan. Leave the overhang standing upright for now. It may look a little funny, but that’s fine. The tart shell will be trimmed after chilling. Baking is full of awkward stages. So are haircuts, honestly.
Step 7: Chill the Tart Shell
Place the tart pan in the freezer for 45 minutes, or refrigerate it for at least 2 hours. Chilling helps the pastry hold its shape while baking. You can also make the tart shell up to 3 days ahead and keep it in the fridge until needed. This is one of those small make-ahead tricks that makes Cornflake Cake feel much easier.
Step 8: Preheat the Oven
Preheat the oven to 180°C / 350°F, or 160°C fan. Make sure the oven is fully heated before the pastry goes in. A hot, steady oven helps the shell bake evenly and crisp properly.
Step 9: Prick and Trim the Pastry
Use a fork to prick the pastry base all over. This lets steam escape and helps stop the base from puffing too much. Then use a small sharp knife to trim off the excess pastry. Suddenly it looks tidy. Always a satisfying little moment.
Step 10: Blind Bake the Tart Shell
Line the tart shell with baking paper and fill it with pie weights or rice. Fill it quite full and press the weights against the edges to support the sides. Bake for 20 minutes. Blind baking helps the pastry become crisp before the jam and cornflake topping are added. Without it, the base could turn soft, and nobody came here for soggy pastry.
Step 11: Bake Again Without the Weights
After 20 minutes, carefully remove the baking paper and pie weights or rice. Return the tart shell to the oven and bake for another 15 minutes, or until the pastry looks dry and lightly golden. Set it aside while you make the filling. The shell should be sturdy enough to hold the jam and sticky topping.
Step 12: Make the Cornflake Filling
Do not make the filling until the tart shell is ready. In a large saucepan, combine the butter, light brown sugar, golden syrup, and fine sea salt. Heat over medium heat, stirring until melted and smooth. The mixture should look glossy and syrupy. It smells amazing, but remember, hot syrup is not something to casually taste with your finger. Ask me how I know. Actually, don’t.
Step 13: Coat the Cornflakes
Remove the saucepan from the heat and quickly but carefully stir in the cornflakes. Stir until they are evenly coated in the golden syrup mixture. If your saucepan is too small, transfer everything to a large bowl and mix it there. Be gentle so the cornflakes stay crunchy and don’t break down too much.
Step 14: Add the Jam Layer
Spread the raspberry jam evenly over the base of the blind-baked tart shell. This is the fruity layer that makes Cornflake Cake so good. Try to spread it all the way to the edges so every slice gets that sweet-tart jam with the crunchy topping.
Step 15: Add the Cornflake Topping
Spoon the coated cornflakes over the jam layer and spread them evenly. Don’t press too hard. You want the topping to sit nicely over the jam while keeping its texture. The cornflakes should look glossy, golden, and a bit wild. That’s the look.
Step 16: Bake Until Toasty
Bake the tart for another 6 to 8 minutes, or until the cornflakes look lightly toasted on top. Keep an eye on it because cornflakes can go from golden to overly browned quickly. You want crisp and toasty, not “oops, I answered a text and now it’s dramatic.”
Step 17: Cool and Slice
Let the Cornflake Cake cool before slicing. This helps the jam and topping settle so the tart cuts more neatly. Once cooled, slice into 10 servings and enjoy. The result is crisp, sticky, jammy, crunchy, and just old-fashioned enough to feel special.
Storage Options
Cornflake Cake stores well, especially when kept airtight. The biggest thing is protecting the cornflake topping from moisture so it stays as crunchy as possible. It’s best on the day it’s made, but leftovers are still very welcome. A slice the next day with tea? Honestly, lovely.
- Room temperature: Store Cornflake Cake in an airtight container at room temperature for up to 2 days. This is usually the best option for keeping the cornflake topping crisp. If your kitchen is warm or humid, the topping may soften slightly, but it will still taste good.
- Refrigerator: You can refrigerate the tart for up to 4 days. Keep it tightly covered or in an airtight container. The pastry and topping may soften a bit in the fridge, so let the tart sit at room temperature for a short time before serving if you want a better texture.
- Freezer: You can freeze Cornflake Cake, but I’ll be honest, it’s not my favorite storage method. The cornflake topping may lose some crunch after thawing. If you do freeze it, wrap slices tightly and freeze for up to 1 month. Thaw in the fridge or at room temperature.
- Make-ahead tart shell: The tart shell can be made up to 3 days ahead and stored in the fridge before blind baking. You can also blind bake the shell earlier in the day, then add the jam and cornflake topping closer to serving time. This keeps the final tart fresher and crunchier.
- Best storage tip: Keep the tart airtight and away from moisture. If you want the topping to stay crunchy, room temperature storage is usually best for the first day or two. Moisture is the enemy of crunch. Rude, but true.
Variations & Substitutions
This Cornflake Cake recipe is classic with raspberry jam and golden syrup, but it leaves room for small changes. You can switch the jam, add chocolate, use store-bought pastry, or make mini versions. It’s traditional, yes, but not so serious that you can’t play around a little. Dessert should have some wiggle room.
- Use a different jam: Raspberry jam is classic, but strawberry, blackcurrant, cherry, apricot, or mixed berry jam can work too. I like jams with a little tartness because they balance the sweet cornflake topping. Blackcurrant is especially good if you want a deeper, sharper fruit flavor.
- Add chocolate: Drizzle melted chocolate over the cooled Cornflake Cake for a fun twist. Dark chocolate balances the sweetness, milk chocolate makes it more dessert-like, and white chocolate looks pretty against the golden cornflakes.
- Use honey or maple syrup: Golden syrup gives the most traditional flavor, but honey or maple syrup can work in a pinch. The texture and taste will be slightly different. Golden syrup is thicker and has that classic British bake flavor, so use it if you can.
- Try a different cereal: Plain cornflakes are traditional, but you can experiment with bran flakes, crispy rice cereal, or a mix. The topping will change texture, but the same basic idea works.
- Make mini tarts: Use small tart tins to make individual Cornflake Cake portions. They’re cute for afternoon tea, parties, or dessert tables. Just reduce the baking time and keep an eye on the pastry.
- Add nuts: Chopped almonds, pecans, or hazelnuts can add extra crunch. Use a small amount so the cornflakes still stay the main feature. A little nuttiness works nicely with the golden syrup.
- Use store-bought pastry: Ready-made shortcrust pastry is a helpful shortcut. Homemade pastry is lovely, but store-bought pastry makes this easy Cornflake Cake much faster. No judgment at all. Some days, shortcut pastry is the hero.
- Add citrus zest: Add a little orange zest or lemon zest to the jam layer for brightness. It works especially well with raspberry jam and golden syrup.
- Add coconut: Stir a little desiccated coconut into the cornflake mixture for a chewy, slightly nutty twist. It’s not traditional, but it tastes good.
- Make it less sweet: Use a tart jam, reduce the brown sugar slightly, or add an extra tiny pinch of salt. The topping is naturally sweet, so small adjustments can help if you prefer a more balanced dessert.
What to Serve With Cornflake Cake?
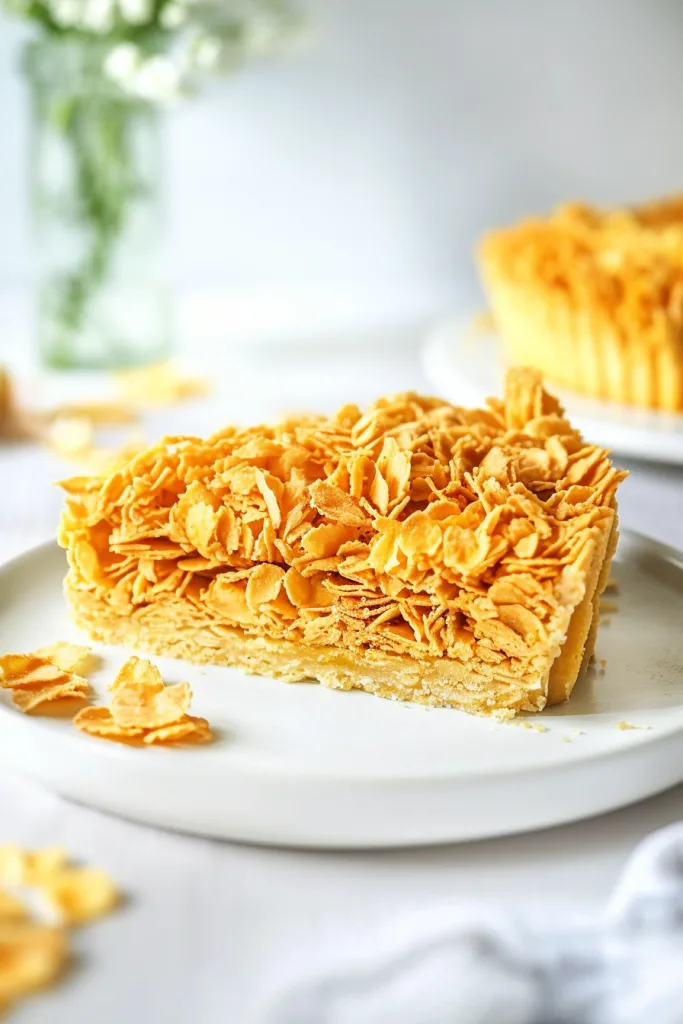
Cornflake Cake is sweet, sticky, crunchy, and jammy, so it pairs beautifully with creamy or lightly tangy sides. You can serve it as a nostalgic pudding, an afternoon tea treat, a family dessert, or a simple weekend bake. It’s delicious on its own, but the right pairing makes it even better.
- Custard: Warm custard is probably the most classic pairing for Cornflake Cake. It softens the crunchy topping just a little and makes everything feel extra comforting. Very British. Very cozy. Very “why don’t we eat custard more often?”
- Vanilla ice cream: Vanilla ice cream is lovely with a slice of cornflake tart, especially if the tart is slightly warm. The cold creaminess works beautifully with the sticky cornflakes and fruity jam.
- Whipped cream: Lightly whipped cream adds softness without making the dessert too heavy. Keep it simple and not too sweet, since the tart already has plenty of sweetness.
- Greek yogurt: Plain or vanilla Greek yogurt adds a tangy contrast to the sweet topping. It’s a nice choice if you want something a little lighter than custard or ice cream.
- Fresh berries: Fresh raspberries, strawberries, or blackberries pair well with the jam layer. They add freshness, color, and a little tartness.
- Tea: A cup of English breakfast tea, Earl Grey, or your favorite black tea is perfect with British Cornflake Cake. The tea helps balance the sweetness, and honestly, tea just feels right here.
- Coffee: Coffee works well if you want a less traditional pairing. Its bitterness cuts through the sweetness and makes the tart feel like a proper afternoon treat.
- Fruit compote: Berry compote or stewed fruit can make the tart feel more dessert-like. Choose something slightly tart to balance the syrupy cornflake topping.
- Pouring cream: A little pouring cream over a slice is simple and delicious. It softens the crunch and makes the dessert feel richer.
- Lunchbox treat: Once cooled, slices can be packed as a sweet lunchbox treat. Wrap them well so the topping stays fresh and the pastry doesn’t dry out.
FAQ
Is Cornflake Cake the same as cornflake tart?
Yes, this recipe is very similar to a classic cornflake tart. Some people call it Cornflake Cake, but it is made in a tart shell instead of being a soft sponge cake.
Can I use store-bought pastry?
Yes, you can use ready-made shortcrust pastry to save time. Homemade pastry gives a lovely buttery texture, but store-bought pastry works well for a quicker version.
Why did my pastry shrink?
Pastry can shrink if it is overworked, stretched into the pan, or not chilled long enough. Chill the tart shell well and press the pastry gently into the pan without stretching it.
How do I keep the cornflakes crunchy?
Store Cornflake Cake in an airtight container and keep it away from moisture. The topping is crunchiest on the day it is made but should stay pleasantly crisp for a day or two at room temperature.
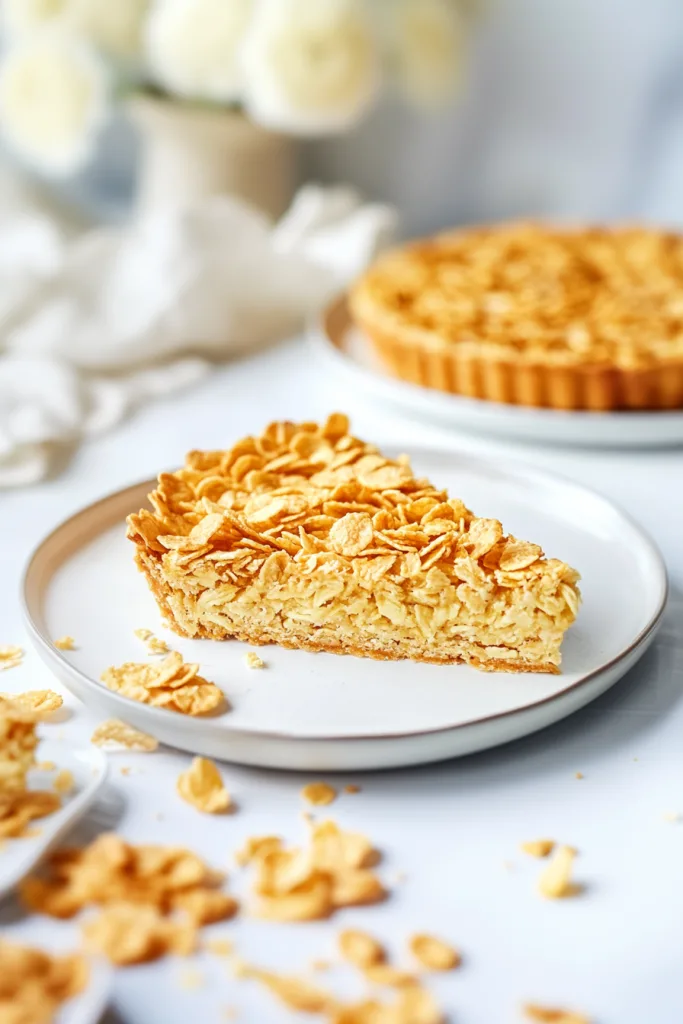
Cornflake Cake is one of those desserts that feels simple, nostalgic, and just a little bit unexpected. It takes plain cornflakes, raspberry jam, golden syrup, brown sugar, and buttery shortcrust pastry and turns them into something sticky, crunchy, fruity, and comforting. Not fancy. Not perfect. Just really, really good.
So the next time you want a classic British-style bake with plenty of crunch and a jammy little surprise underneath, try this Cornflake Cake. Serve it with warm custard, a cup of tea, ice cream, or just a fork and zero ceremony. Can’t wait to hear what you think!
Cornflake Cake
Ingredients
Shortcrust Tart Shell
- 225 g plain flour also known as all-purpose flour
- 100 g unsalted butter cold and cubed
- 40 g icing sugar also known as powdered sugar or confectioners’ sugar
- 1 large egg cold
Cornflake Filling
- 4 cups Kellogg’s Cornflakes
- 60 g unsalted butter
- 1/4 cup light brown sugar
- 1/2 cup golden syrup
- 1/4 tsp fine sea salt
- 1/3 cup raspberry jam
Instructions
Prepare the Shortcrust Tart Shell
- Add the plain flour, icing sugar, and cold cubed butter to the bowl of a food processor.
- Process until the mixture resembles fine breadcrumbs and the butter is cut into very small pieces.
- Add the cold egg.
- Process on low speed until the mixture begins to form large clumps.
- Transfer the dough to a clean work surface.
- Gently bring the dough together with your hands, taking care not to overwork it.
- Shape the dough into a smooth ball.
- Press the dough into a disk approximately 1 inch thick.
- Lightly flour the work surface and dust the top of the dough with a small amount of flour.
- Roll the pastry gradually, turning it often, until it is approximately 4 to 5 mm thick or about 11 inches in diameter.
- Place a rolling pin in the center of the rolled pastry.
- Fold one side of the pastry over the rolling pin.
- Lift the rolling pin carefully so the pastry hangs over it.
- Lightly remove any excess flour from the underside of the pastry.
- Carefully lay the pastry into a 9-inch round tart pan with a removable base.
- Press the pastry gently into the corners from the sides.
- Press the pastry against the sides of the tart pan.
- Leave the excess pastry standing upright around the edge.
- Place the tart pan in the freezer for 45 minutes, or refrigerate for at least 2 hours.
Blind Bake the Tart Shell
- Preheat the oven to 180°C / 350°F, or 160°C fan.
- Use a fork to prick the pastry base all over.
- Trim away the excess pastry using a small sharp knife.
- Line the tart shell with baking paper.
- Fill the lined tart shell with pie weights or rice, ensuring the weights are pressed firmly against the edges.
- Bake for 20 minutes.
- Carefully remove the baking paper and pie weights or rice.
- Return the tart shell to the oven.
- Bake for an additional 15 minutes, or until the pastry is dry and lightly golden.
- Remove the tart shell from the oven and set it aside.
Prepare the Cornflake Filling
- Prepare the filling only after the tart shell has been blind baked.
- Add the unsalted butter, light brown sugar, golden syrup, and fine sea salt to a large saucepan.
- Place the saucepan over medium heat.
- Stir until the butter has melted and the mixture is smooth and well combined.
- Remove the saucepan from the heat.
- Add the cornflakes to the saucepan.
- Stir quickly and carefully until the cornflakes are evenly coated in the syrup mixture.
- If the saucepan is not large enough, transfer the mixture to a large bowl and stir gently.
Assemble and Bake
- Spread the raspberry jam evenly over the base of the blind-baked tart shell.
- Spoon the coated cornflake mixture over the jam layer.
- Spread the cornflake mixture evenly over the tart.
- Bake for 6 to 8 minutes, or until the cornflakes appear lightly toasted on top.
- Remove the tart from the oven.
- Allow the Cornflake Cake to cool before slicing.
- Cut into 10 servings.
- Serve as desired.
Notes