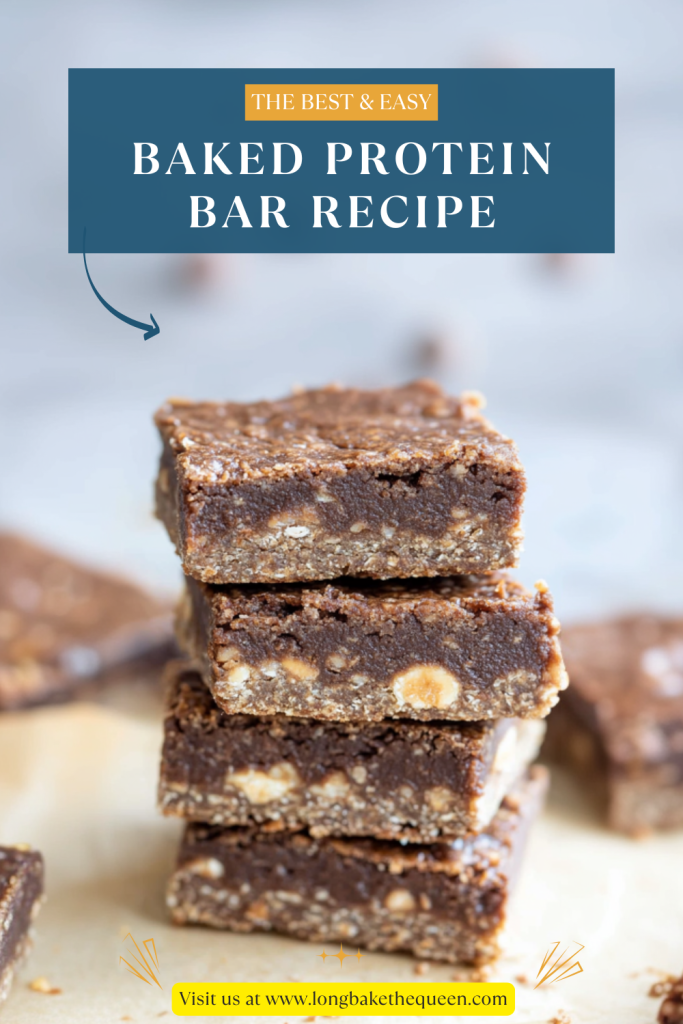
Baked Protein Bar Recipe made with peanut butter, coconut flour, protein powder, granulated sweetener, and unsweetened cocoa powder.
I have a funny little habit after workouts. I come home feeling very proud of myself for moving my body, drink half a glass of water like I’ve just crossed a desert, and then suddenly I’m standing in front of the pantry looking for something snacky. Not a whole meal. Not a salad. Just something chewy, peanut buttery, and filling enough to stop me from turning into a mildly dramatic version of myself. That’s where this Baked Protein Bar Recipe comes in.
I started making homemade protein bars because, honestly, store-bought bars can be a bit unpredictable. Some are great. Some are fine. And some taste like someone pressed protein powder into a brick and whispered “vanilla” at it from across the room. Harsh? Maybe. But you know what I mean, right? If you’ve ever taken one bite of a protein bar and immediately needed coffee, water, and emotional support, sound familiar?
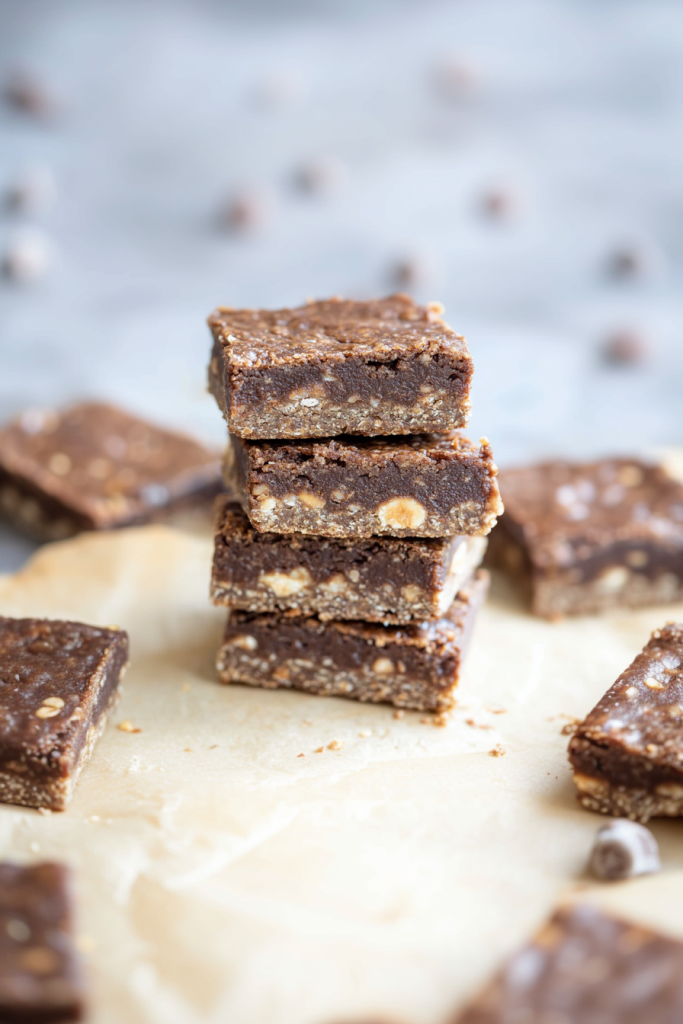
This Baked Protein Bar Recipe is different in the best simple way. It uses peanut butter, coconut flour, protein powder, granulated sweetener, and cocoa powder. That’s it. No long list of mystery ingredients. No fancy equipment. Just a two-layer peanut butter protein bar with a chocolatey top that feels like a treat but still gives you that protein-rich, low-carb snack energy.
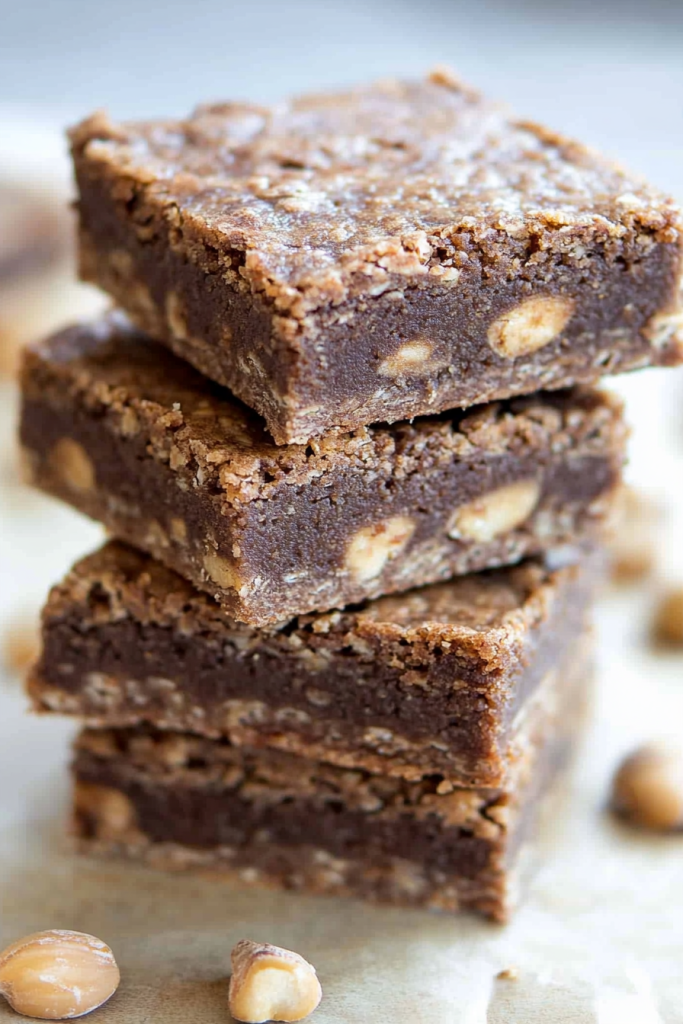
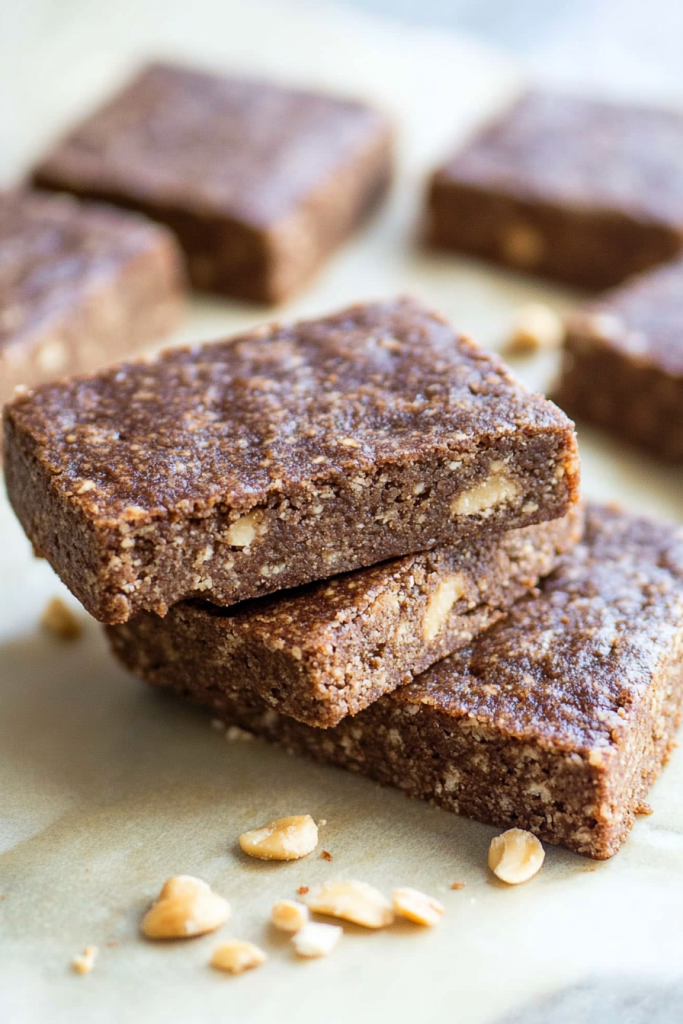
The first time I made these baked peanut butter protein bars, I wasn’t even trying to be impressive. I just had a jar of soft peanut butter sitting on the counter and one of those “I should probably prep snacks this week” moods. You know, the kind that comes after buying gym leggings or cleaning out the fridge. The bars came out chewy, fudgy, and just sweet enough. Not candy-bar sweet, but snack-bar sweet. There’s a difference, and I kind of like that middle ground.
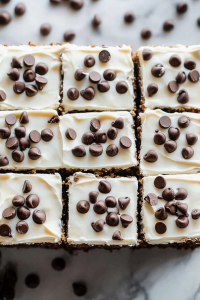
The two layers make them feel more fun than a plain bar. The bottom layer is peanut buttery and simple, while the top layer has cocoa powder for that chocolate-peanut butter thing we all know is basically a love language. It reminds me a little of those peanut butter cups people keep in the freezer, except this is more practical and less likely to disappear in one mysterious evening. Although, no promises.
I like keeping this homemade protein bar recipe around for post-workout snacks, busy mornings, late afternoon coffee breaks, or those weird in-between times when lunch was too light and dinner is still hours away. There’s something comforting about opening the fridge and knowing you have a little bar ready. It’s not glamorous. But neither is eating peanut butter from a spoon while staring at your phone. Been there too.
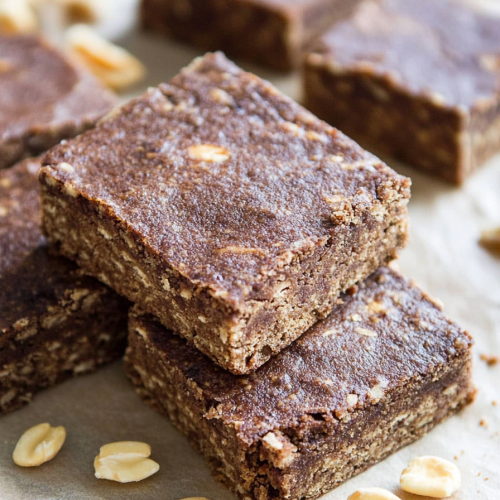
And I’ll be honest, the cooling step tests me a little. Warm peanut butter smells ridiculously good. You have to let the bars cool before slicing, or they’ll be too soft and crumbly. I know. Waiting is annoying. But it’s worth it. These low carb protein bars firm up as they cool and turn into chewy little squares that feel tidy and useful and maybe even a little smug in the fridge.
If you like sugar free protein bars, peanut butter protein snacks, or easy homemade bars that don’t taste like a chore, this one is worth keeping in your back pocket. Or your fridge. Probably your fridge.
Why you’ll Love this Baked Protein Bar Recipe?
This Baked Protein Bar Recipe is worth making because it gives you a filling snack without a lot of fuss. The prep takes about 5 minutes, the baking takes around 25 minutes, and you end up with 8 bars that are chewy, peanut buttery, and easy to grab when the day gets busy. And let’s be real, most days do get busy, even when we swear they won’t.
The peanut butter is the heart of the recipe. Since it’s used in both layers, the bars stay rich and soft instead of dry. I think peanut butter is one of those ingredients that makes almost anything feel more satisfying. It’s thick, cozy, and a little indulgent, but still works beautifully in a protein snack. Use a soft, unsweetened peanut butter if you can, because it makes mixing and pressing the layers much easier.
The coconut flour helps the bars hold together. Coconut flour can be a little bossy, though. It absorbs moisture quickly, so you don’t need much. Add too much and suddenly your dough feels like beach sand with ambitions. Just a small amount helps create structure while keeping this Baked Protein Bar Recipe low carb.
The protein powder gives the bars their snack power. I’m not overly picky about protein powder here, but I do think the kind you use matters. Vanilla protein powder gives a softer, sweeter flavor. Chocolate protein powder makes the top layer richer. Unflavored protein powder keeps things simple. Different brands absorb moisture differently, so if your mixture feels a bit dry, don’t panic. It happens.
The sweetener keeps the bars sugar free while still giving them enough sweetness to feel treat-like. I don’t like protein bars that taste aggressively sweet, personally. I want something that feels like a snack, not frosting in disguise. But if you like your bars sweeter, you can adjust a little.
And the cocoa powder in the top layer gives this peanut butter protein bar recipe that chocolate finish. It’s not a full dessert, exactly, but it scratches that chocolate-peanut butter itch. Which, in my house, is a very real itch.
Another reason I like this recipe is that it stores well. You can bake a batch, slice it, and keep the bars ready for the week. Fewer snack decisions is a beautiful thing. Sometimes the best meal prep is not a perfectly packed lunch box. Sometimes it’s just having something better than random pantry grazing.
Ingredient Notes
The ingredients in this Baked Protein Bar Recipe are short and simple, but they all matter. Since there are only a few of them, the texture can shift a little depending on your peanut butter and protein powder. That’s not a bad thing, just something to know. Homemade bars are not always perfectly identical, and honestly, that’s part of the charm.
- Peanut butter: Peanut butter gives these bars their rich flavor and chewy texture. Use unsweetened, soft peanut butter for the best result. If your peanut butter is thick or dry, the mixture may be harder to knead. I usually give the jar a good stir first because natural peanut butter likes to separate and act dramatic.
- Coconut flour: Coconut flour helps bind the bars and keeps them low carb. It absorbs moisture very quickly, so don’t add extra unless the mixture truly needs it. A little coconut flour goes a long way. Too much can make the bars dry, and nobody wants a protein bar that needs a rescue drink.
- Protein powder: Protein powder adds the protein boost. Vanilla, chocolate, or unflavored protein powder can work. Just remember that every brand behaves a little differently. Some make the mixture softer, some firmer, and some are just… opinionated.
- Granulated sweetener: Granulated sweetener keeps this sugar free protein bar recipe sweet without adding sugar. Use your favorite low-carb sweetener. If your sweetener has a strong aftertaste, start with the recipe amount and adjust next time if needed.
- Unsweetened cocoa powder: Cocoa powder goes into the top layer and gives the bars that chocolate-peanut butter flavor. Use unsweetened cocoa powder so you can control the sweetness yourself.
How to Make Baked Protein Bar Recipe?
Making this Baked Protein Bar Recipe is simple, but there is a little hands-on mixing involved. You’ll make two thick mixtures, press them into a small parchment-lined dish, bake until set, cool completely, and slice. Nothing fancy. Just a good little snack project.
Step 1: Preheat the oven.
Preheat your oven to 175 Celsius / 350 Fahrenheit. A properly heated oven helps the bars set evenly and gives the edges that lightly browned finish. It’s a small step, but it helps.
Step 2: Mix the base layer.
In one bowl, add the peanut butter, coconut flour, protein powder, and granulated sweetener for the base layer. Mix everything with a fork first. Then use your hands to knead it together until it feels like a thick, soft dough. It might look a little crumbly at first, but keep pressing and folding it together.
Step 3: Mix the chocolate top layer.
In a separate bowl, combine the peanut butter, cocoa powder, granulated sweetener, protein powder, and coconut flour. Mix with a fork, then knead it with your hands until it comes together. This layer will be darker, a little fudgier, and very peanut butter chocolate in the best way.
Step 4: Line the baking dish.
Line an ovenproof dish with parchment paper. This makes the bars easier to lift out later and keeps them from sticking. I always appreciate parchment paper in recipes like this. It’s like a tiny insurance policy against frustration.
Step 5: Press in the base layer.
Press the base layer into the dish, shaping it into a rectangle about 5 x 6 inches. Try to make it fairly even so the bars bake evenly. It doesn’t need to be perfect. Mine usually has slightly wonky edges, and everyone survives.
Step 6: Add the top layer.
Place the cocoa peanut butter layer over the base layer and press it gently into place. Smooth it out as best you can. Again, homemade protein bars do not need to look like they came from a factory. A little rustic is fine. Cute, even.
Step 7: Bake the bars.
Bake for up to 25 minutes, or until the top has set and the edges are beginning to brown. Keep an eye on them near the end. Peanut butter can brown quickly, and you don’t want the bars to turn dry.
Step 8: Cool completely.
Remove the dish from the oven and let the bars cool to room temperature before cutting. This part is important. The bars firm up as they cool, so slicing too soon can make them crumble. Annoying, yes. Necessary, also yes.
Step 9: Slice and enjoy.
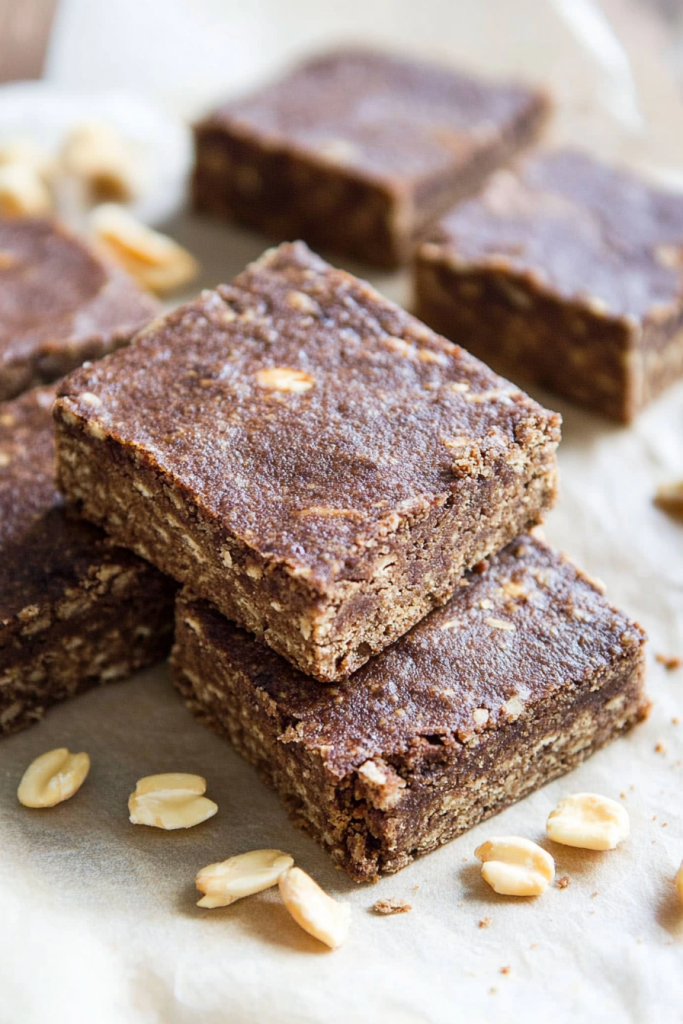
Once cooled, cut the batch into 8 bars. Store them for workouts, busy mornings, coffee breaks, lunchboxes, or those “I need something before I start chewing on my own thoughts” snack moments.
Storage Options
This Baked Protein Bar Recipe stores nicely, which is exactly what you want from a homemade snack bar. Once the bars are fully cooled, you can keep them ready for the week and grab one whenever you need a quick protein-rich bite.
If your kitchen is cool, store the bars in an airtight container at room temperature for 2 to 3 days. If your kitchen runs warm, especially during summer, I’d keep them in the refrigerator. Peanut butter bars can get soft when warm, and nobody wants a bar that turns into a sticky situation in your hand.
For longer storage, refrigerate the bars for up to 1 week. If you stack them, place parchment paper between the layers so they don’t stick together. It’s a small extra step, but future you will be grateful.
You can also freeze these homemade low carb protein bars. Wrap each bar individually or place them in a freezer-safe container with parchment between layers. Freeze for up to 2 months. This is great if you like having backup snacks, which I fully support.
To thaw, move a bar to the fridge overnight or let it sit at room temperature for about 15 to 20 minutes. The texture may be a little firmer after freezing, but still good. I actually don’t mind them slightly chilled. They taste a little more like a fudgy peanut butter bite that way.
Just don’t leave these bars in a hot car or a gym bag for too long. Peanut butter, heat, and closed spaces are not a romantic trio. Trust me, that’s a mess waiting to happen.
Variations & Substitutions
This Baked Protein Bar Recipe is simple, but you can still play around with it. I’d just keep changes small at first because coconut flour and protein powder can change the texture pretty quickly. They’re useful ingredients, but a little moody.
- Use almond butter: Almond butter can replace peanut butter if you want a slightly different flavor. Choose a soft, unsweetened almond butter so the dough comes together easily.
- Use sunflower seed butter: Sunflower seed butter works as a nut-free option. The flavor is different, a little earthier maybe, but still good.
- Use chocolate protein powder: Chocolate protein powder makes the bars richer and gives the top layer more chocolate flavor. If you’re a chocolate person, this is a good move.
- Use vanilla protein powder: Vanilla protein powder gives the bars a softer, sweeter flavor. It pairs really well with peanut butter.
- Add cinnamon: A small pinch of cinnamon in the base layer adds warmth. It’s subtle, but nice.
- Add sugar-free chocolate chips: Press a few sugar-free chocolate chips into the top layer before baking if you want more chocolate. Not too many, unless you want the bars to feel more dessert-like. Which, honestly, I understand.
- Add chopped nuts: Chopped peanuts, almonds, or pecans add crunch. Keep the amount small so the bars still hold together.
- Make them sweeter: Add a little extra granulated sweetener if you prefer a sweeter bar. I like them lightly sweet, but you do you.
- Add a pinch of salt: If your peanut butter is unsalted, a tiny pinch of salt can make the flavor pop. It sounds small, but it helps.
What to Serve With Baked Protein Bar Recipe?
This Baked Protein Bar Recipe is great on its own, but I also like pairing it with something simple. Since the bars are rich and peanut buttery, they go well with coffee, milk, berries, or anything fresh and easy.
- Coffee: Coffee and peanut butter protein bars are such a good match. The rich peanut butter flavor tastes great with a hot cup of coffee, especially in the afternoon when your energy starts doing that slow dramatic fade.
- Iced coffee: Iced coffee makes these bars feel like a quick grab-and-go treat. Very nice after a workout or on a warm day.
- Unsweetened almond milk: Almond milk keeps the snack low carb and pairs well with the peanut butter and cocoa flavors.
- Greek yogurt: A bar with Greek yogurt makes a more filling breakfast or post-workout snack. It’s simple and satisfying.
- Fresh berries: Strawberries, raspberries, or blueberries add freshness and a little natural sweetness. The tartness is nice with the peanut butter.
- Banana slices: If you’re not strictly low carb, banana and peanut butter are always a win. Add a bar on the side and it feels like a proper snack plate.
- Post-workout smoothie: Pair one of these baked protein bars with a smoothie when you need something more filling after exercise.
- Hard-boiled eggs: This sounds very practical, but it works. A protein bar with hard-boiled eggs makes an easy high-protein snack plate.
- Tea: A warm cup of tea with one of these bars feels cozy, especially when you want something sweet-ish but not too much.
FAQ
Are these protein bars low carb?
Yes, this Baked Protein Bar Recipe can be low carb when made with unsweetened peanut butter, coconut flour, protein powder, and a low-carb granulated sweetener. Always check your ingredient labels, especially the protein powder.
Are these protein bars sugar free?
They can be sugar free if you use unsweetened peanut butter, unsweetened cocoa powder, and a sugar-free granulated sweetener. Some protein powders contain sugar, so check that label too.
What protein powder should I use?
Vanilla, chocolate, or unflavored protein powder can work. The texture may change depending on the brand. If your bars seem dry, your protein powder may be absorbing more moisture.
Why is my mixture too dry?
Coconut flour and protein powder both soak up moisture quickly. If the mixture feels too dry, add a tiny bit more soft peanut butter and knead again. Don’t add too much at once.
This Baked Protein Bar Recipe is chewy, fudgy, peanut buttery, low carb, sugar free, and easy enough to make when you don’t feel like doing a big snack-prep project. It’s useful after workouts, during busy mornings, with coffee, or anytime your stomach starts asking questions before dinner.
Make this Baked Protein Bar Recipe when you want a homemade protein snack that feels filling but still a little treat-like. And tell me — are you eating yours after a workout, with coffee, or sneaking one straight from the fridge because, honestly, that might be my favorite way?
Baked Protein Bar Recipe
Ingredients
Base Layer
- 1/2 c / 130 g unsweetened soft peanut butter
- 1 1/2 tbsp coconut flour
- 1 tbsp protein powder
- 1 1/2 tbsp granulated sweetener
Top Layer
- 1/2 c / 130 g soft peanut butter
- 1 tbsp unsweetened cocoa powder
- 1 1/2 tbsp granulated sweetener
- 1 tbsp protein powder
- 1 1/2 tbsp coconut flour
Instructions
Preheat the oven.
- Preheat the oven to 175°C / 350°F.
Prepare the base layer.
- In a medium bowl, combine the peanut butter, coconut flour, protein powder, and granulated sweetener for the base layer.
Mix the base layer.
- Stir the ingredients with a fork until partially combined, then knead by hand until a thick, uniform dough forms.
Prepare the top layer.
- In a separate medium bowl, combine the peanut butter, unsweetened cocoa powder, granulated sweetener, protein powder, and coconut flour for the top layer.
Mix the top layer.
- Stir the ingredients with a fork until partially combined, then knead by hand until fully incorporated and smooth.
Prepare the baking dish.
- Line an ovenproof dish with parchment paper.
Shape the base layer.
- Press the base layer evenly into the prepared dish, forming a rectangle of approximately 5 x 6 inches.
Add the top layer.
- Place the cocoa peanut butter layer over the base layer and press evenly to fit the same shape.
Bake.
- Bake for up to 25 minutes, or until the top is set and the edges begin to brown.
Cool.
- Remove the dish from the oven and allow the bars to cool completely to room temperature.
Slice.
- Once fully cooled, cut into 8 bars and serve.
Notes