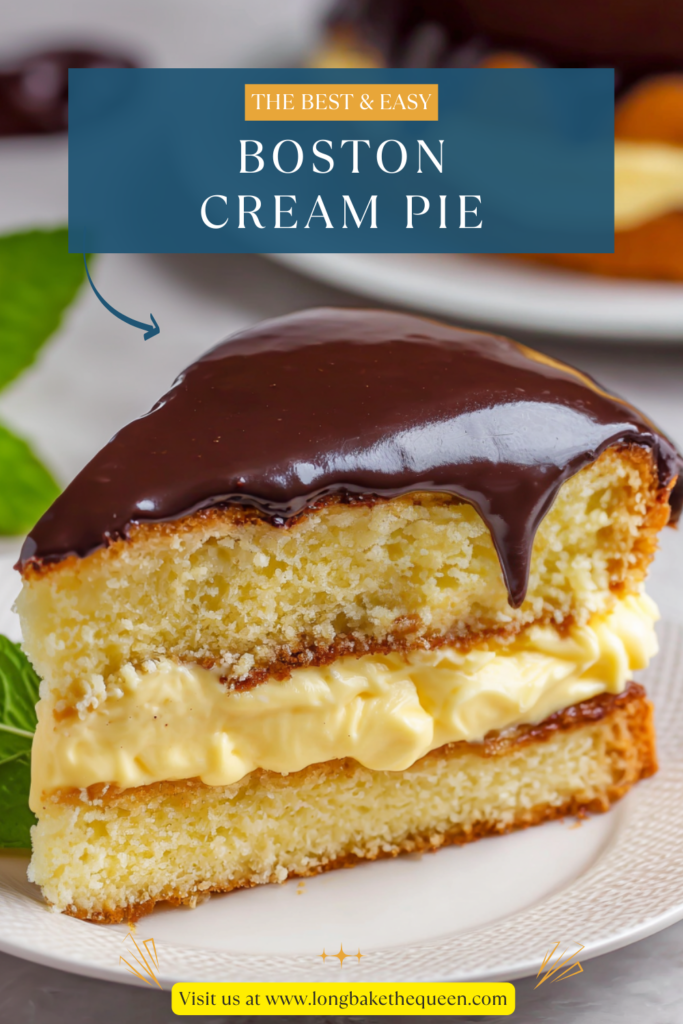
Classic Boston Cream Pie made with soft vanilla cake, creamy custard filling, and rich chocolate glaze using eggs, milk, butter, sugar, and chocolate.
I didn’t grow up eating Boston Cream Pie all the time, which almost makes it feel more special now. It’s one of those desserts I always noticed—in bakeries, on diner menus, in old cookbooks—but never actually made until later. The name alone confused me for years. Pie? Cake? Why are we lying to each other?
The first time I finally baked a Boston Cream Pie, it was one of those quiet afternoons when I wanted to make something nostalgic but didn’t really know why. Maybe it was the weather. Maybe it was one of those weeks. You know the ones. I remember the pastry cream chilling in the fridge, me checking it way too often, like it might disappear if I didn’t keep an eye on it.
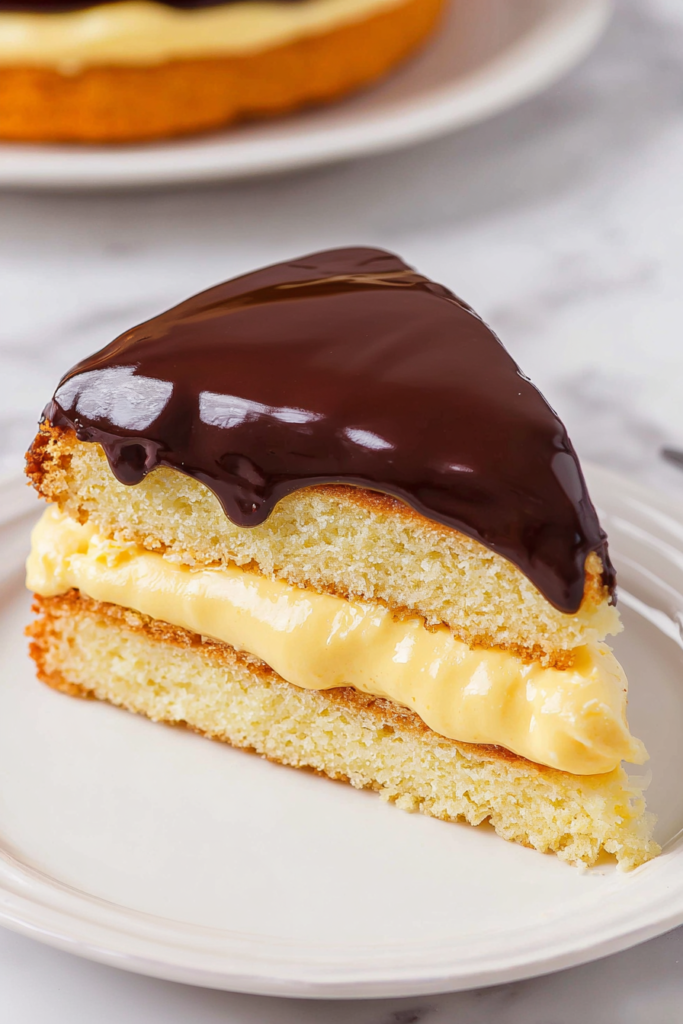
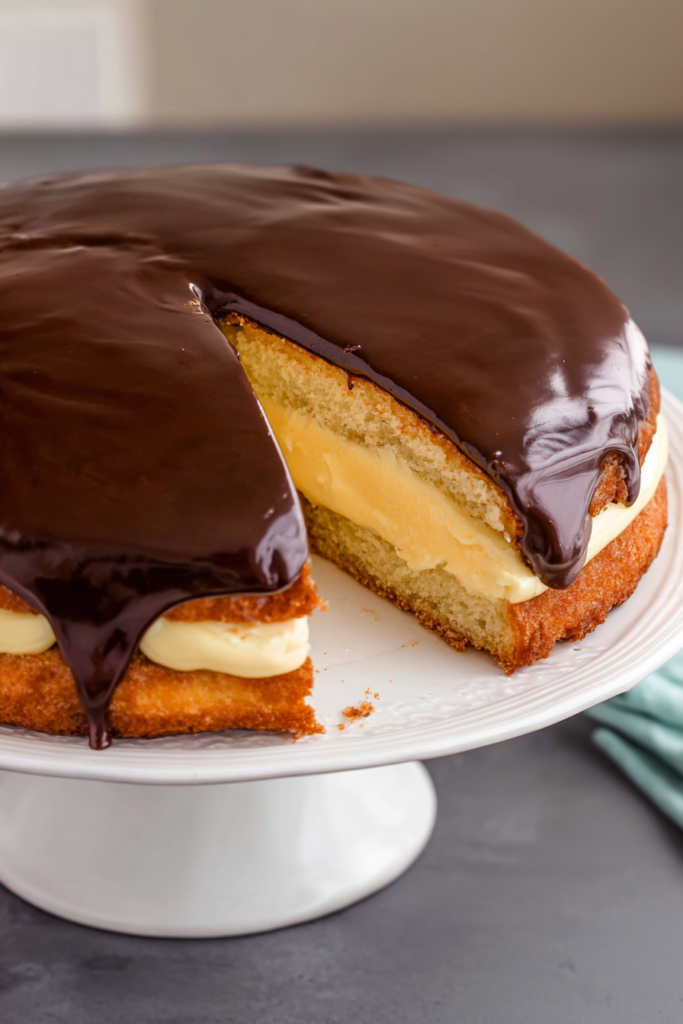
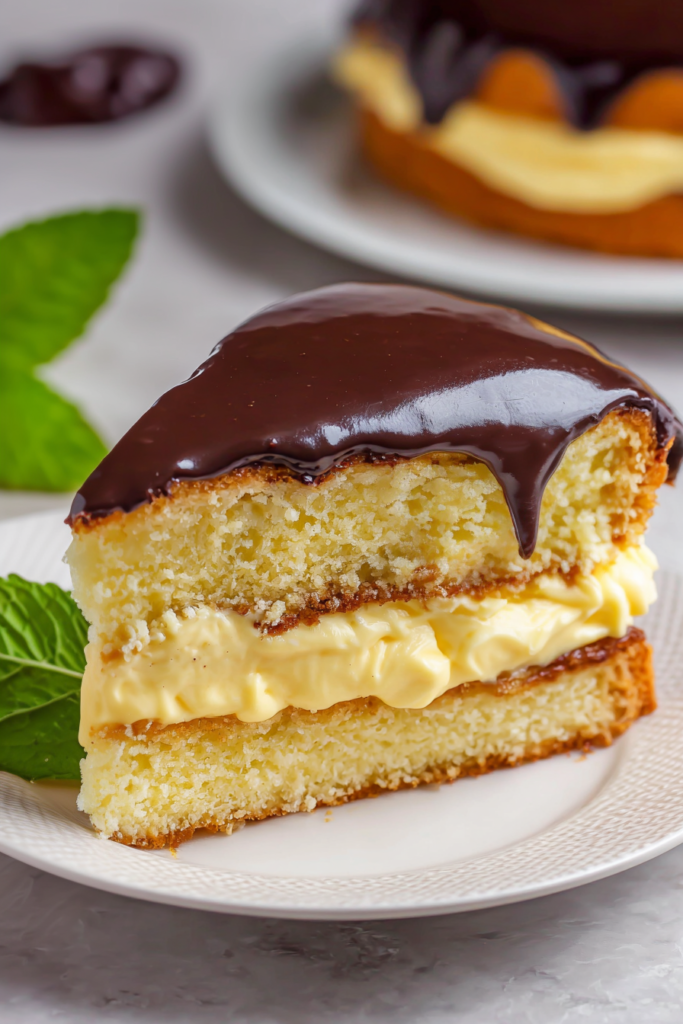
When I sliced into that finished cake—soft vanilla layers, thick custard, shiny chocolate on top—it hit me. This dessert isn’t loud. It doesn’t scream for attention. It just… shows up and does its job really well. And honestly, that’s kind of comforting. Boston Cream Pie feels like something you make when you want people to slow down for a minute.
Why you’ll Love this Boston Cream Pie?
There are flashier desserts out there, sure. But Boston Cream Pie has this quiet confidence that’s hard to beat. The vanilla sponge cake is soft but not fragile, which matters more than people think. The pastry cream is thick and silky and actually tastes like vanilla—not just sugar pretending. And the chocolate glaze? Rich, smooth, slightly bittersweet. It knows when to stop.
What I really love about this Boston Cream Pie is the balance. Nothing’s fighting for attention. Every layer knows its role. It’s indulgent, yes—but not exhausting. And maybe it’s just me, but it feels like one of those desserts people remember more than they expect to. Ever notice that?
Ingredient Notes
Before you start, let’s talk ingredients—not in a scary way, just like we’re checking the fridge together.
- Egg yolks: These are the heart of the pastry cream. They give it that rich, custardy texture that makes you want to swipe the spoon across the bowl when no one’s looking. Room temp helps, but I’ll admit—I’ve forgotten before and survived.
- Cornstarch: This is what keeps the cream from turning into a soft puddle. You want structure here, not soup.
- Whole milk: This isn’t the time to go low-fat. The richness matters, especially in a classic Boston Cream Pie.
- Butter: Unsalted gives you control, and it adds that quiet, comforting flavor that makes everything better.
- Bittersweet chocolate: This keeps the glaze from being overly sweet. Boston Cream Pie should feel rich, not overwhelming.
- Corn syrup: I know some people side-eye it, but here it’s about texture and shine, not sweetness. It keeps the glaze smooth and glossy instead of dull and stiff.
How to Make Boston Cream Pie?
This recipe looks long. It is. But it’s not hard. It’s just layered. Like a weekend project that’s actually worth finishing.
Step 1: Pastry Cream
You’ll whisk together sugar, salt, cornstarch, egg yolks, and a little milk until it looks smooth and pale. Heating the rest of the milk gently is key—boiling is where things go wrong fast.
Tempering the eggs sounds fancy, but really it’s just slow pouring and steady whisking. Once everything’s back on the stove, stir constantly. The thickening happens suddenly—one minute it’s thin, the next it’s clearly custard. Stir in butter and vanilla, strain if you want it extra smooth (I usually do), then press plastic wrap right on the surface. That part feels fussy, but it saves you from that weird skin nobody likes. Chill it and try not to poke it every five minutes.
Step 2: Hot Milk Sponge Cake
This cake surprised me the first time I made it. Beating the eggs and sugar until they ribbon builds the structure, so don’t rush it. When you add the flour, go gently—this isn’t the moment for aggression.
Heating the milk and butter together feels strange, but it’s what gives the cake that tender crumb. The batter will be thin. That’s normal. Bake, cool, and resist peeling the cakes out too soon. Warm cakes are delicate in every sense of the word.
Step 3: Assembly
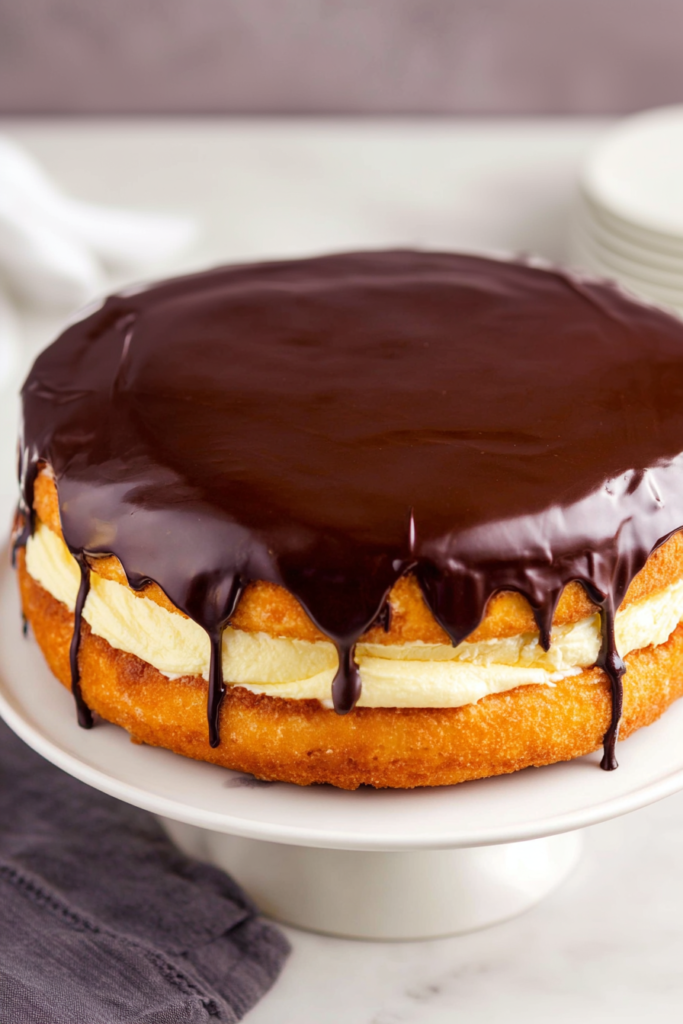
Let the pastry cream soften just a bit before spreading. Leave a small border around the edge—it gives the cream room to settle without escaping. Place the second cake on top (bottom side up—trust me), then chill again so everything firms up before glazing.
Step 4: Chocolate Glaze
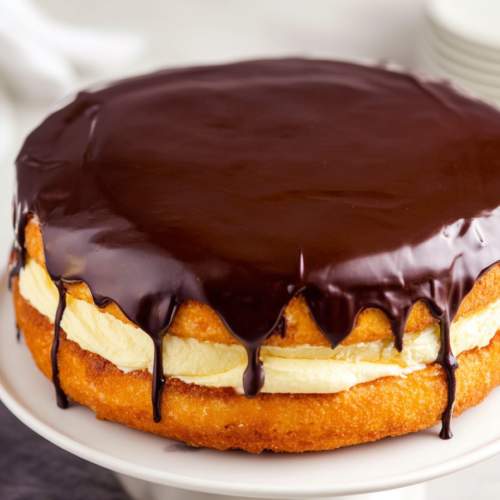
Hot cream, corn syrup, chopped chocolate. Let it sit. Stir gently. Watch it turn smooth and glossy like magic. Pour it over the center of the cake and spread slowly. A little drip down the sides is encouraged. Chill again, then bring it back toward room temperature before slicing. Warm knife. Clean cuts. Deep satisfaction.
Storage Options
Boston Cream Pie needs to be refrigerated because of the pastry cream. Covered well, it’ll keep for about three days. That said, it tastes best when it’s not ice-cold, so I always let it sit out for 30 minutes before serving.
You can make the pastry cream a day ahead and bake the cakes early if you want to space things out. Freezing? I wouldn’t recommend it. The cream texture just isn’t the same, and this cake deserves better than that.
Variations & Substitutions
I love a classic Boston Cream Pie—but I also love options.
- Chocolate cake layers: Rich, dramatic, and honestly pretty irresistible.
- Espresso pastry cream: A little coffee flavor adds depth and pairs beautifully with the chocolate.
- Dark chocolate glaze: Less sweet, more grown-up. Especially good if you’re serving this after a heavy meal.
- Gluten-free: A solid 1:1 gluten-free flour works, though the cake will be slightly softer and more delicate.
What to Serve With Boston Cream Pie?
This dessert doesn’t need much, but a good pairing makes it even better.
- Fresh berries to cut through the richness
- Coffee or espresso, which feels almost mandatory
- Light whipped cream on the side (not on top—trust me)
- Vanilla ice cream if you’re leaning fully into comfort mode
FAQ
Can I make Boston Cream Pie ahead of time?
Yes, and I actually think it’s better that way. The flavors settle, the layers hold, and everything slices more cleanly.
Why is my pastry cream lumpy?
Usually heat was a little too high or stirring slowed down. Straining fixes most issues, so don’t panic.
Is Boston Cream Pie really a pie?
No. Never was. And somehow that just makes it more charming.
Boston Cream Pie isn’t flashy. It’s not trendy. But it’s dependable, comforting, and quietly impressive—and sometimes that’s exactly what you want. If you try this one, I’d genuinely love to know how it turns out. Did you keep it classic… or did you tweak it a little?
Boston Cream Pie
Ingredients
Pastry Cream
- ⅔ cup 130 g granulated sugar
- ¼ teaspoon fine sea salt
- ¼ cup 30 g cornstarch
- 6 large egg yolks at room temperature
- 2 cups 510 g whole milk divided
- 3 tablespoons 40 g unsalted butter
- 2 teaspoons 8 g vanilla extract
Hot Milk Sponge Cake
- 1 ½ cups 185 g all-purpose flour spooned and leveled
- 1 ½ teaspoons 7 g baking powder
- ¾ teaspoon 4.5 g fine sea salt
- 3 large eggs at room temperature
- 1 ½ cups 300 g granulated sugar
- 1 ½ teaspoons 6.5 g vanilla extract
- ¾ cup 180 g whole milk
- 6 tablespoons 85 g unsalted butter
Chocolate Glaze
- ½ cup 120 g heavy cream
- 2 tablespoons 41 g corn syrup
- 5 ounces 142 g bittersweet chocolate finely chopped
Instructions
Prepare the Pastry Cream
- In a medium heatproof bowl, whisk together the granulated sugar, salt, and cornstarch. Add the egg yolks and ¼ cup of the milk, whisking until the mixture is smooth and well combined. Set aside.
- In a medium saucepan, heat the remaining 1 ¾ cups of milk over medium heat until it just begins to simmer. Do not allow the milk to boil. Remove from heat.
- Gradually temper the egg mixture by slowly pouring approximately ½ cup of the hot milk into the yolk mixture while whisking continuously. Once tempered, return the egg mixture to the saucepan with the remaining milk, whisking constantly.
- Return the saucepan to medium heat and cook, stirring continuously with a wooden spoon, until the mixture thickens and begins to bubble, about 5 minutes. Remove from heat and stir in the butter and vanilla extract until fully incorporated.
- For a smooth texture, strain the pastry cream through a fine-mesh sieve into a clean bowl. Cover with plastic wrap pressed directly onto the surface and refrigerate for at least 2 hours or up to 24 hours.
Prepare the Cake Layers
- Preheat the oven to 325°F (165°C). Grease two 9-inch round cake pans, line the bottoms with parchment paper, and grease again. Set aside.
- In a small bowl, whisk together the flour, baking powder, and salt.
- In a large mixing bowl or stand mixer fitted with the whisk attachment, beat the eggs and granulated sugar on medium-high speed for approximately 4 minutes, until the mixture becomes pale and thick and falls from the whisk in ribbons. Mix in the vanilla extract.
- Gradually add the dry ingredients on low speed, mixing just until combined.
- In a microwave-safe measuring cup, heat the milk and butter together until the butter is melted and the milk is hot and lightly steaming. Slowly add the hot milk mixture to the batter while mixing on low speed, just until incorporated. The batter will be thin.
- Divide the batter evenly between the prepared pans. Bake for 28–33 minutes, or until a toothpick inserted into the center comes out clean.
- Allow the cakes to cool in the pans for 20 minutes, then turn out onto a wire rack to cool completely.
Assemble the Cake
- Remove the pastry cream from the refrigerator approximately 20 minutes before assembly to soften slightly.
- Place one cake layer onto a serving plate. Spread the pastry cream evenly over the surface, leaving a ½-inch border around the edge.
- Place the second cake layer on top, bottom side up, and gently press down. Refrigerate the assembled cake while preparing the chocolate glaze.
Prepare the Chocolate Glaze
- In a microwave-safe bowl, heat the heavy cream and corn syrup until steaming, stirring every 20 seconds. Add the chopped chocolate and allow it to sit undisturbed for 5 minutes.
- Stir until smooth and fully melted. Pour the glaze over the center of the cake and spread evenly with an offset spatula, allowing some glaze to drip down the sides if desired.
- Refrigerate the cake for at least 2 hours to set. Before serving, allow the cake to sit at room temperature for approximately 30 minutes. Slice using a warm knife for clean cuts.
Notes